|
||||||
|
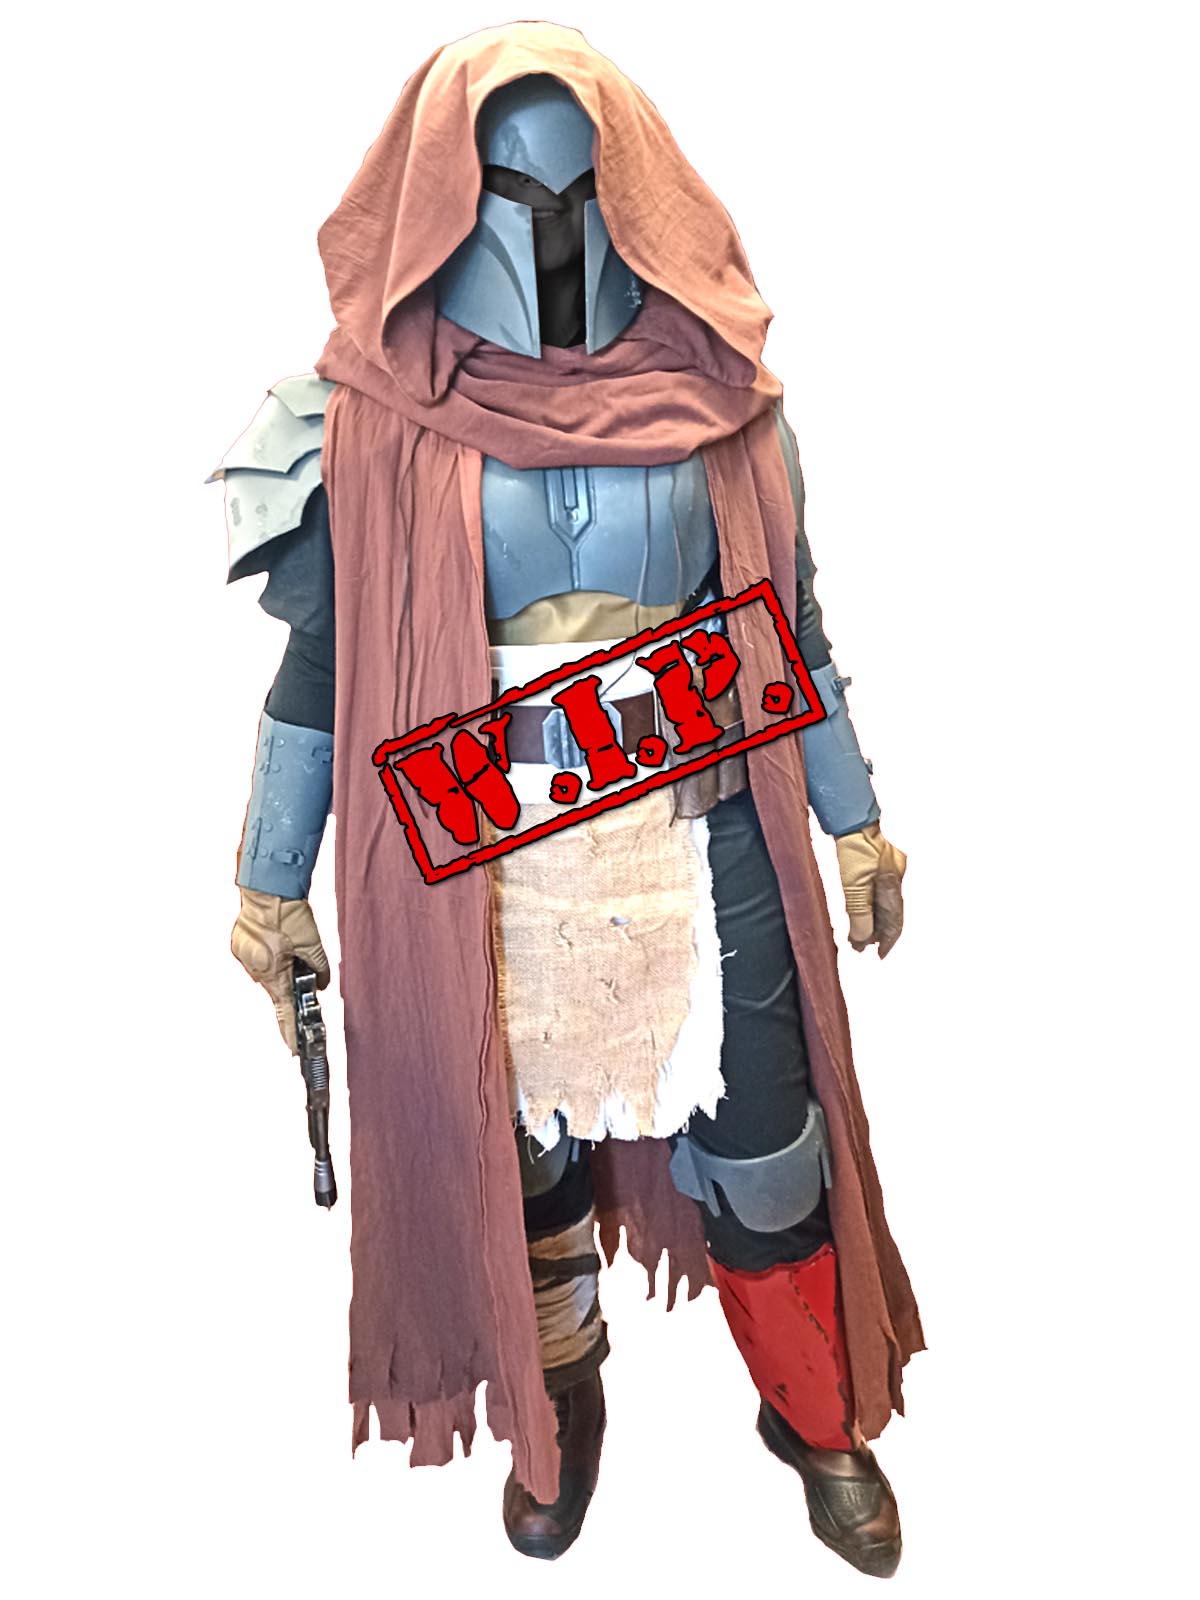
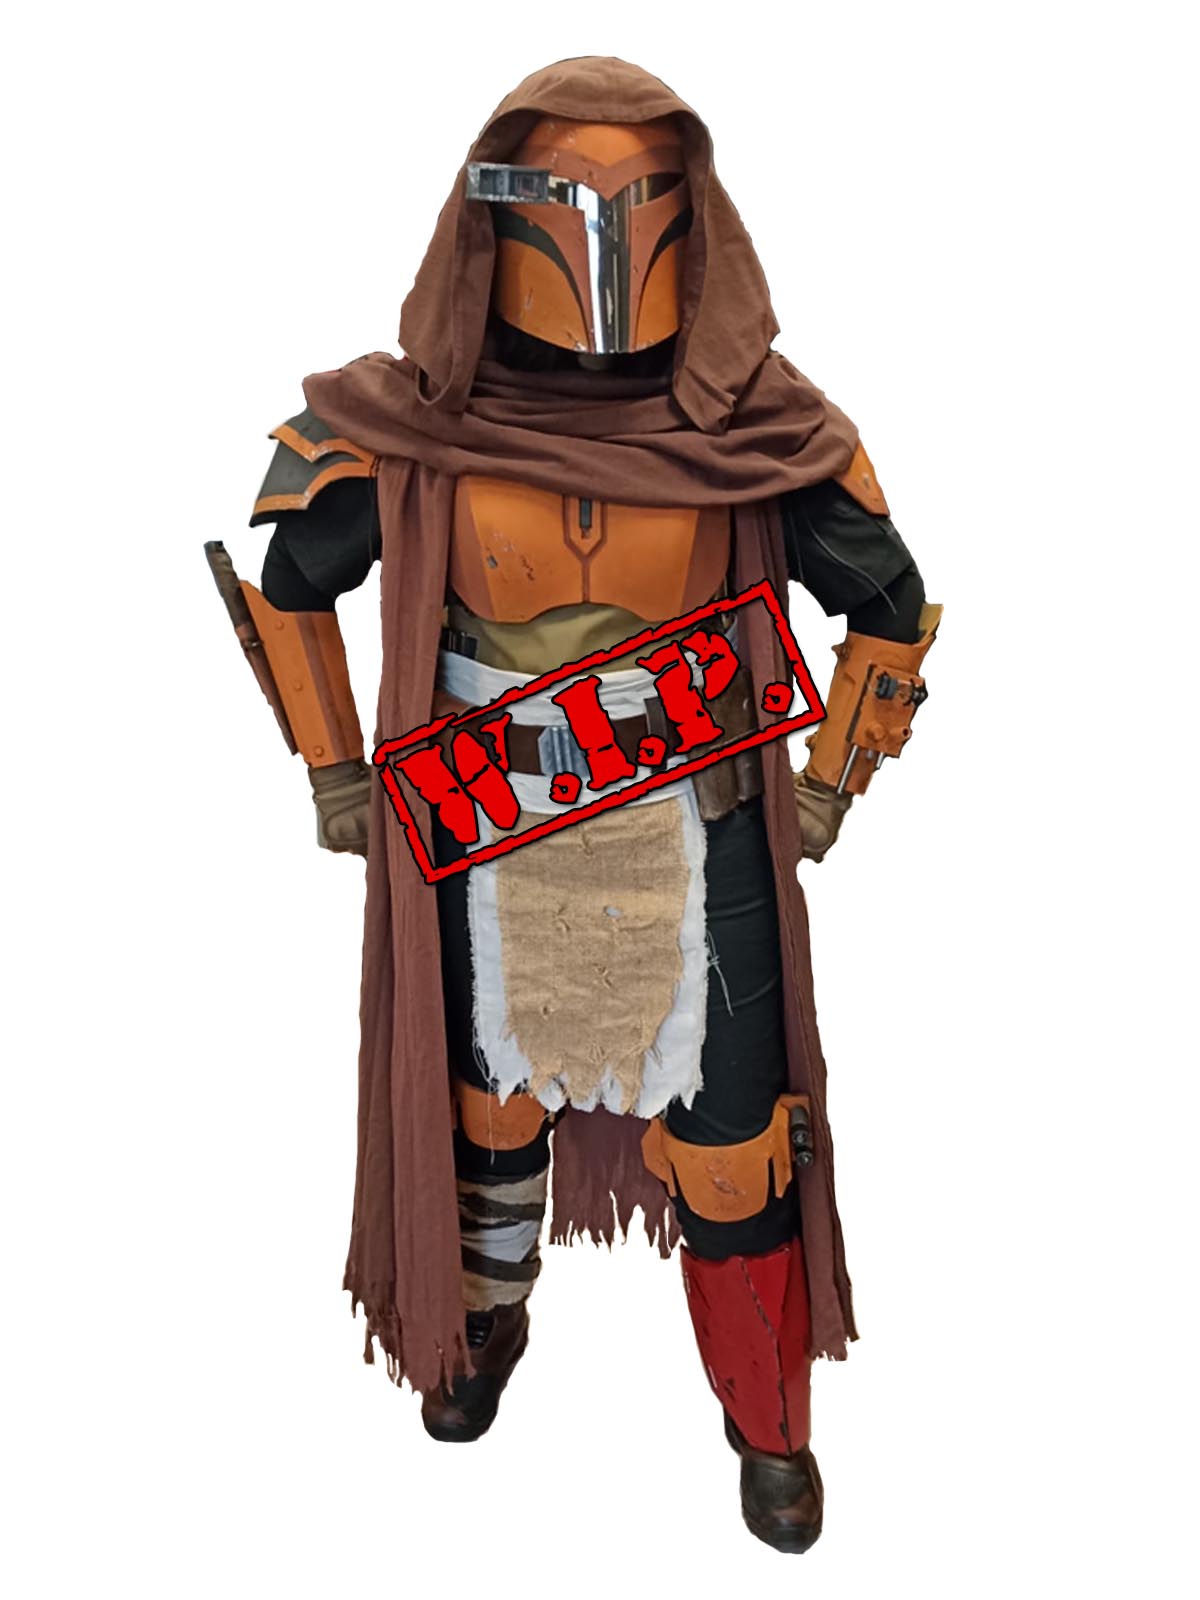
Mando Custom Survivor Post Imperial |
 >
>
Overview
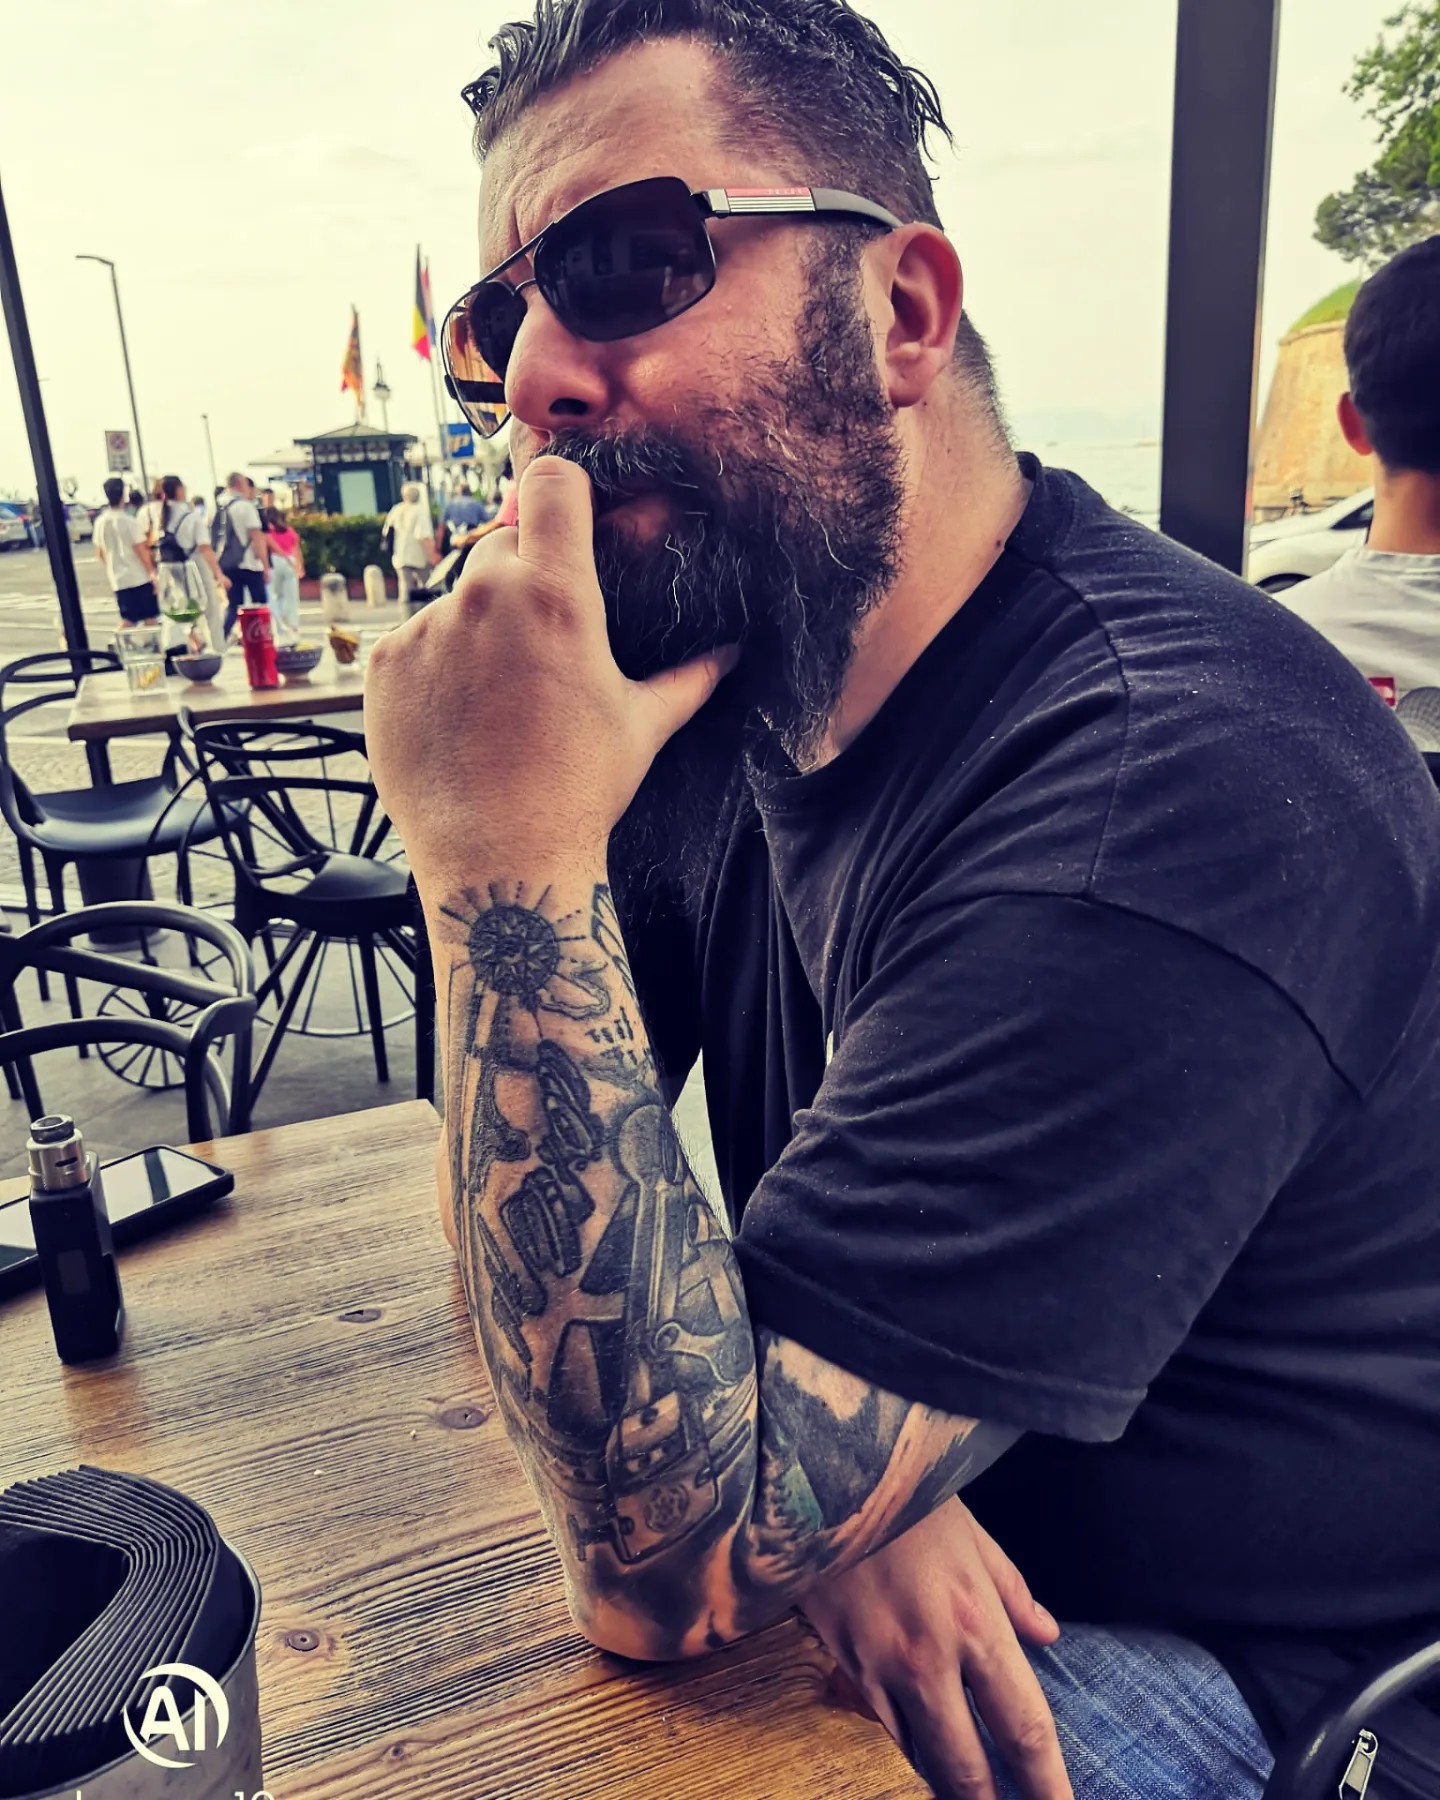
As promise in presentation post, here we are with the wip topic for mine costume Gabro and Nadia's costume.
Let's start talking about the initial concept on the mando creator.
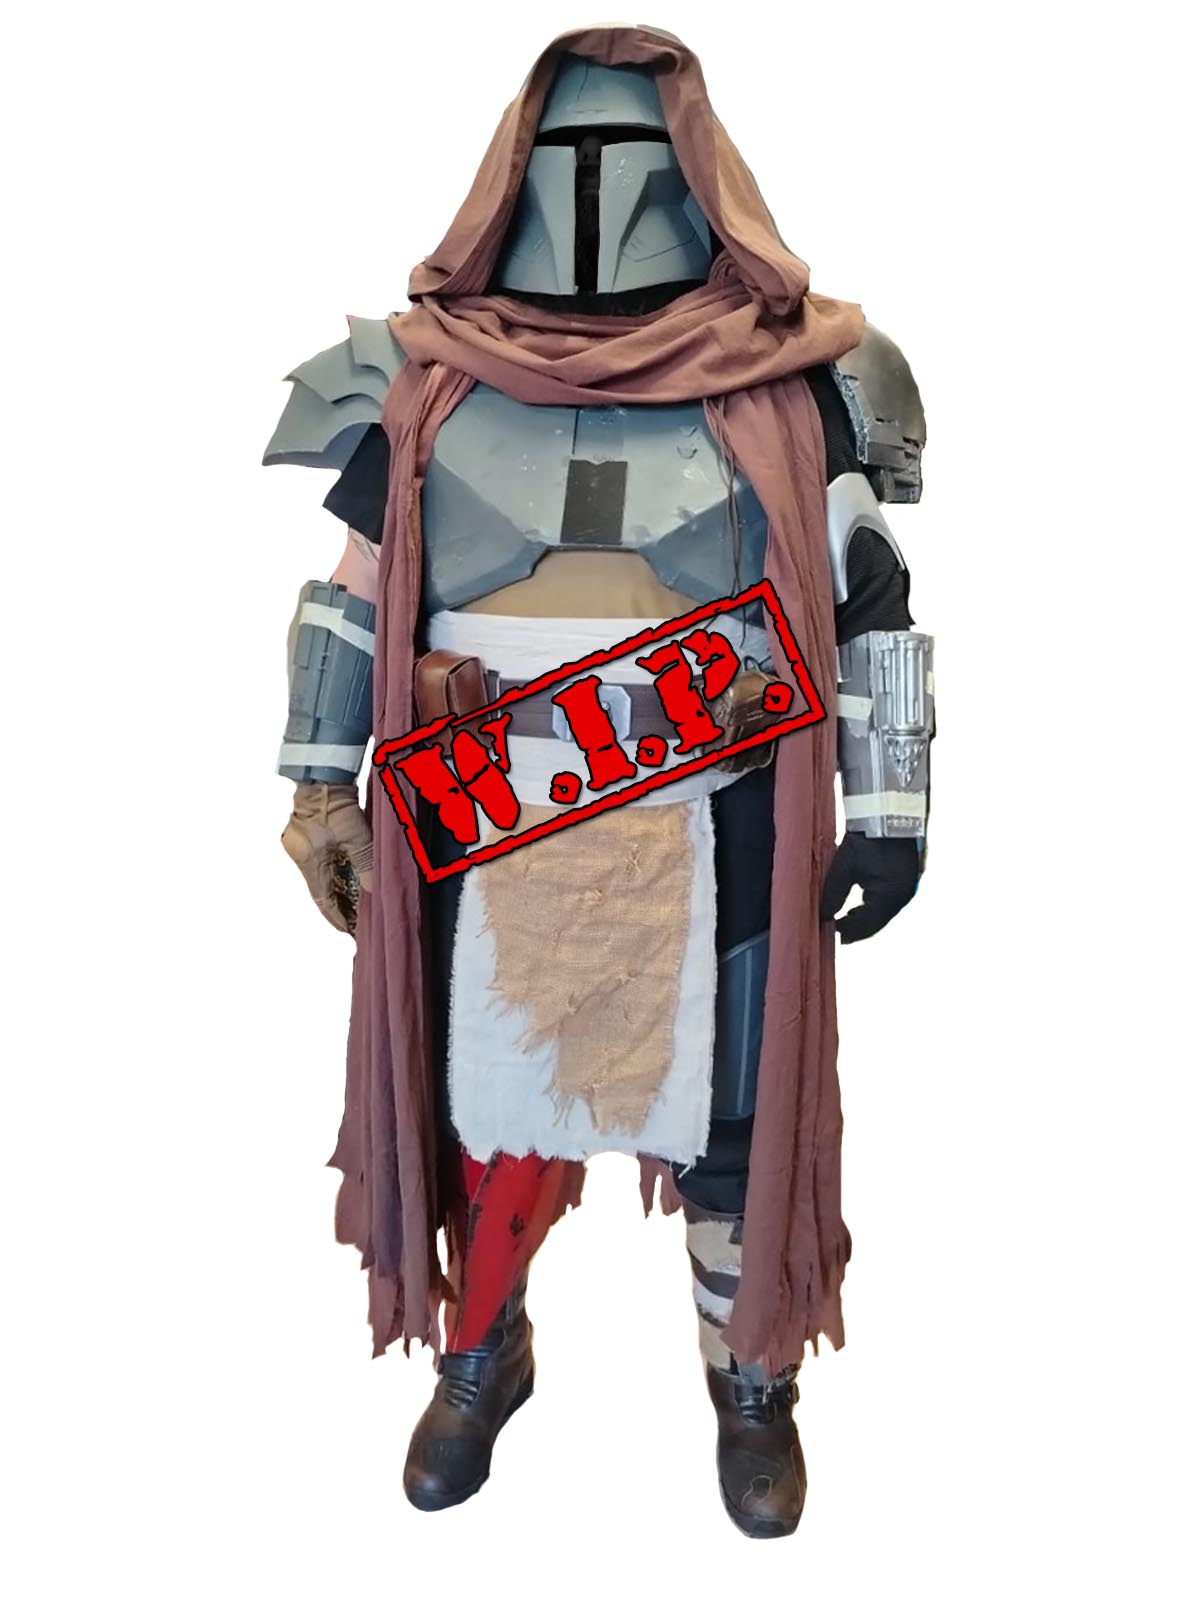
The starting idea was doing a couple of mando's ispired to Tusken,but after some search i saw that there are other already created so we choose a style change, moving from something legacy to the recent style mando survivors.
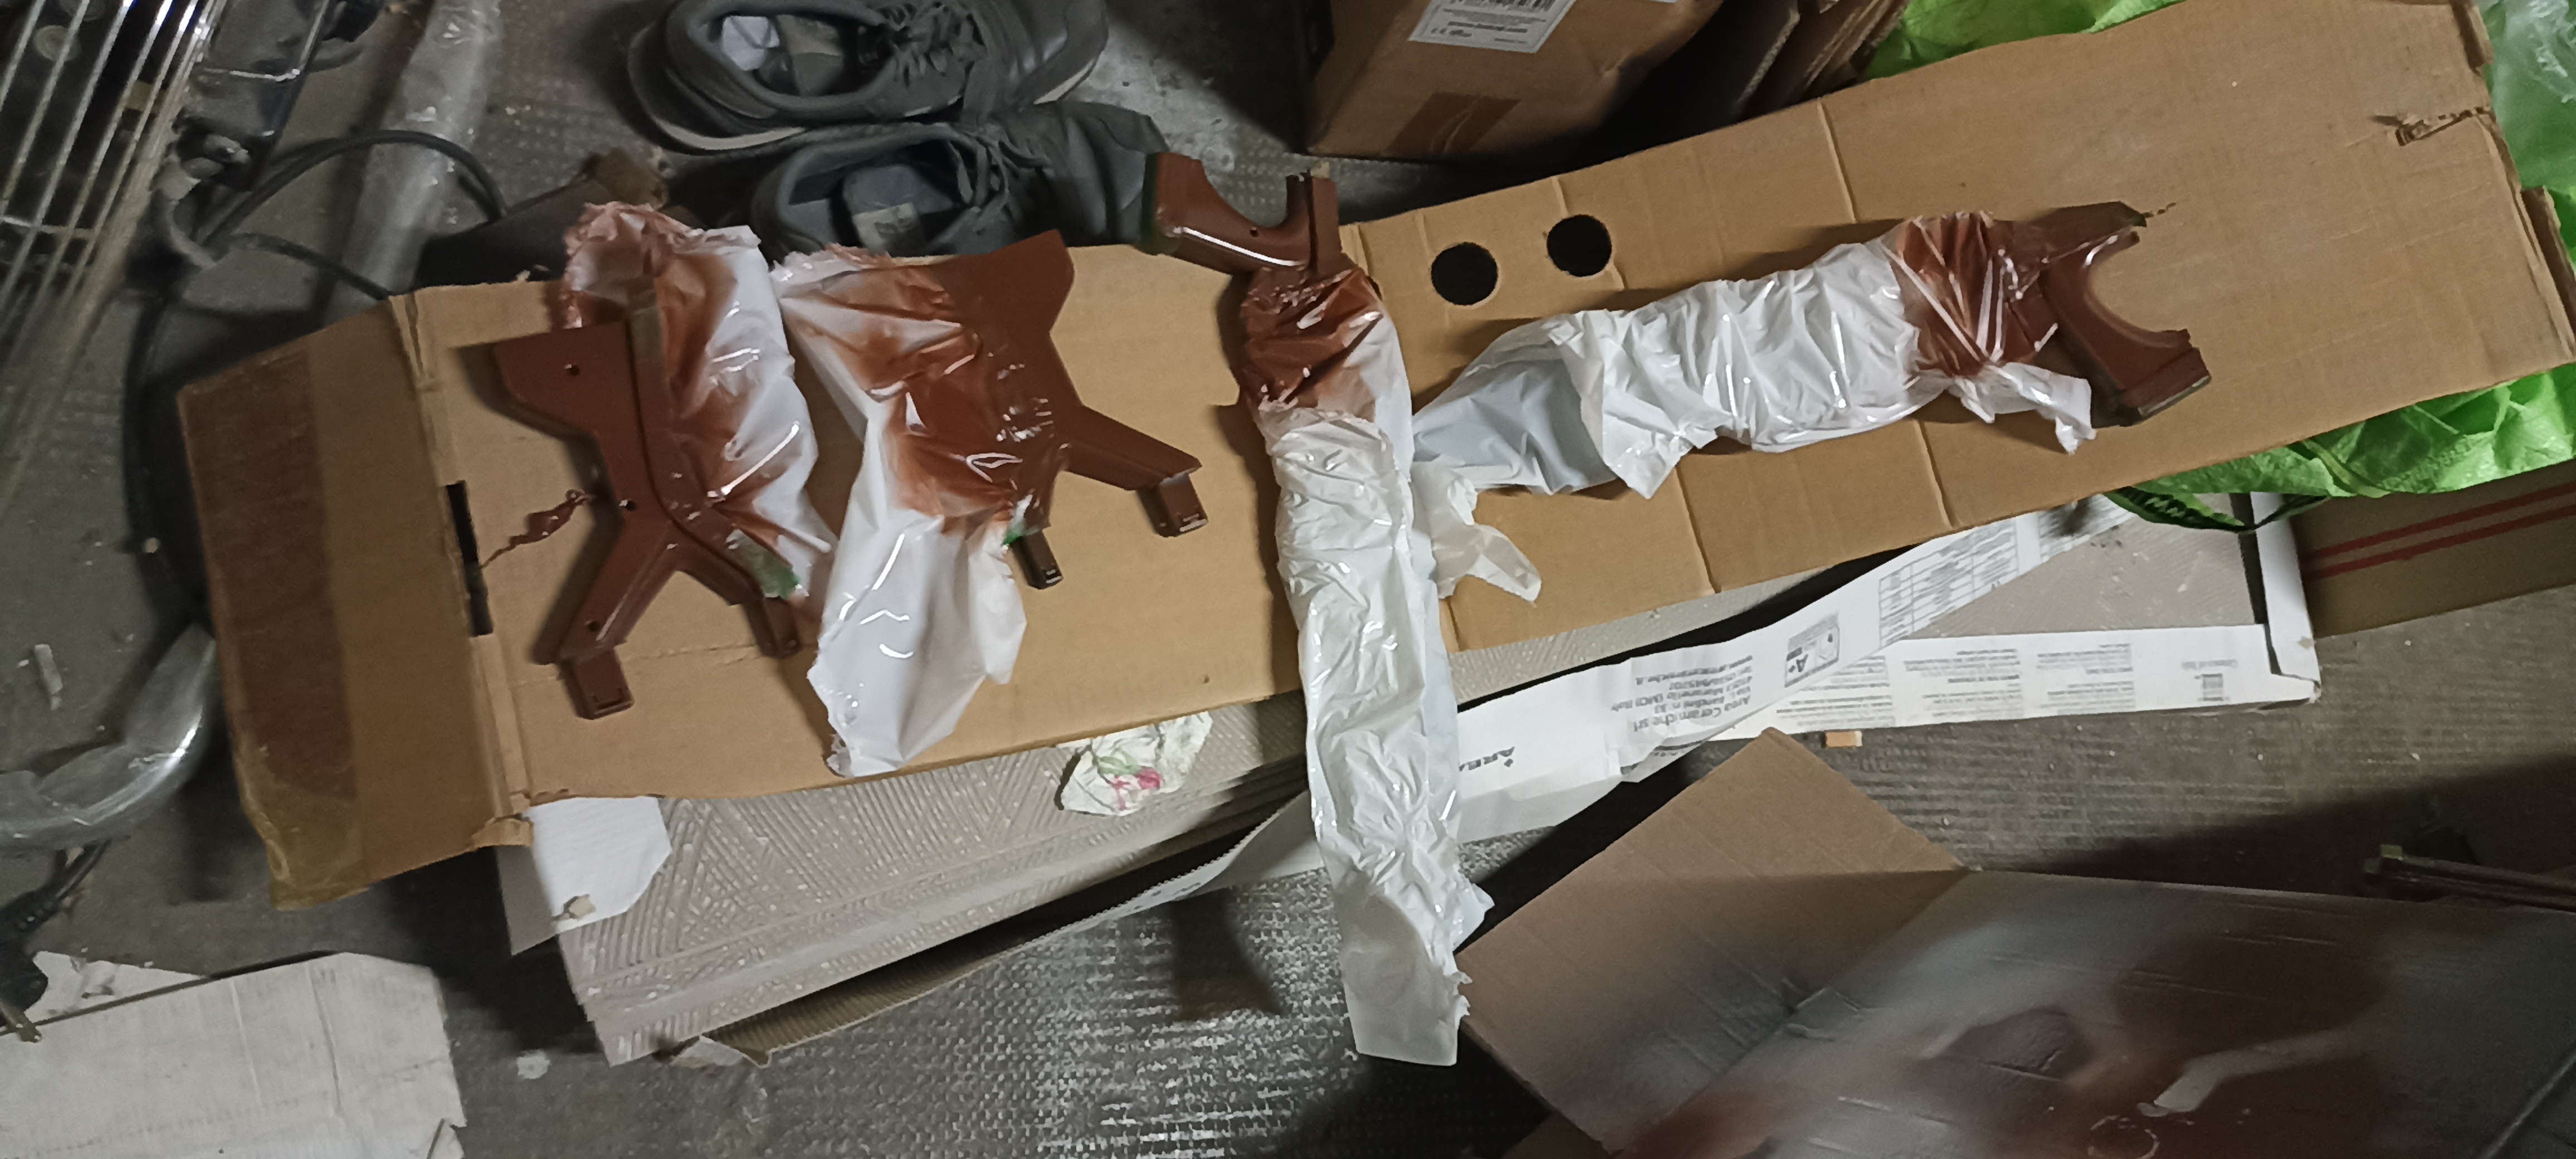
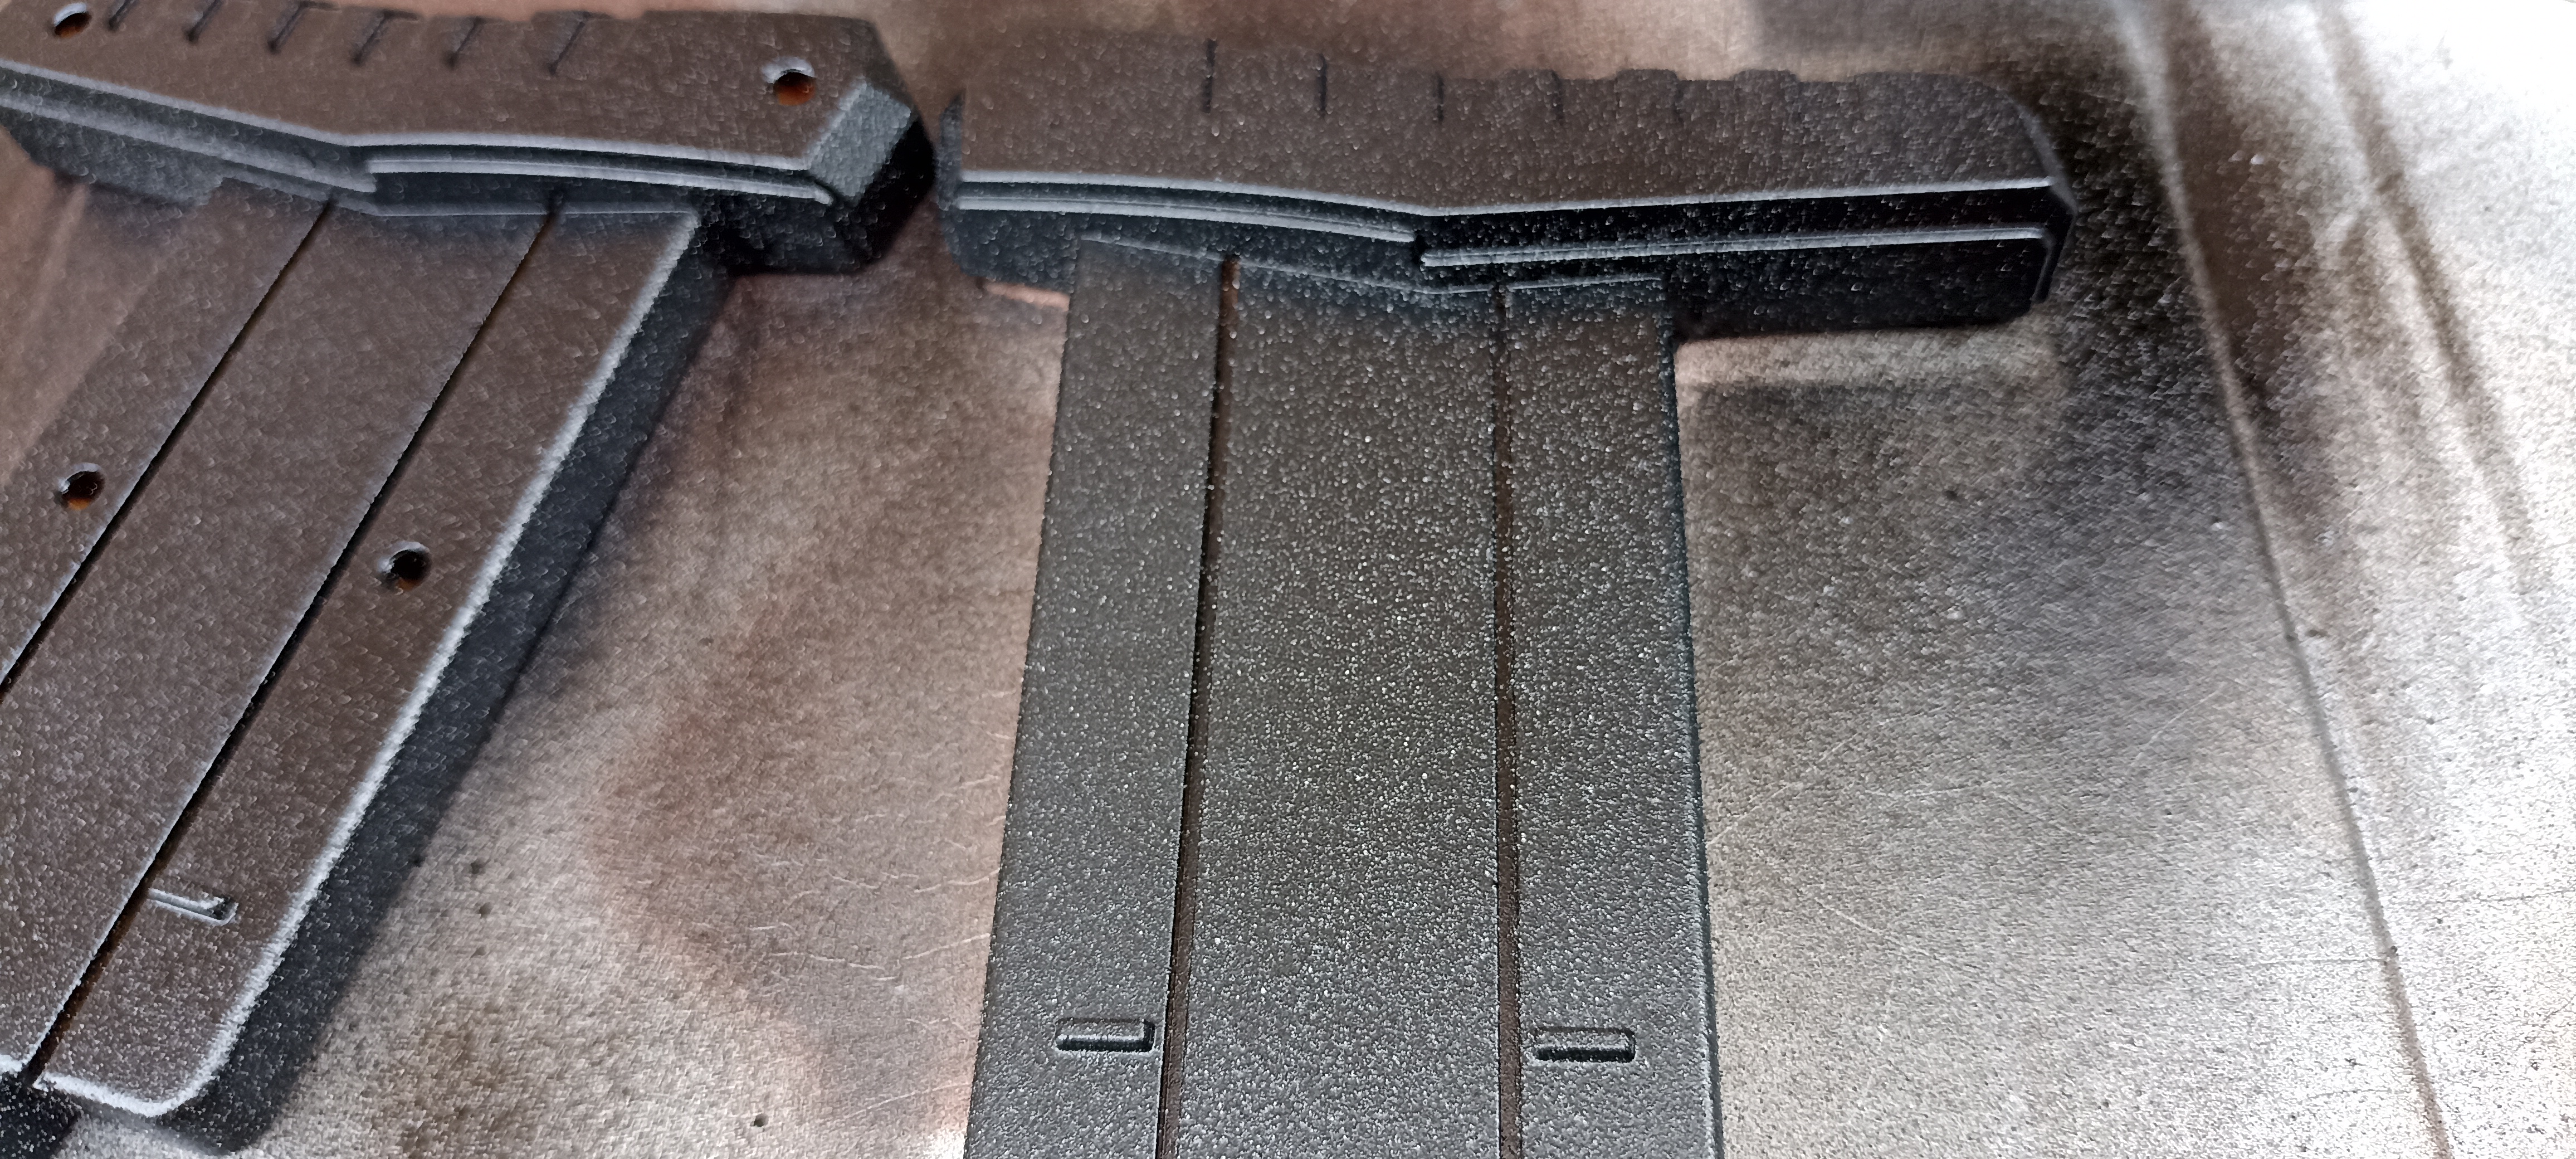
We also choose to use similar colors and styles in order to let the work more simple and also we think that view in couple could can be cool. Costumes are similar but not the same, we are survivor together so some parts could be splitted, for example the shins , taken from a Clone Throoper Shock PhaseII. Armor parts, repainted and some asymmetric parts.
Old (Tusken) concept:
Here ther is the list of common parts that are used in a similar way for each costumes.
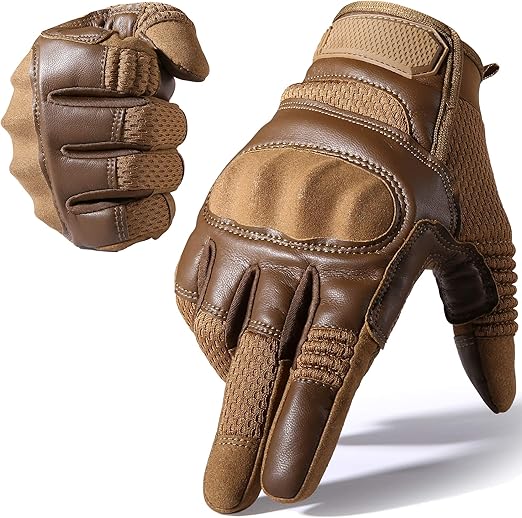 | Gloves, a classic tactical tan colored model |
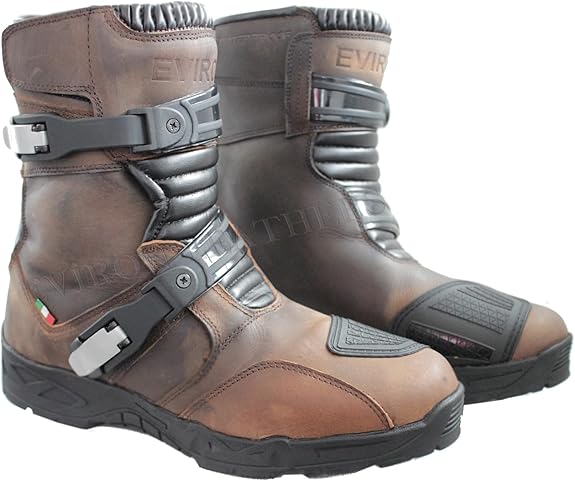 | Boots, model Eviron MX Off Road, very cool boots, normally used for motorbyce ride. |
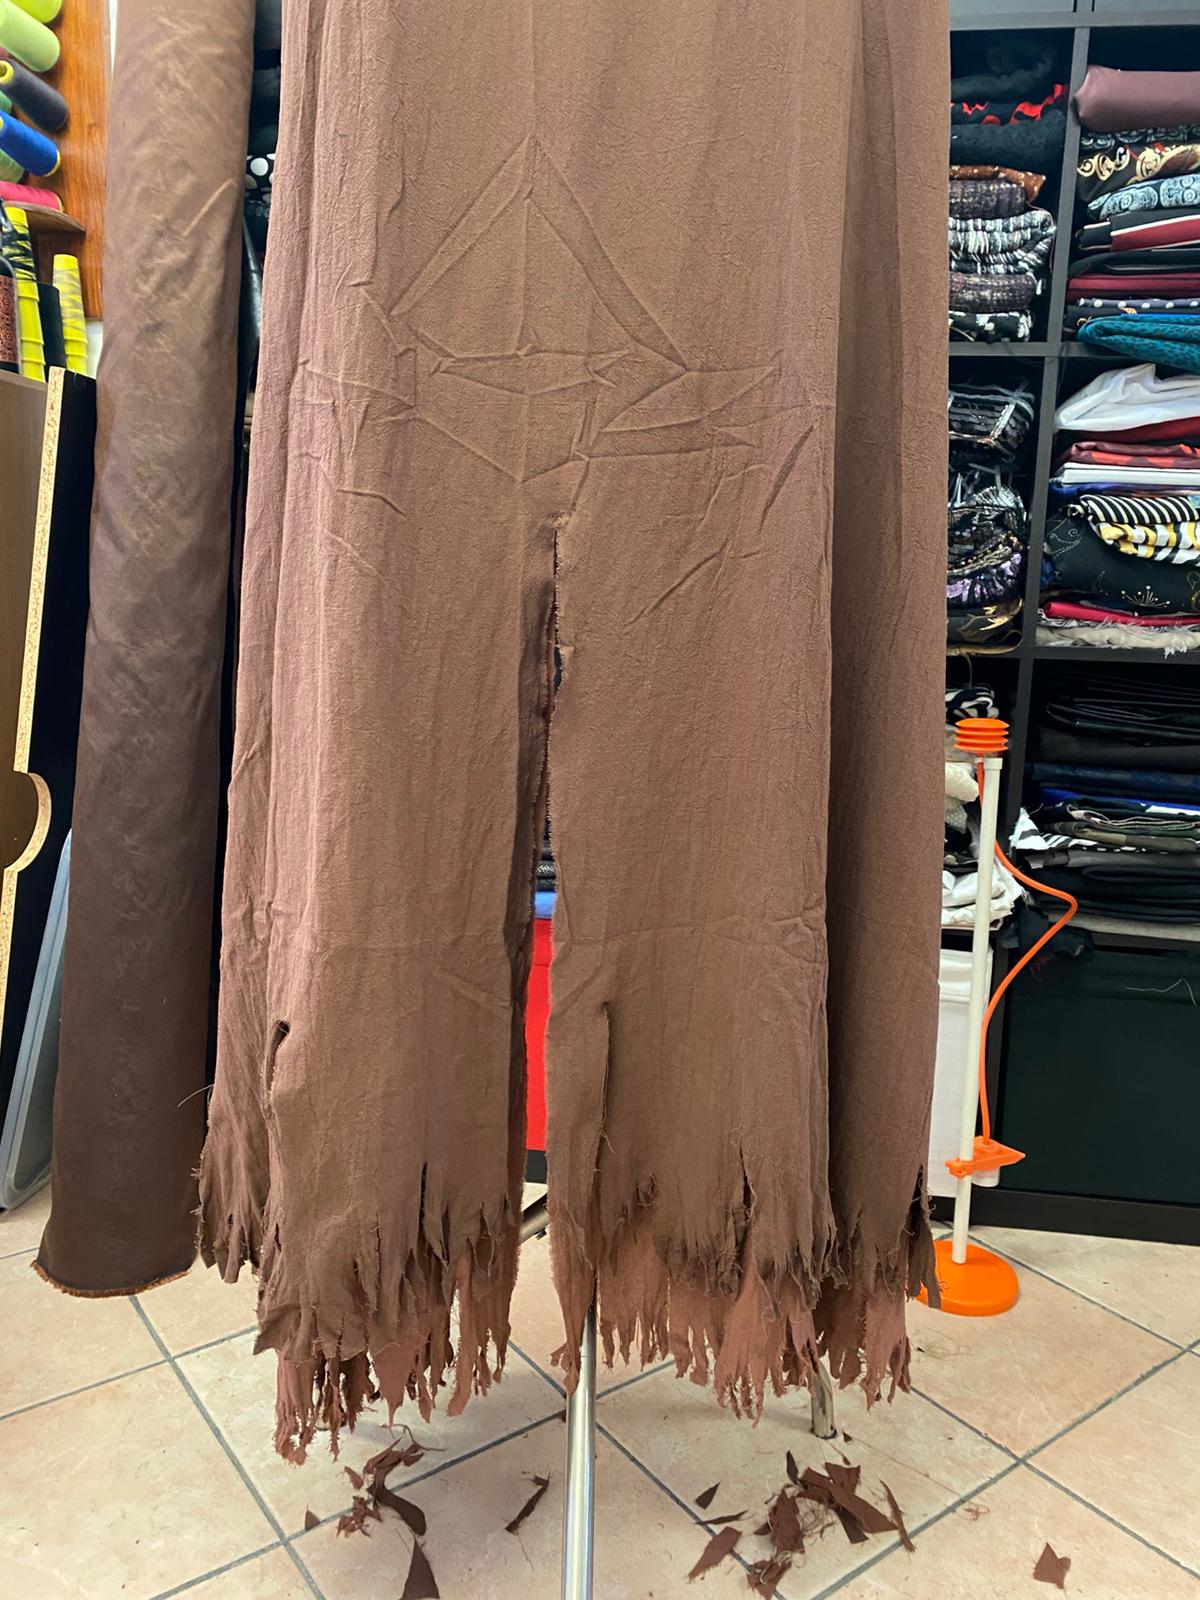 |
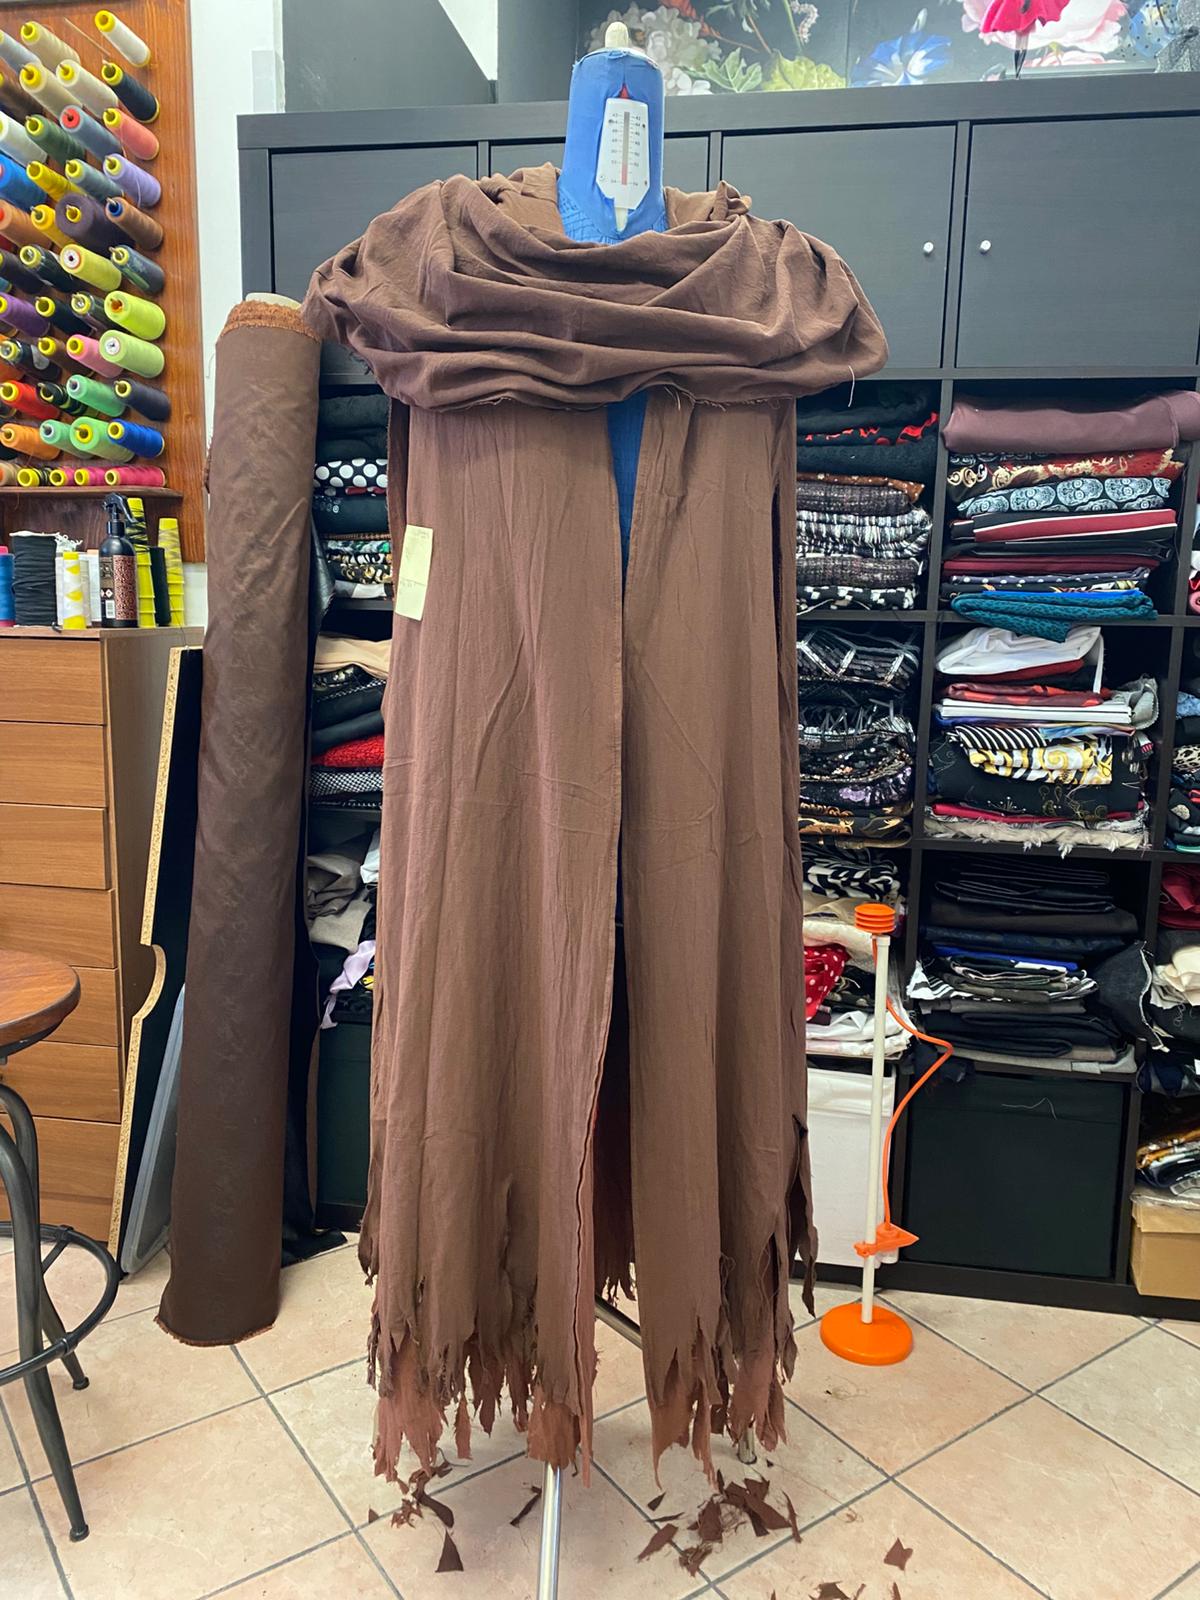
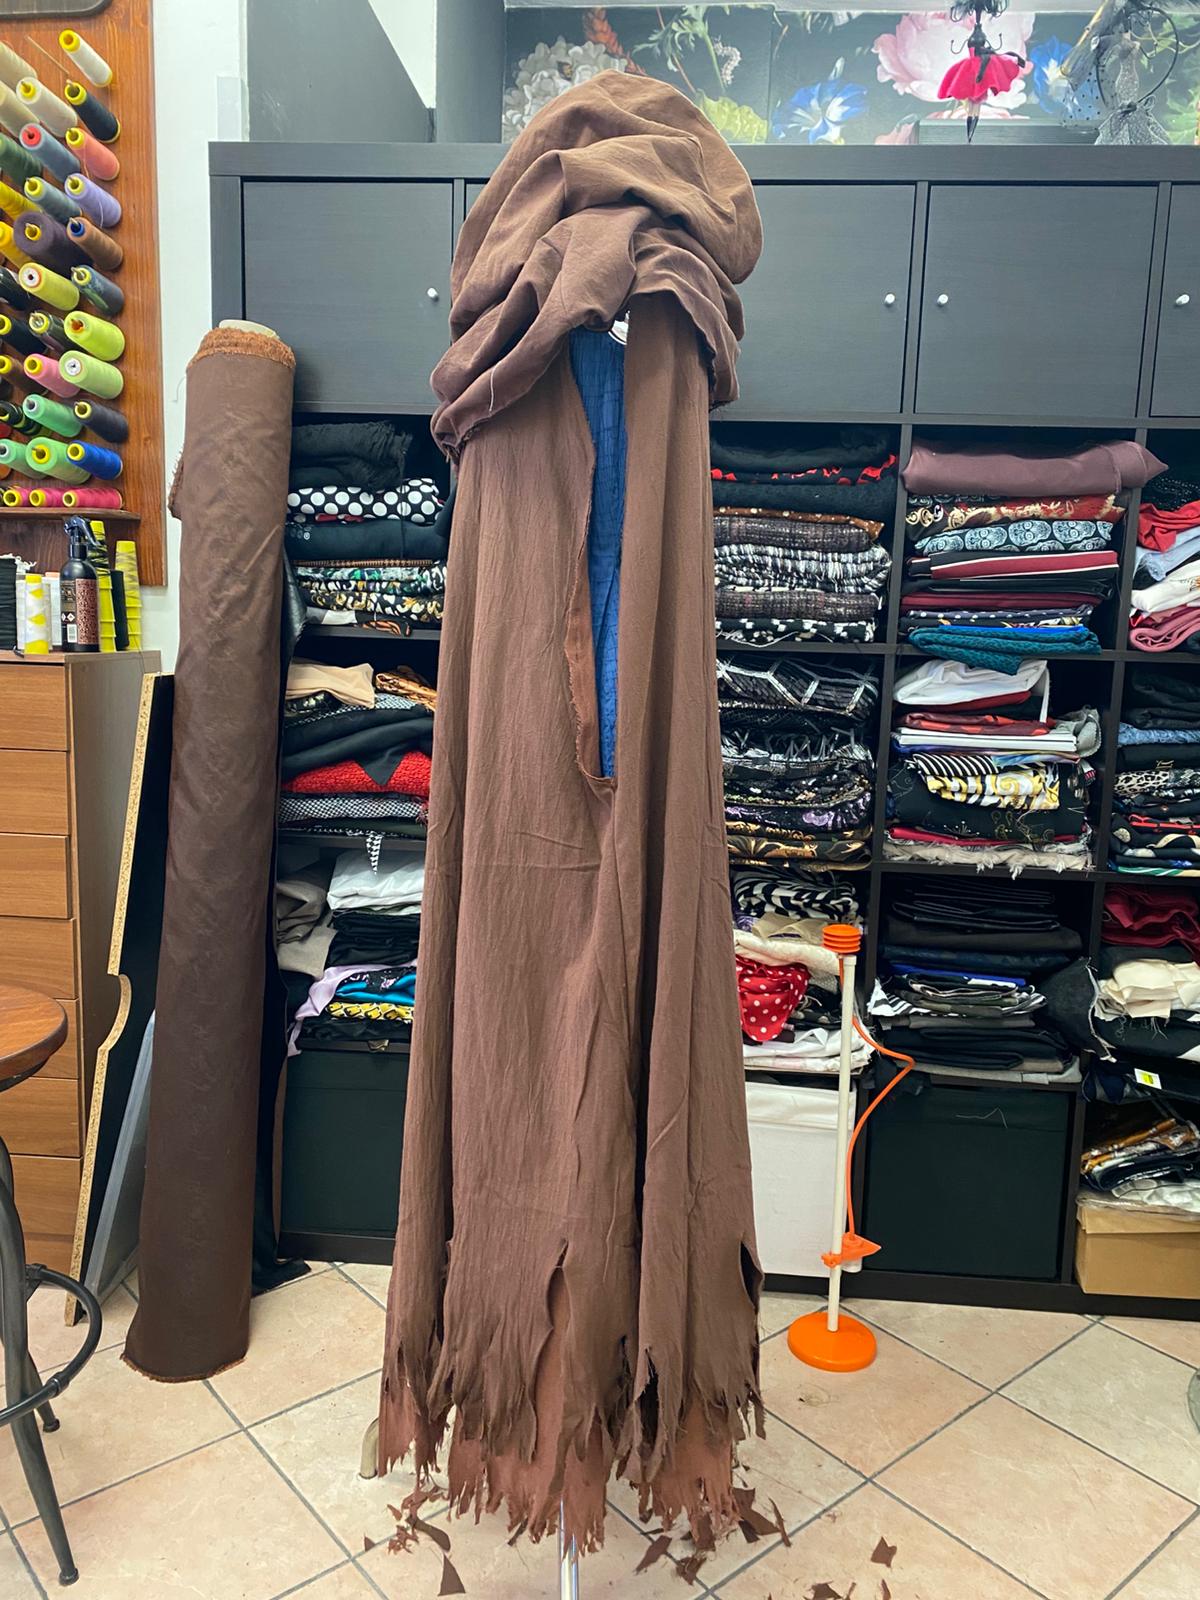
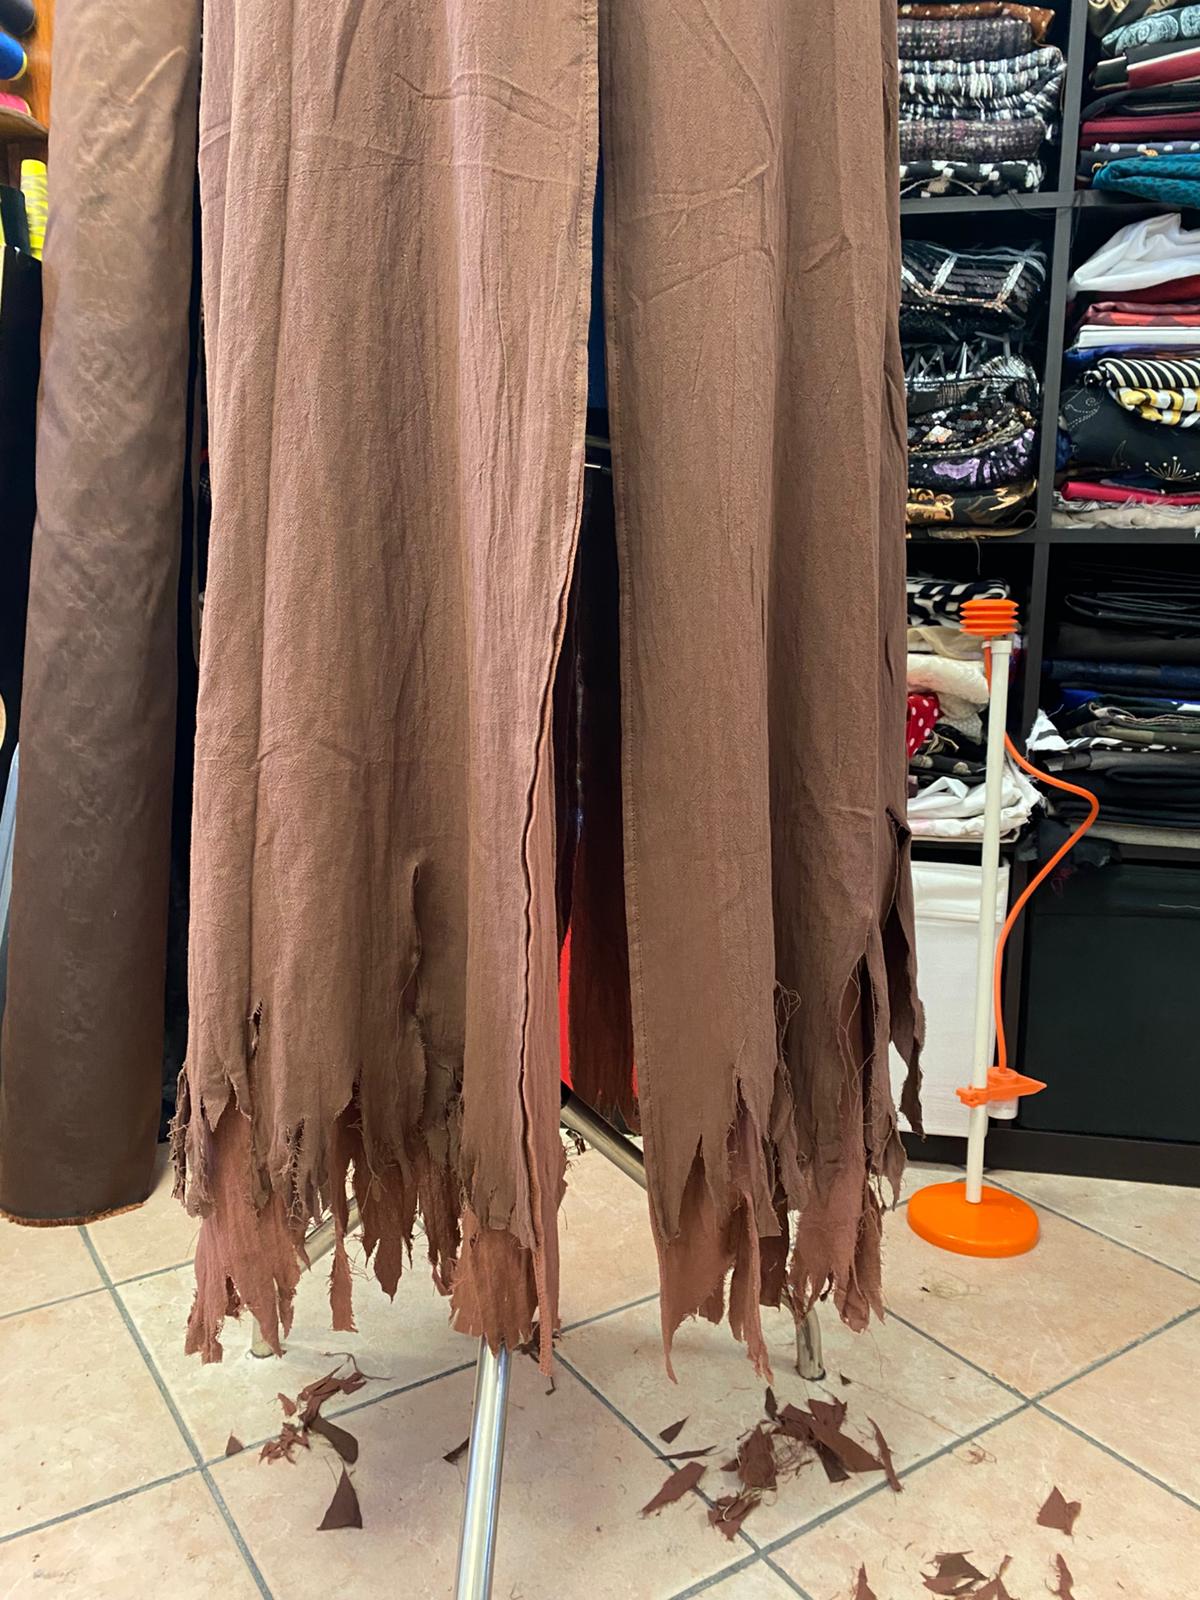
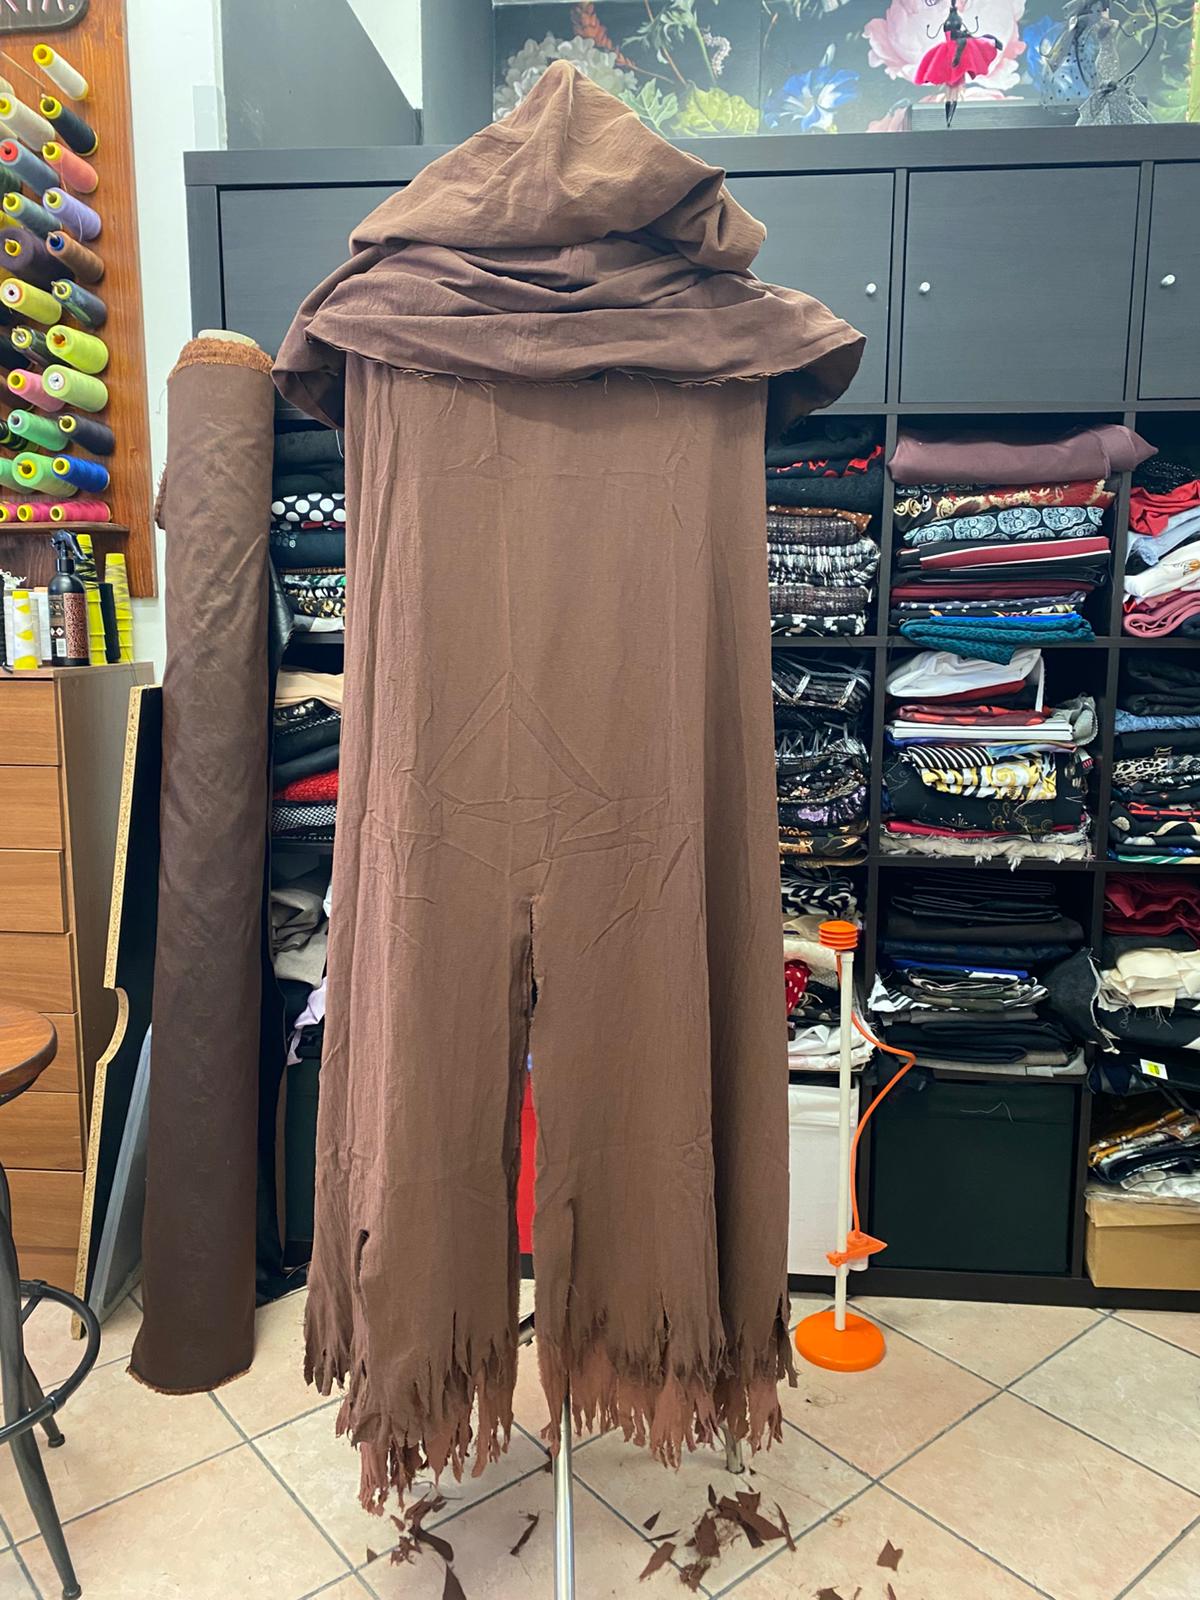
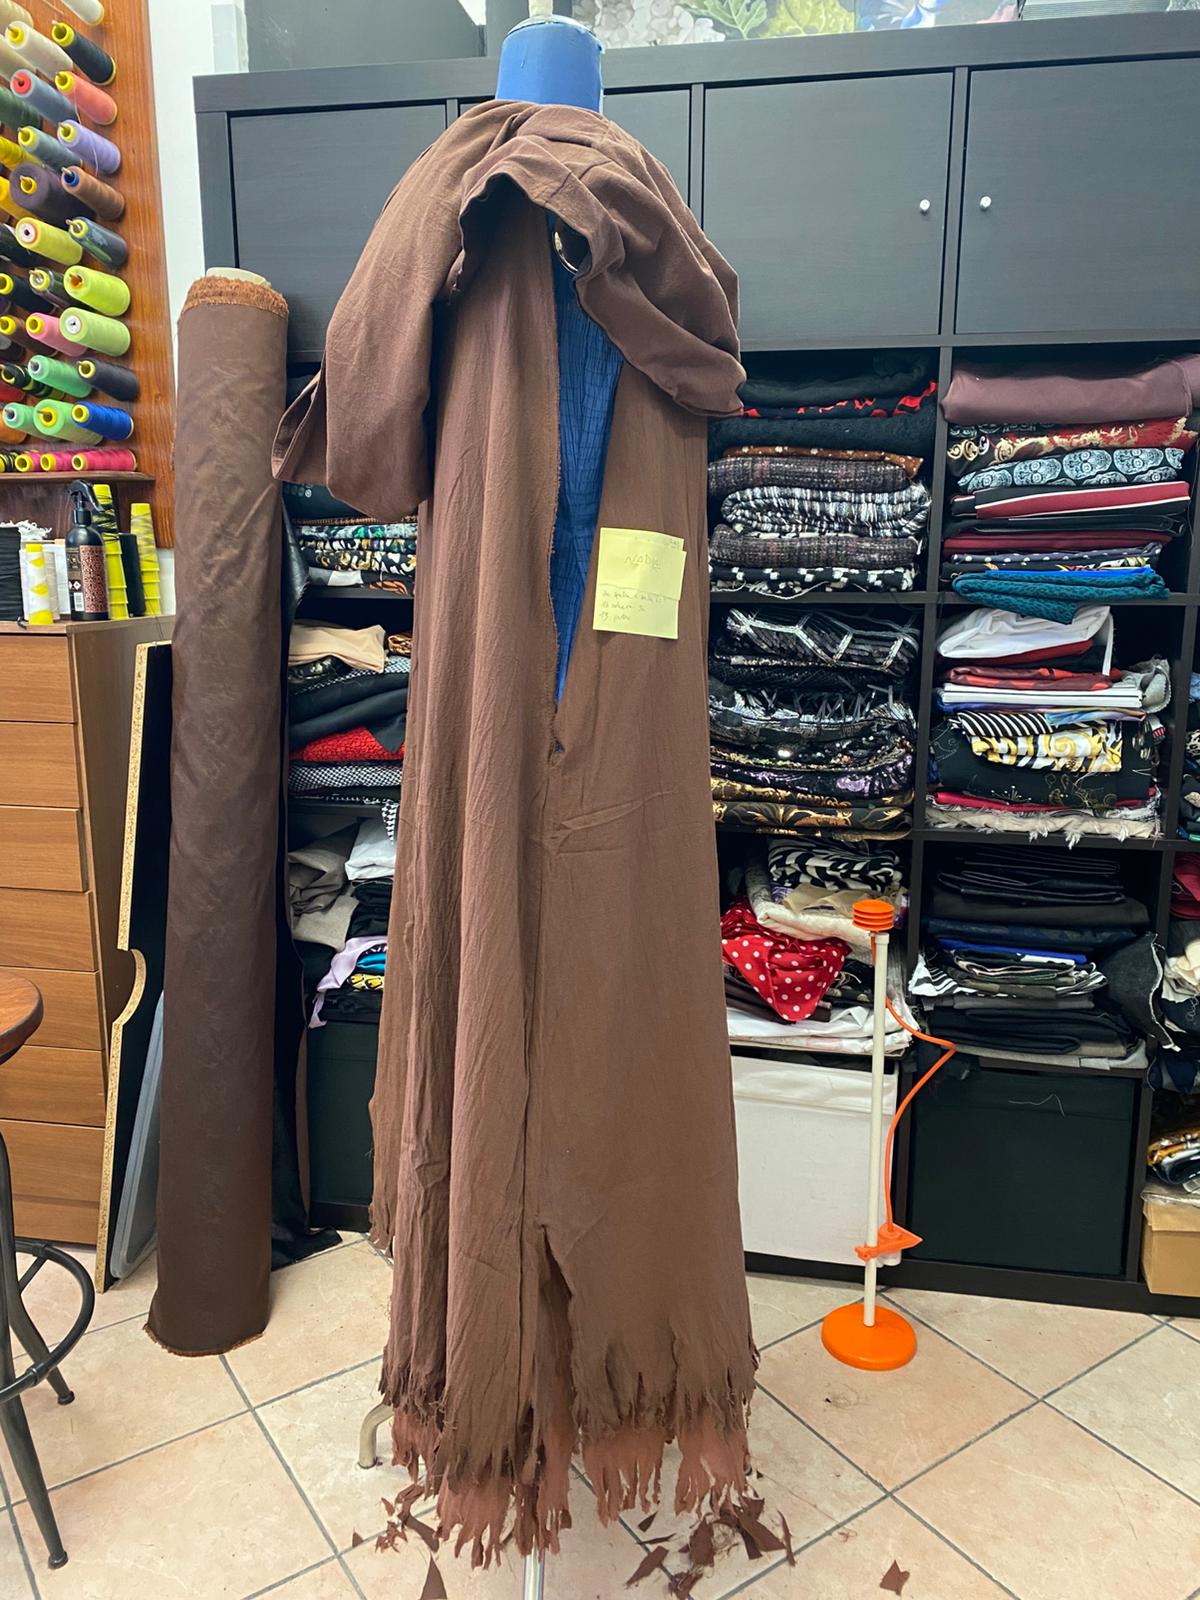
Custom survivor duster, crafted with hands and love. There is a Hood and a fabric choker, sleeves are absent. Each duster is composed by 3 Larp china brown cloak. |
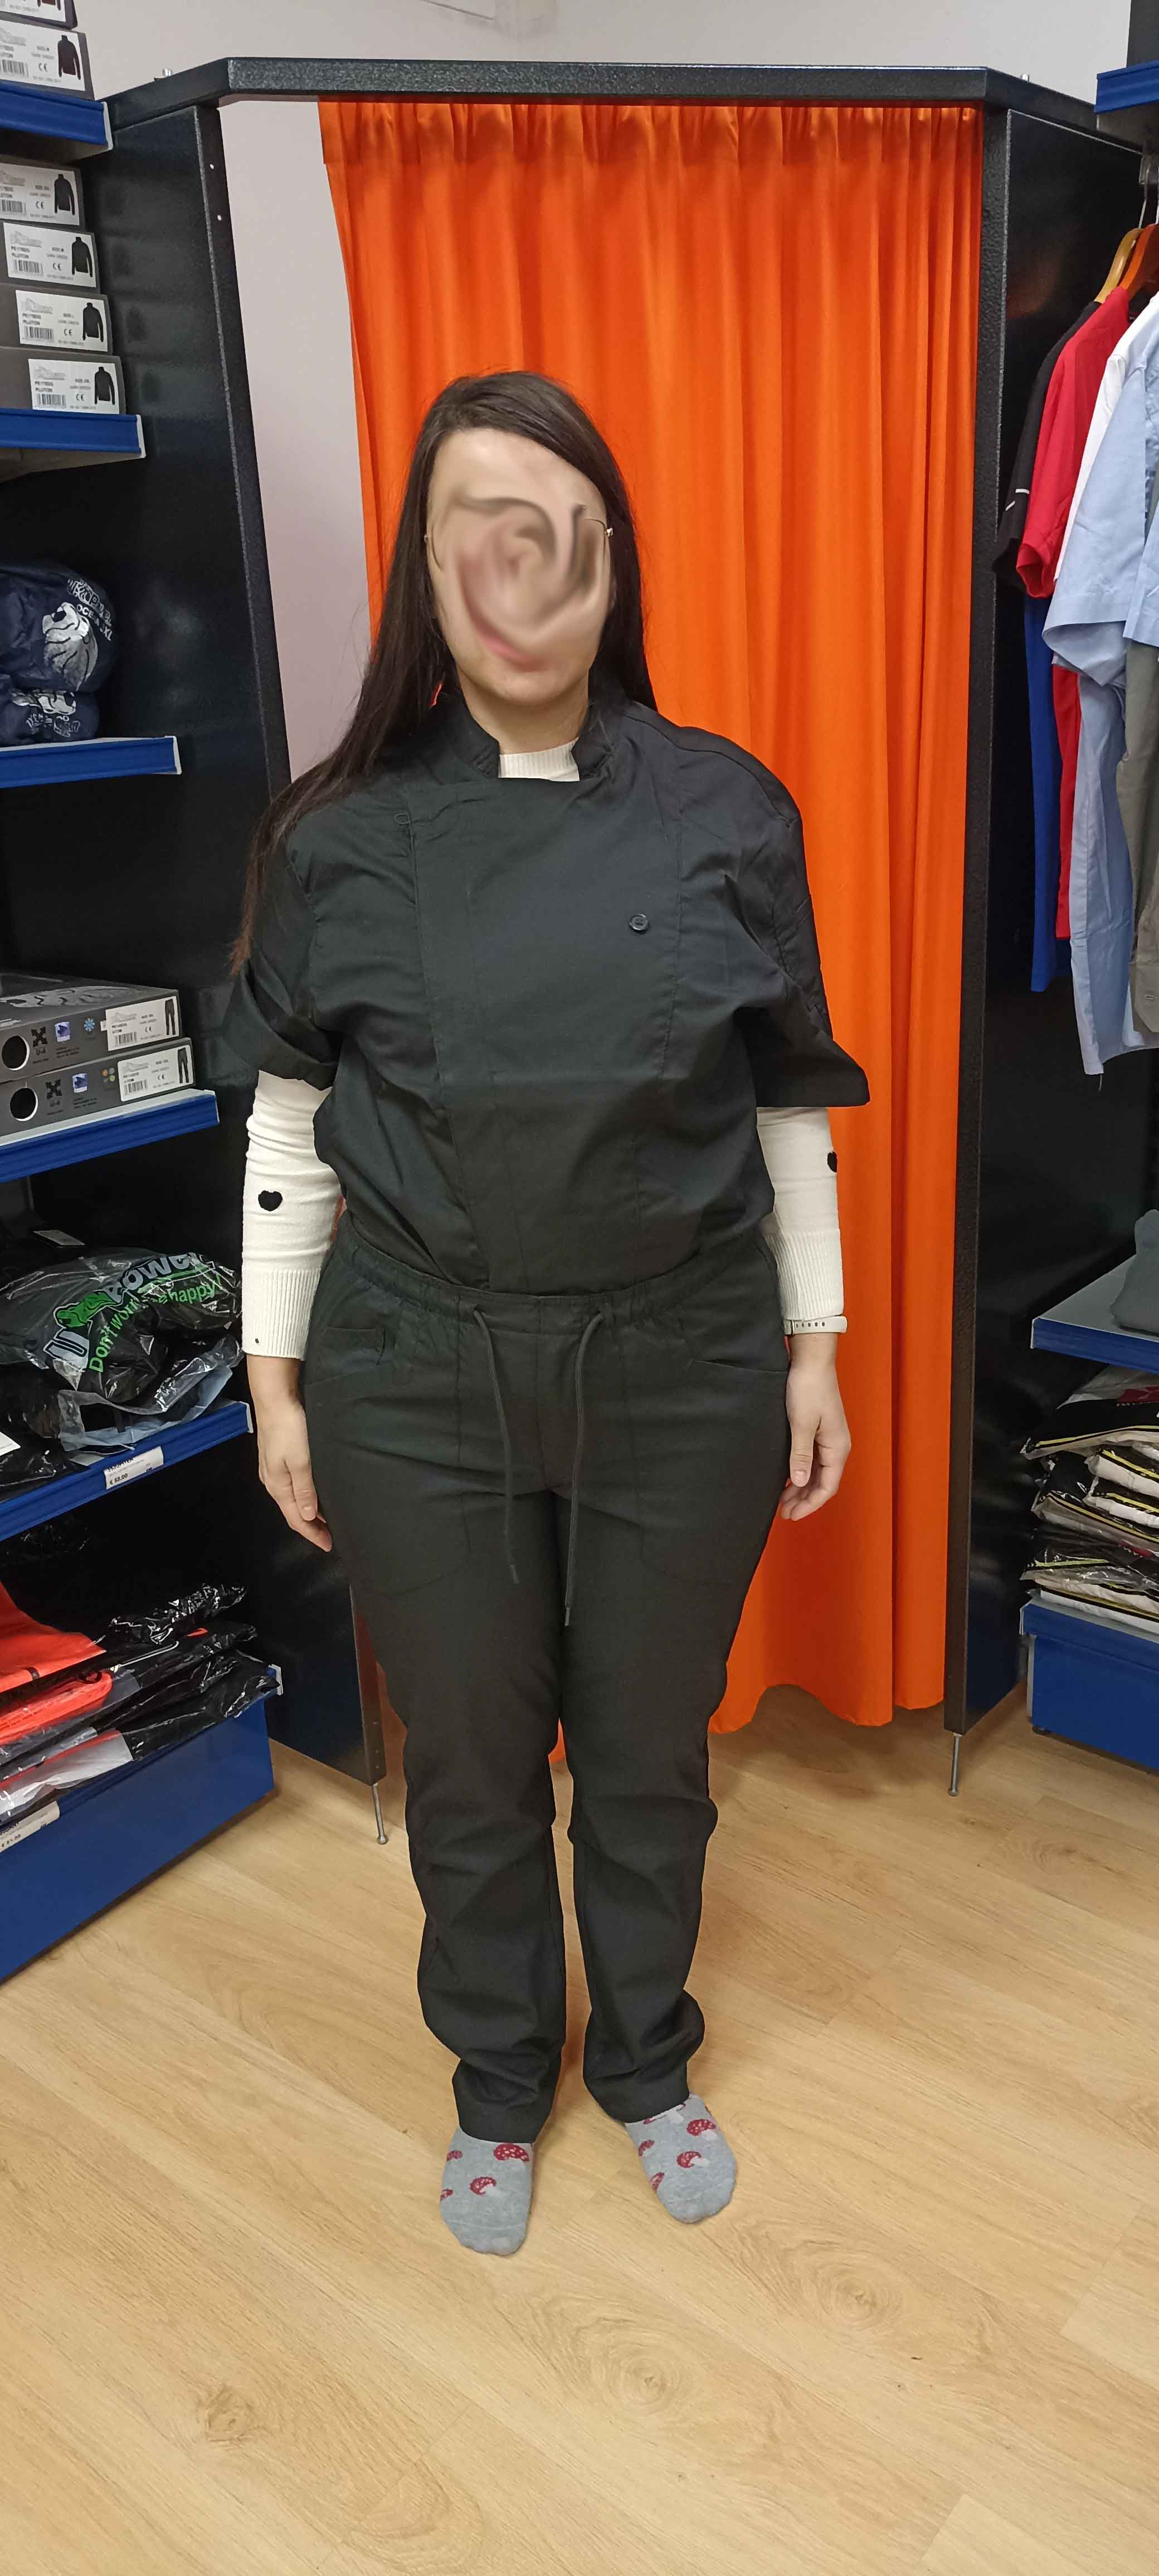
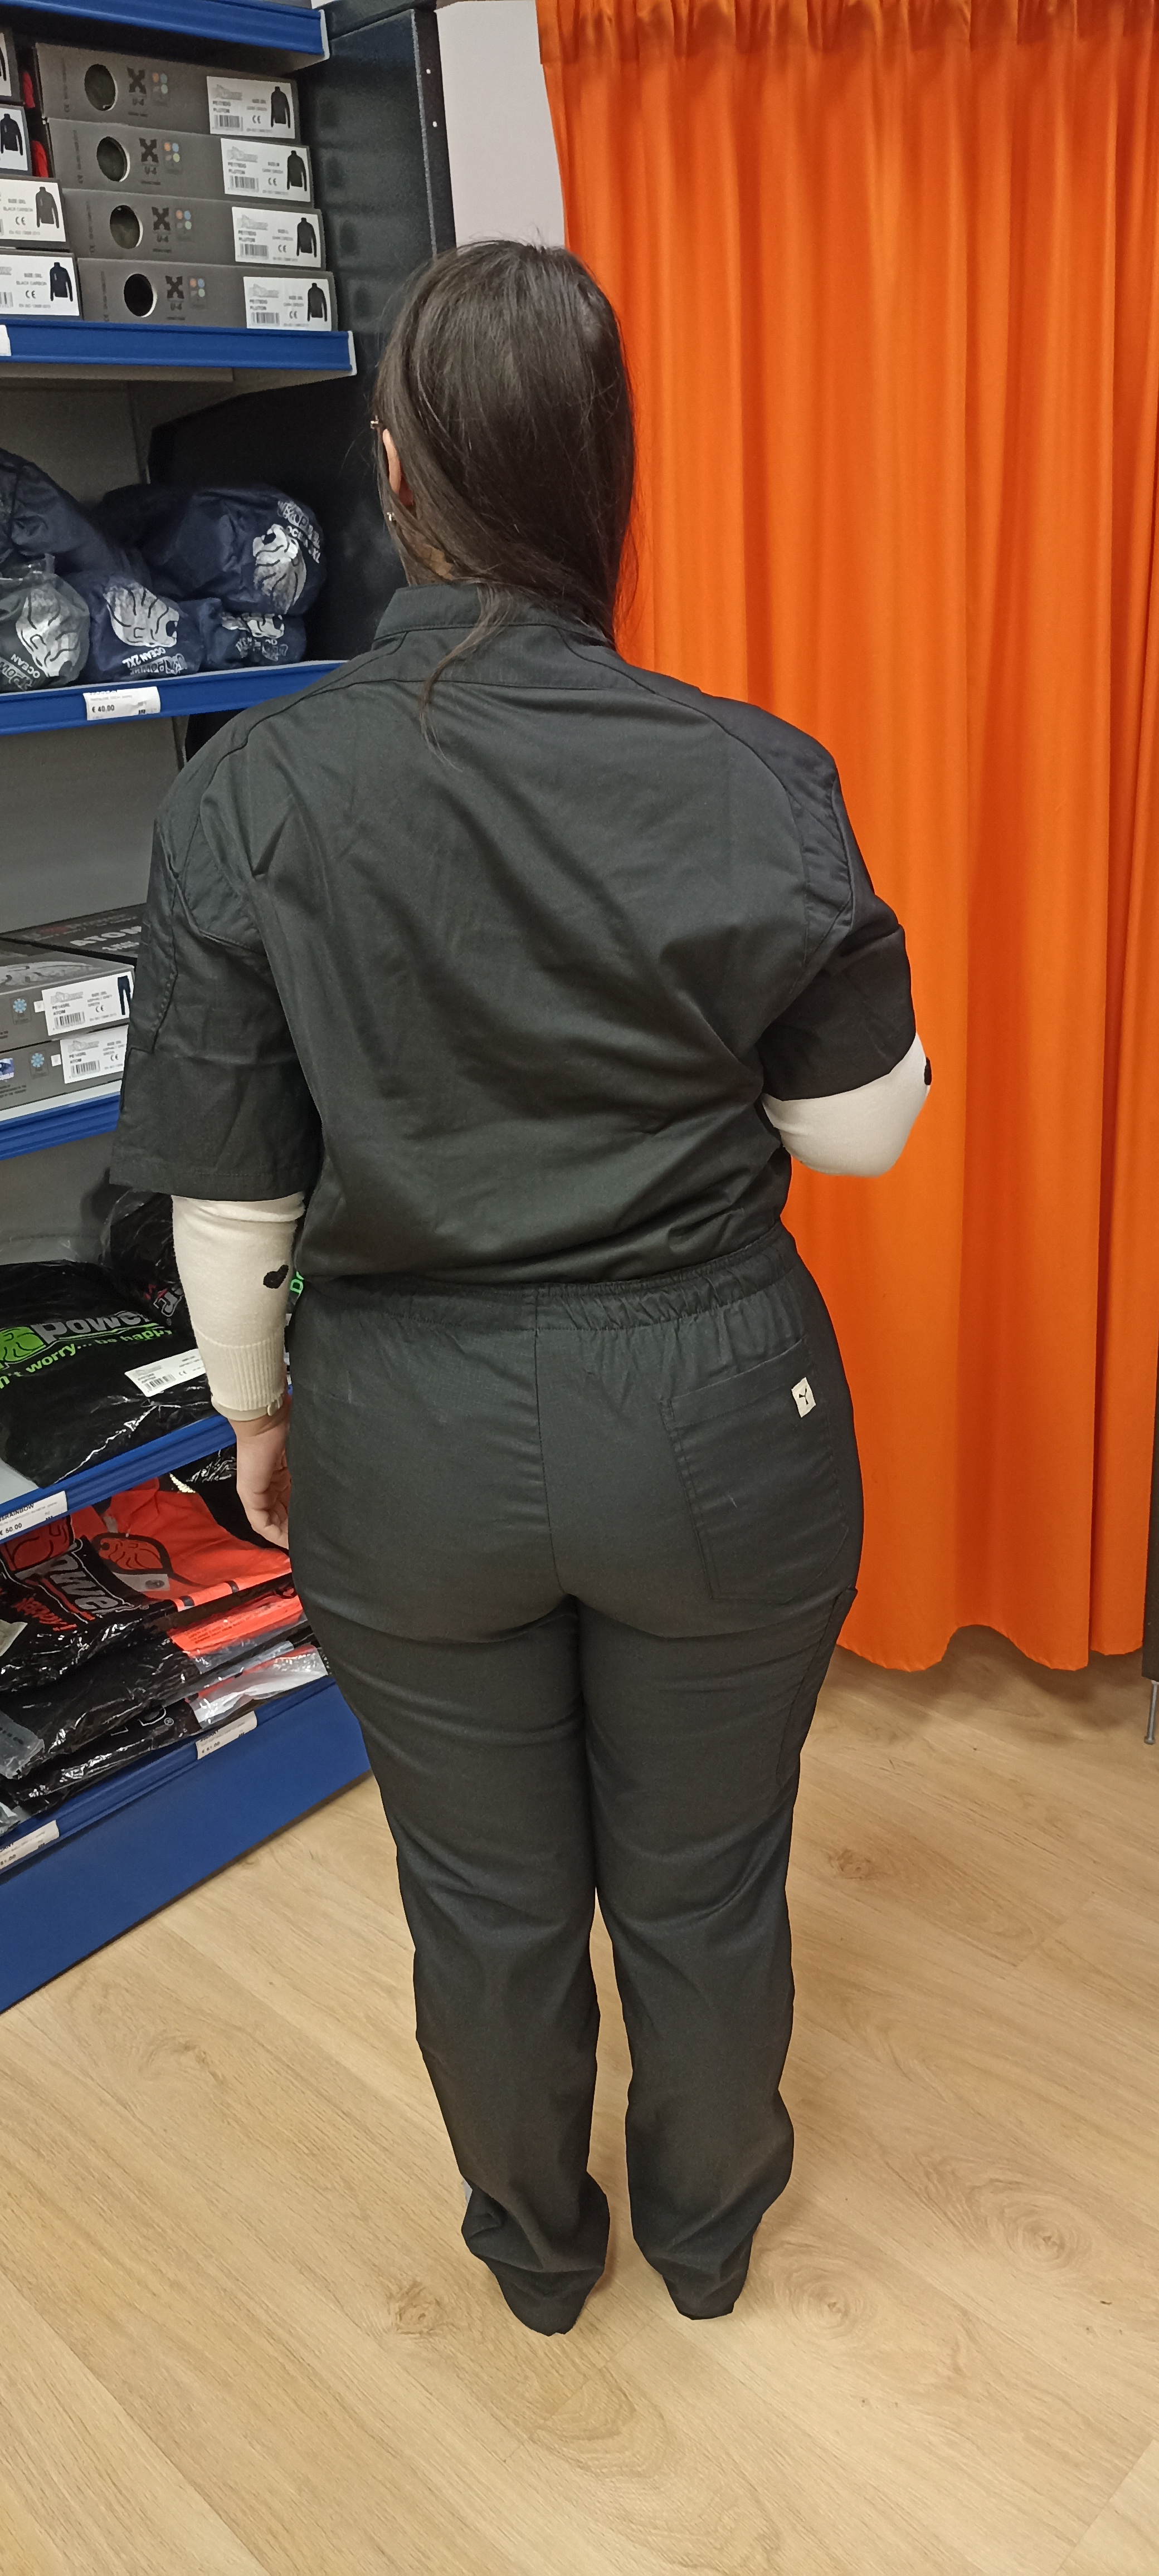
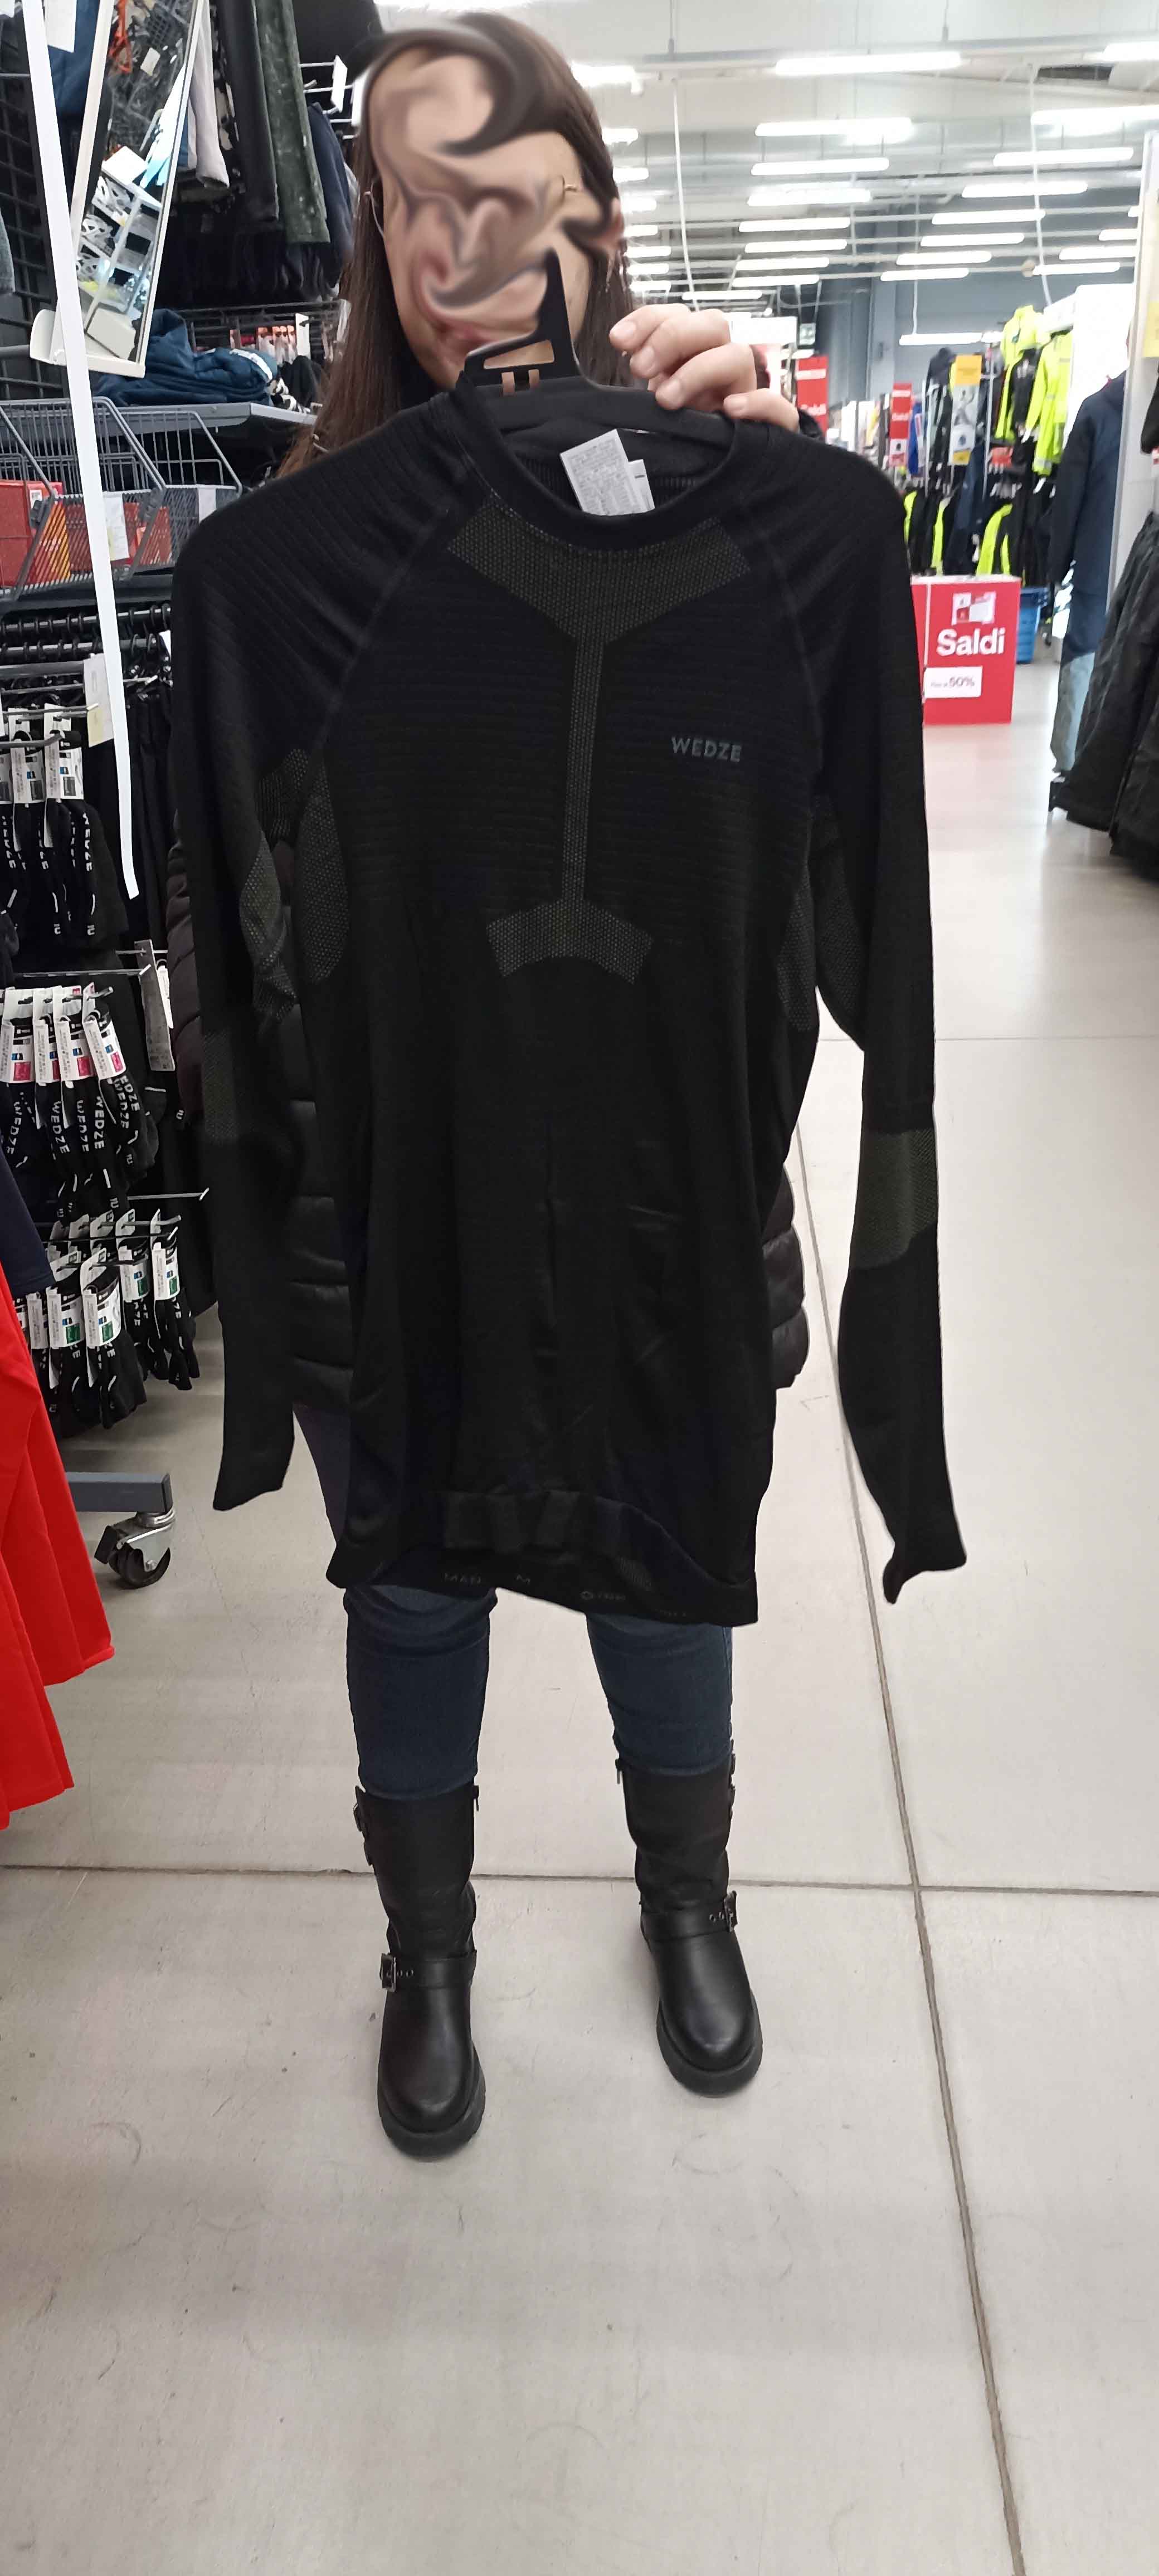
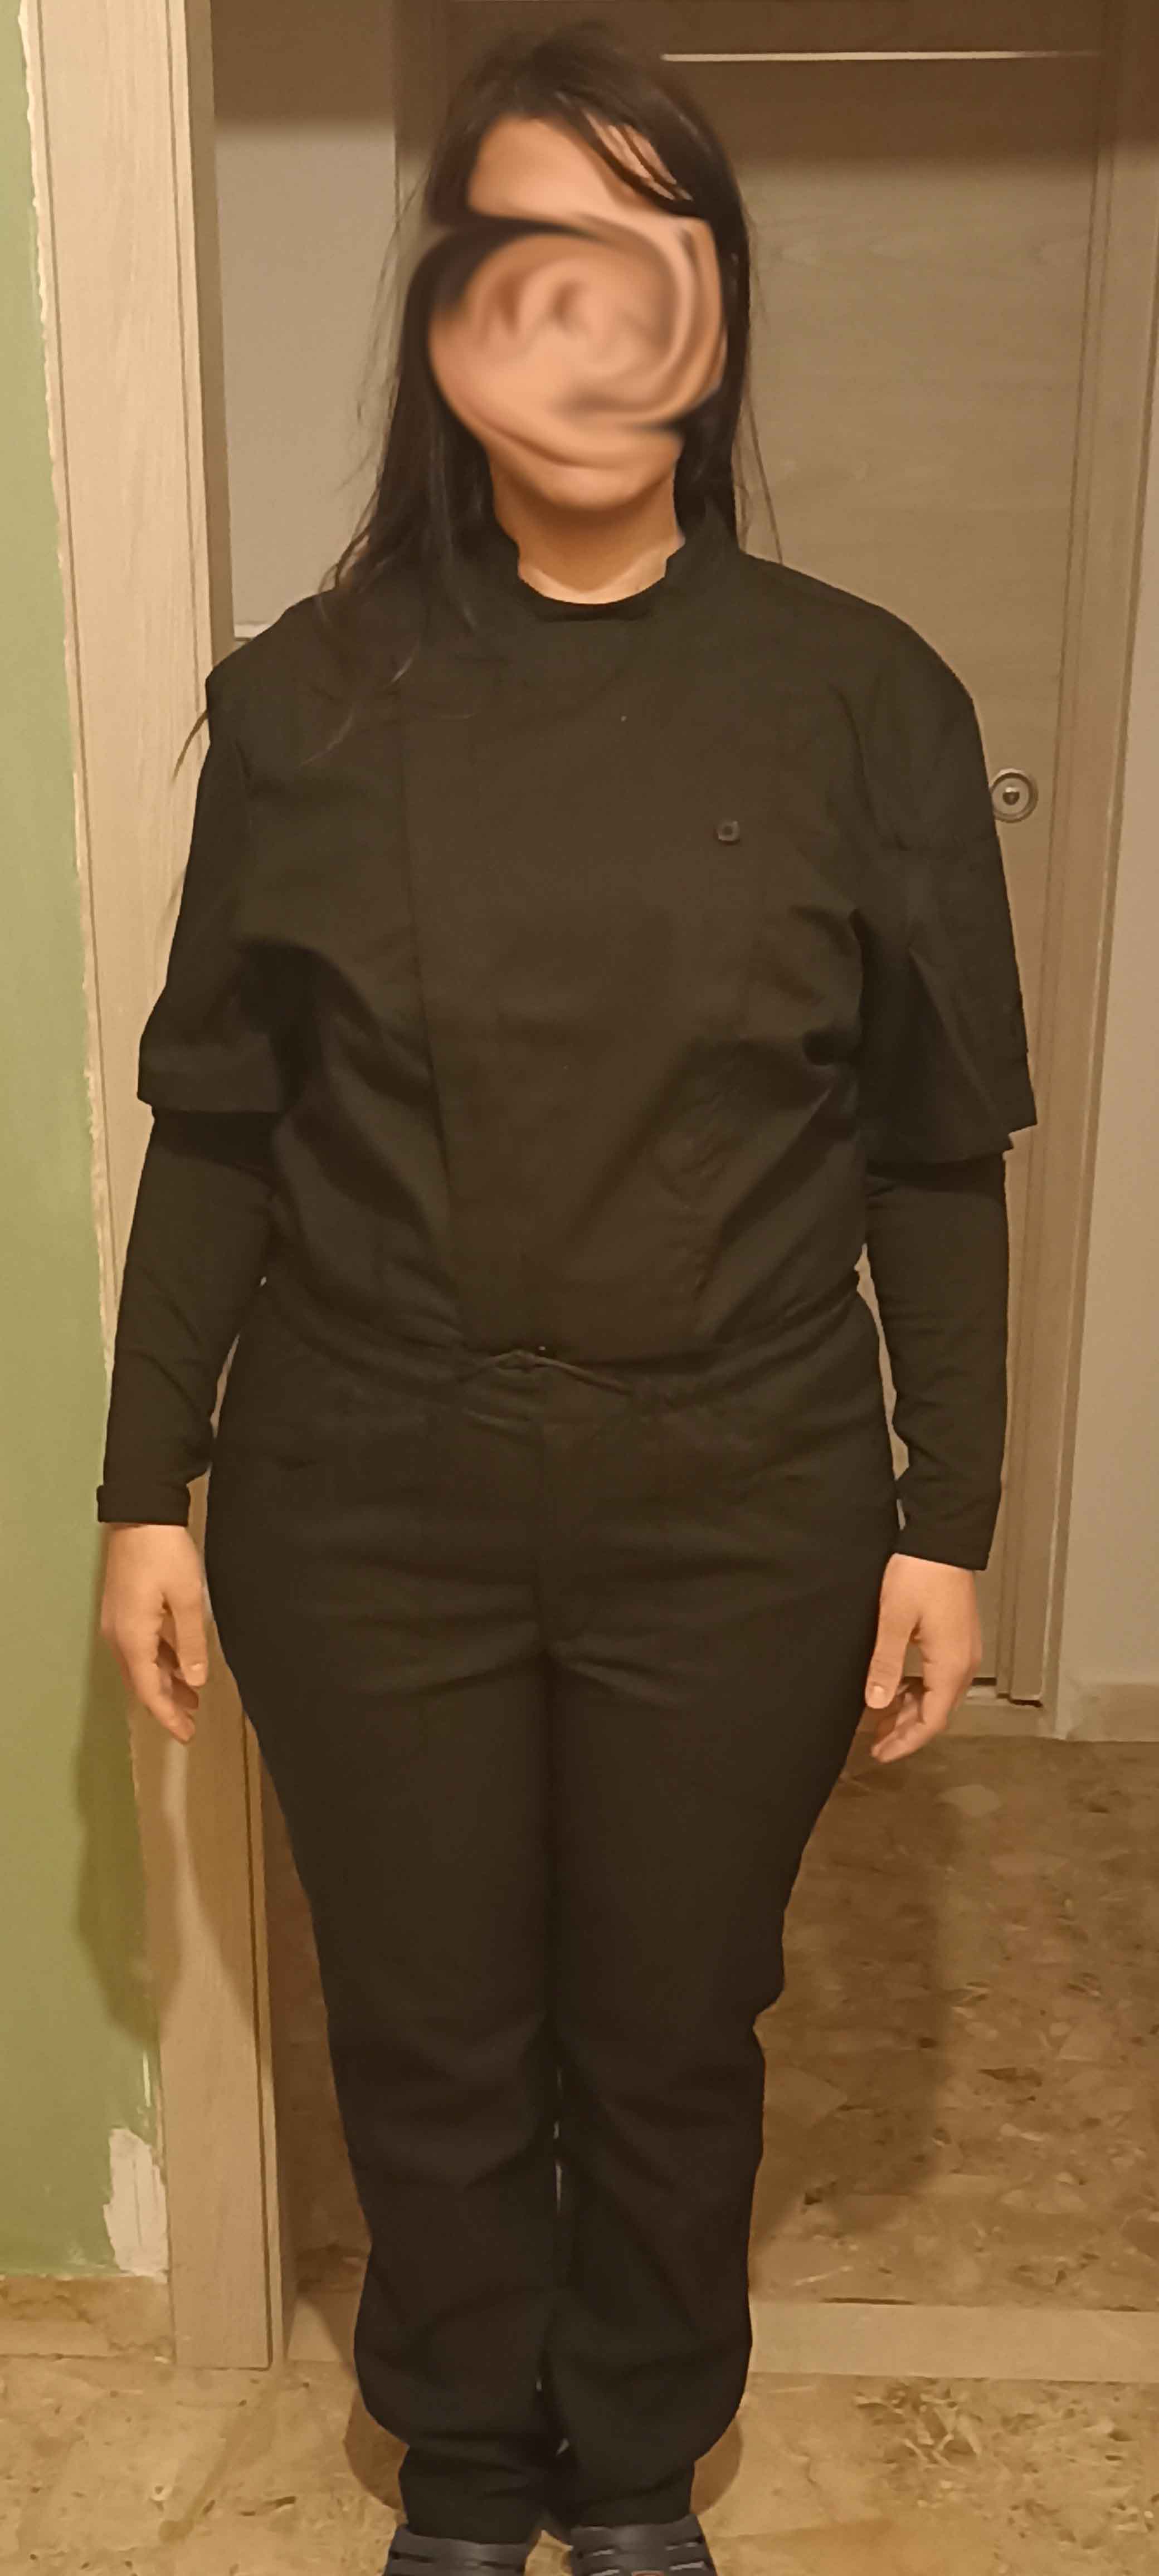 | The Flight Suit, The flight suit consists of a modified chef's jacket and trousers, and a long-sleeved black shirt underneath. |
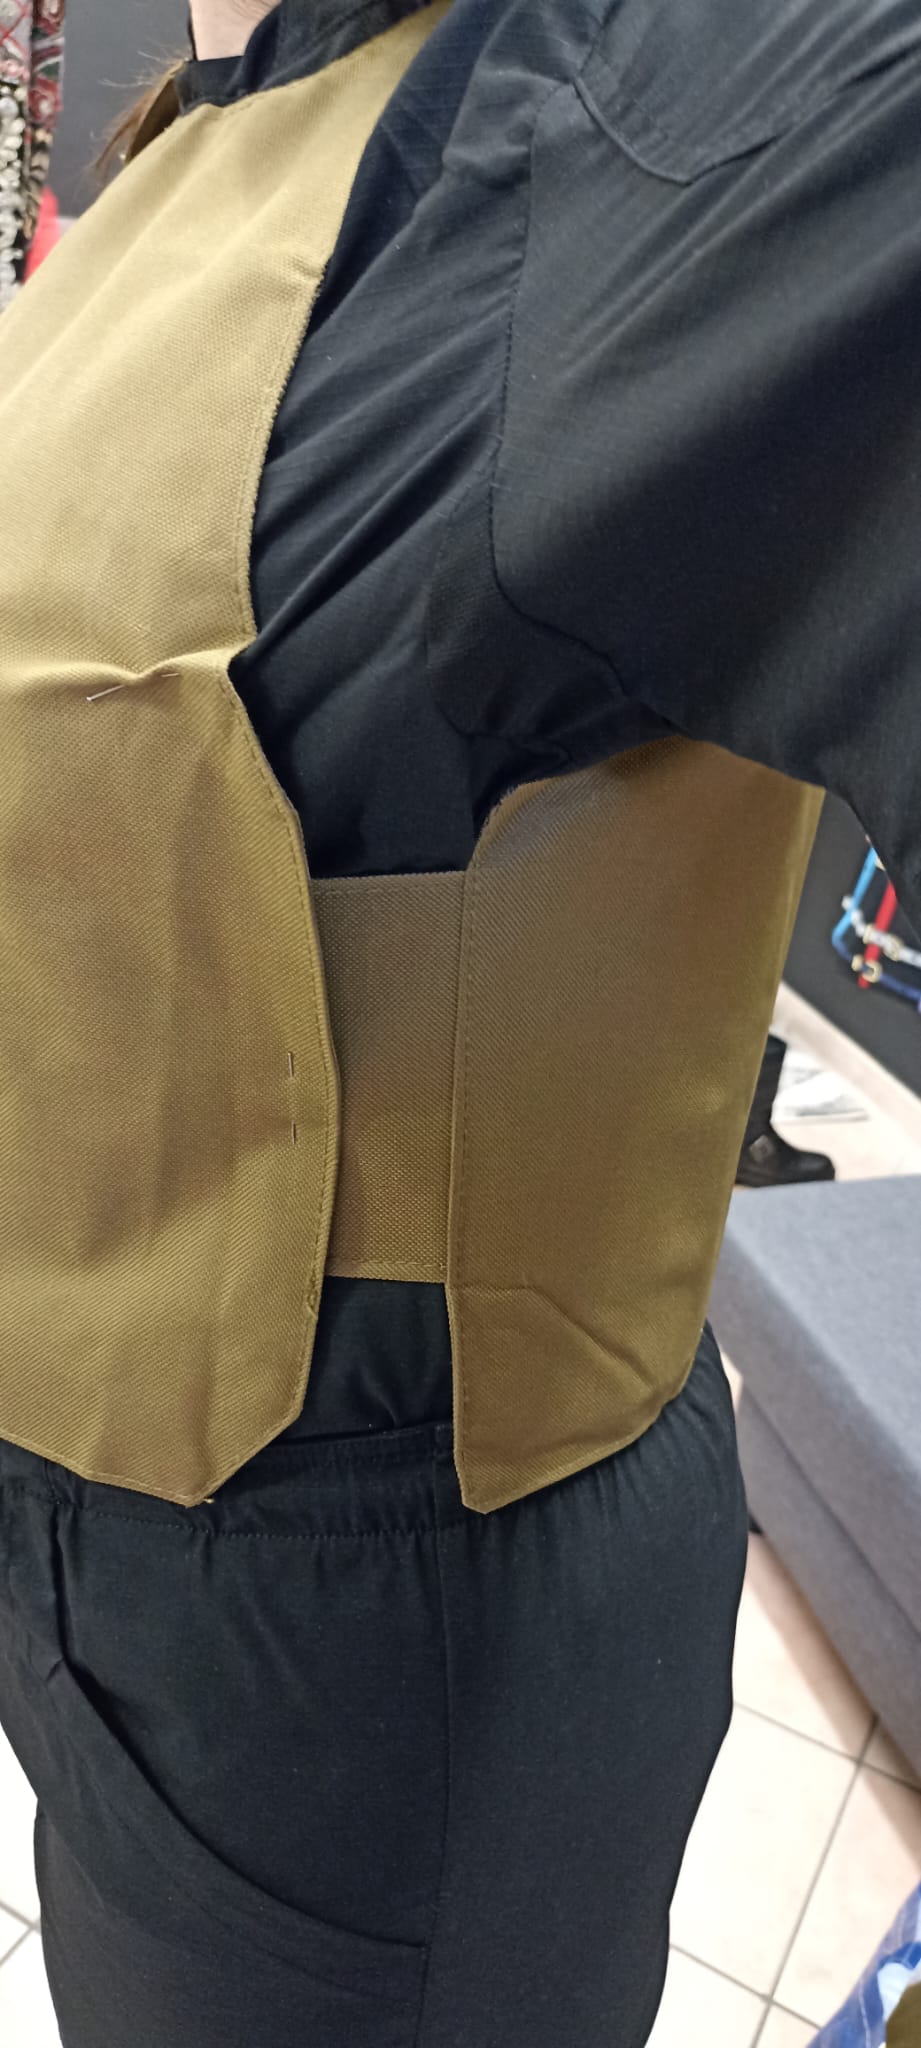
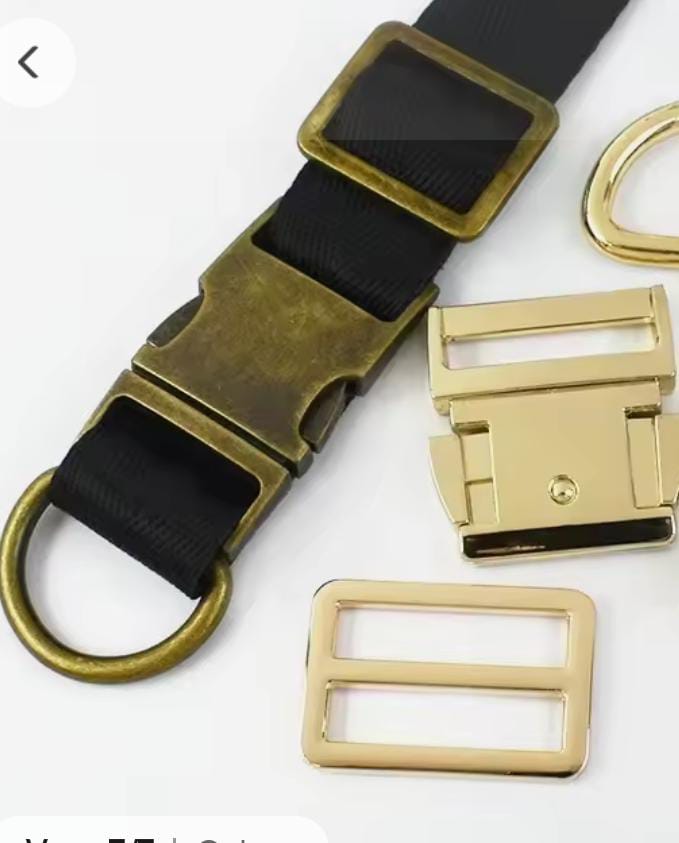
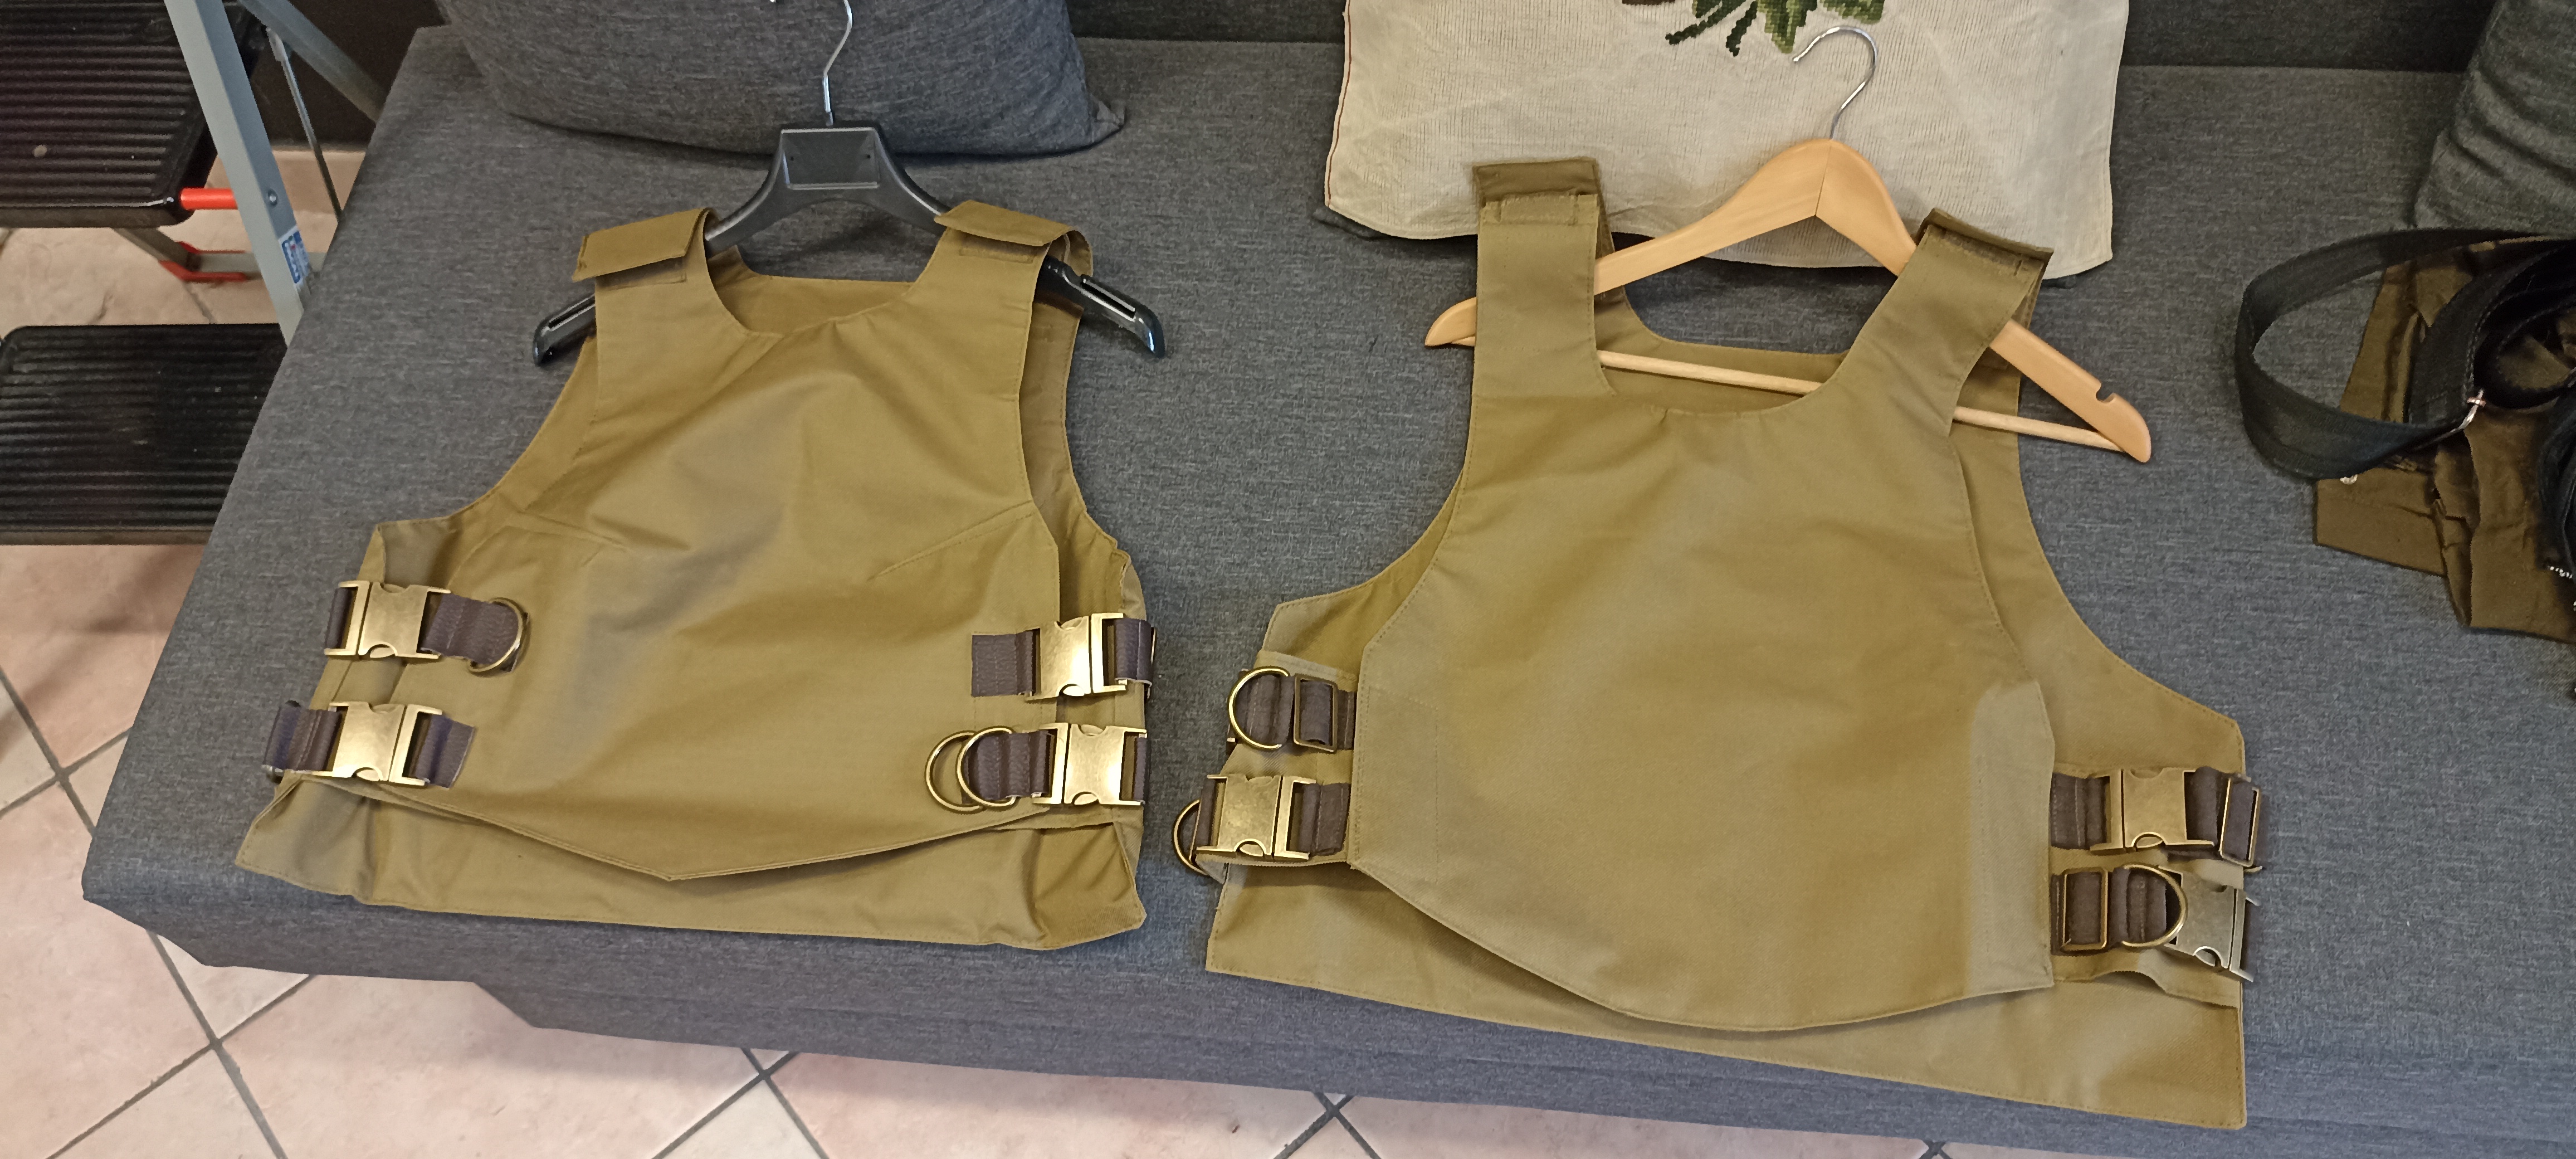 | The Flack, is a 12€ china' softair tactical vest, modified with some metal clips. |
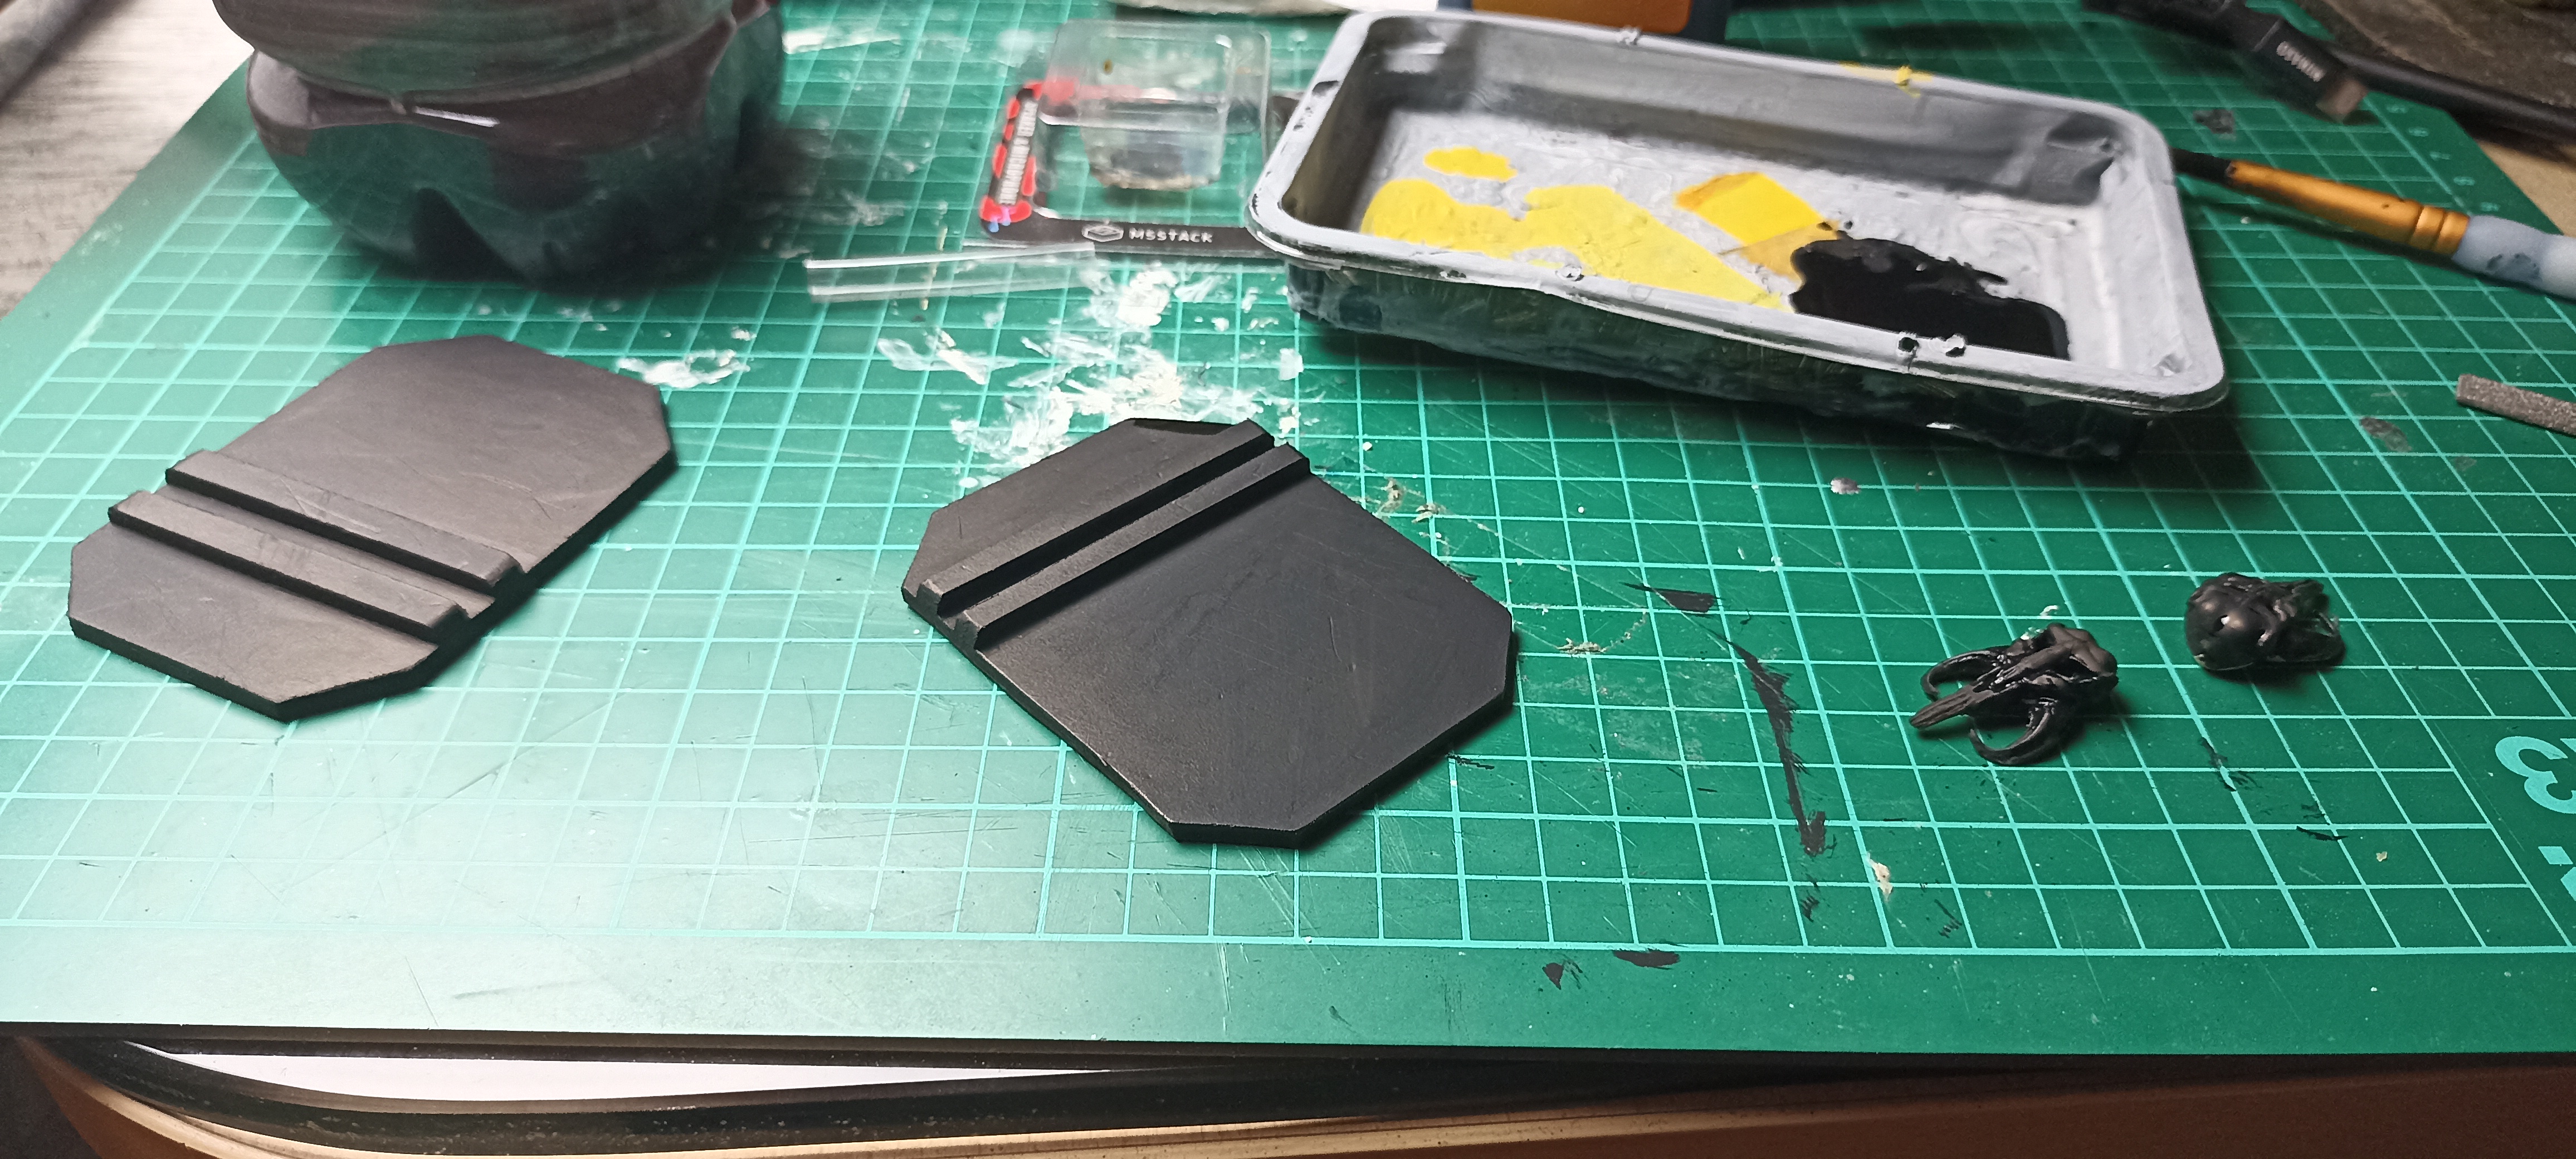

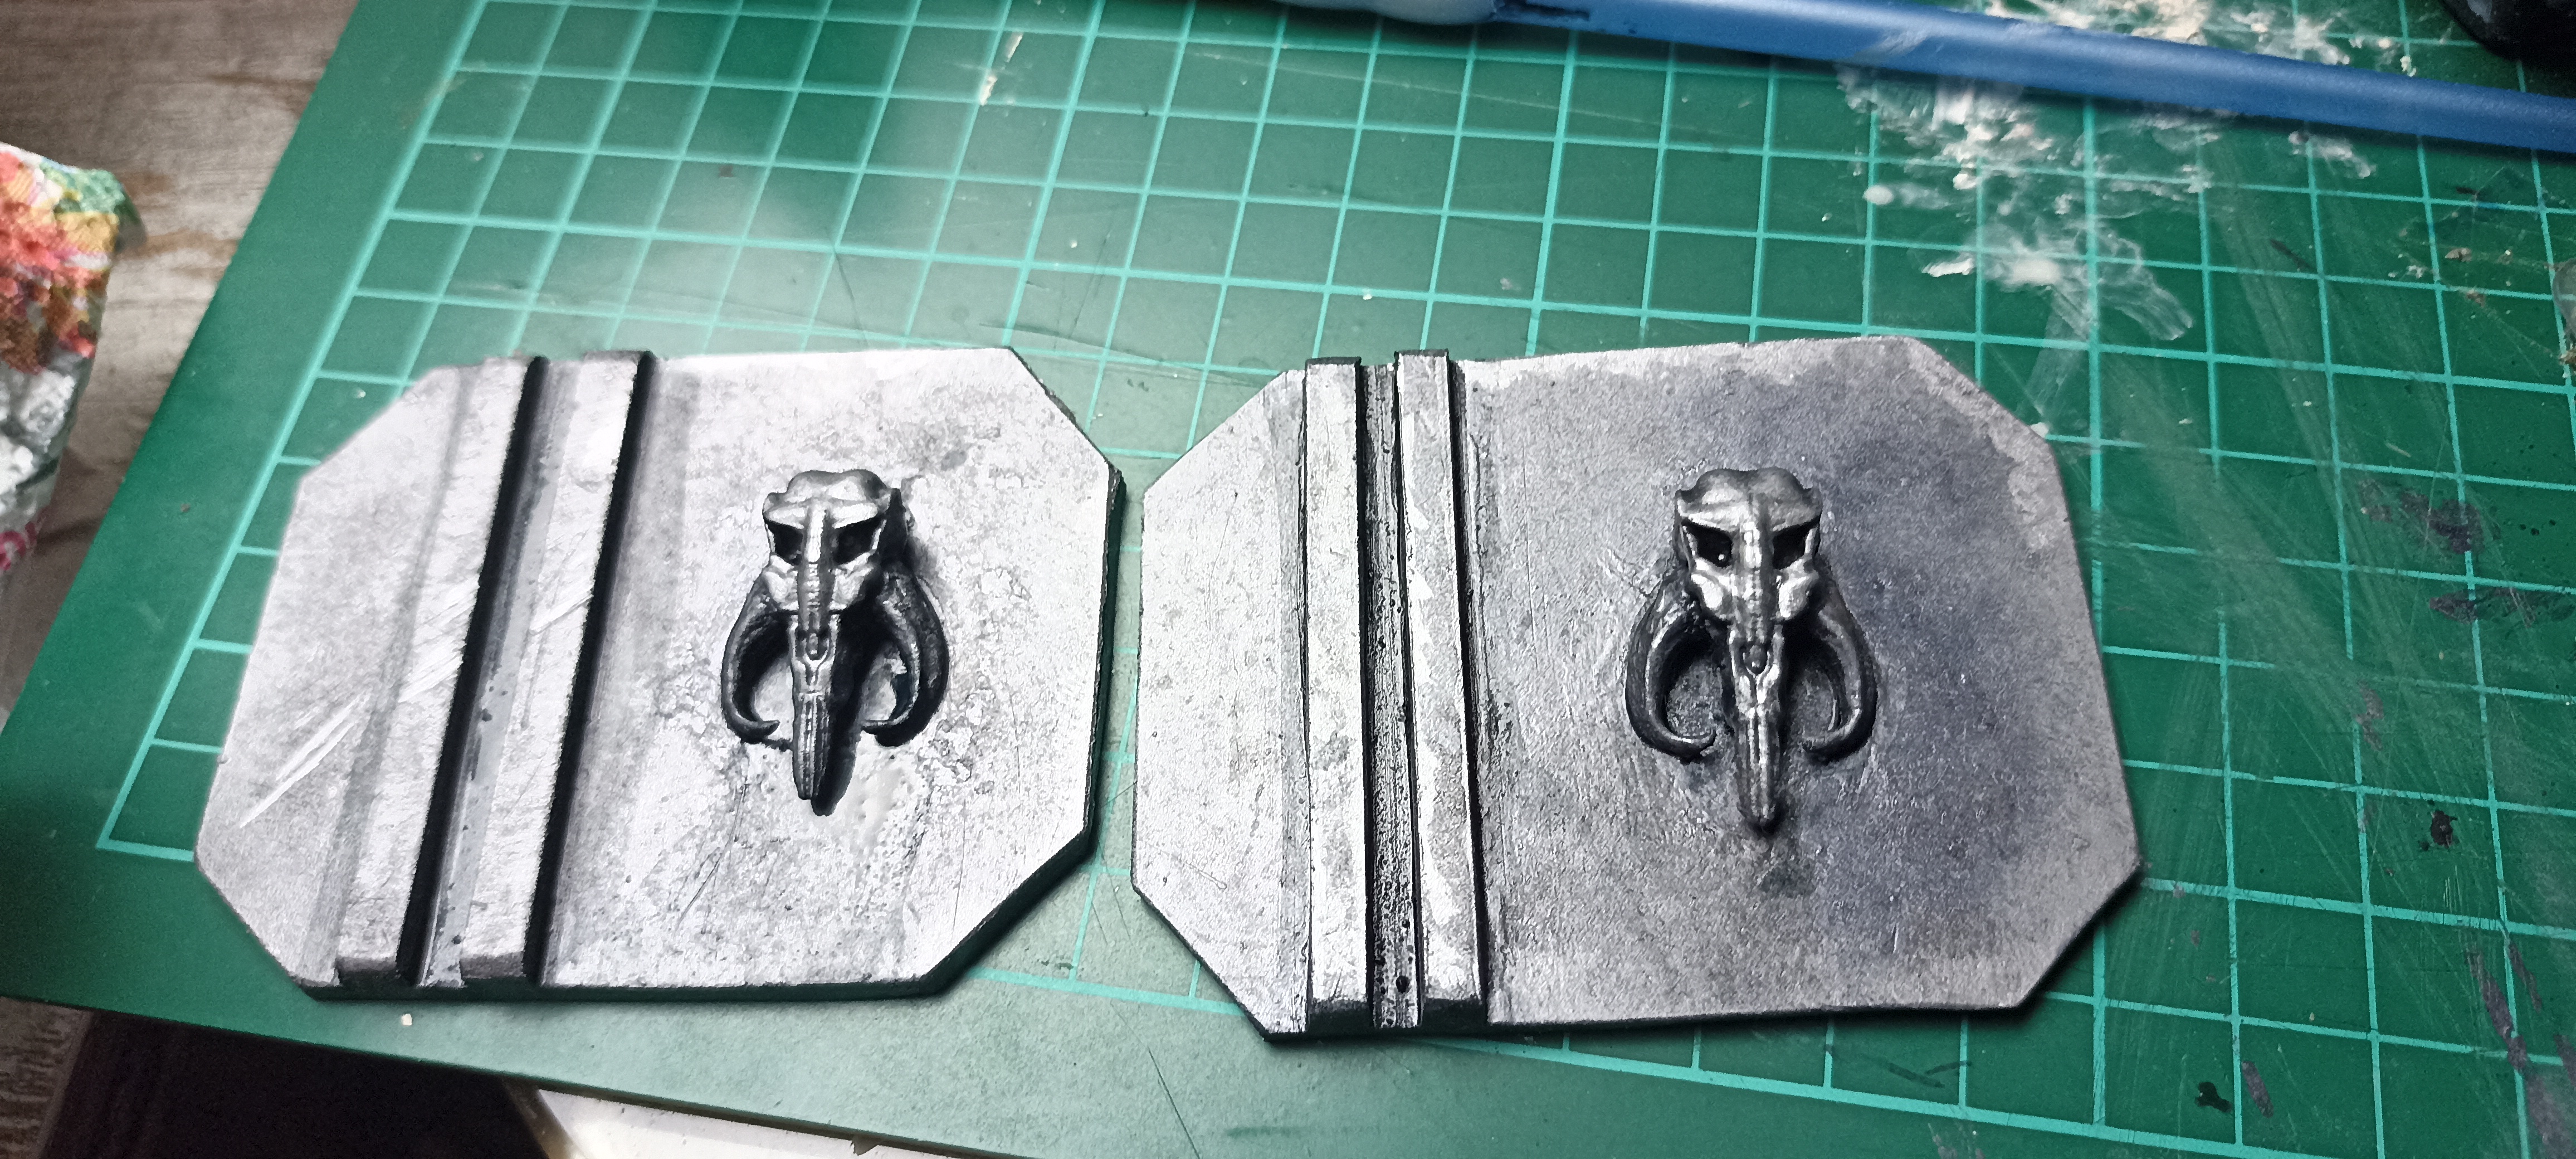 | Belt buckleMithosaur skull printed in resin, buckle hand-crafted using polistyren. |
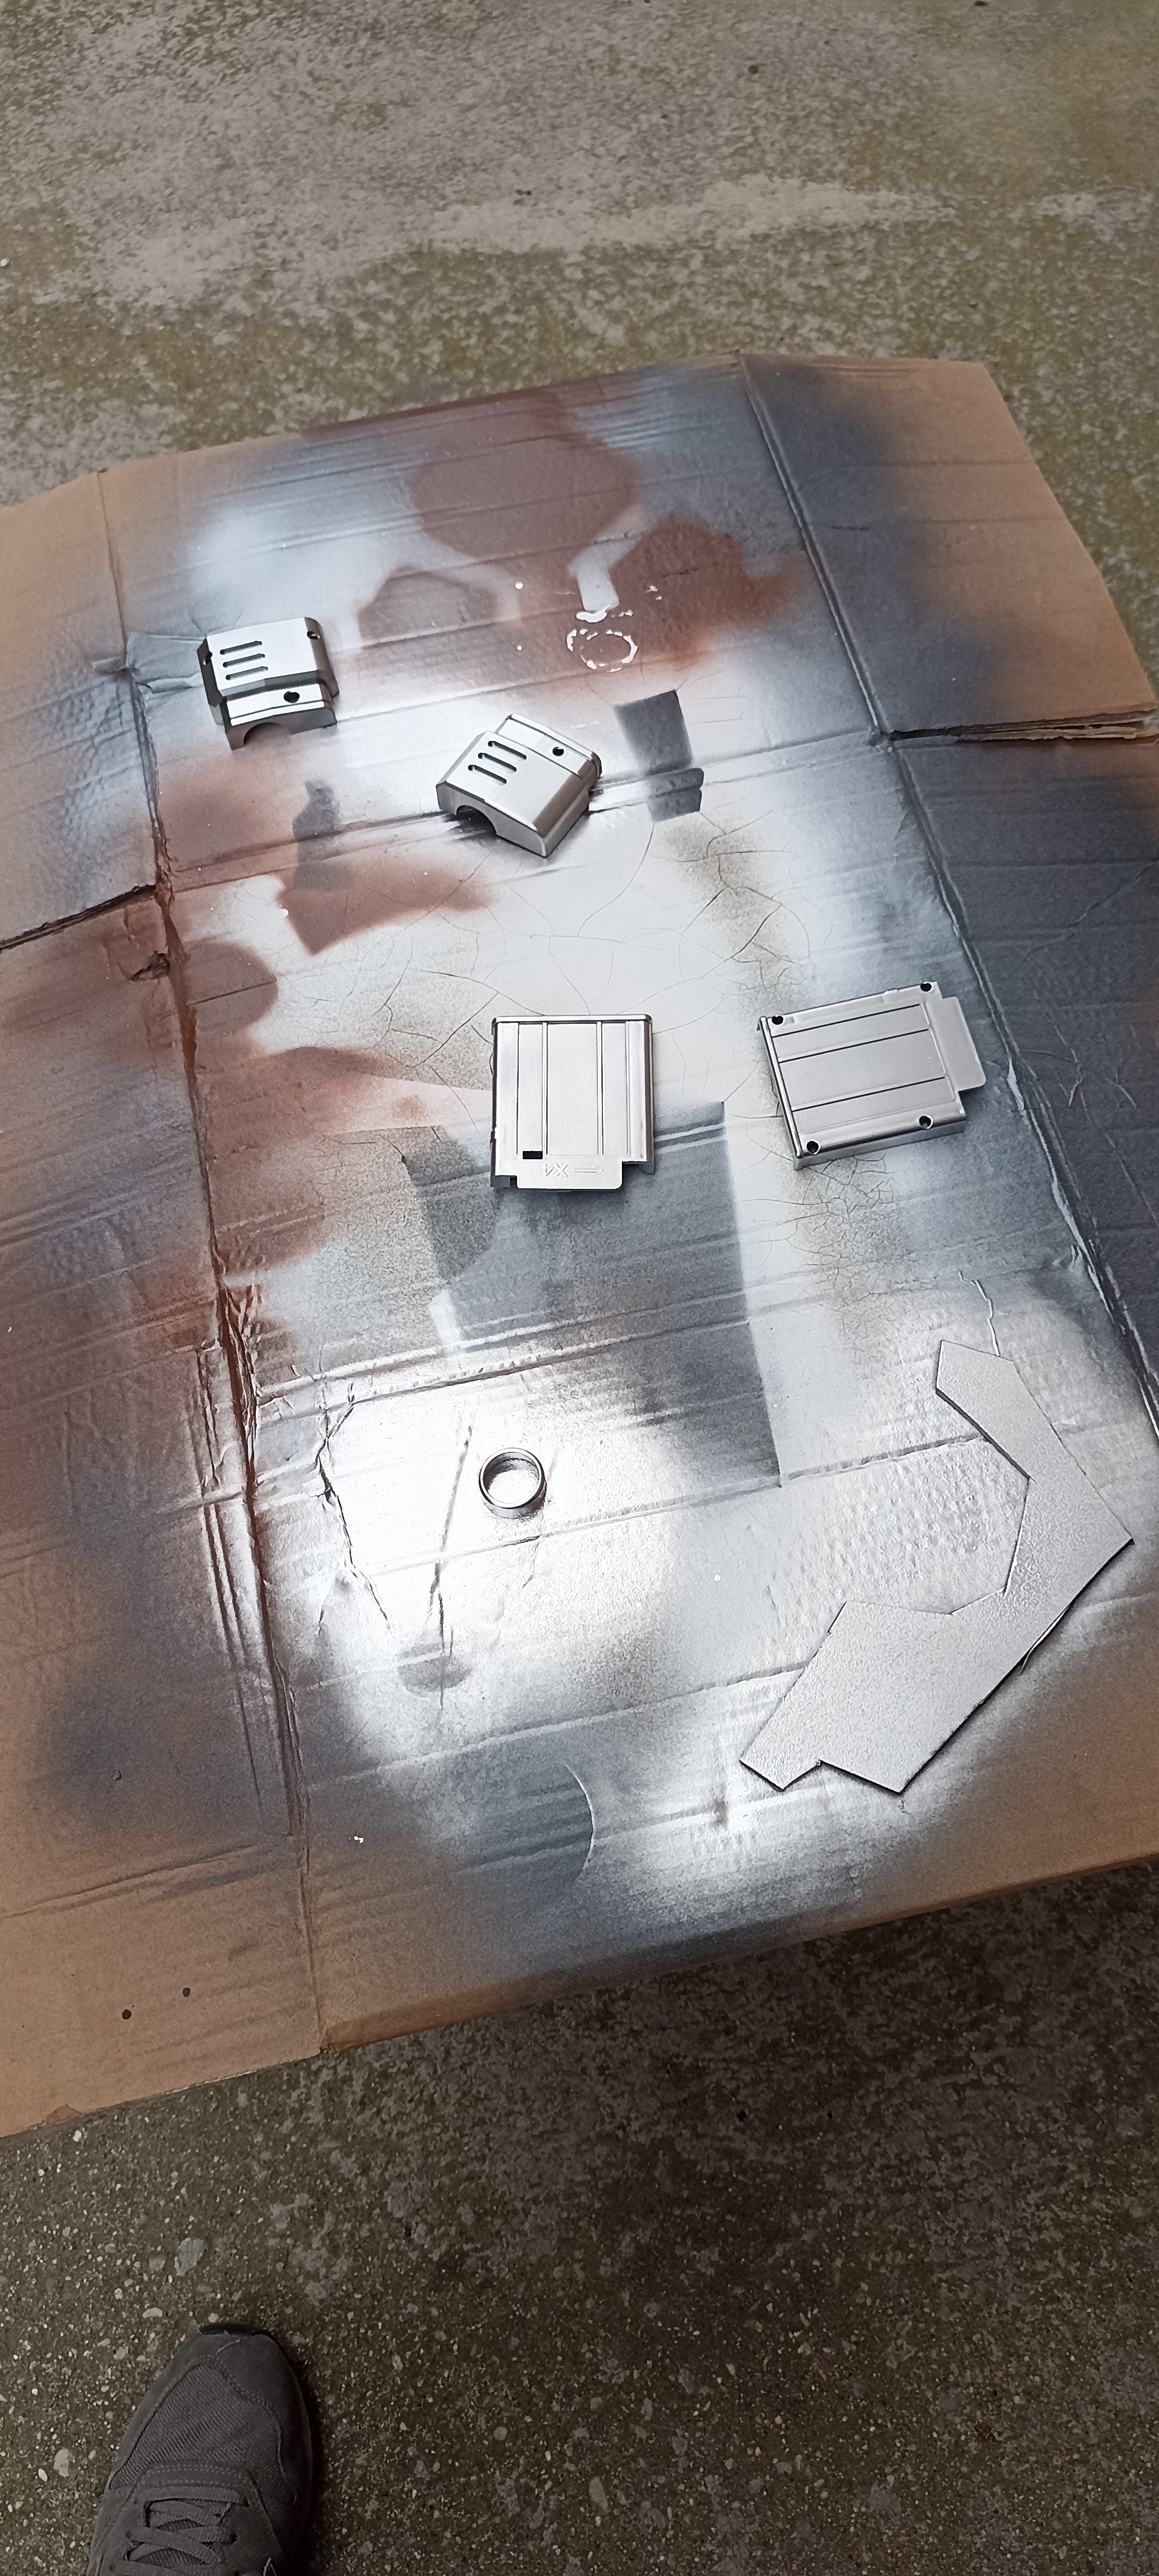
Colori
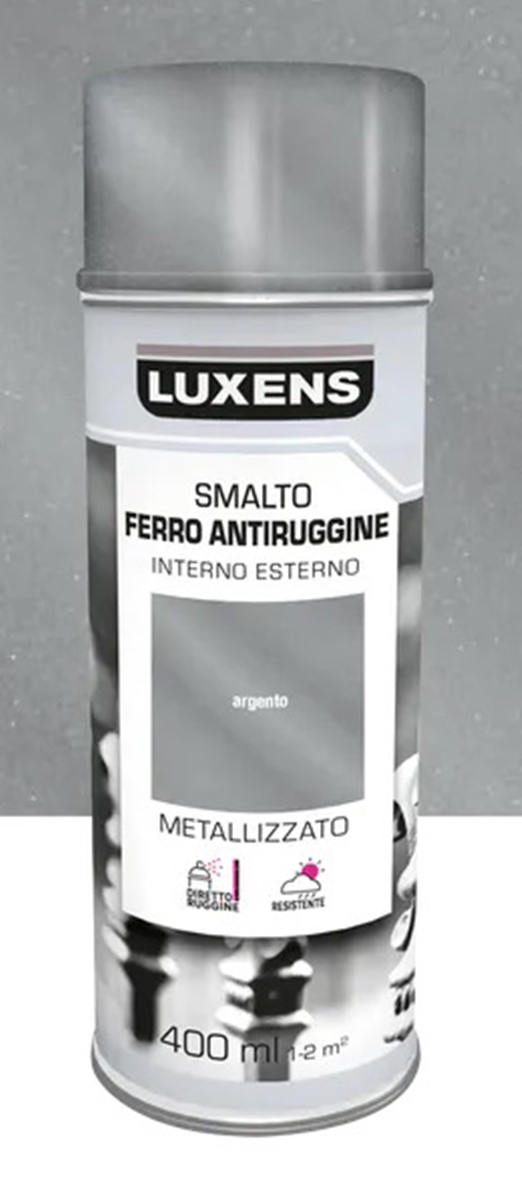 | Silver color used as base for all armor parts. |
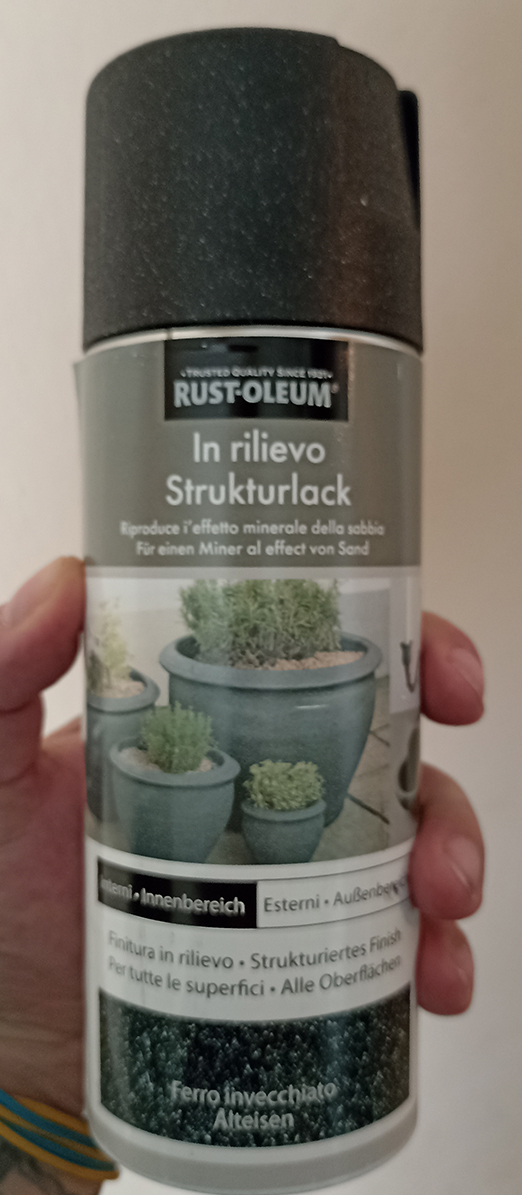 | Texture spray. |
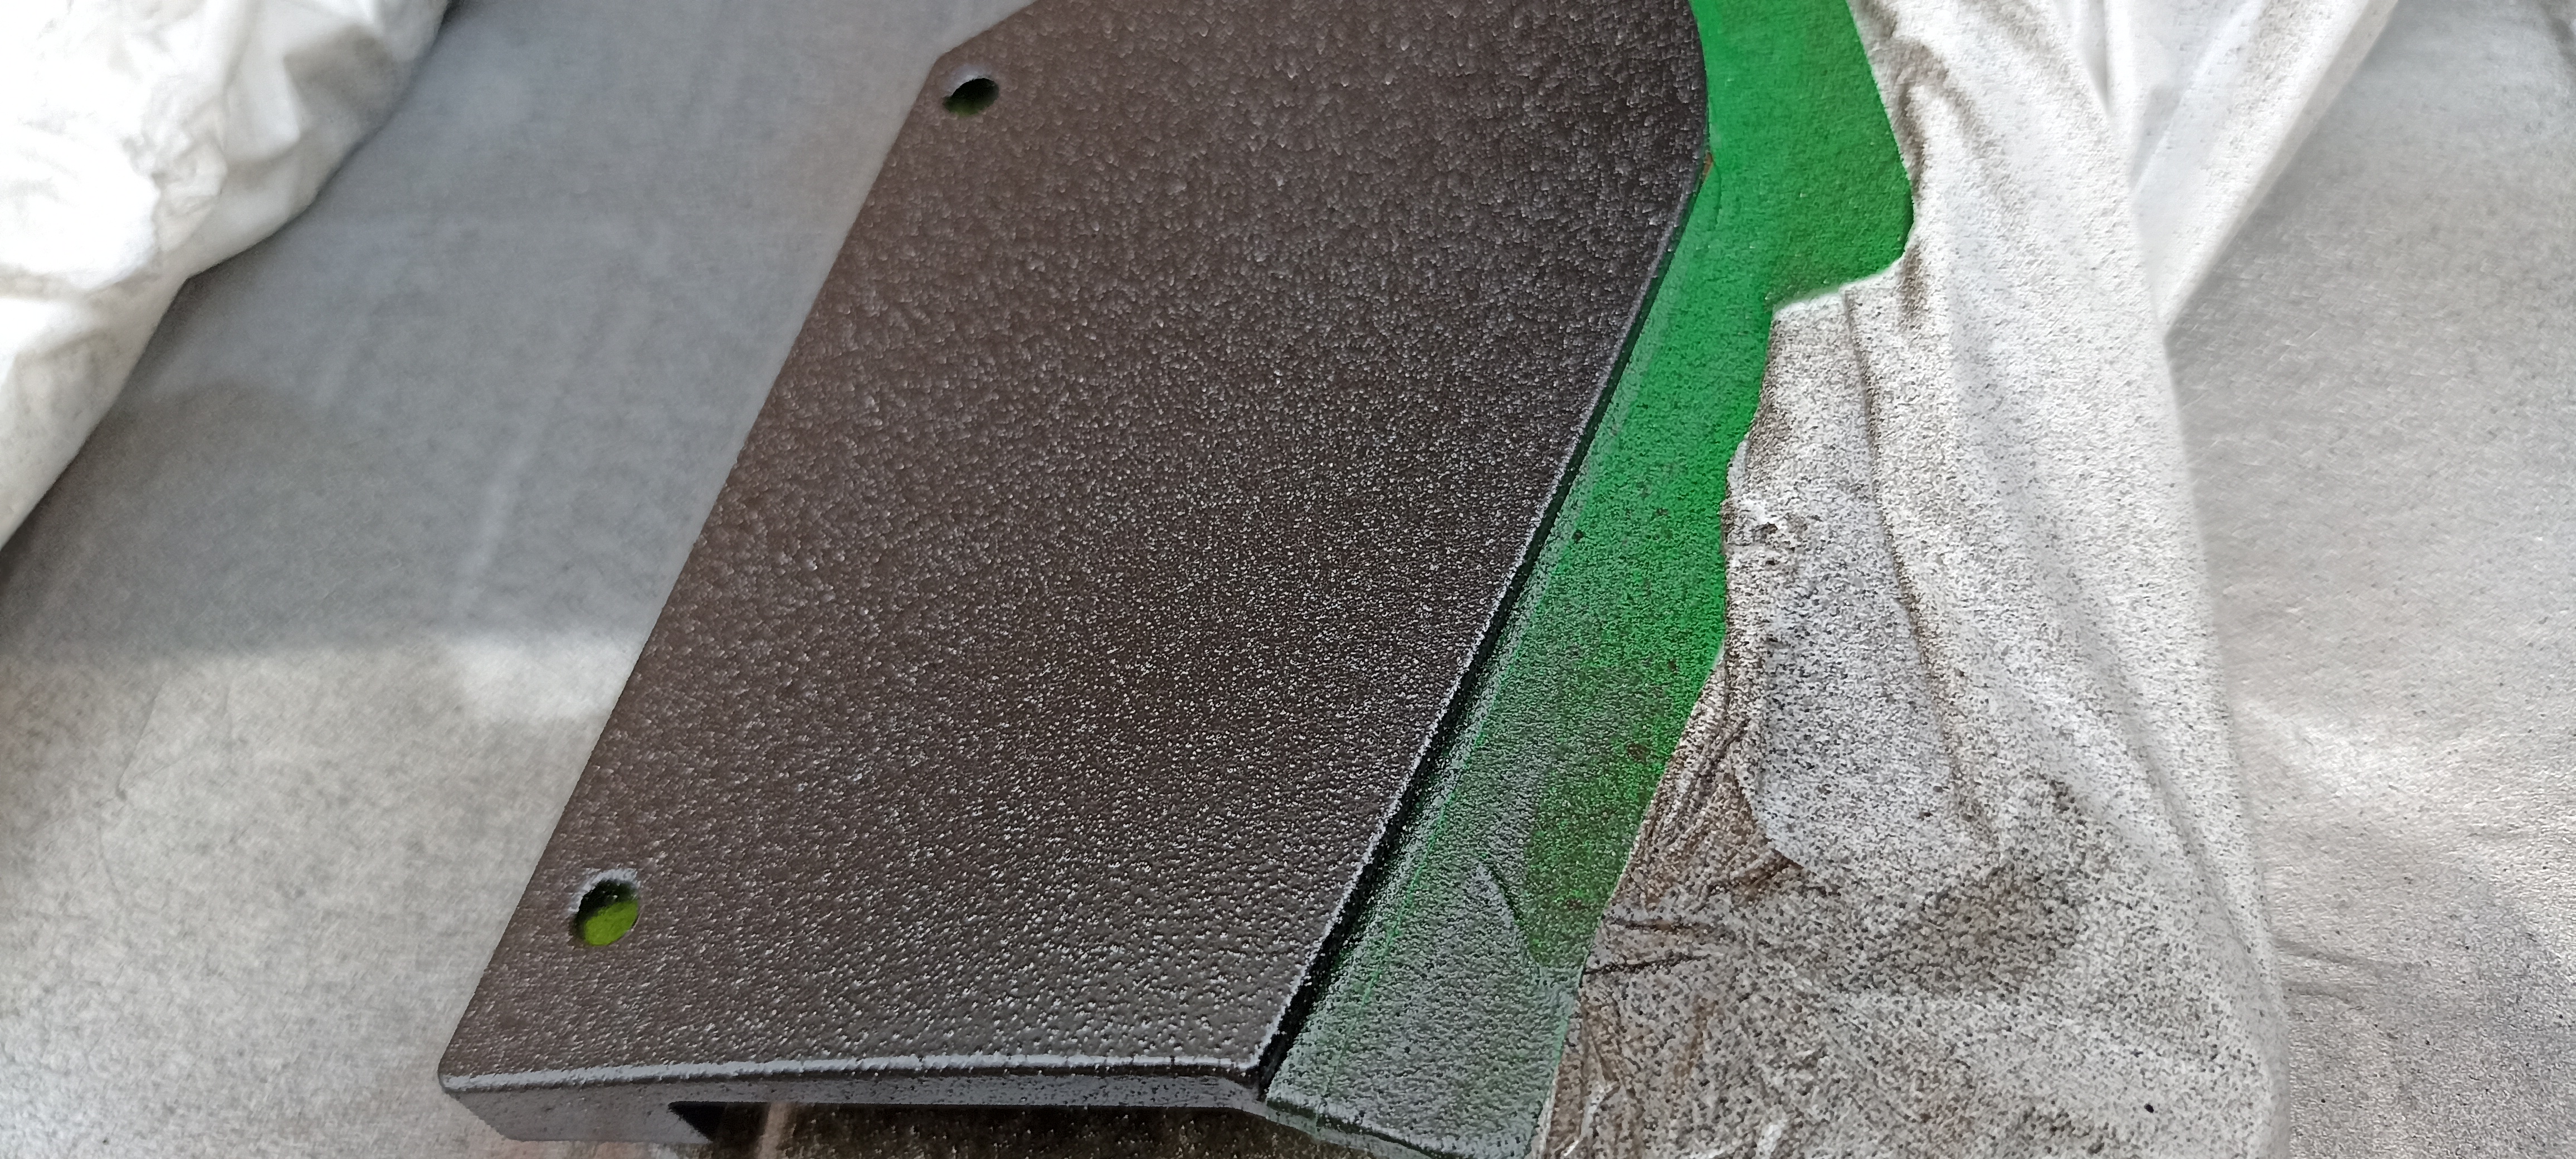
 | A nice gray used as base on the silver. (MG PRIME Pantone 446C Grey). |
 | The orange armor base color. (MG PRIME Pantone 158C Orange). |
 | Light brown for details on the armor. (MG PRIME Pantone 7516C Brown). |
|
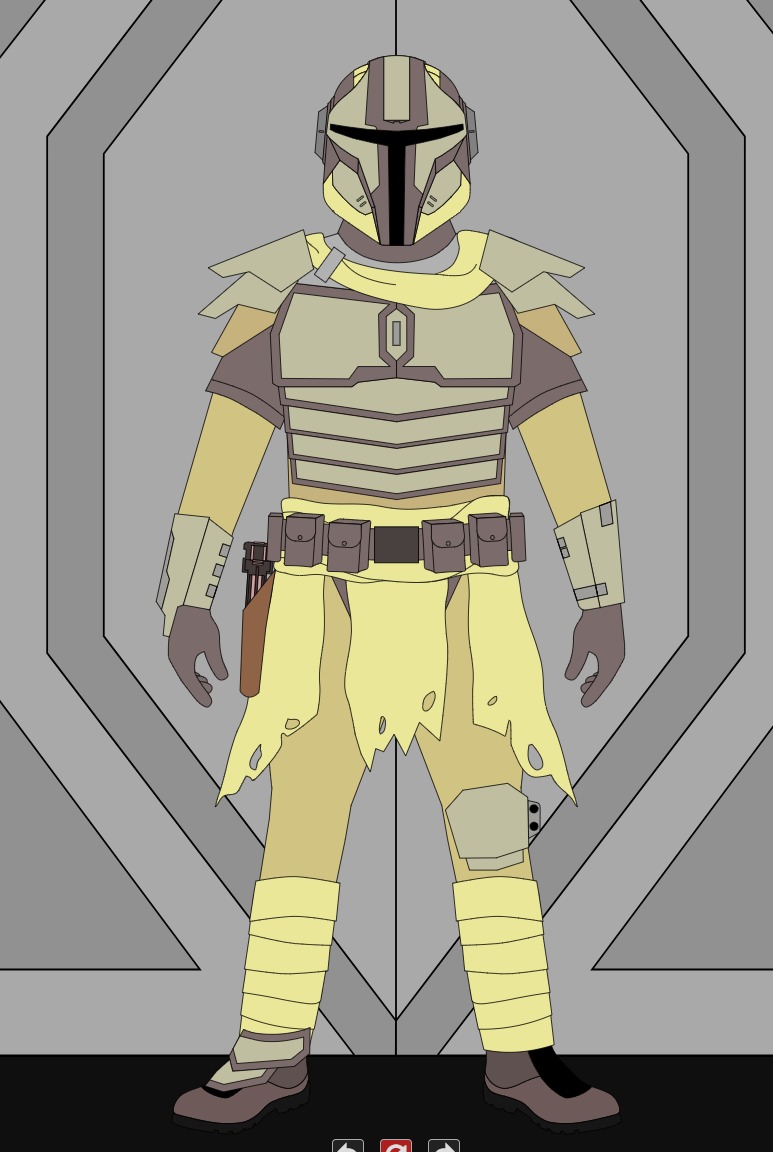
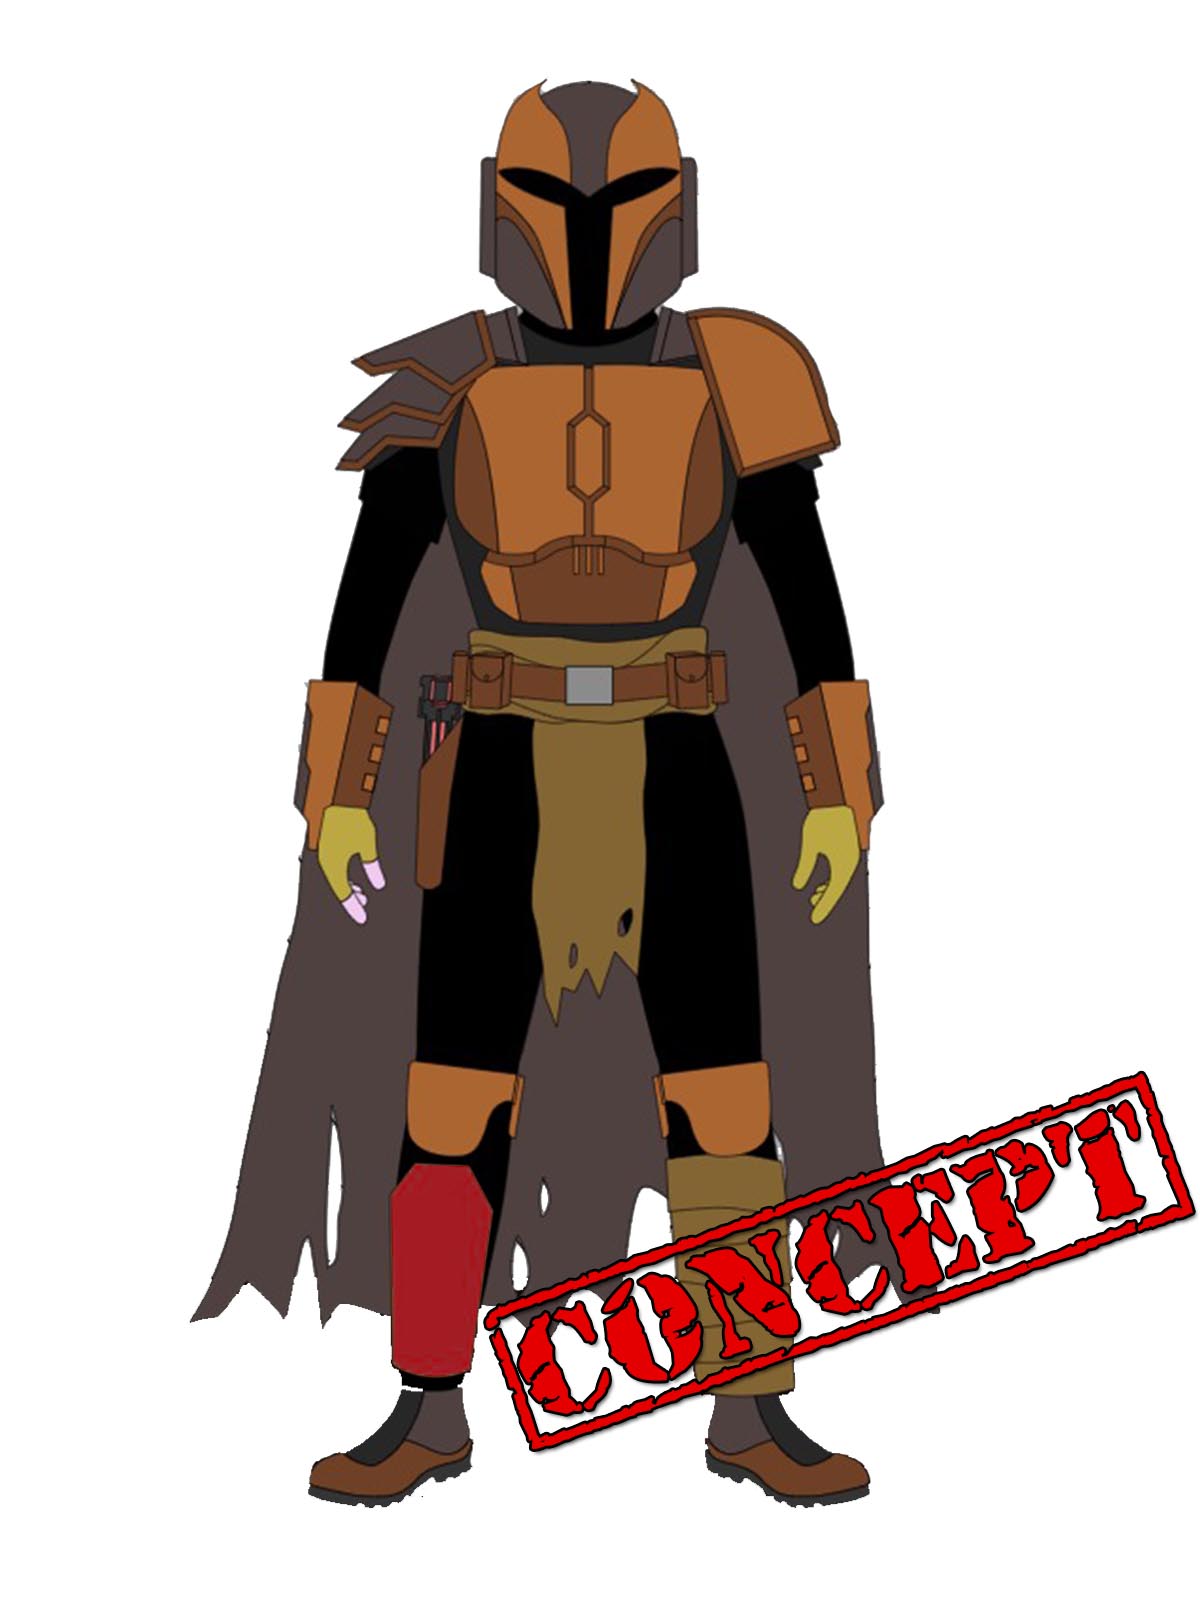
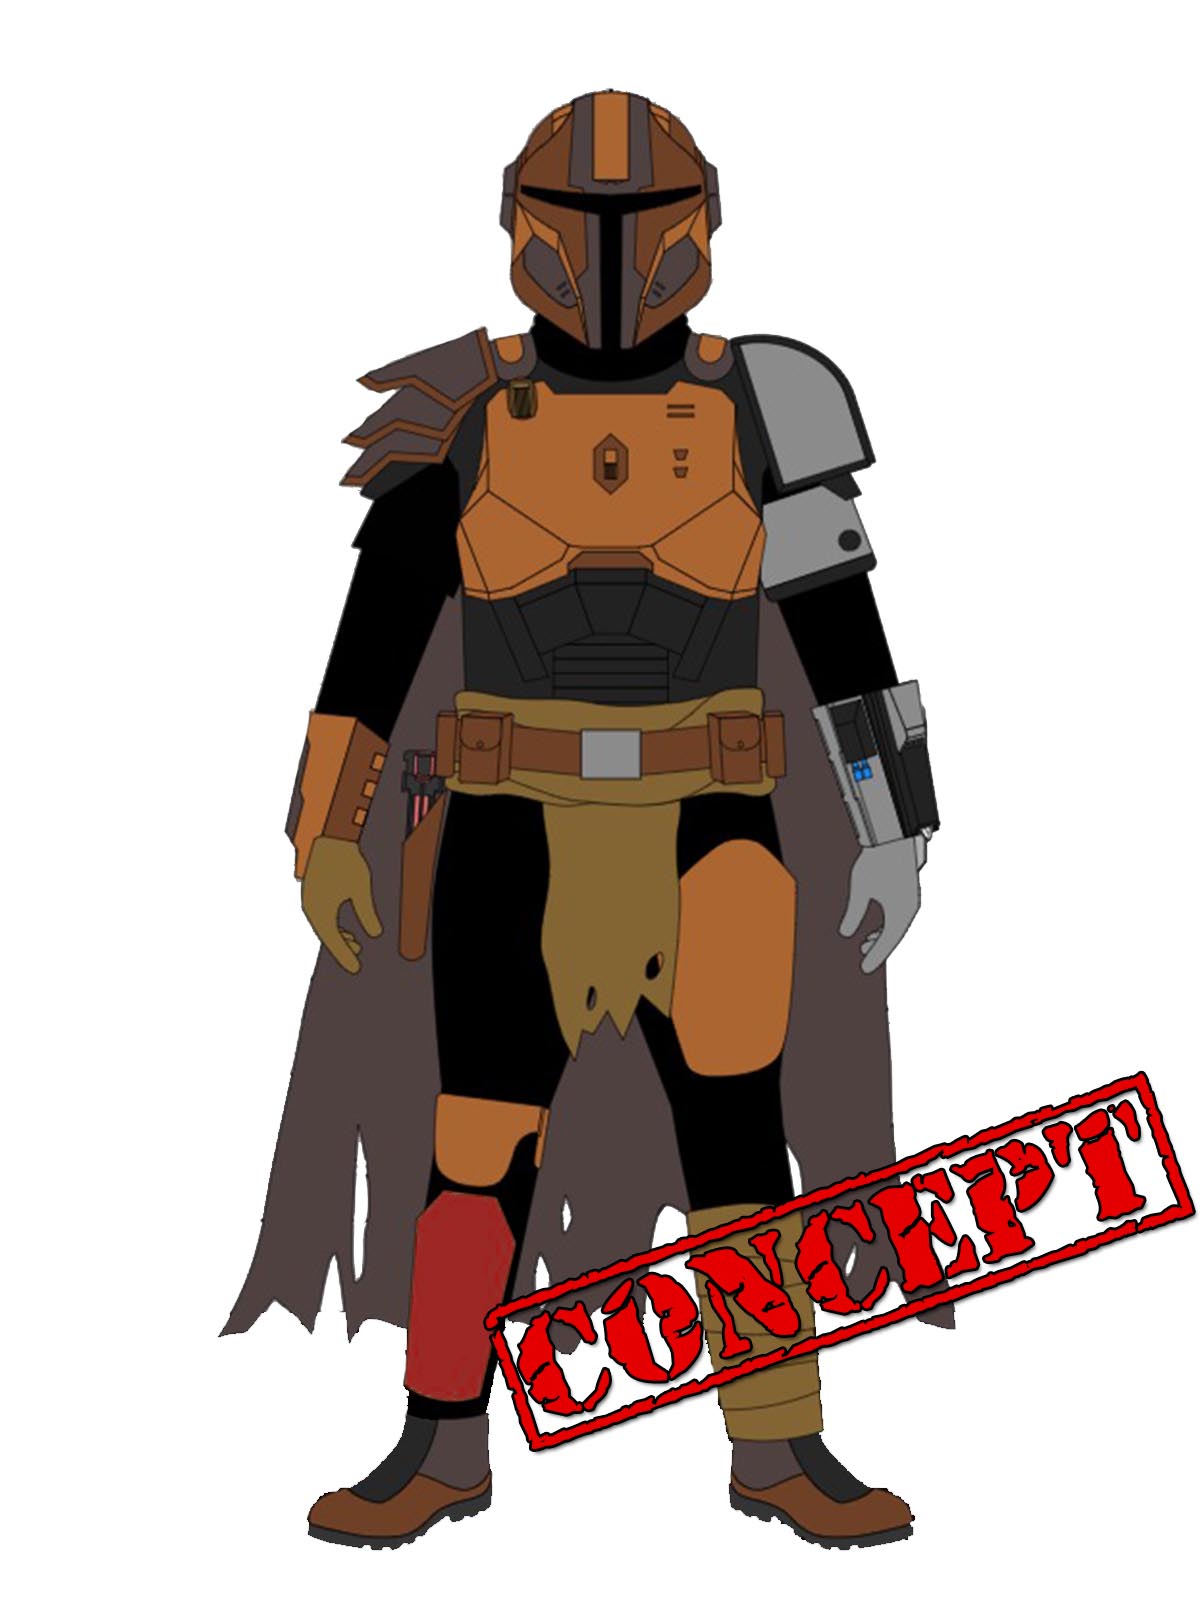
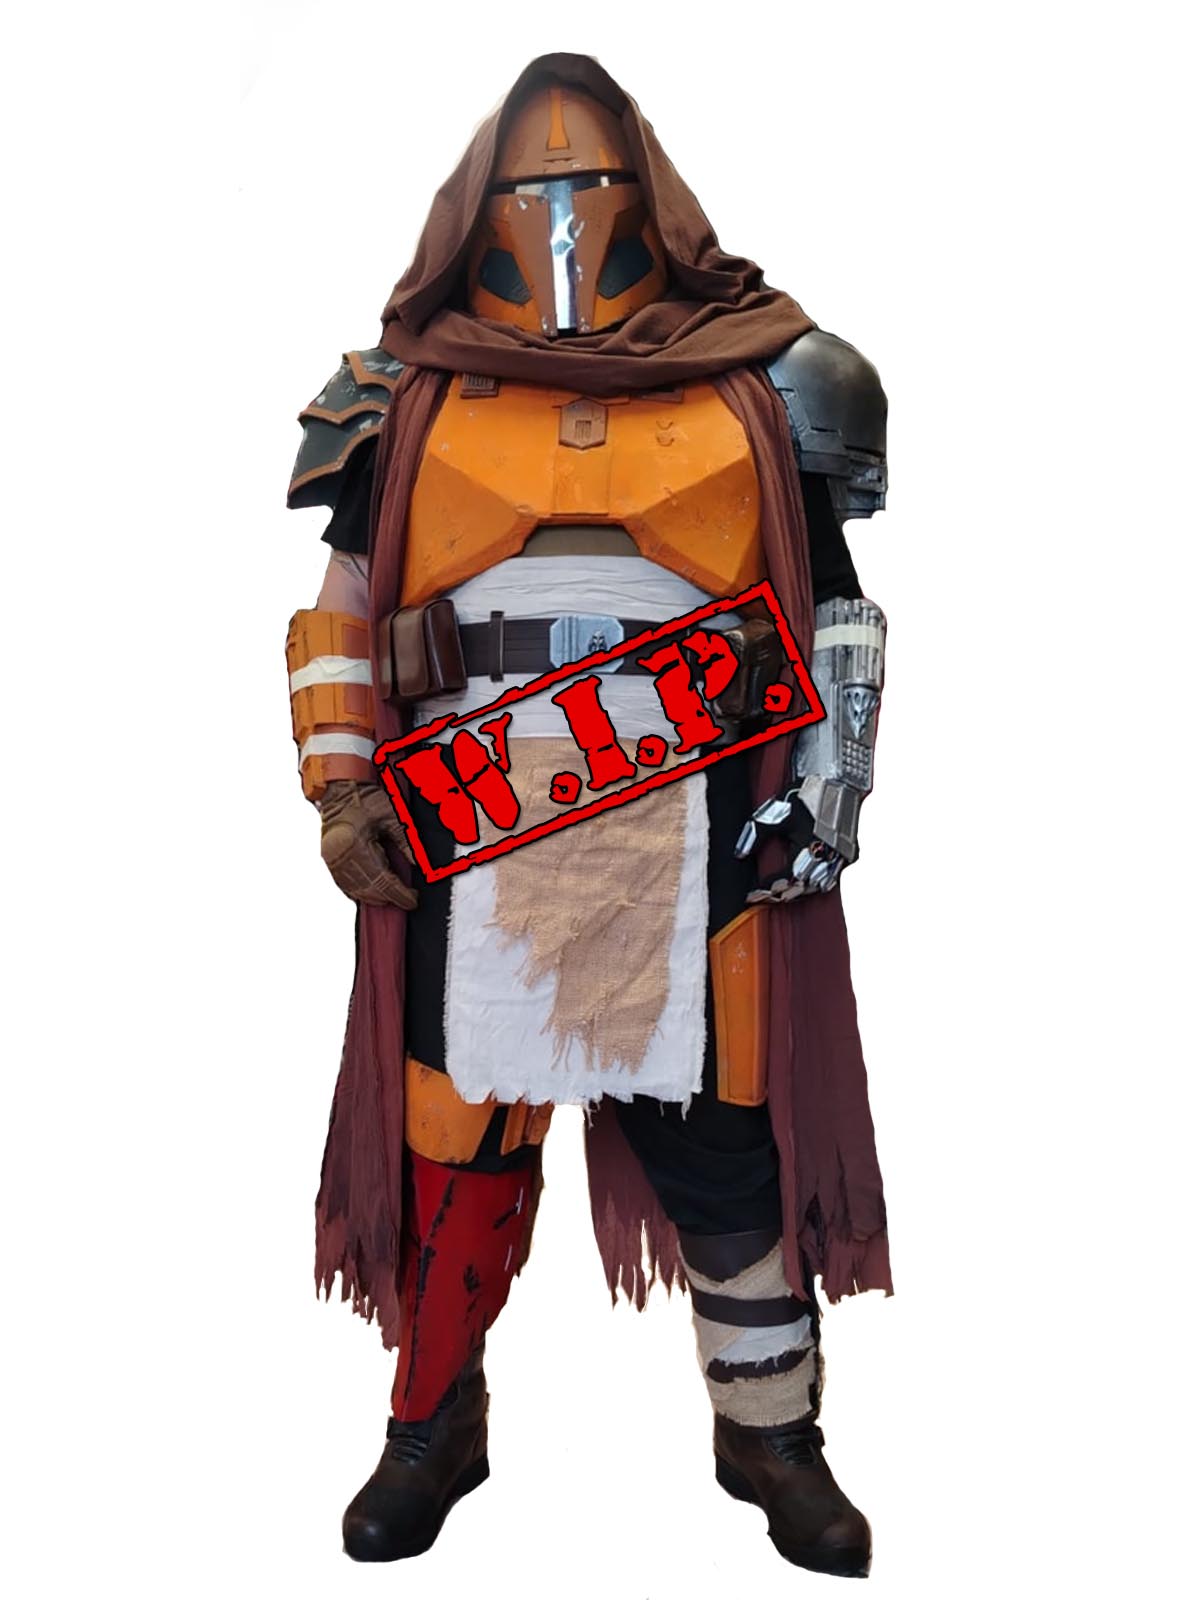
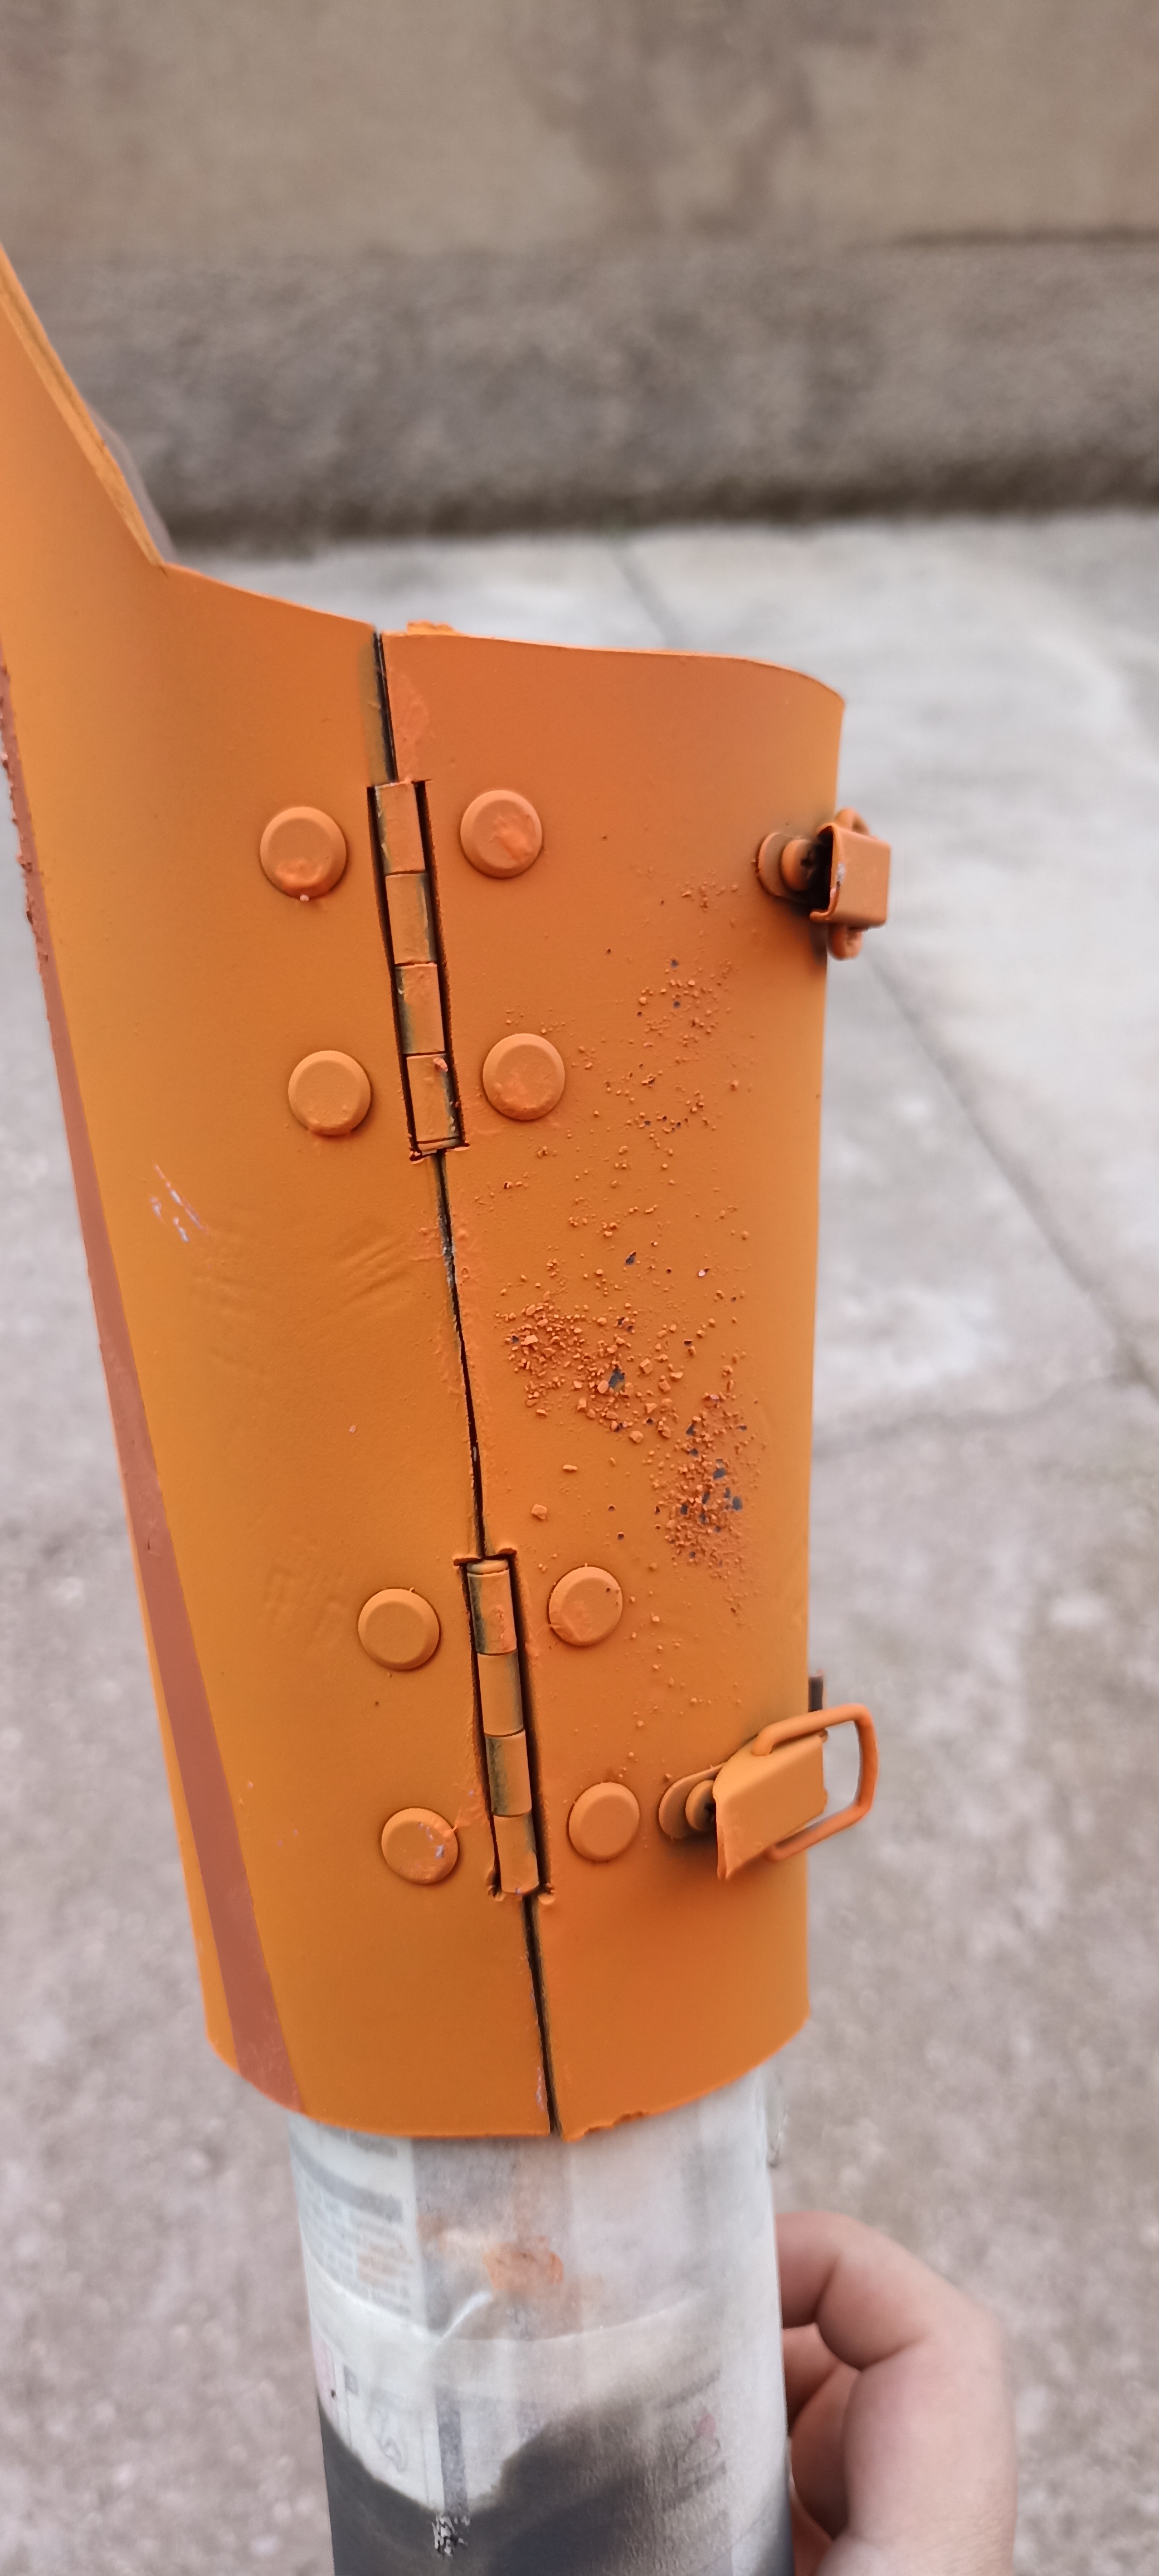
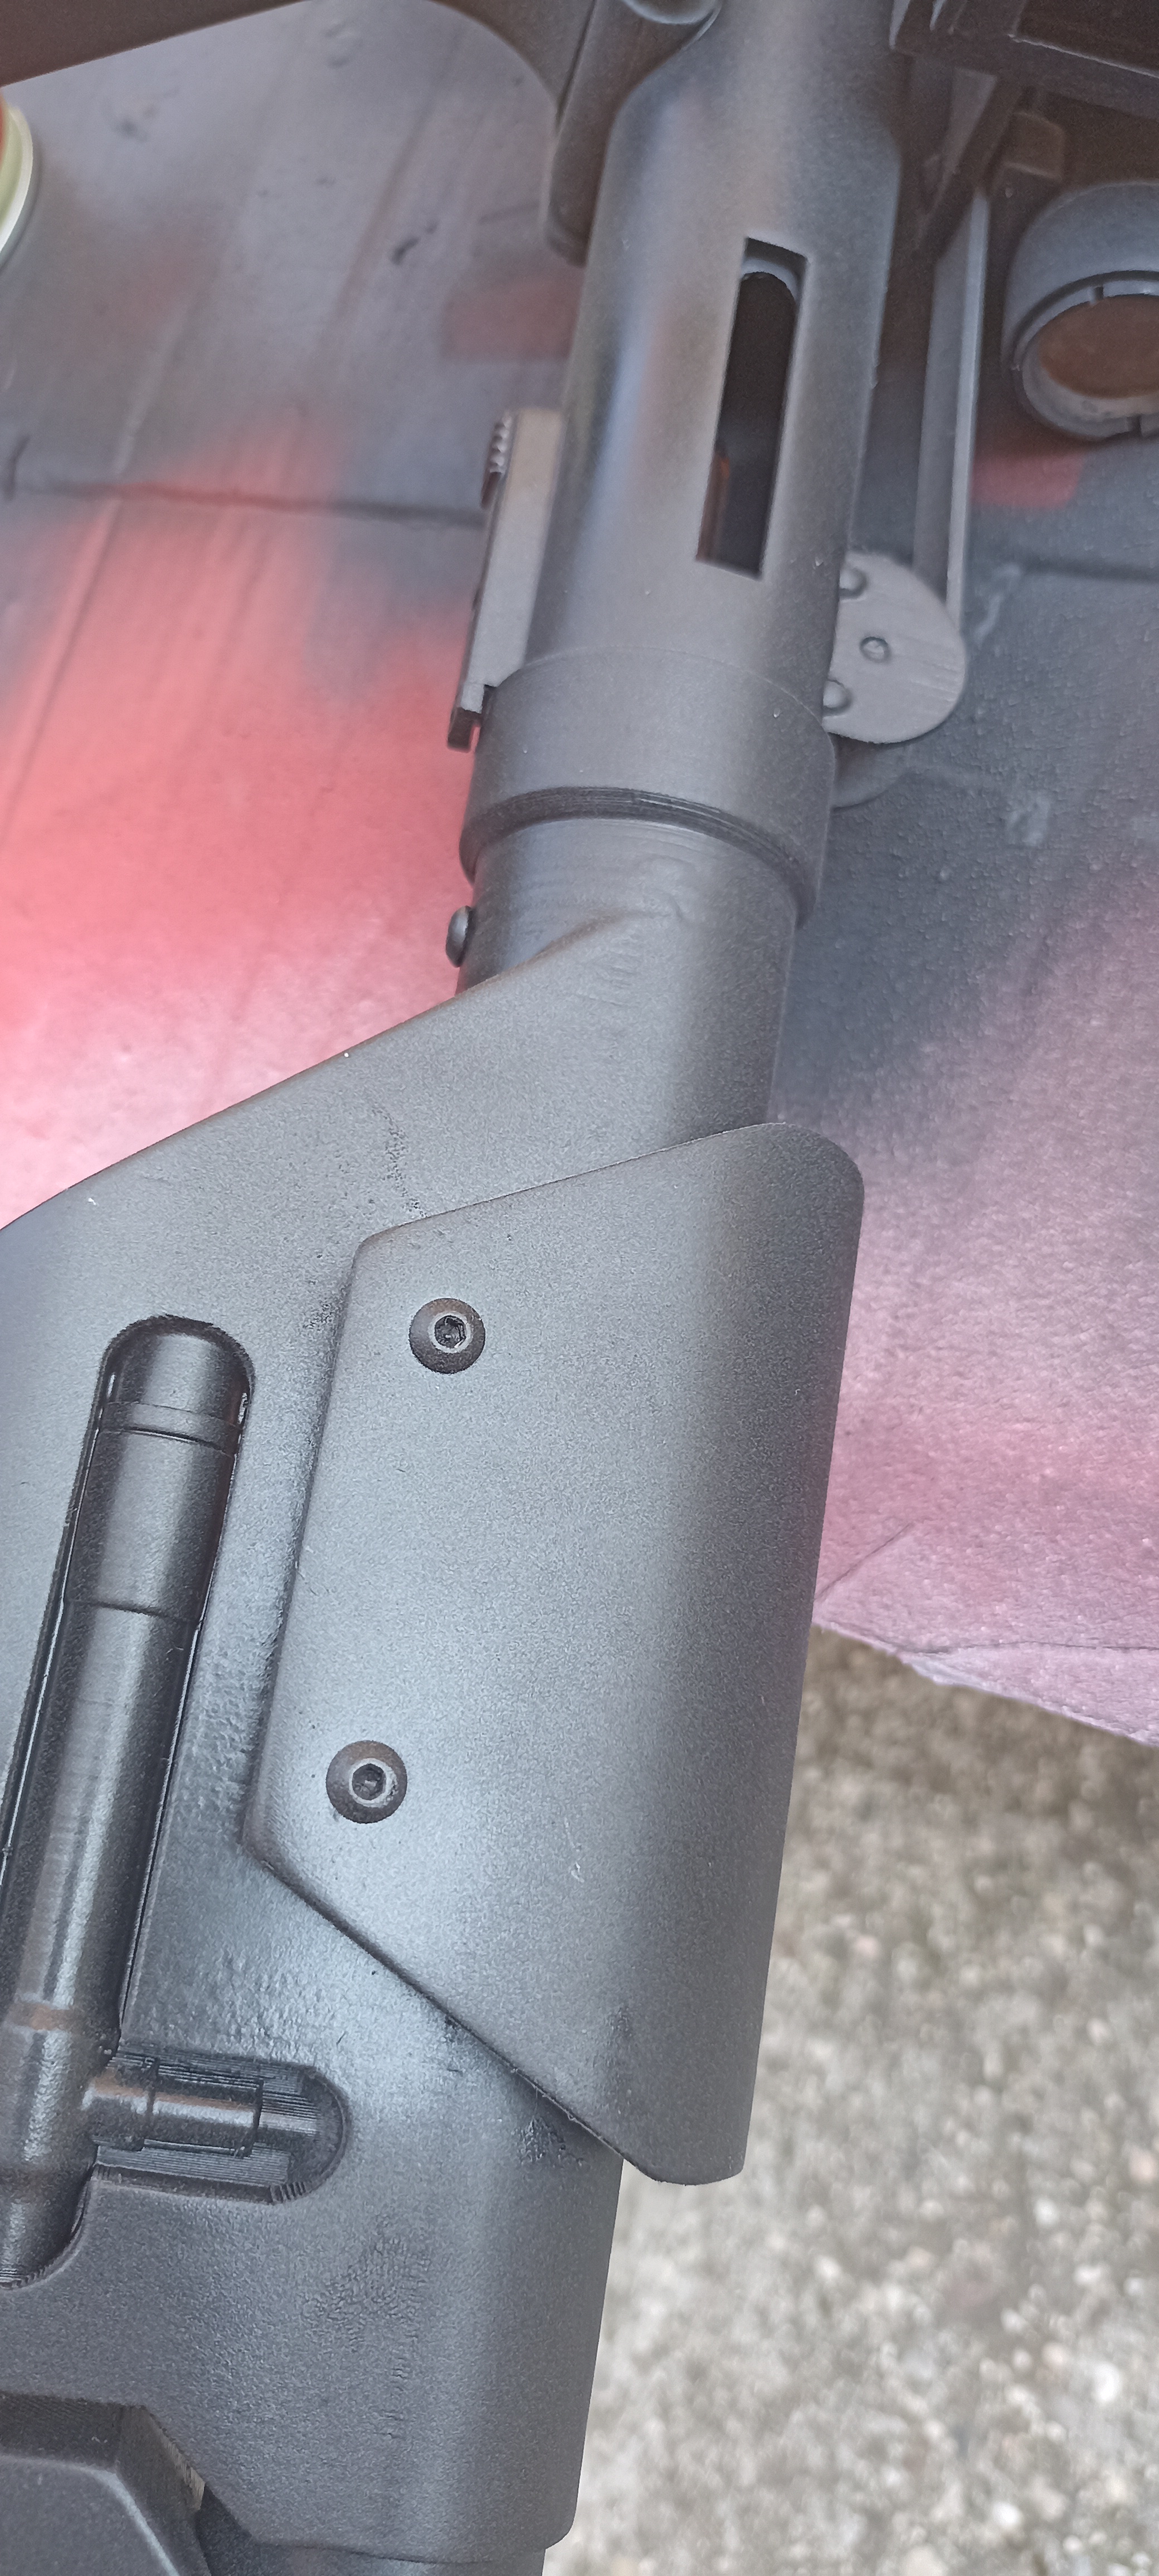
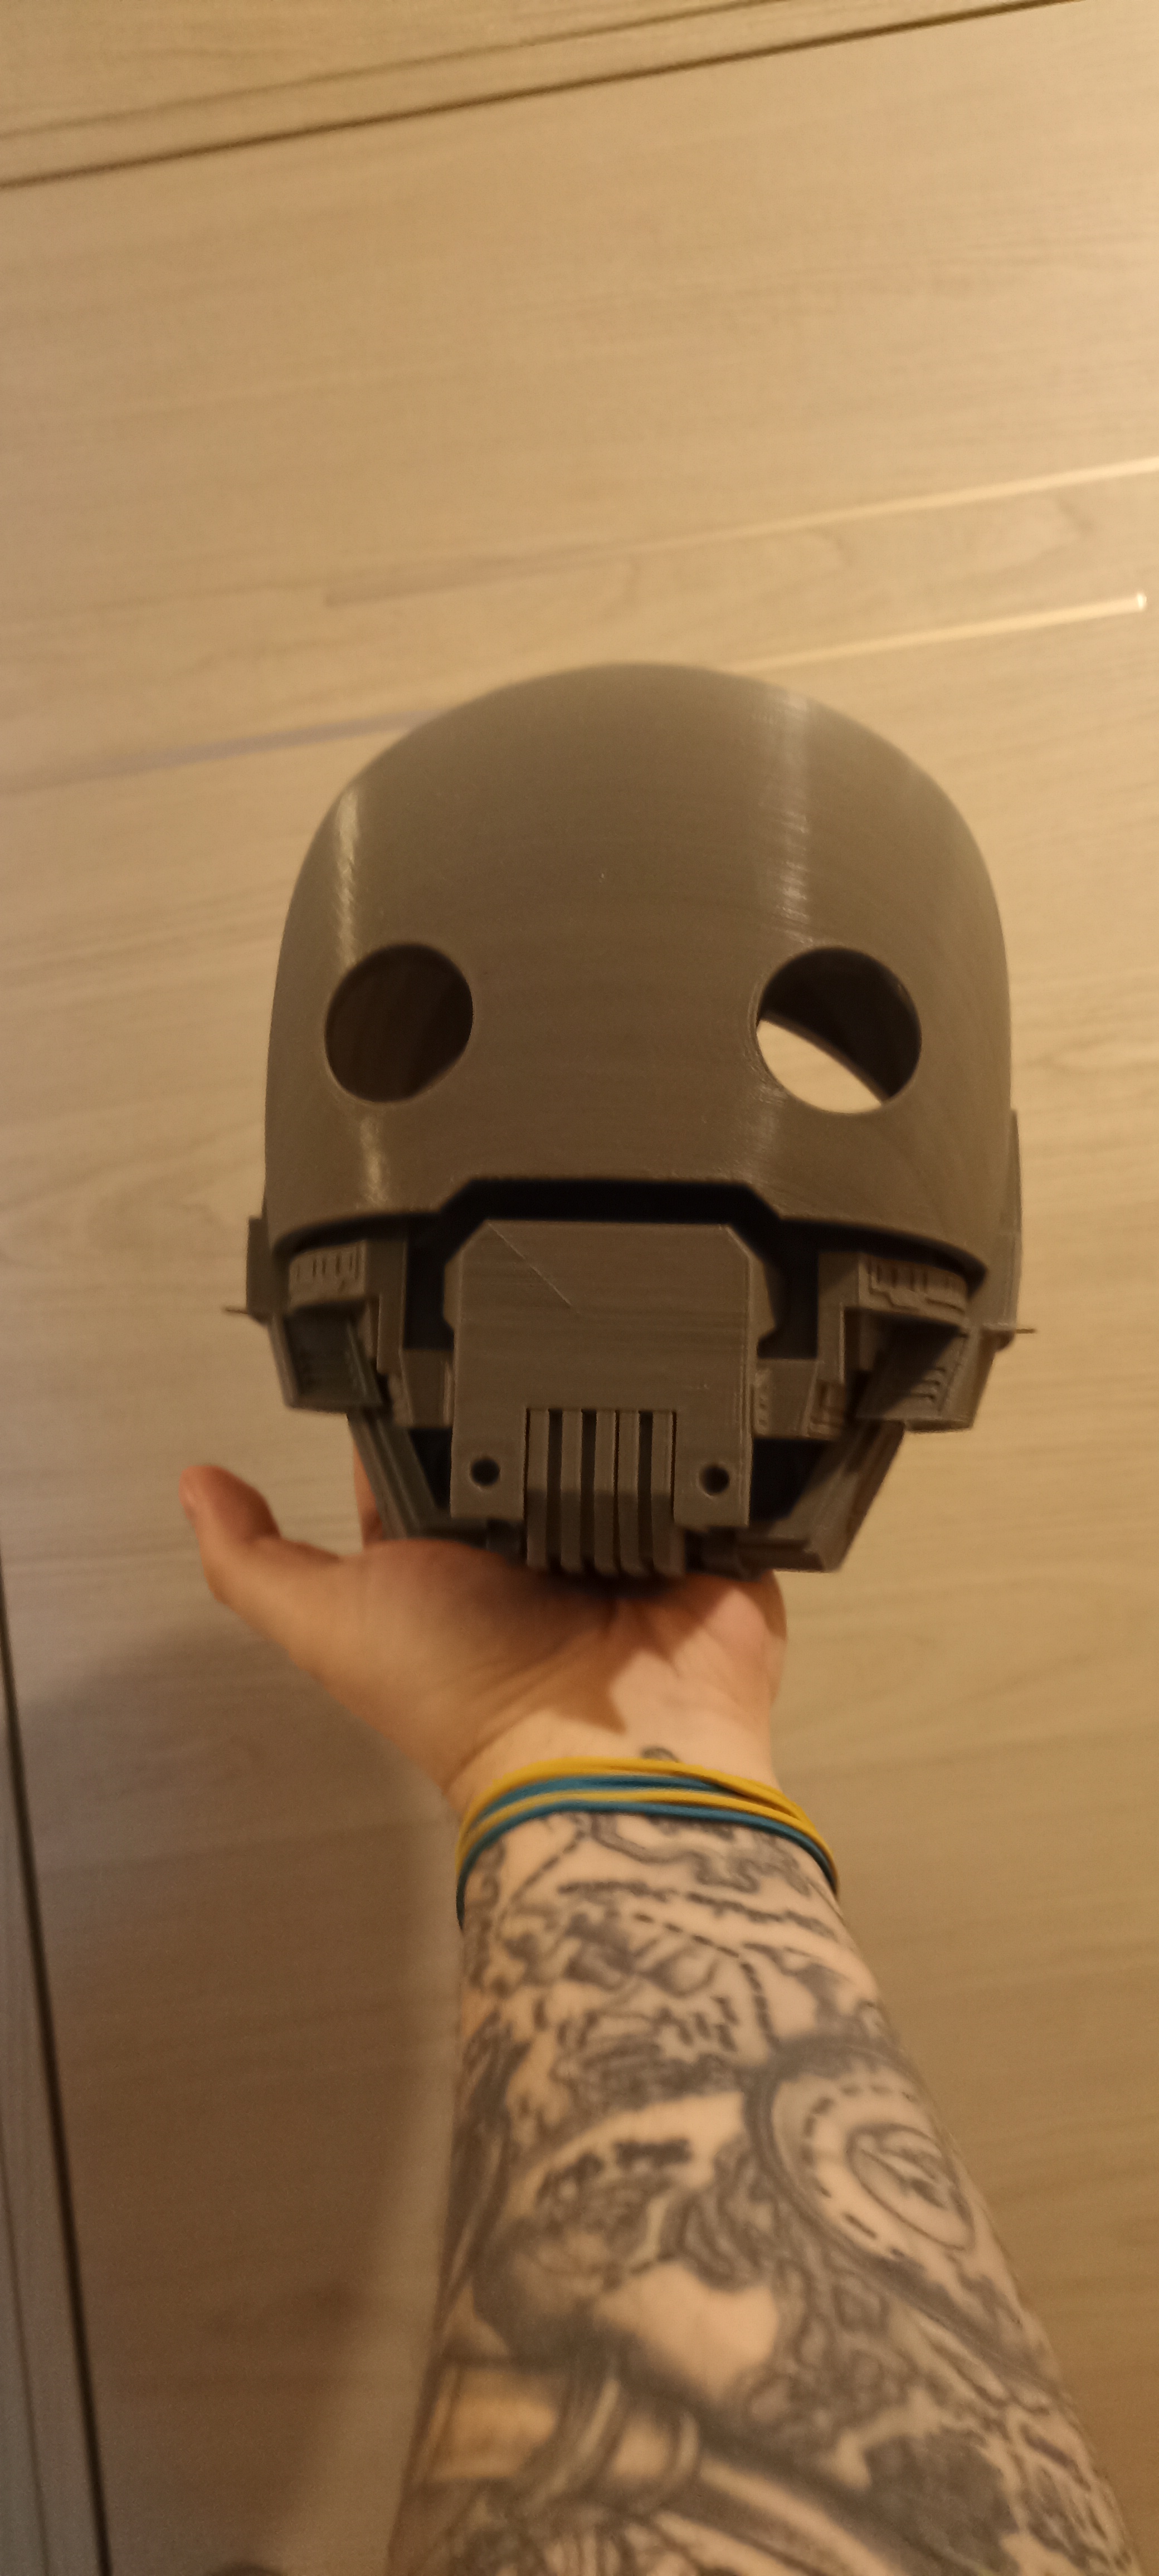
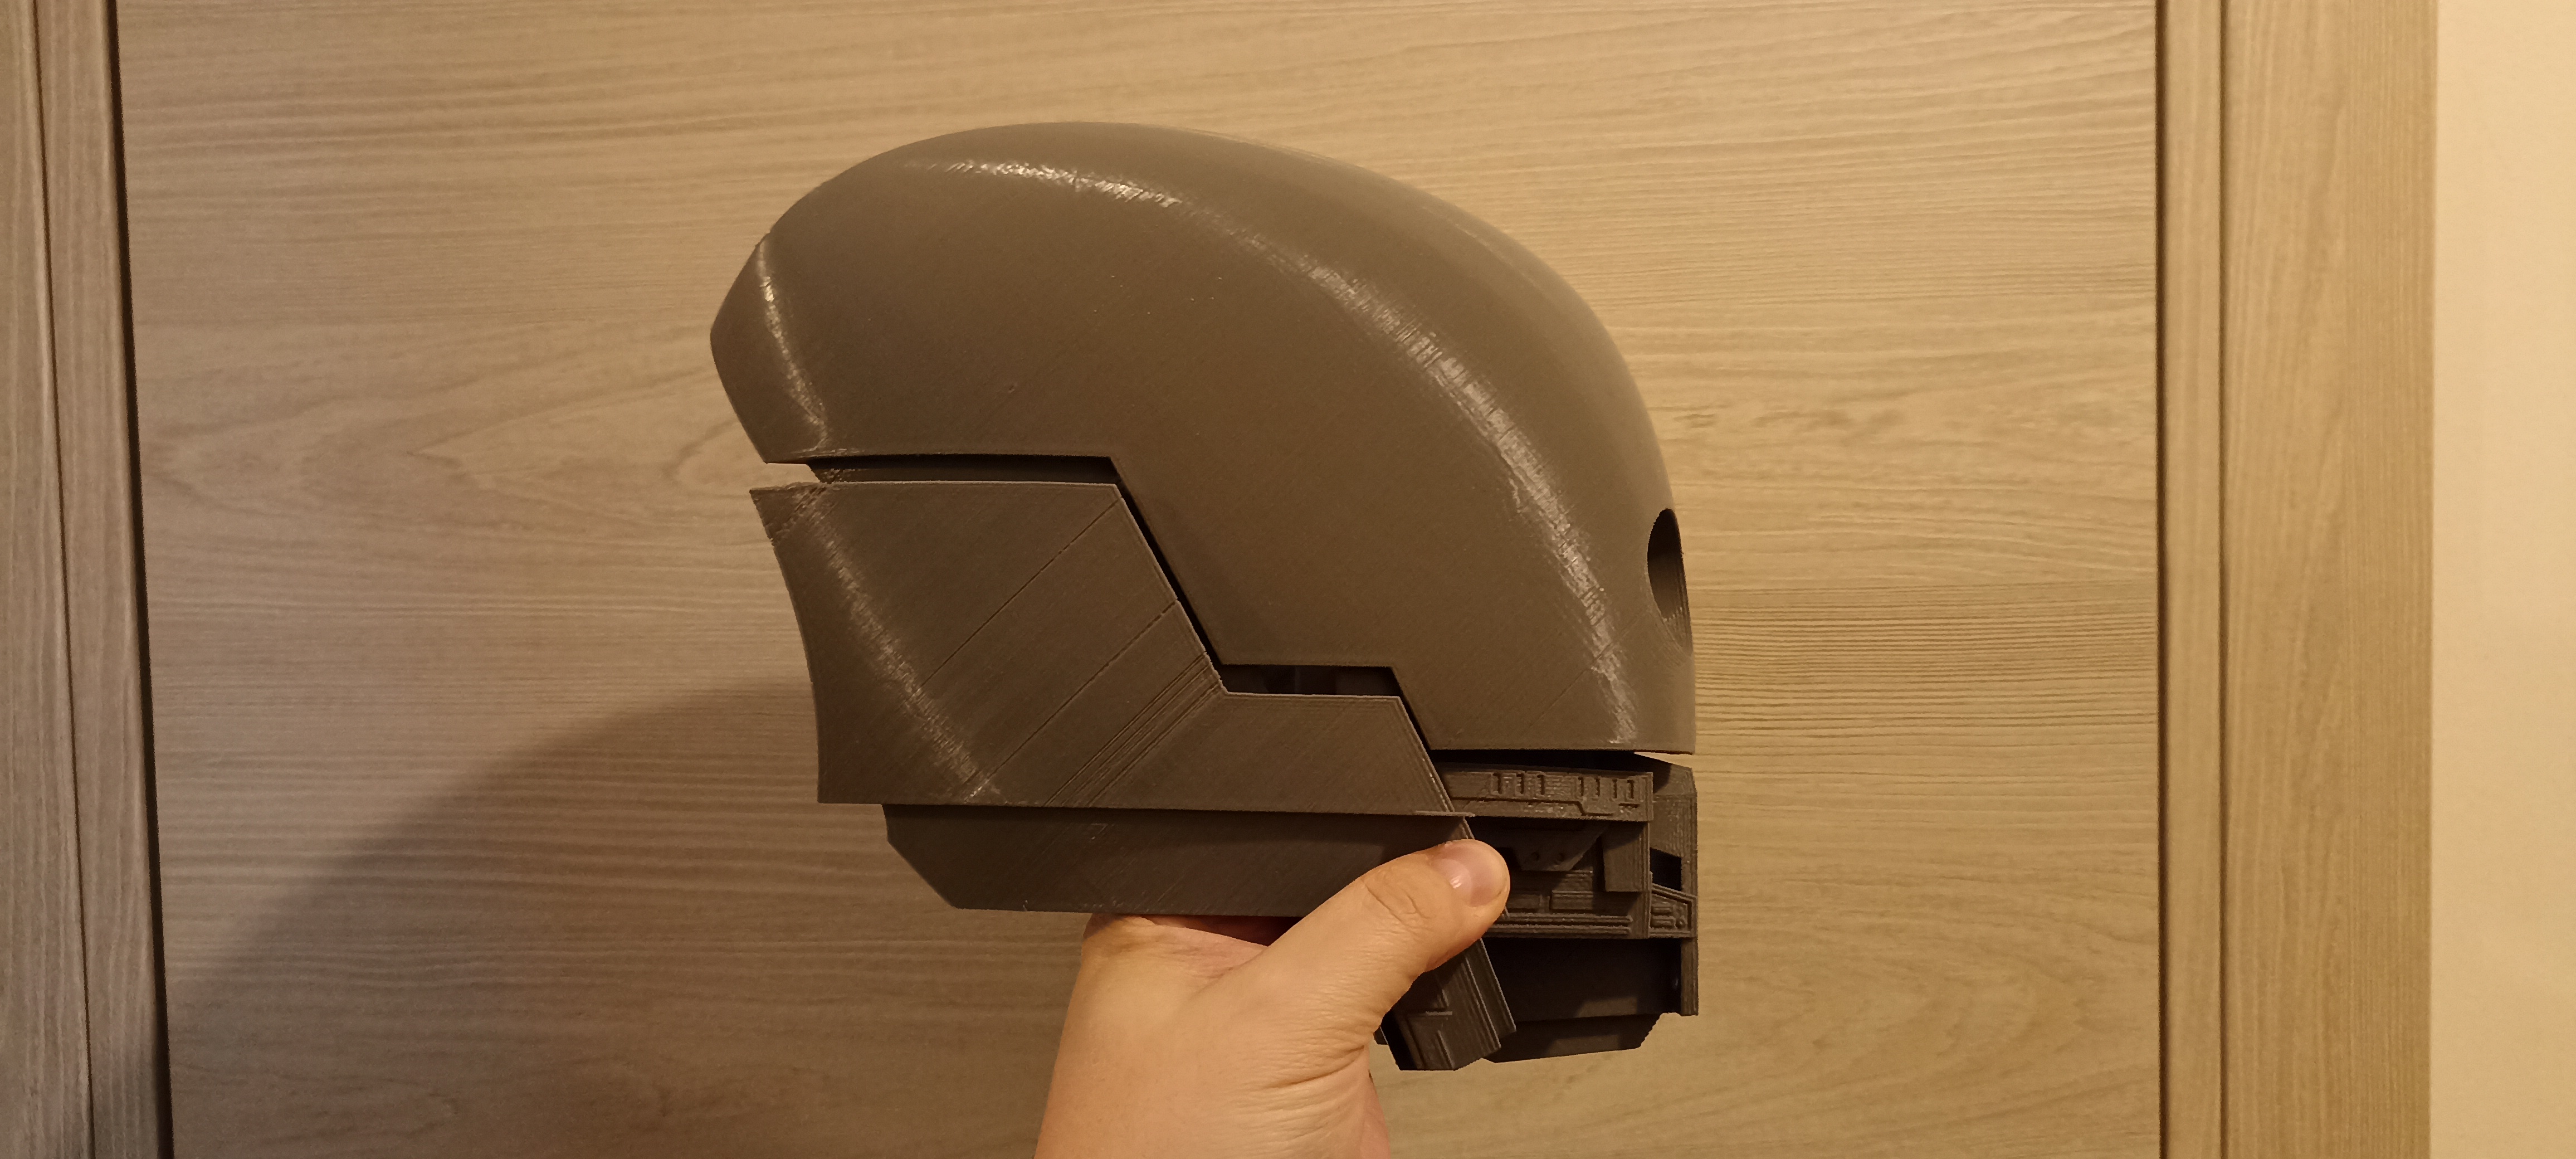
This is the concept desined with the mandocreator tool, the initial idea was to use a Ursa Wren bucket, but when Nadia saw the Harbro' Sabine helmet fall in love (i was happy because it require less work to do, and it has a better fit. Drapes and bandages are in Juta and or Linen, same thing for the under belt. Forearm guards are totally hand made by me on my custom desin that i moved on a polistyrene pannel, cut, and with hot gun forged. Bokatan's chest. The leather parts are made of imitation leather.. The rigid shin is recovered from a shock phase II clone. In practice the two survivors found a shock phase II clone and took the shins, dividing them one each and reusing them to adapt them to their armor, without repainting them. |
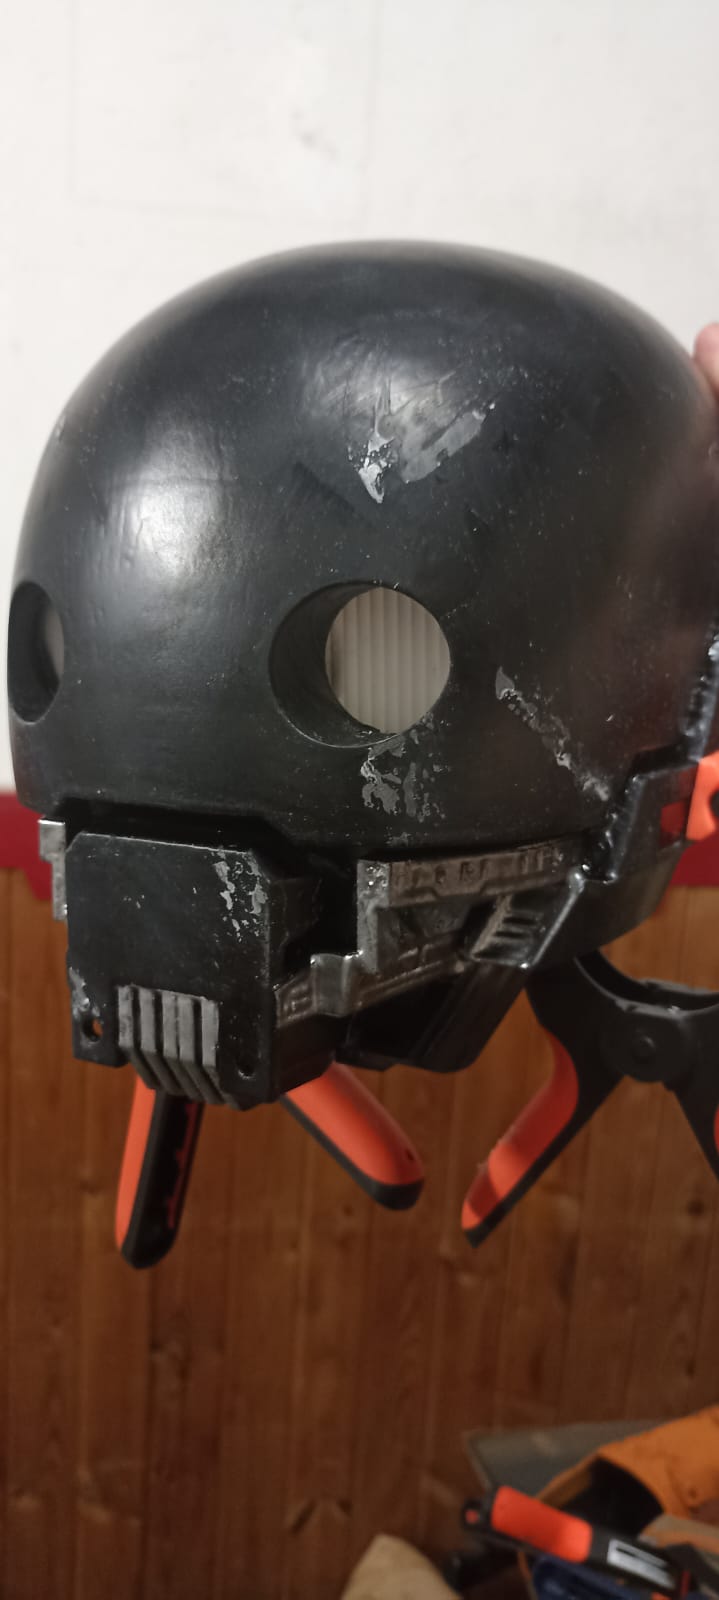
| Helmet is a resin rotocasted 2017 old NME Props S.T.A.L.K.E.R bucket.
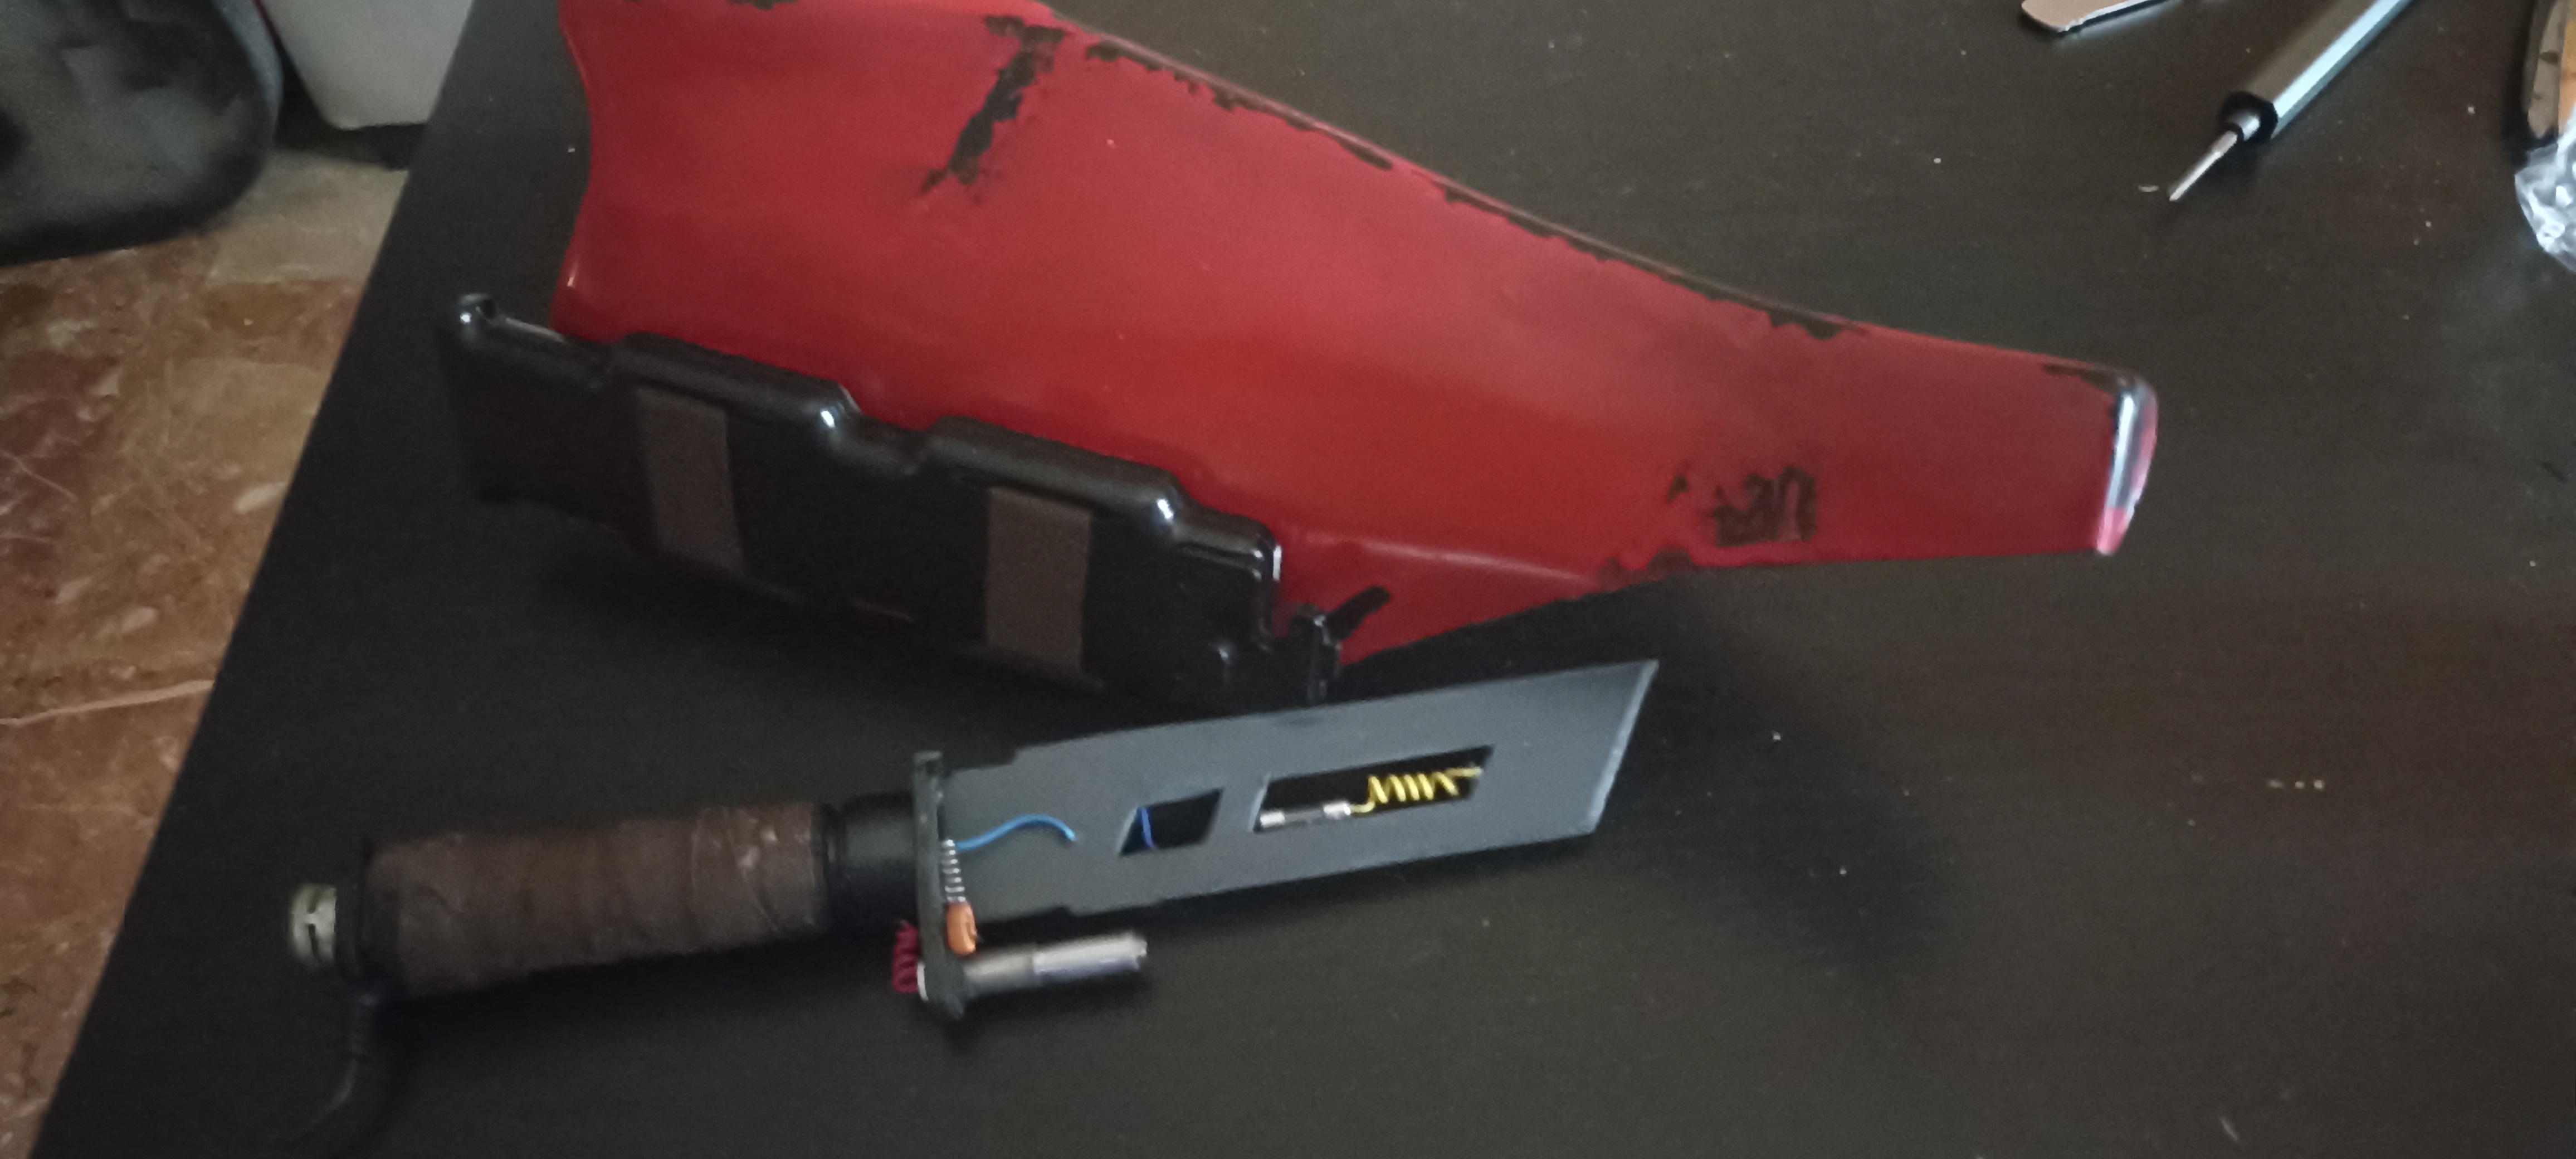
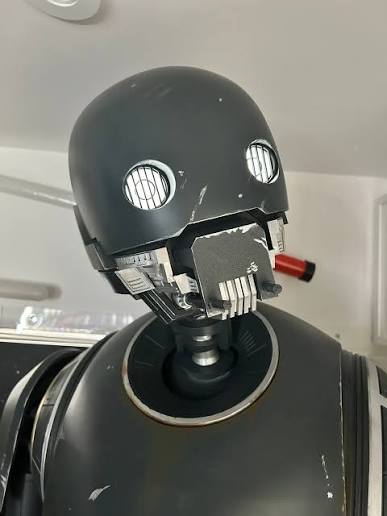
Visla's chest, abdom absent. This Mandalorian had his left arm amputated, and has a cybernetic arm. The shoulder is the head of a KX droid. The entire left arm is chrome (excluding weathering). |
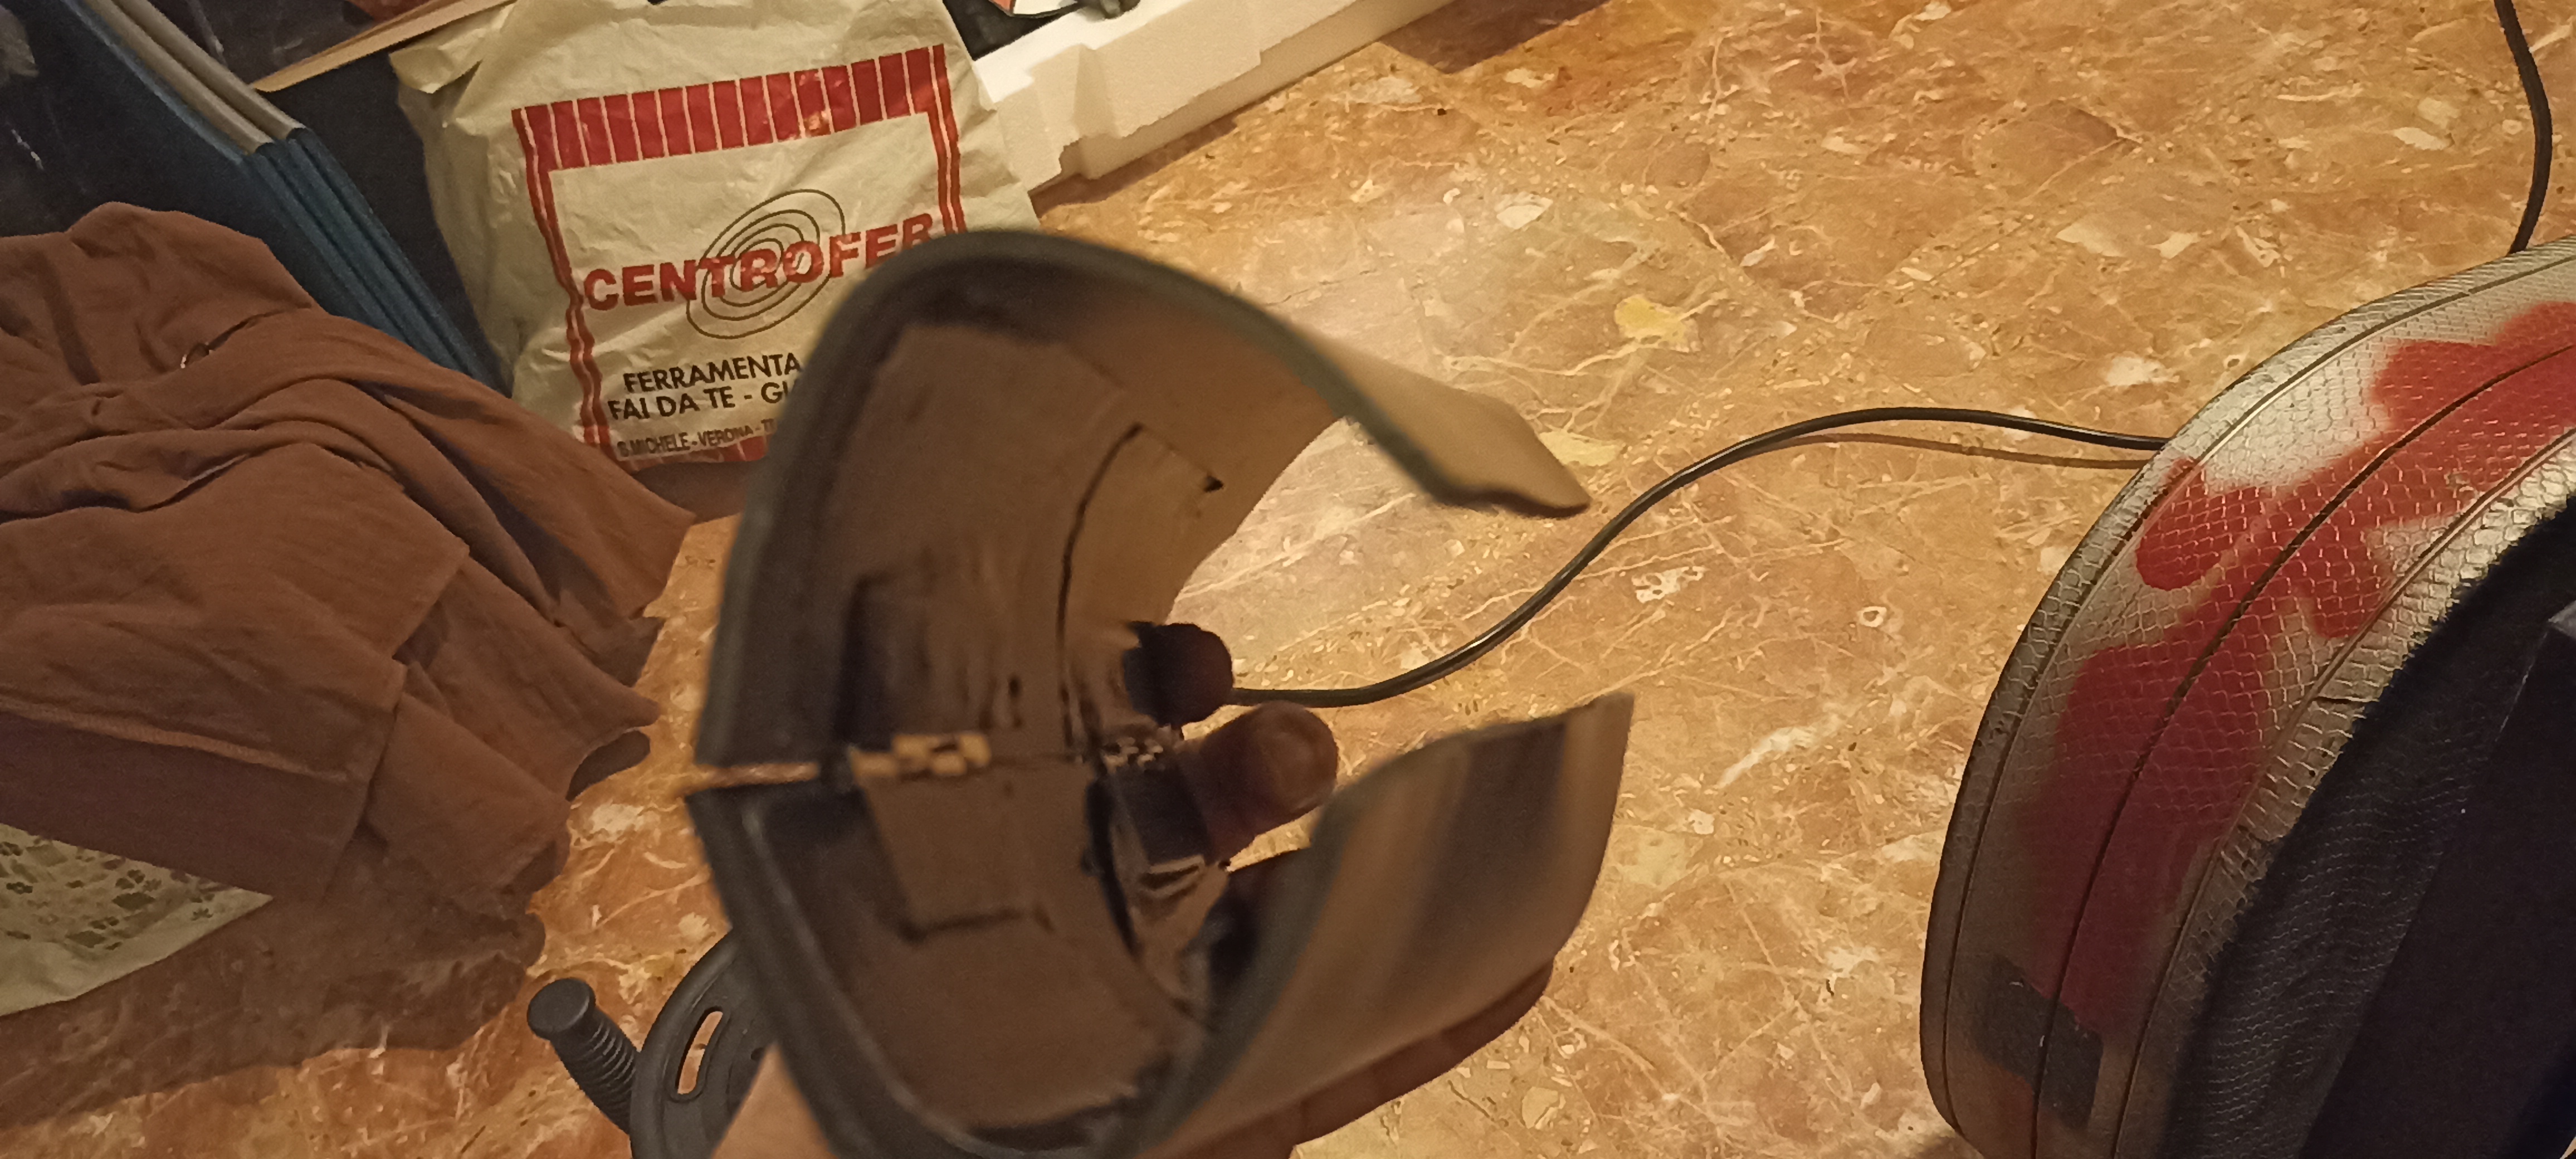
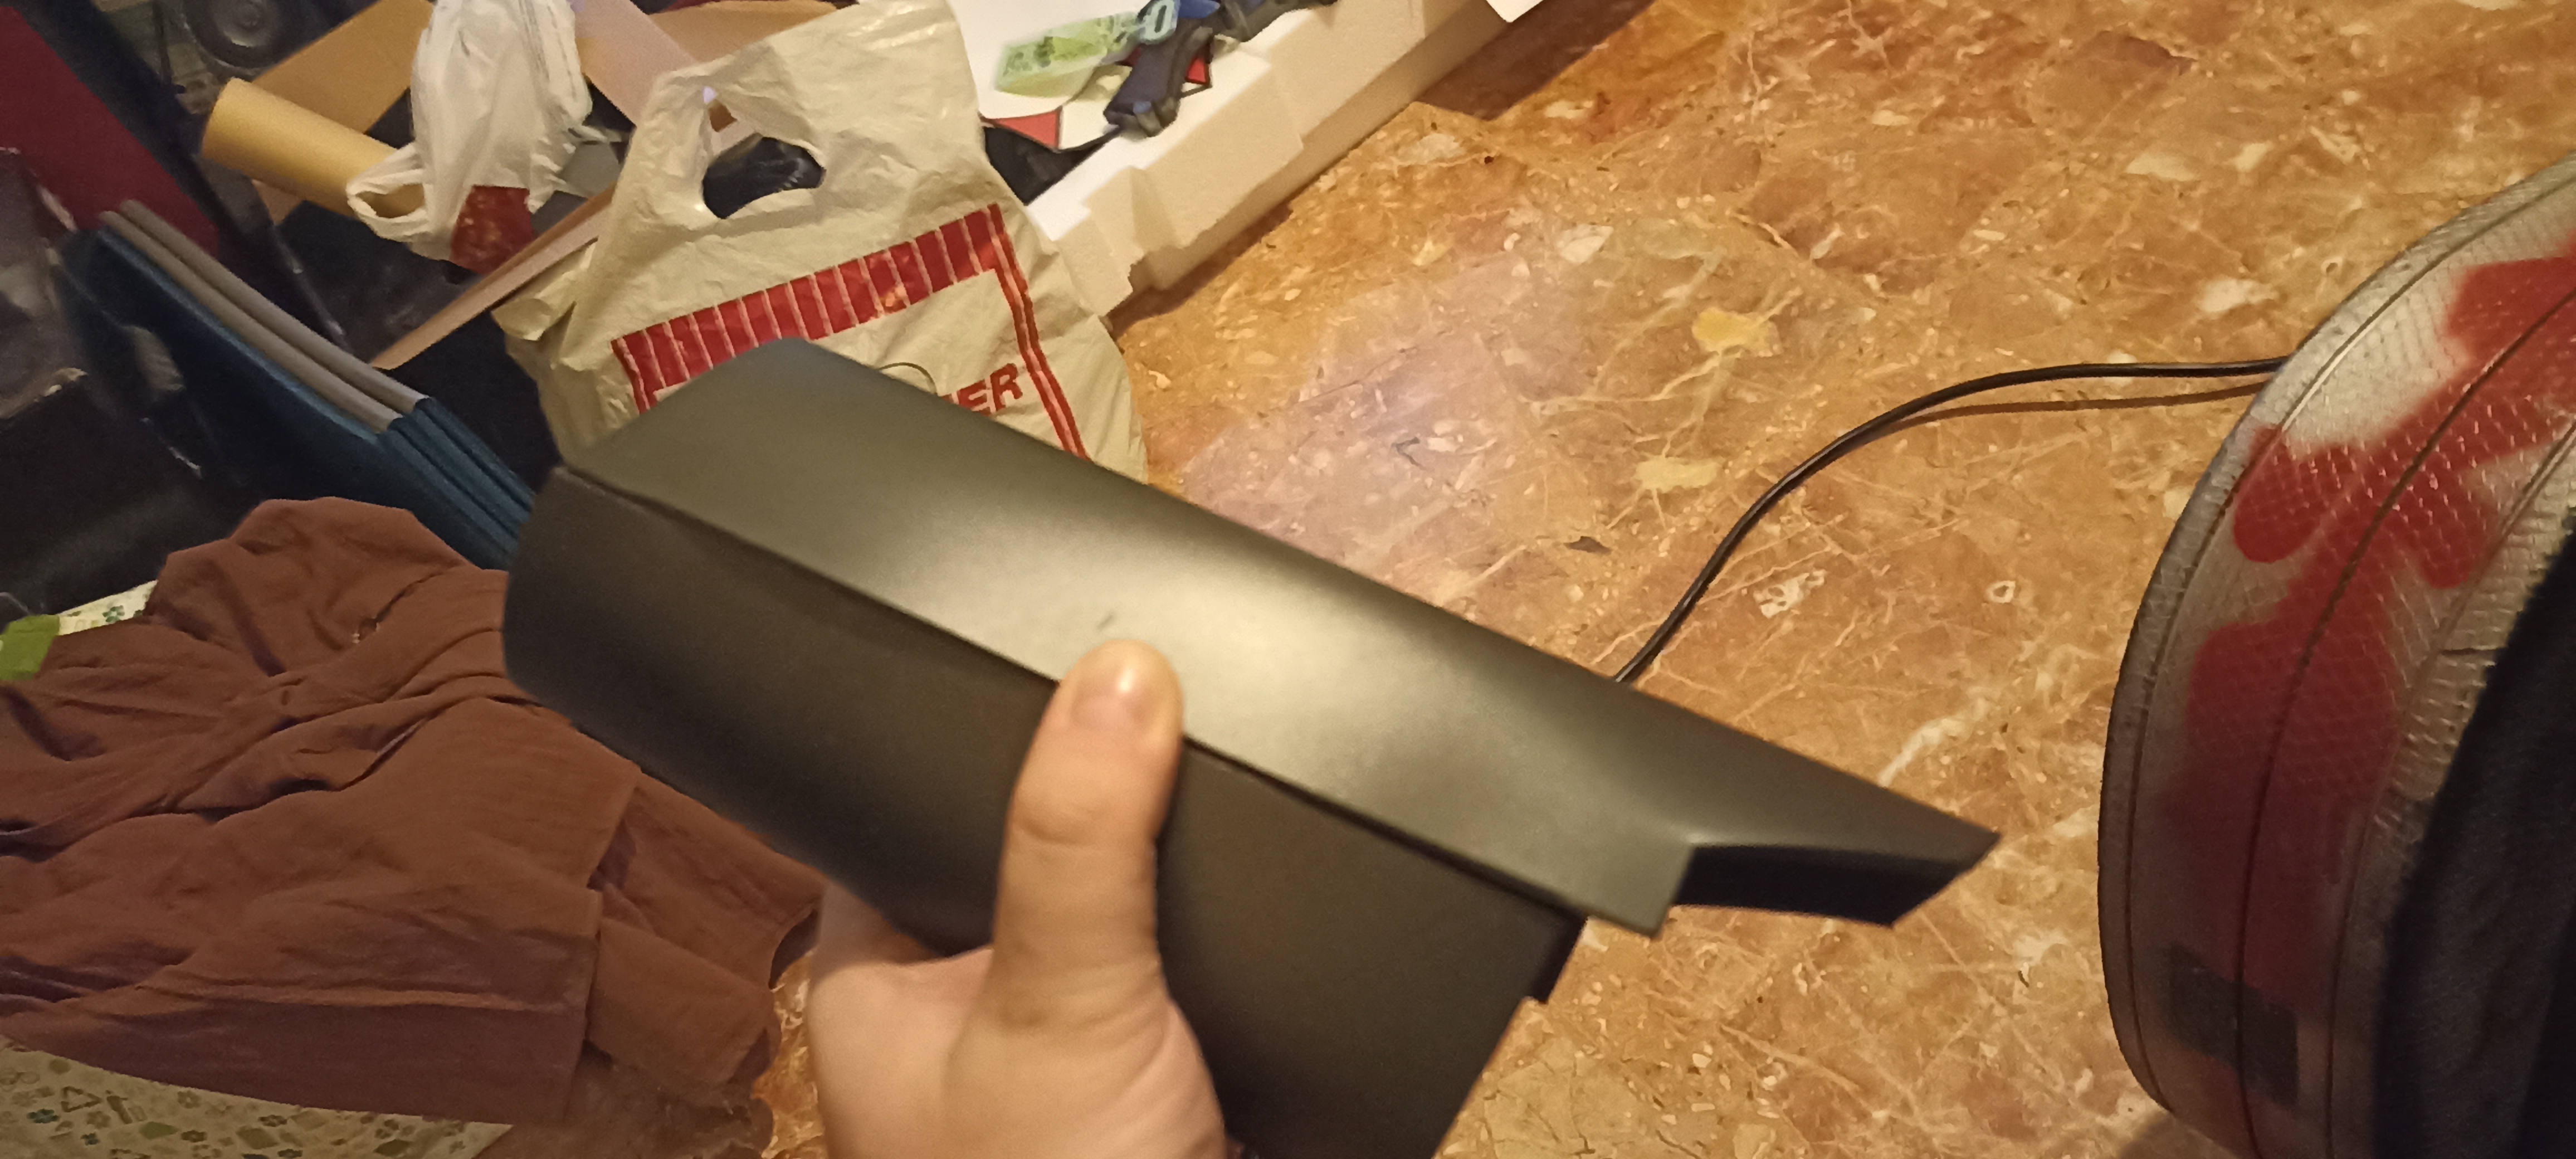
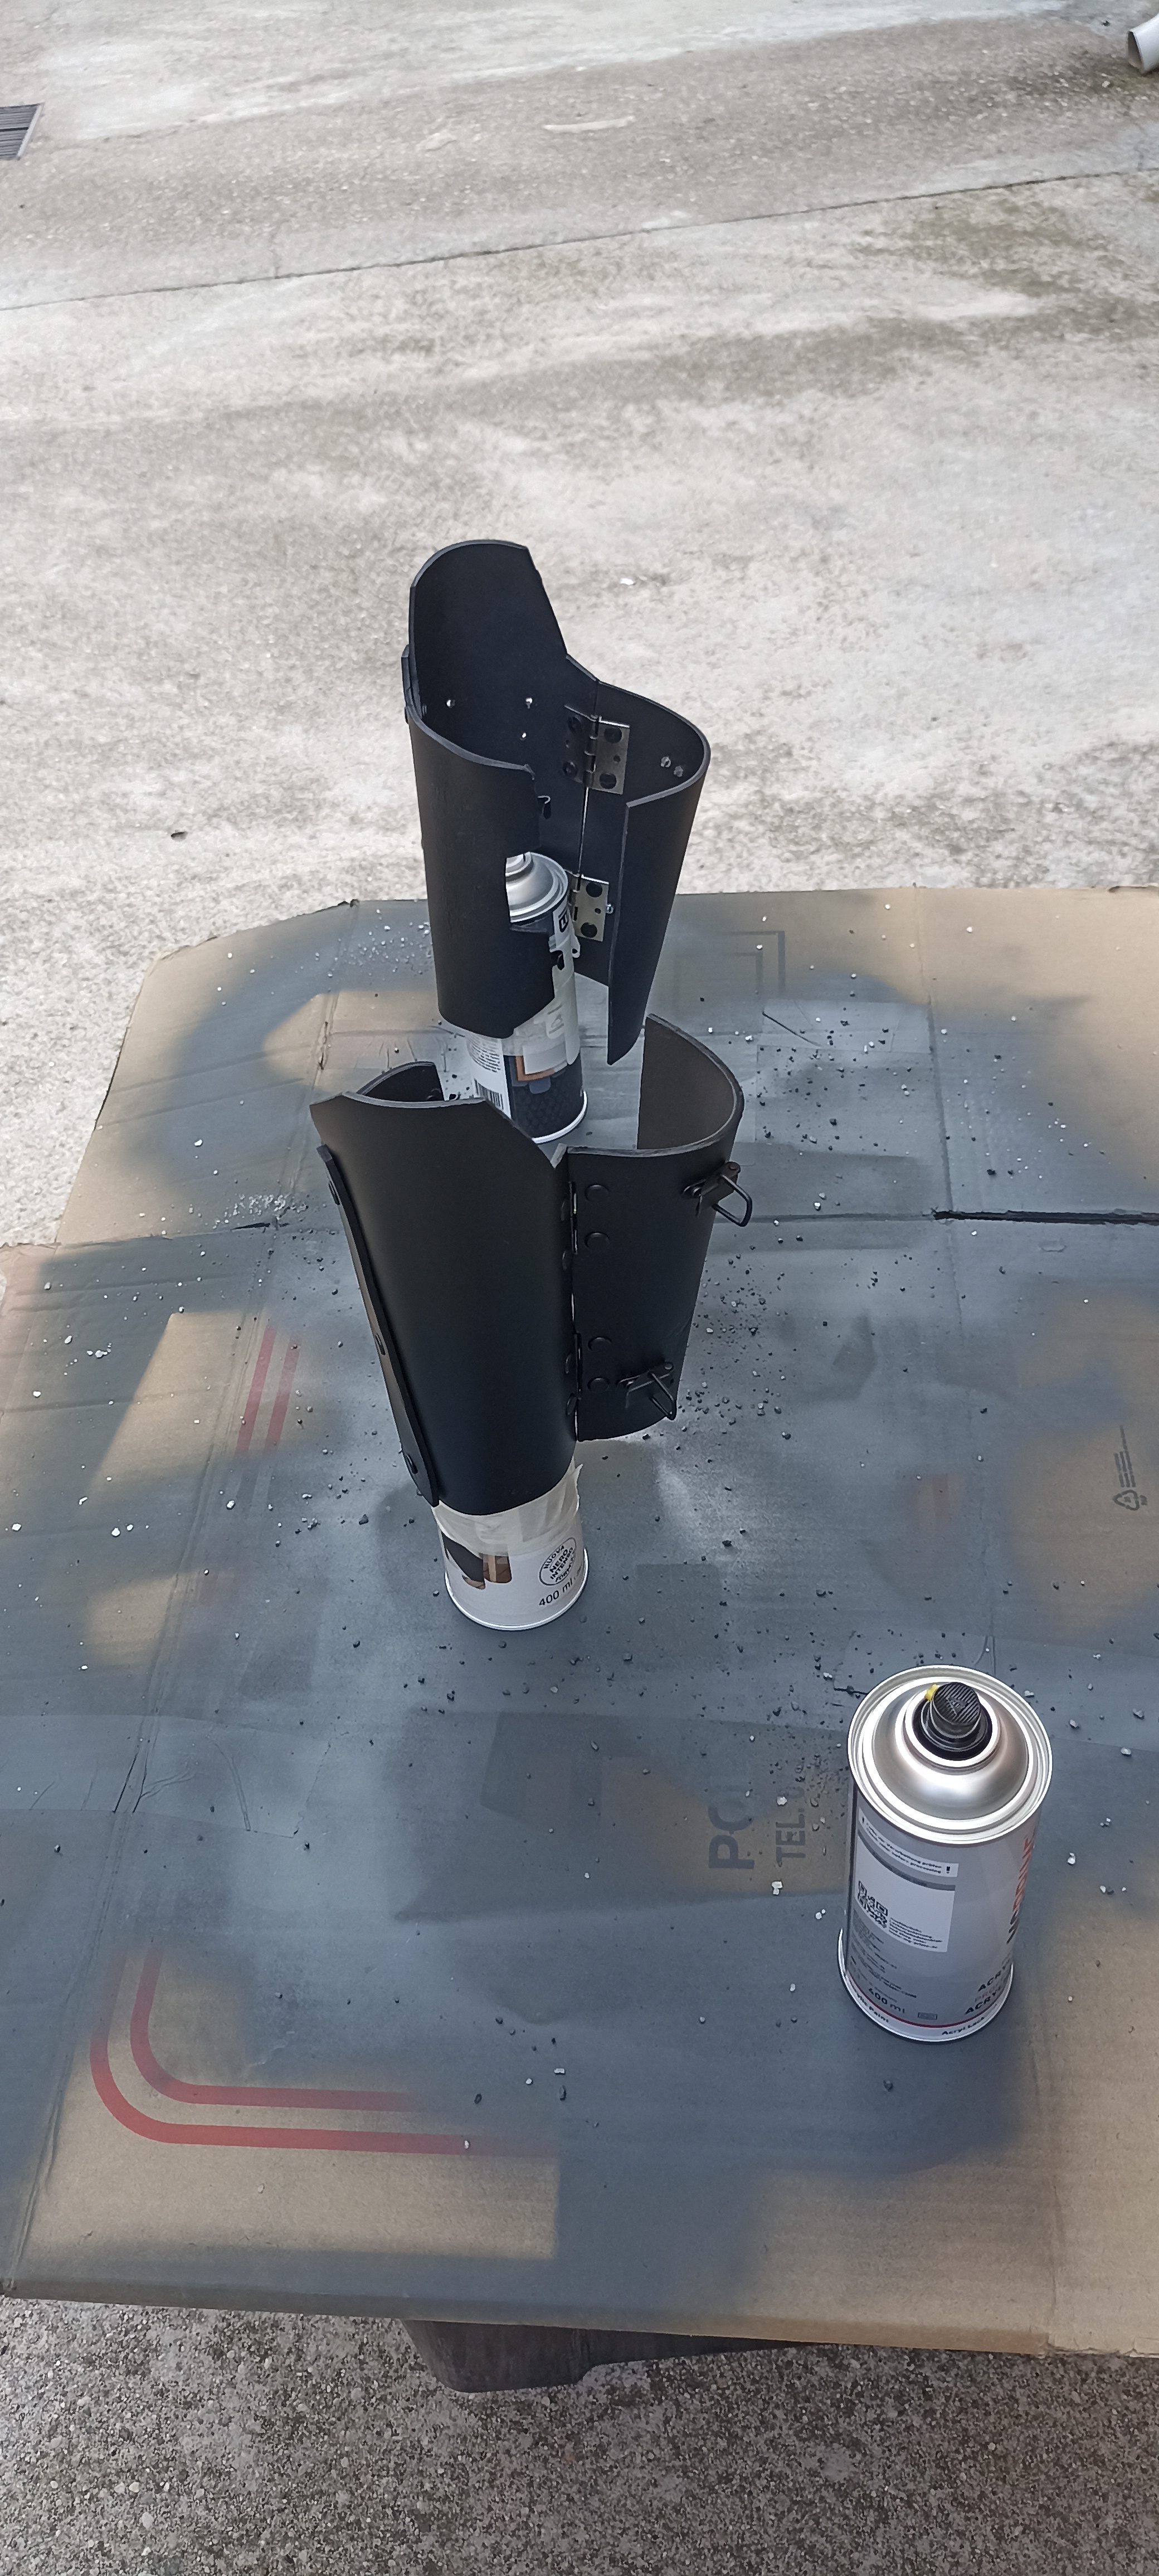
Here you can see the full wip for Nadia's Forearm guards
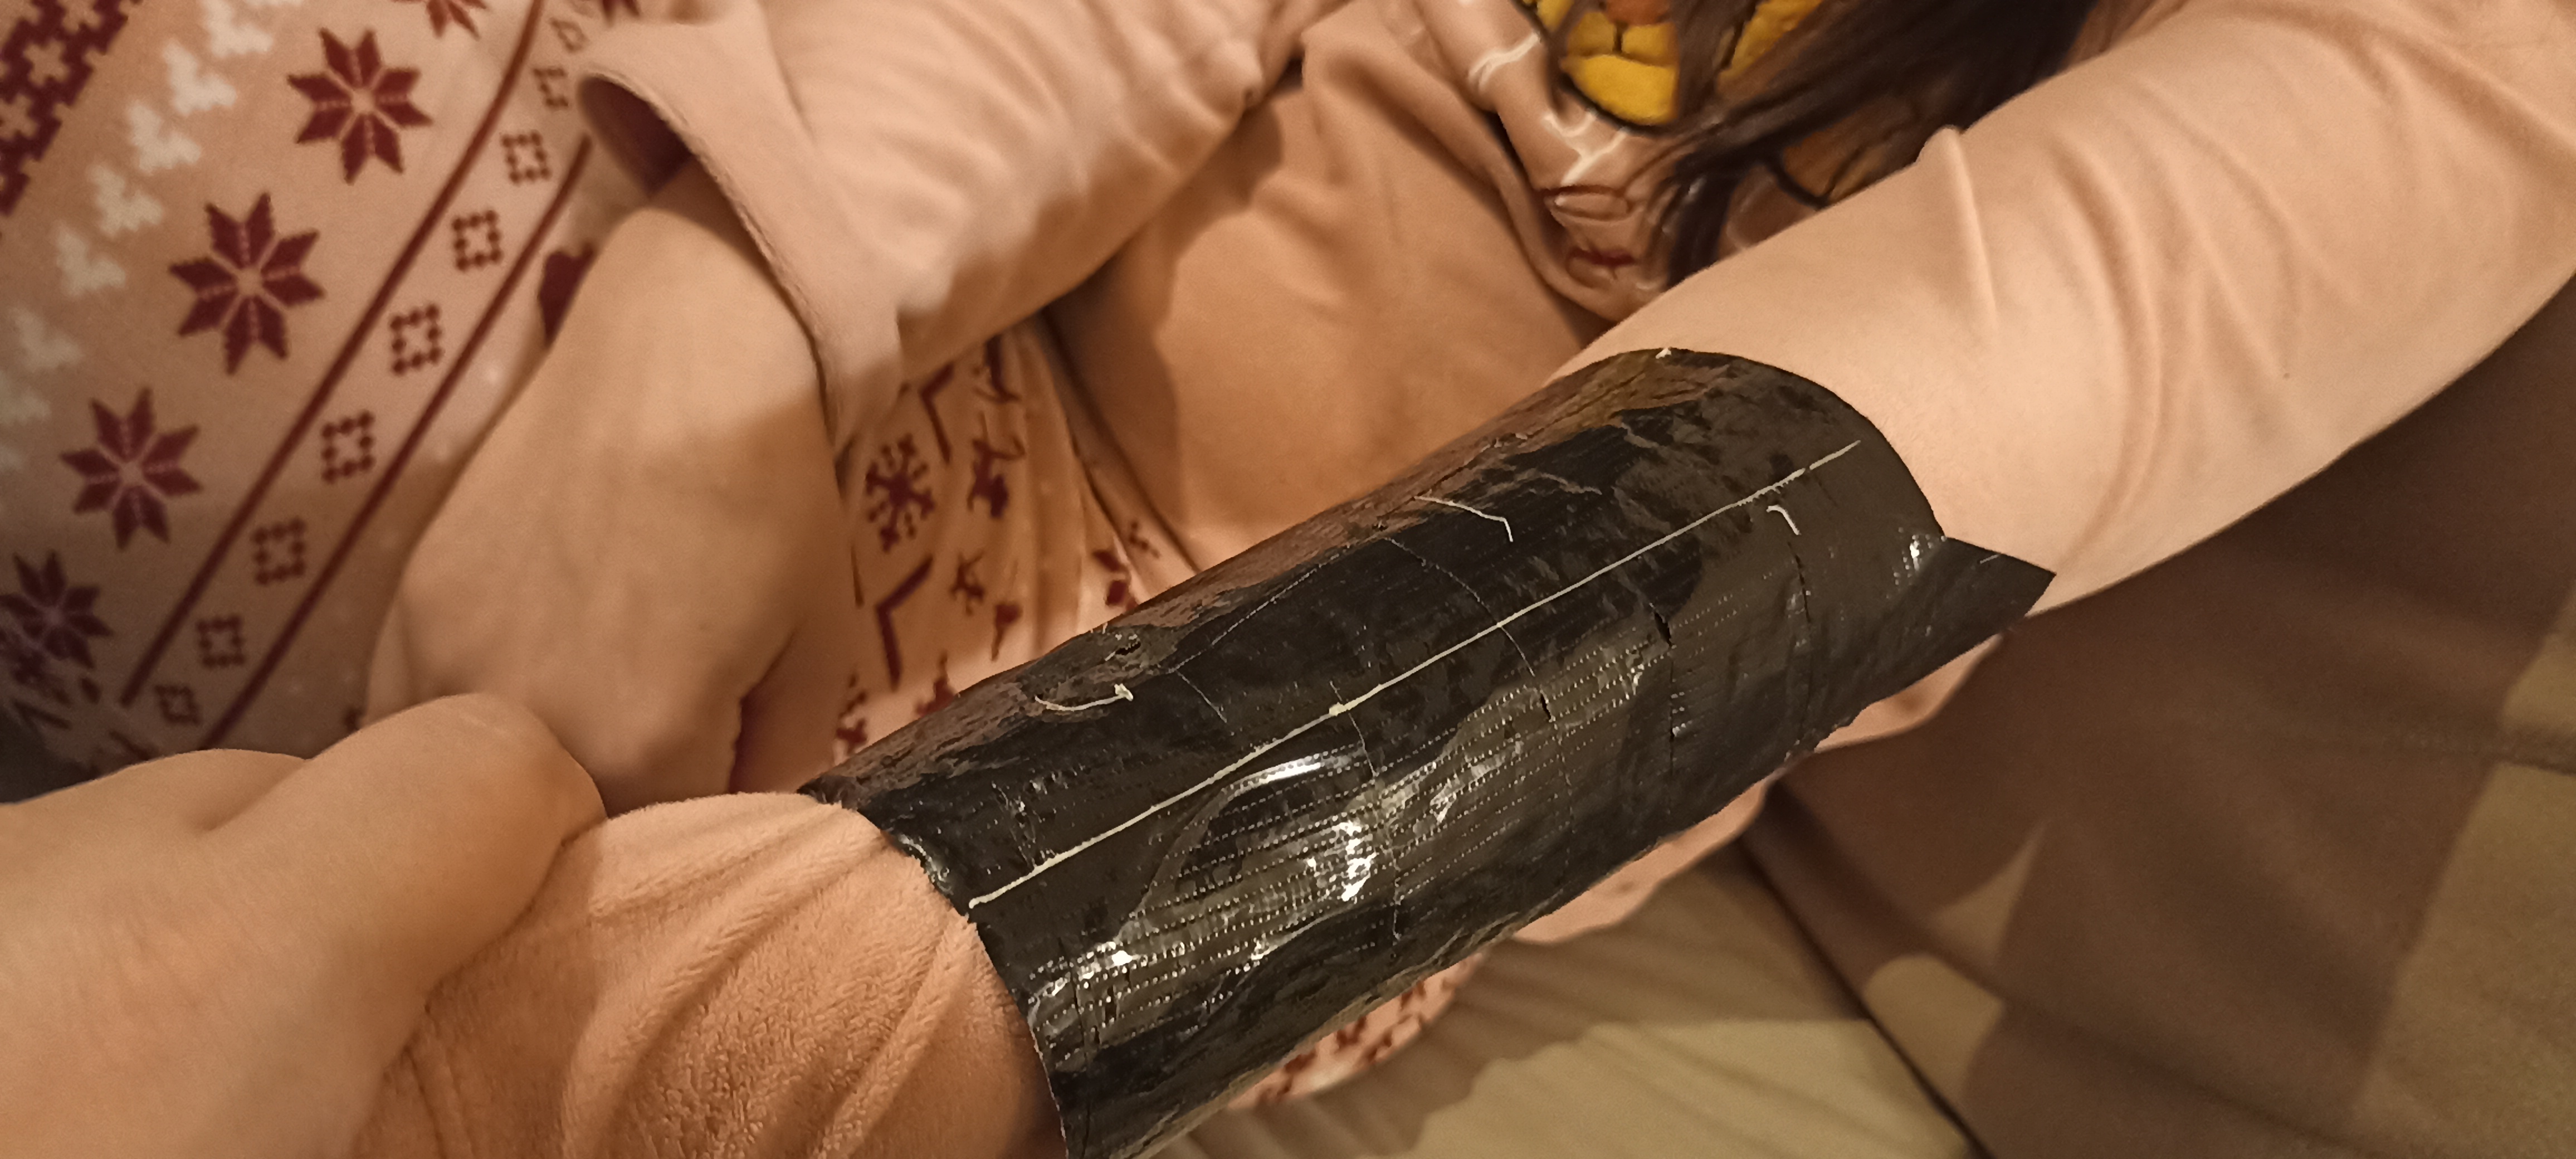
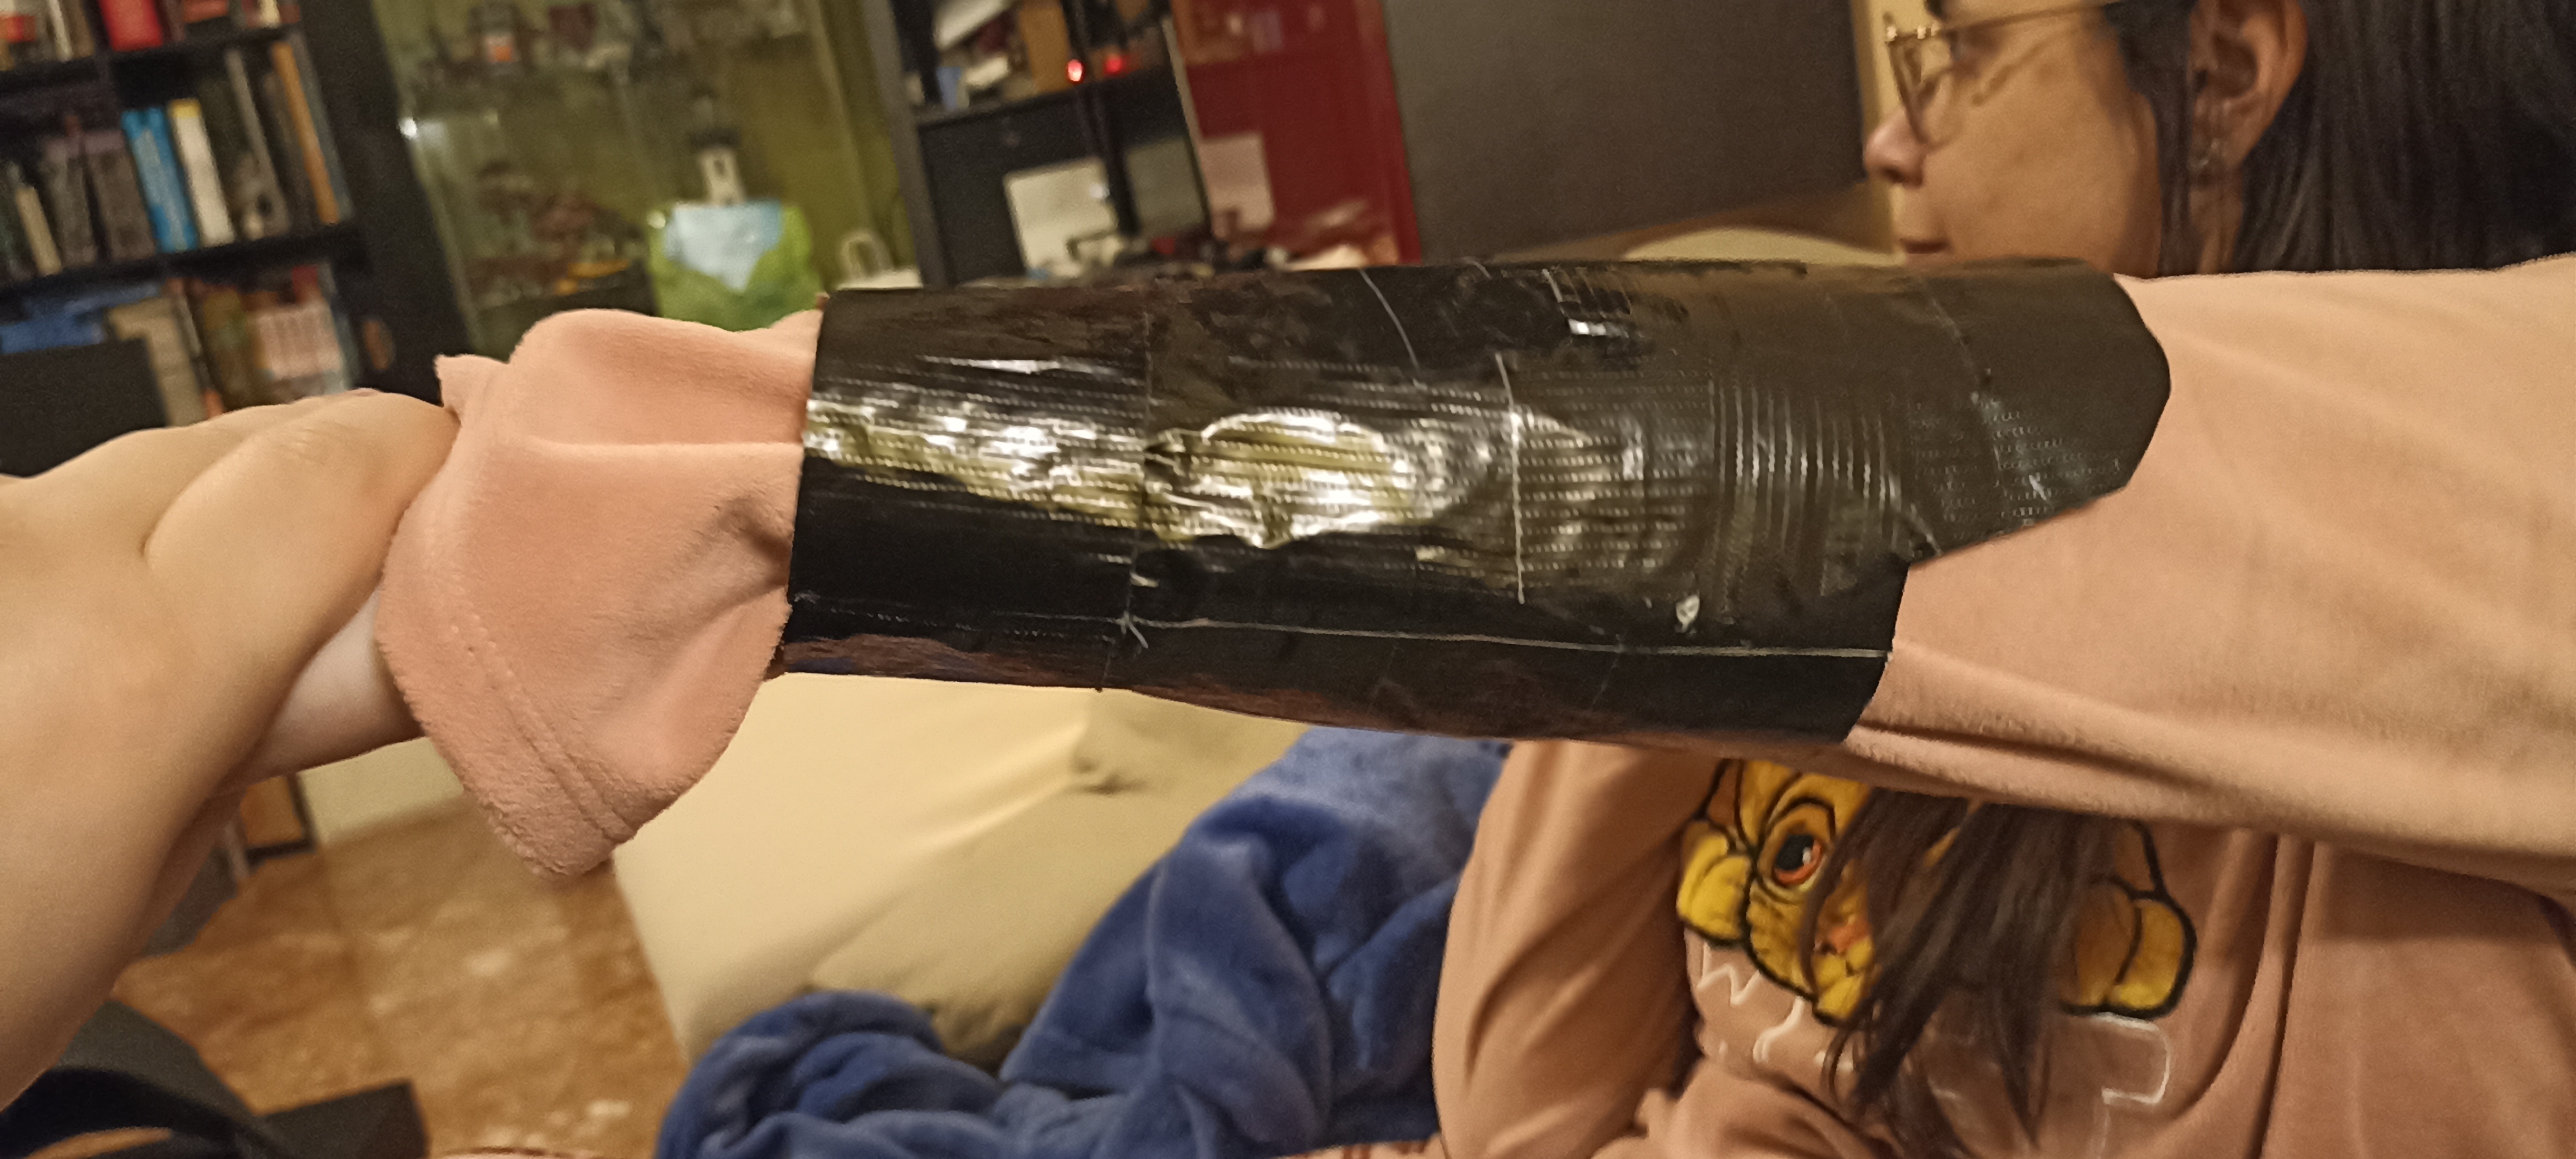 | I started by wrapping the forearm with cling film and covering it with tape. After refining the shape, I then transferred it to a sheet of polystyrene (such as a Forex brand). |

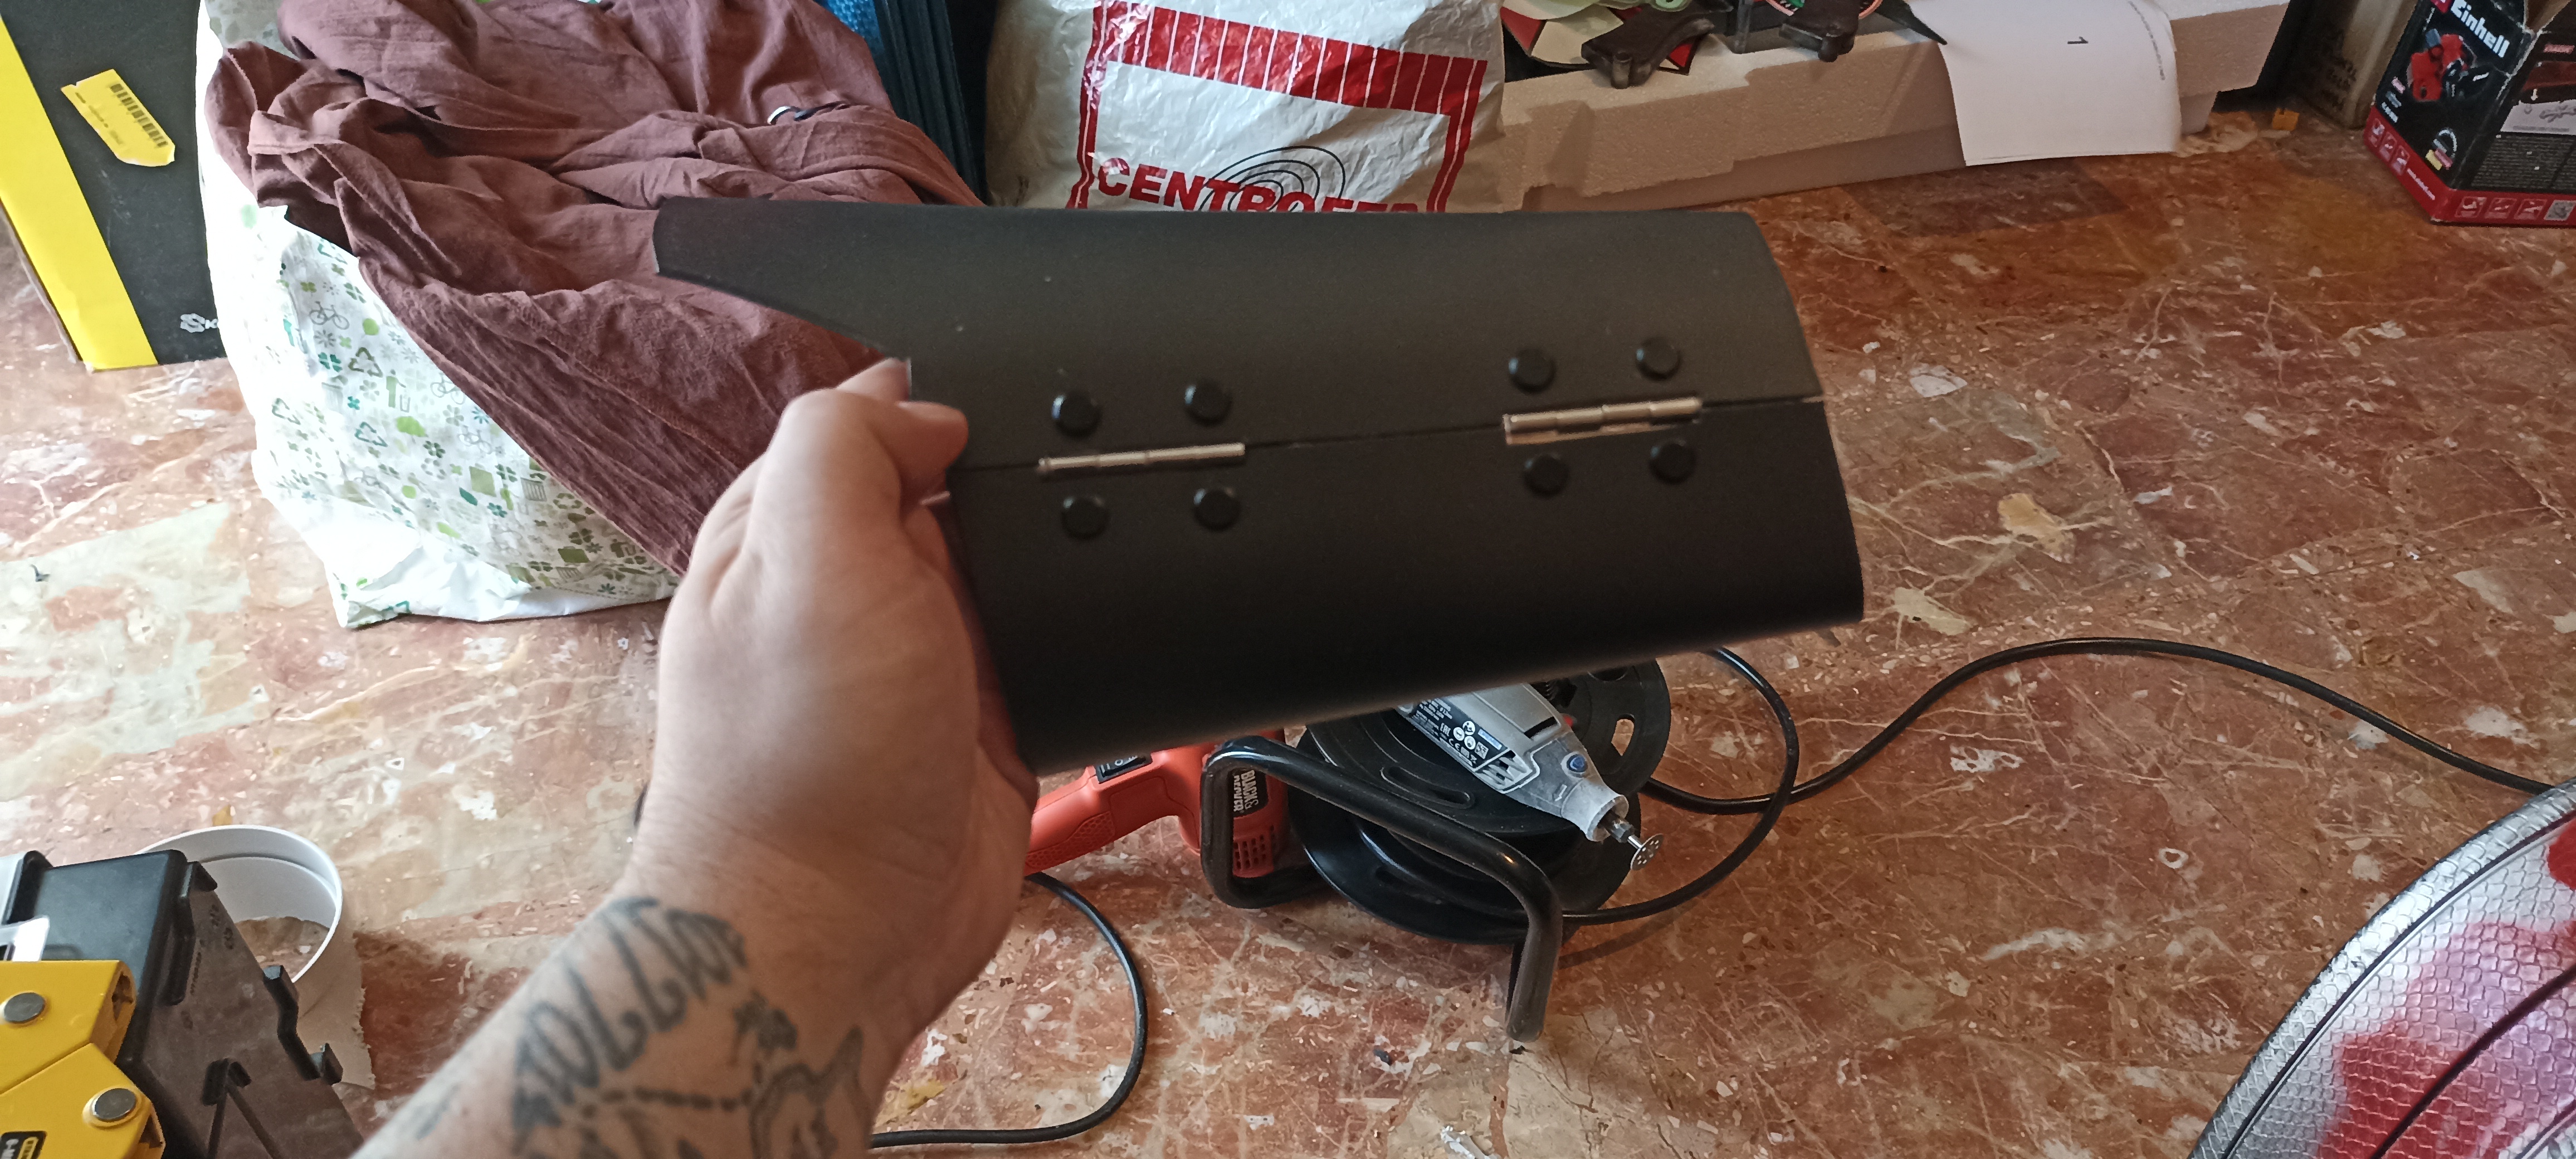
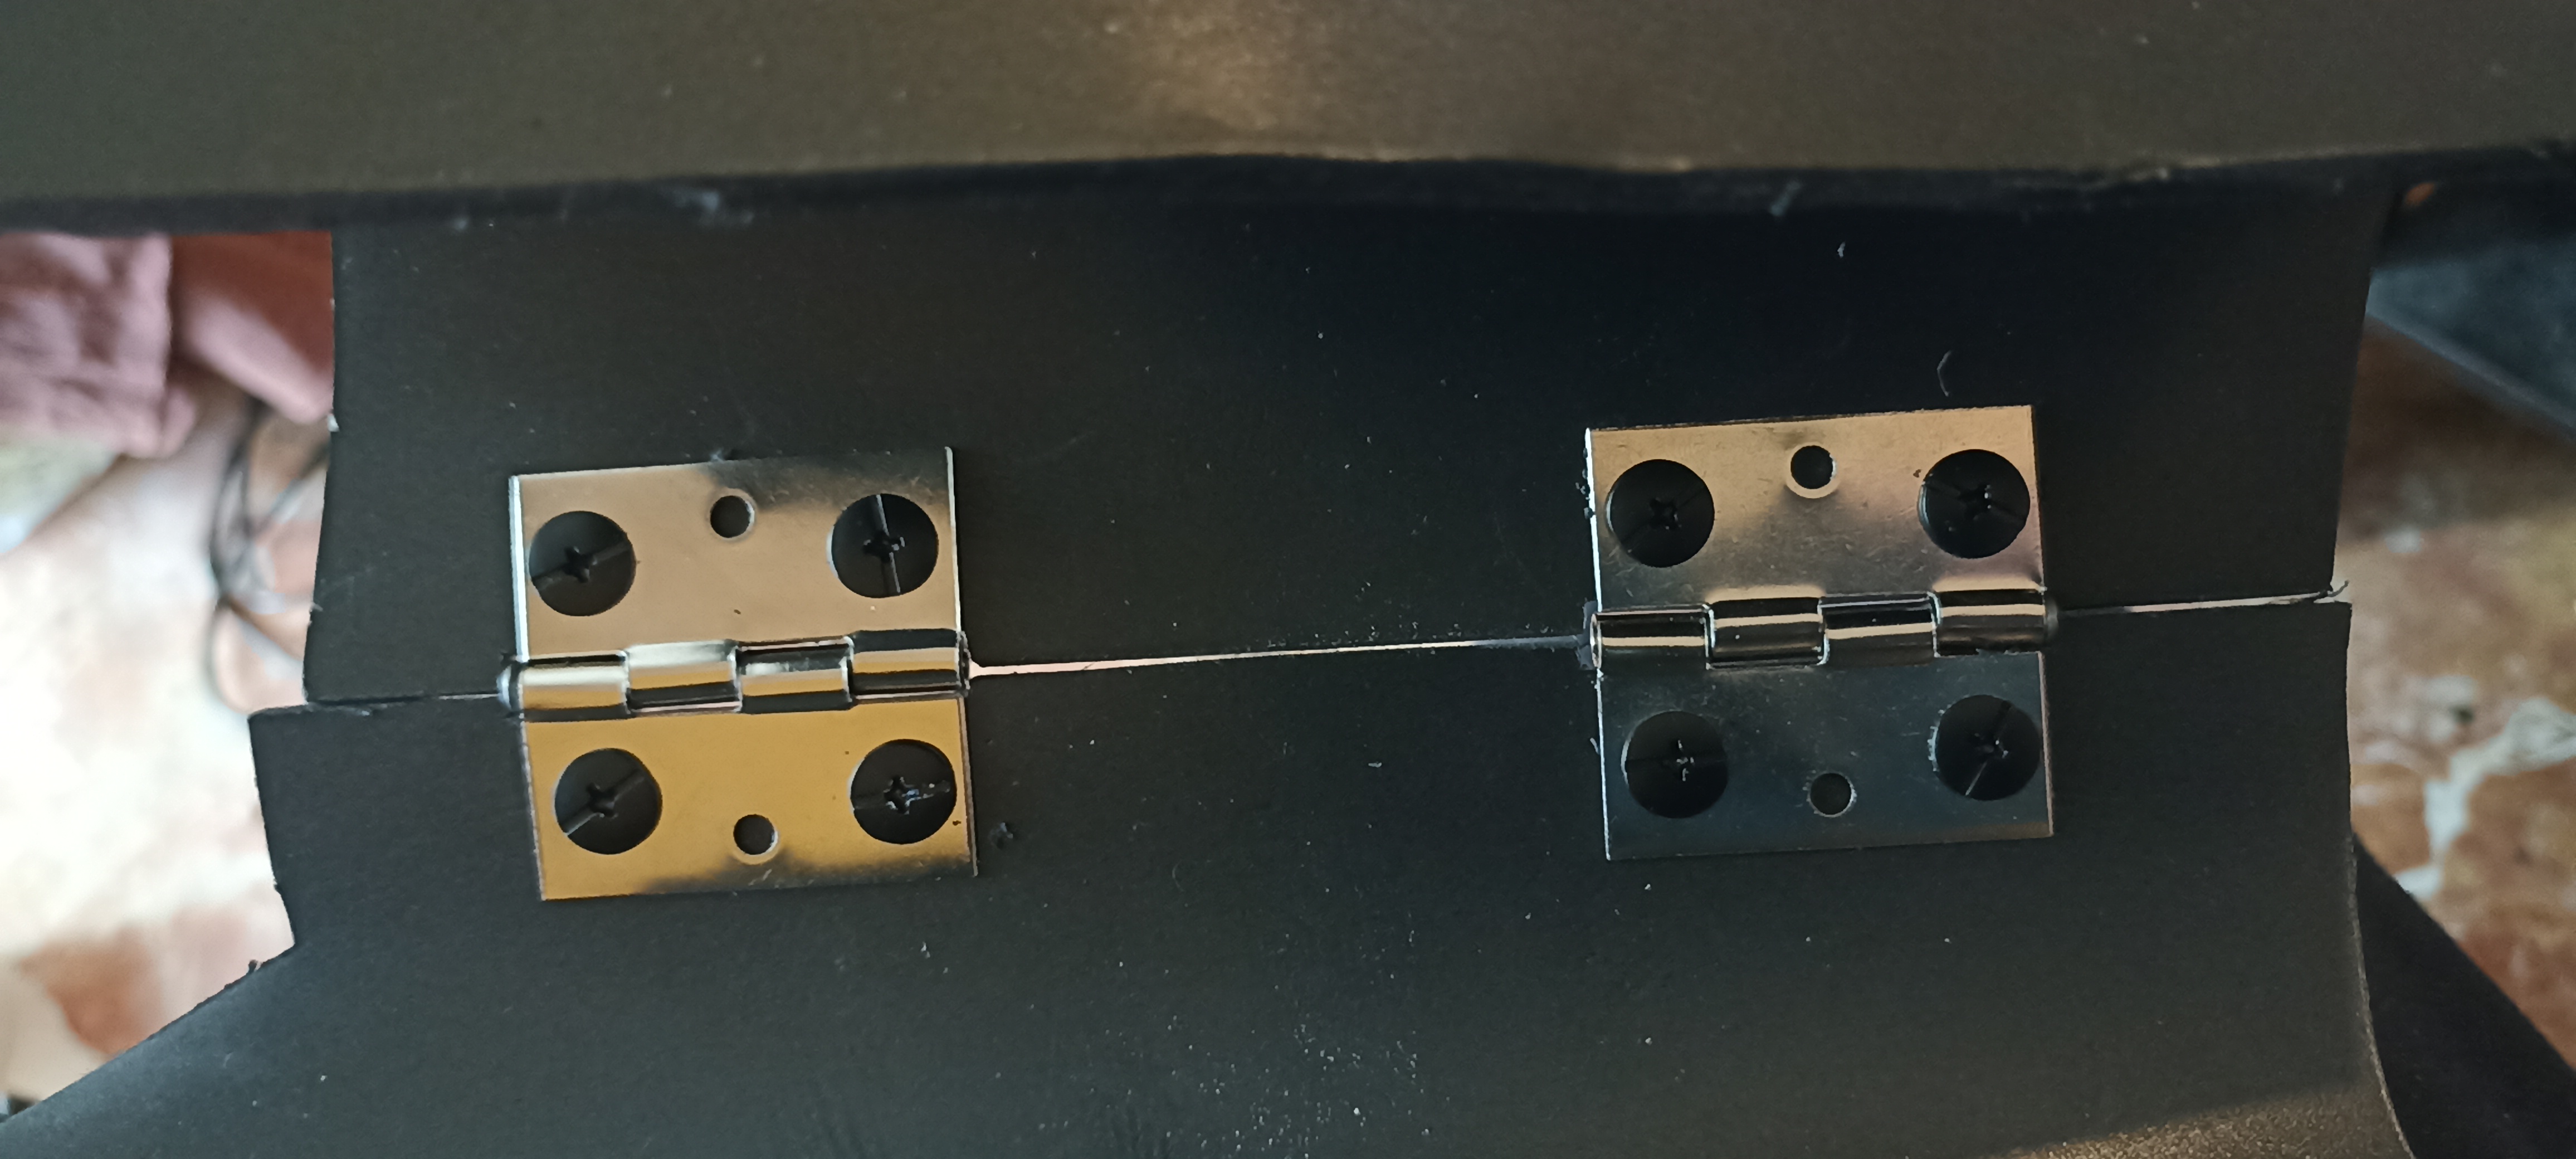 | I used cabinet hinges to join the two pieces, after shaping them with a hot gun. |
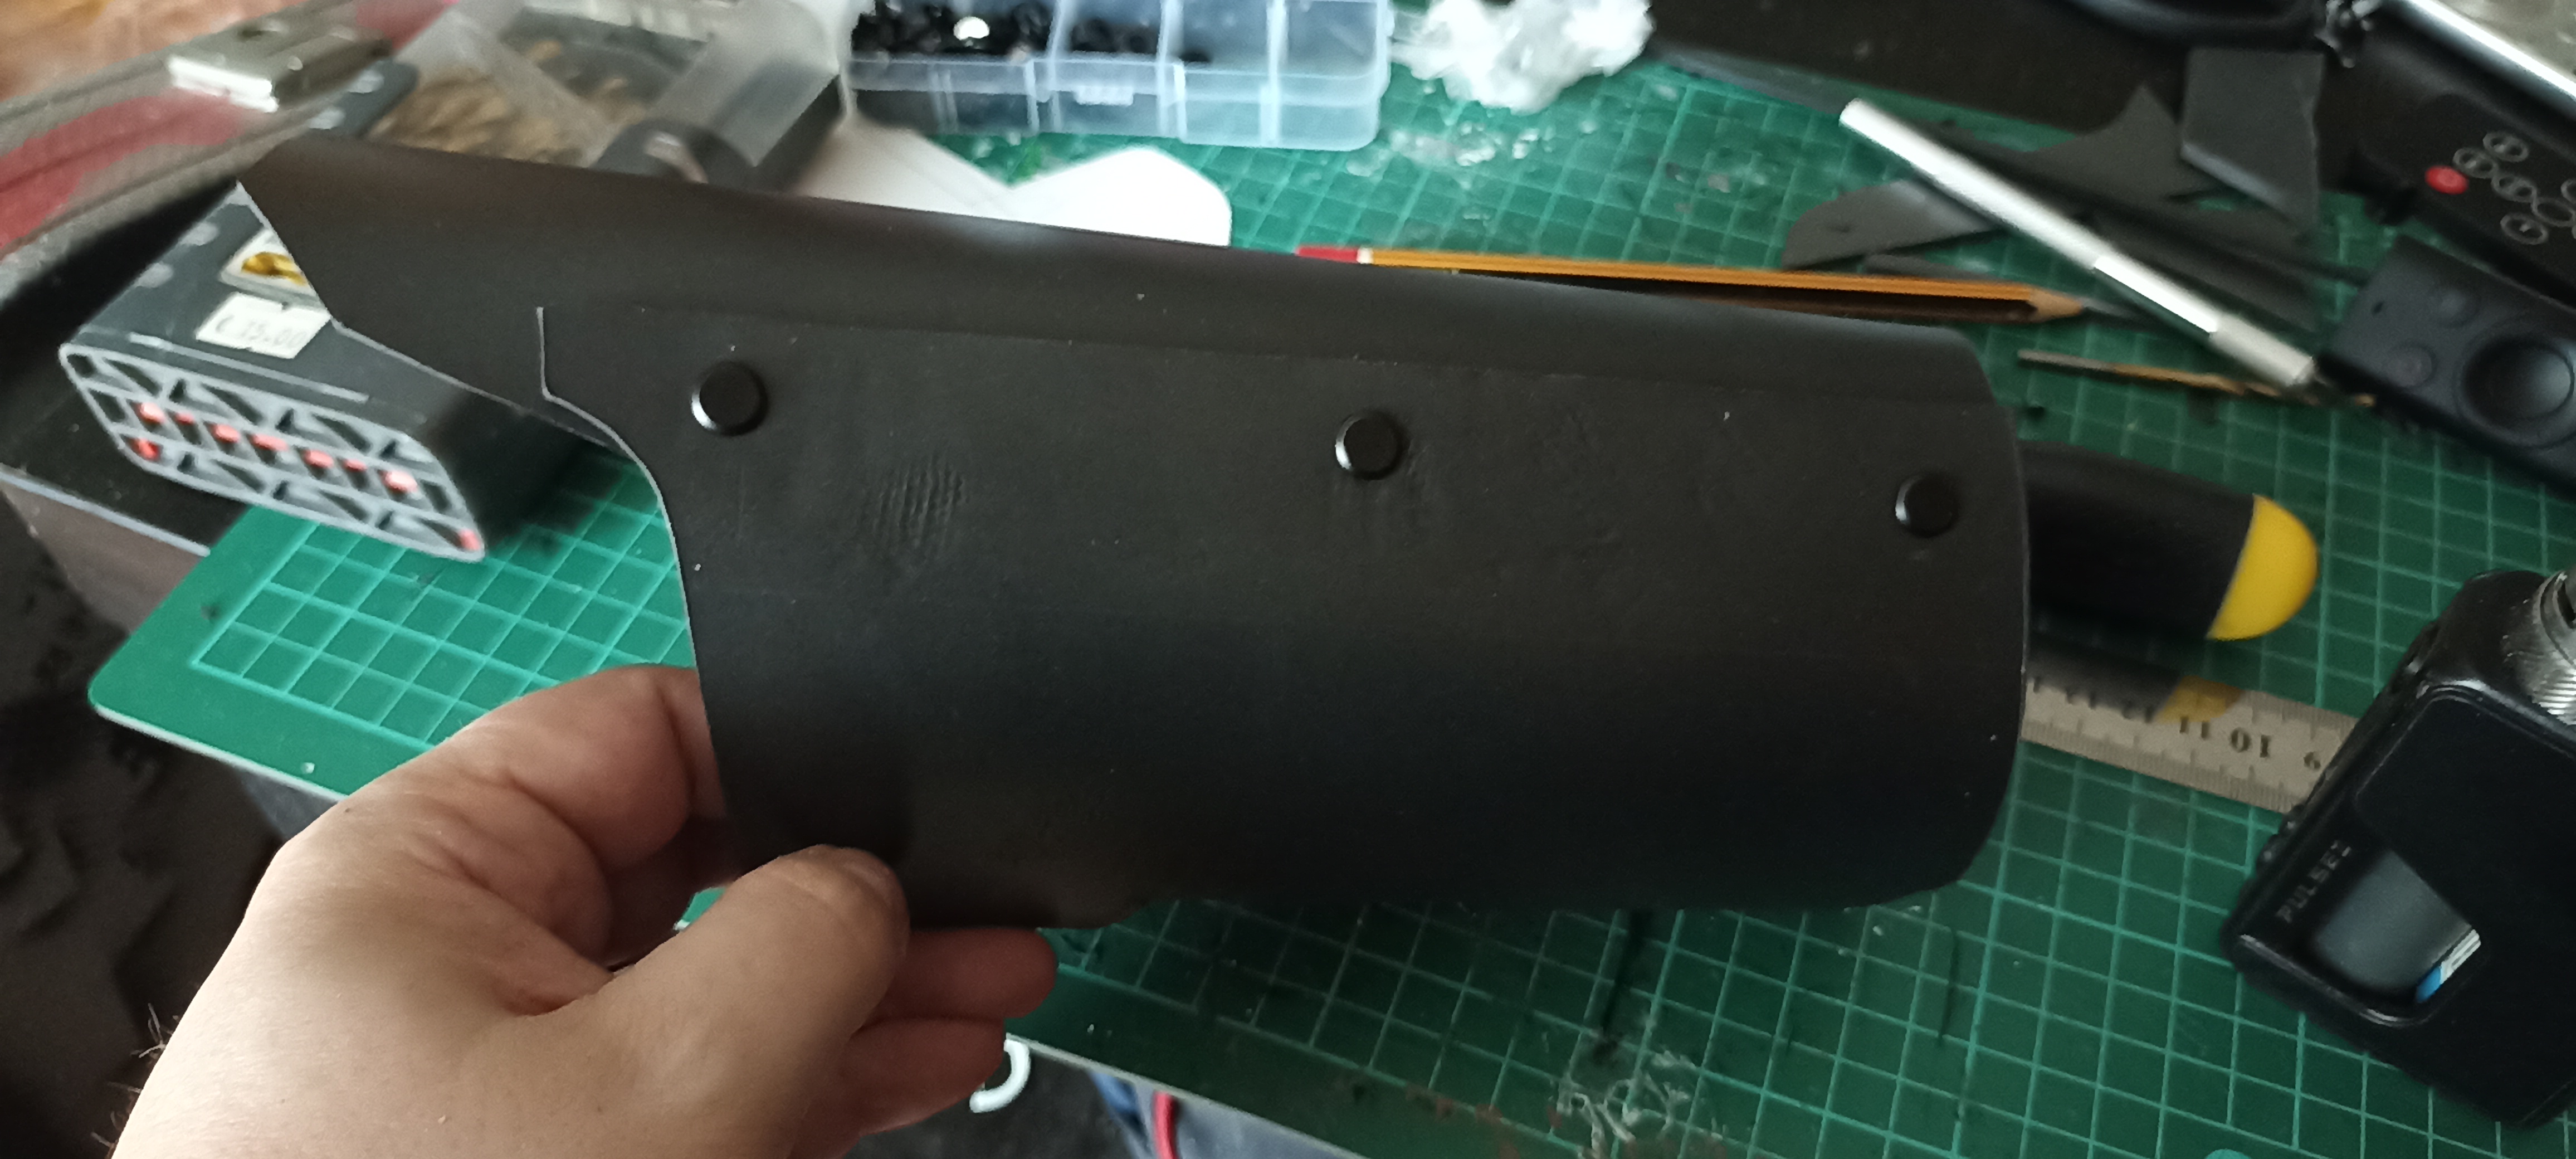 | To give movement I added an overlapping part, adding some Chicago Screws. |
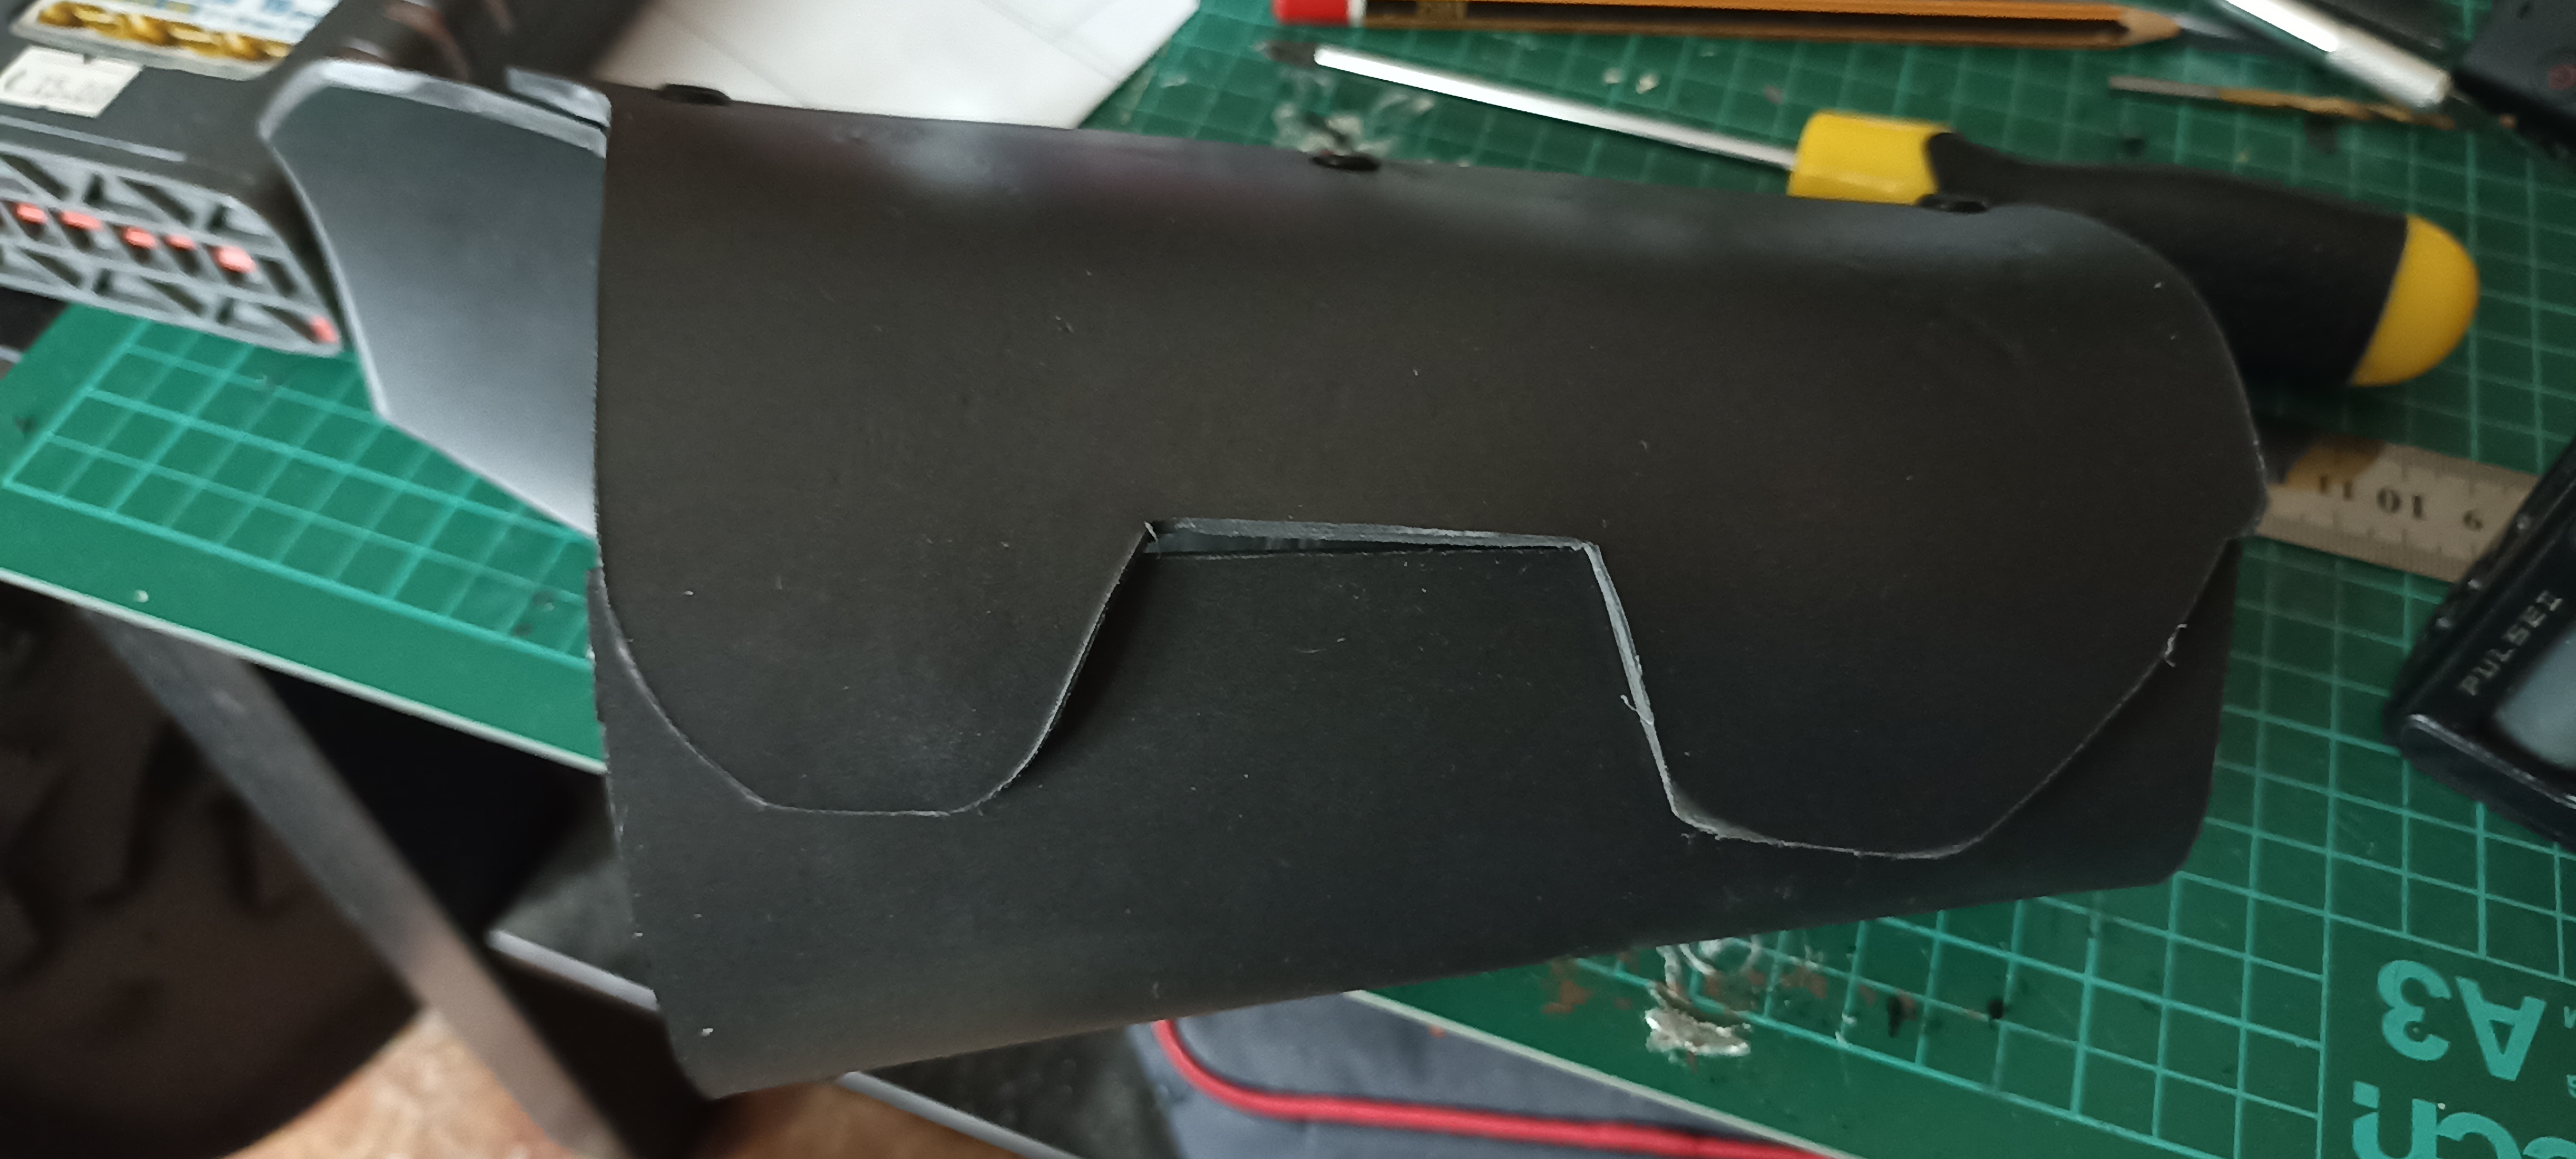 | While I had doubts about the closing part, I initially left two tabs, but I needed to fix their shape. |
 | Later I opted to give it a different shape |
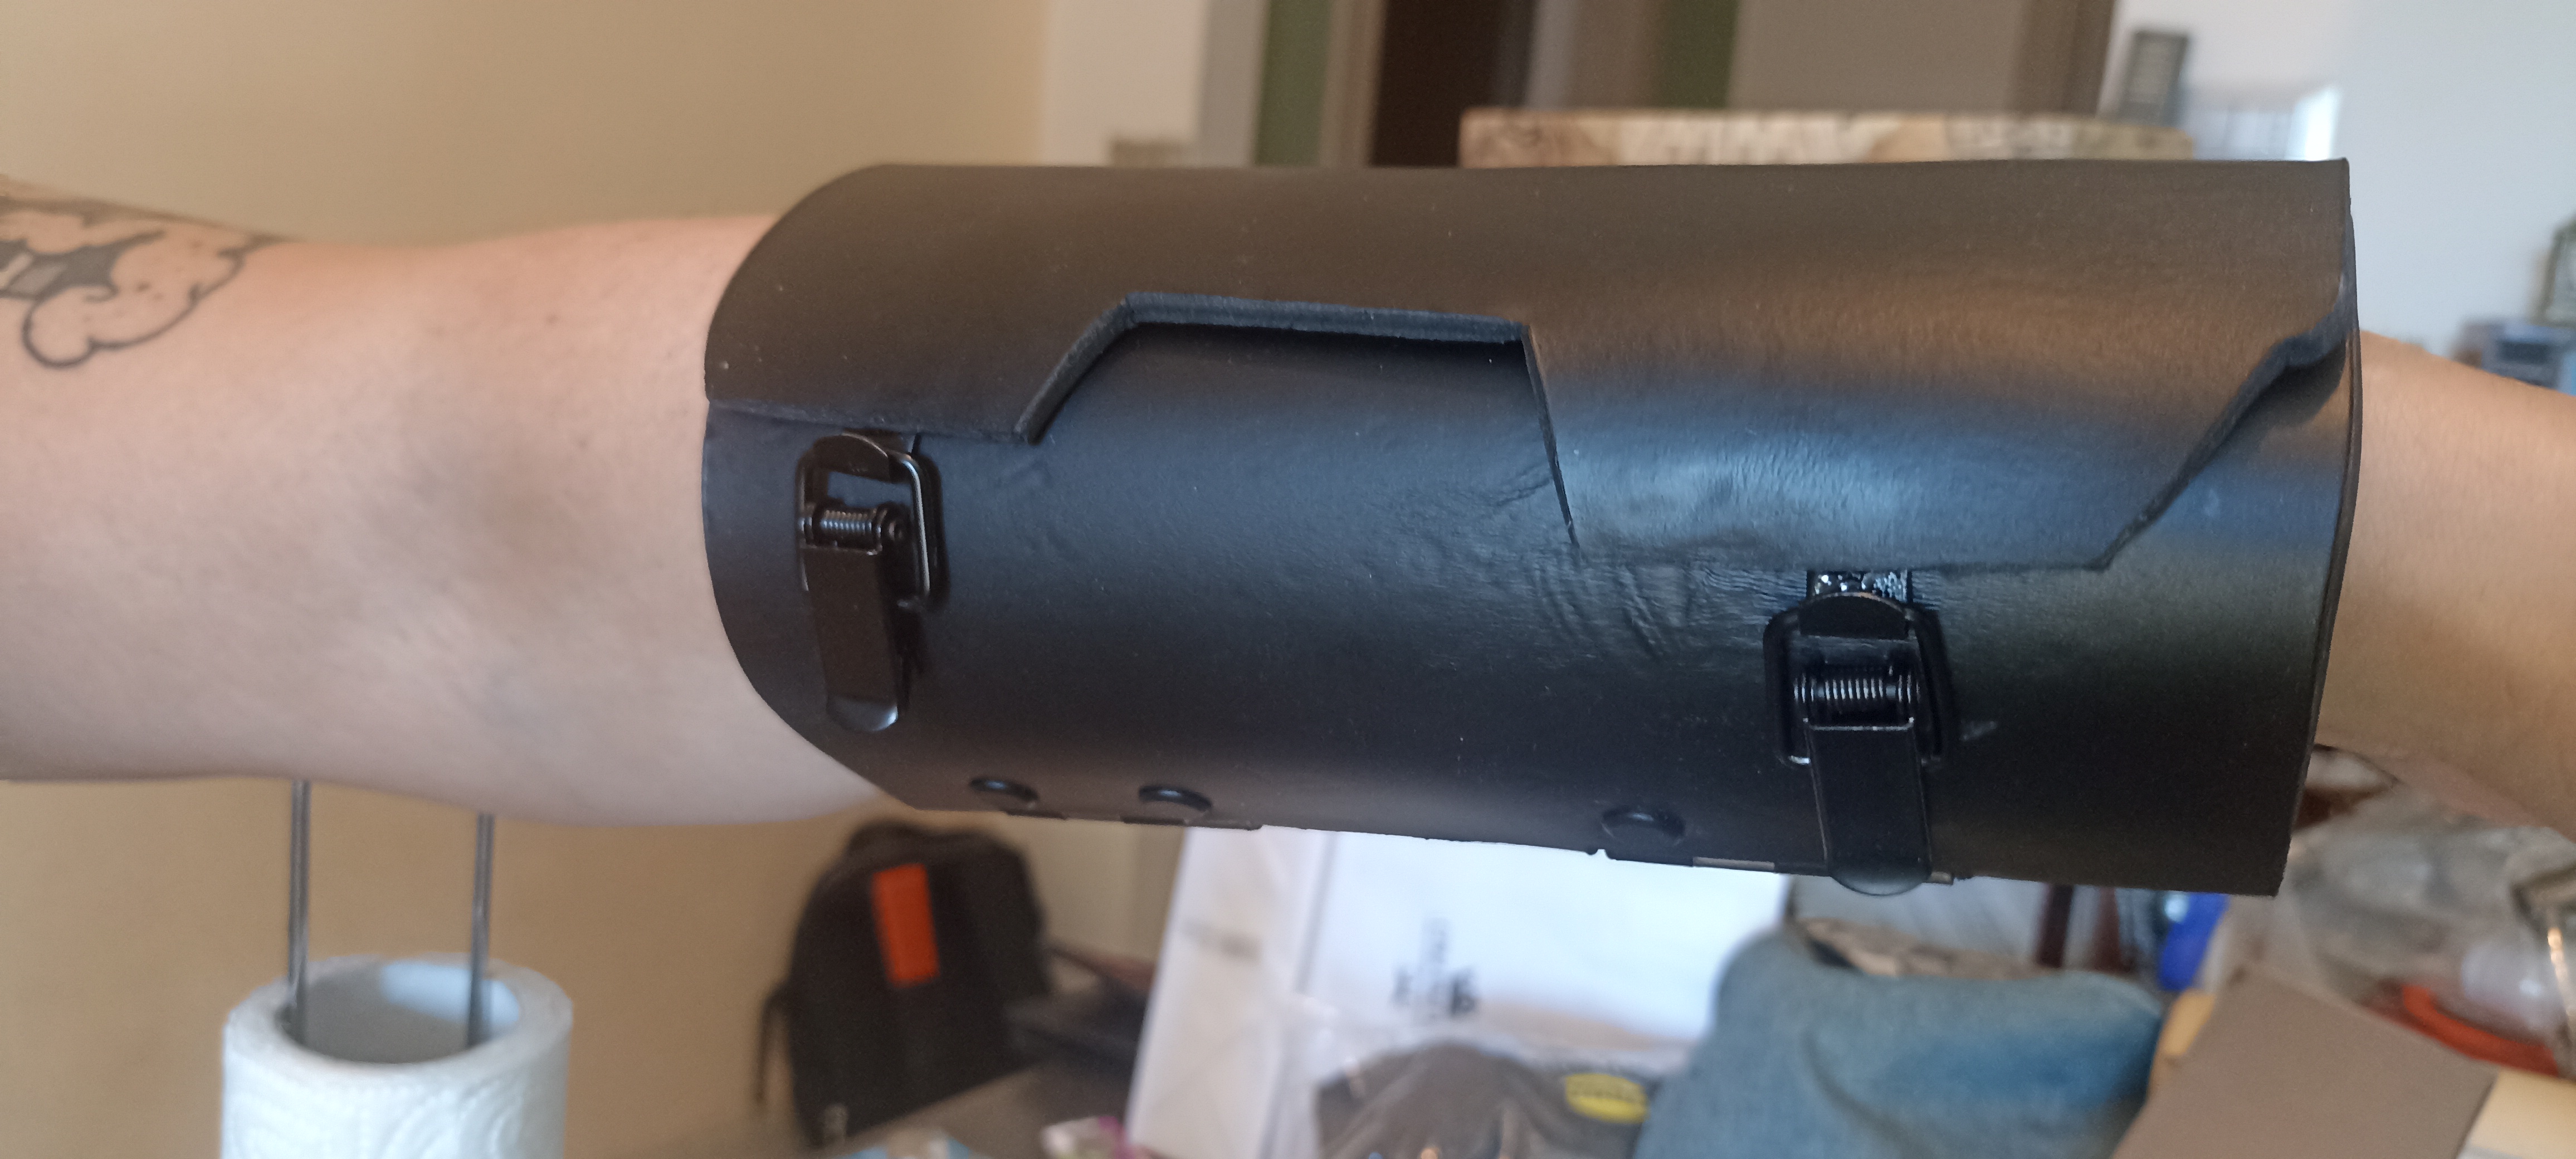
 | For the closure I later opted for these hooks, but I had to make an internal guide to keep the bracelet in place. |
 | I made a matte black base. |
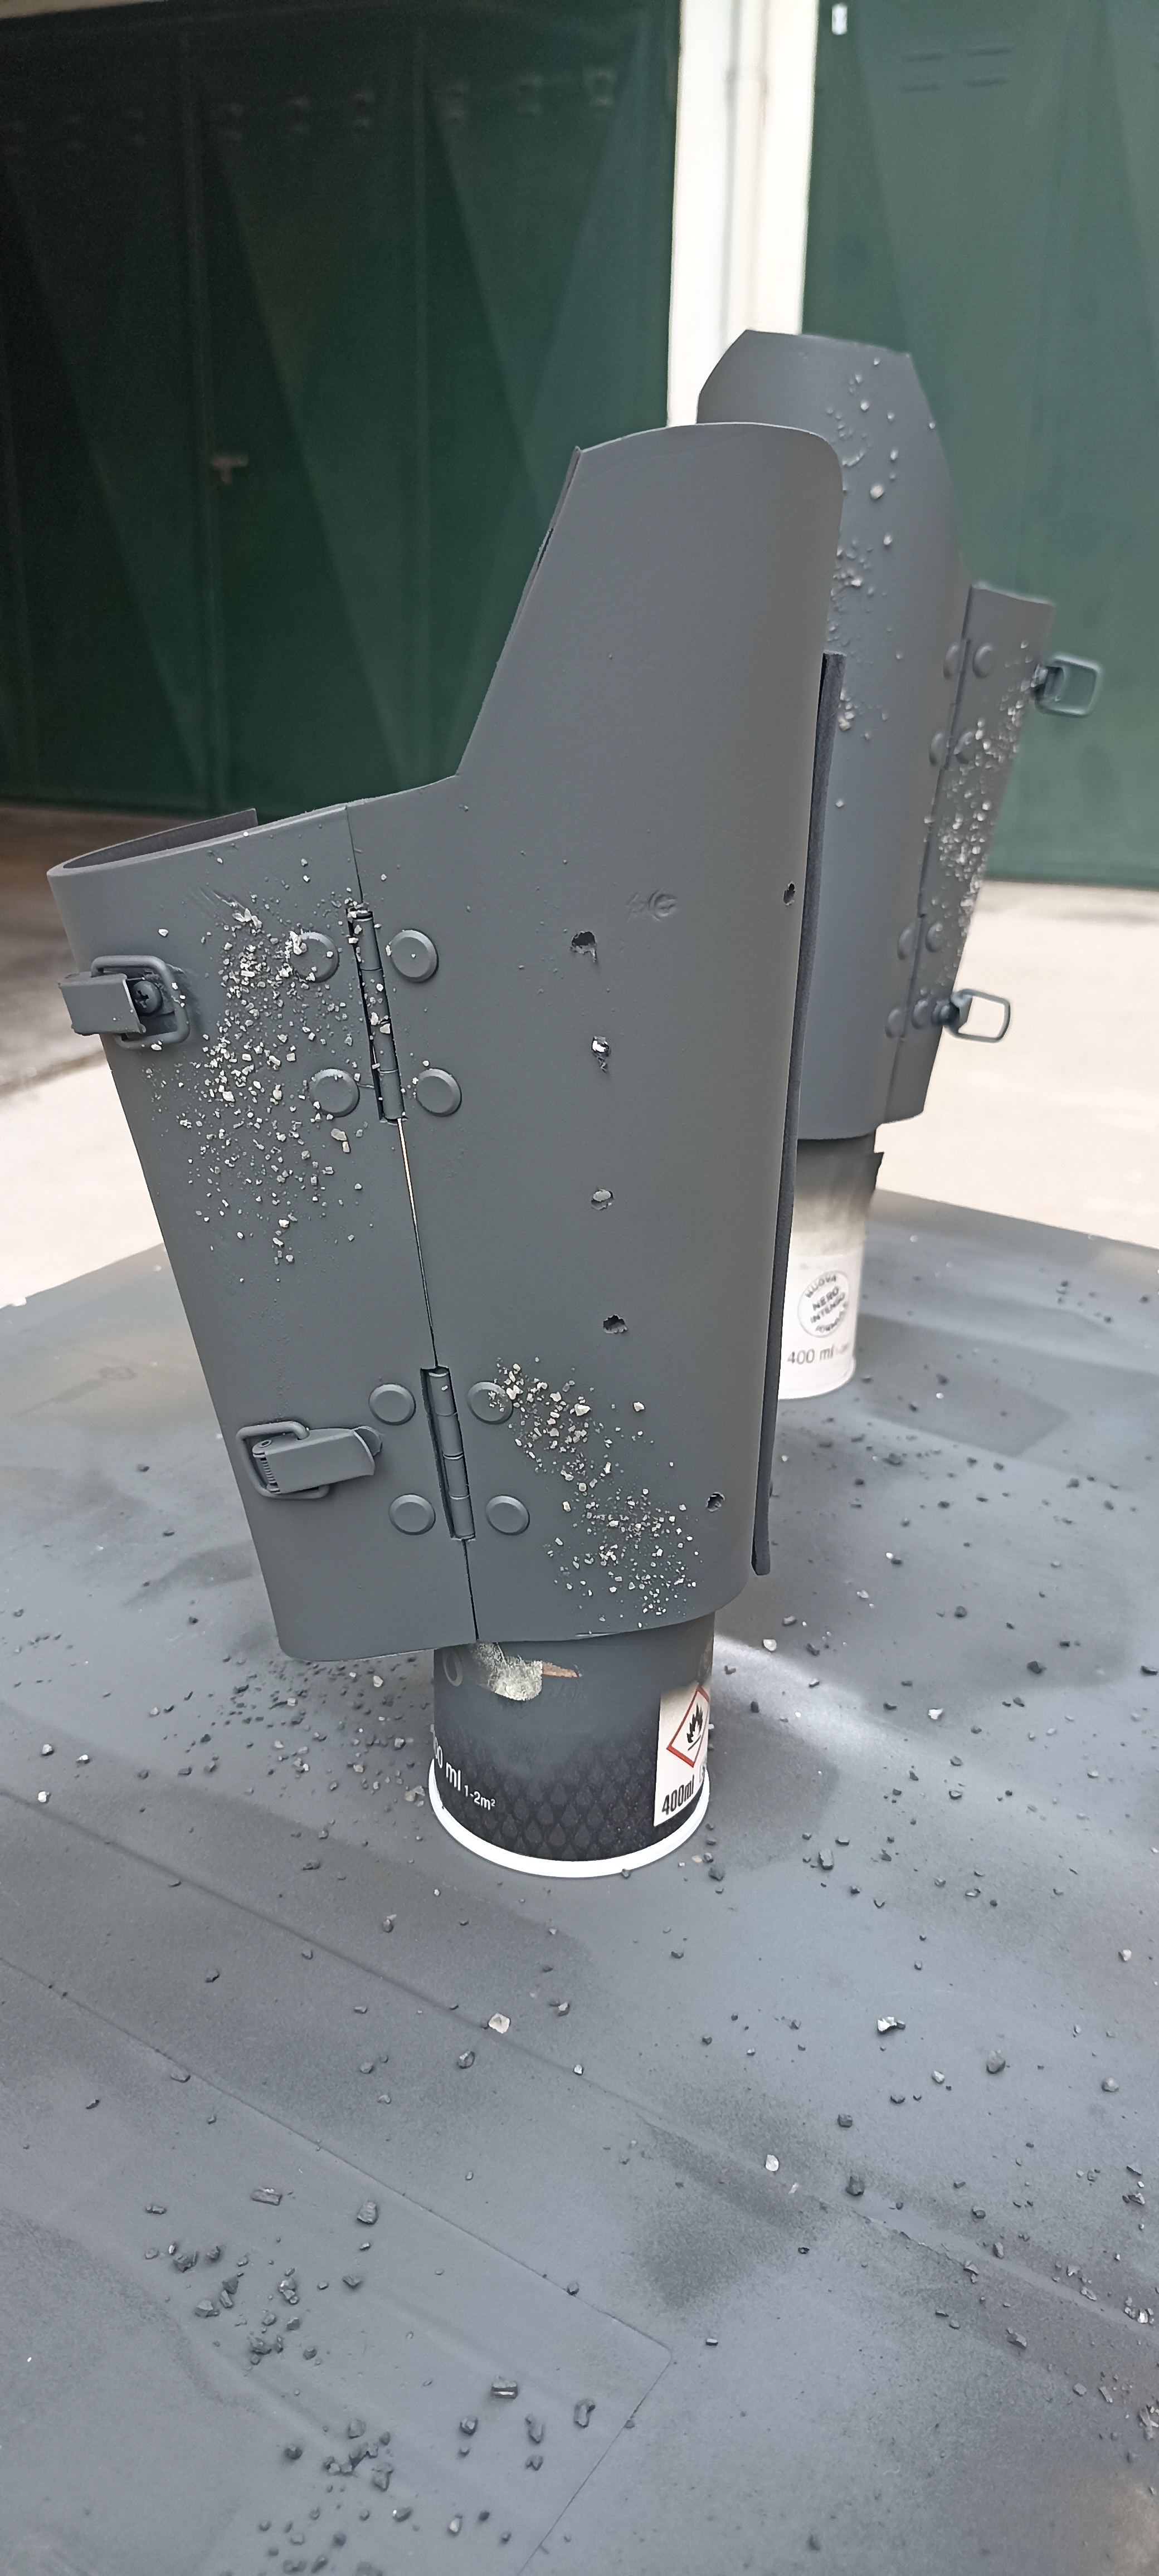 | Then silver and subsequently after some masks with toothpaste I made the first real base of the three colours, RAL 446C Grey, using the salt technique. |
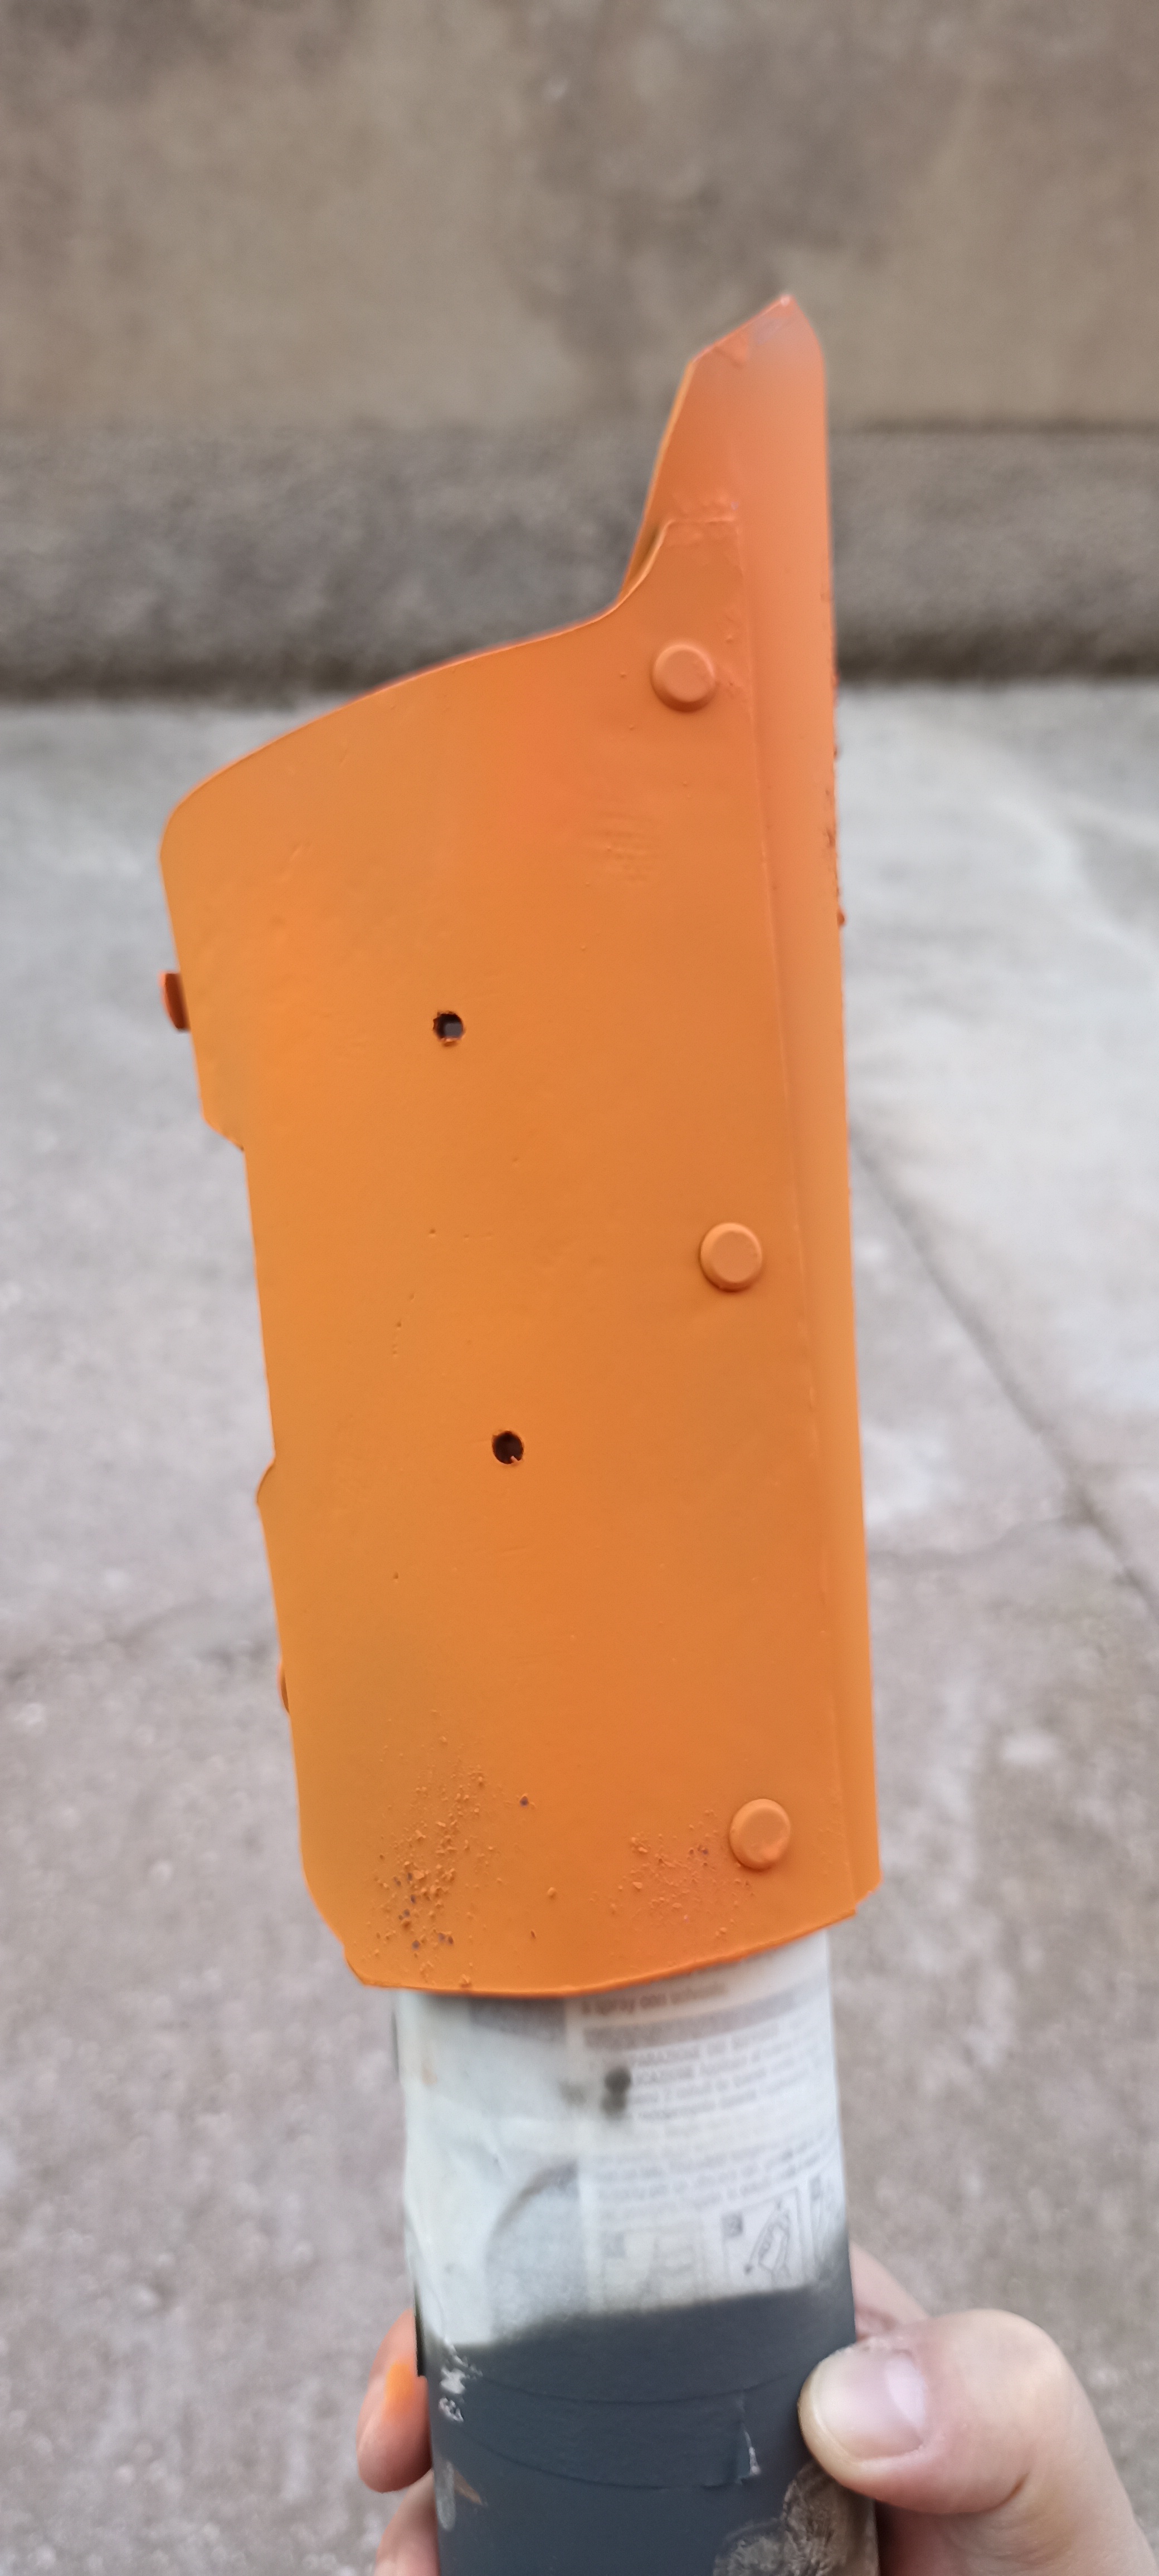
 | Base coat with RAL 158C Orange and salt after further masking with toothpaste |
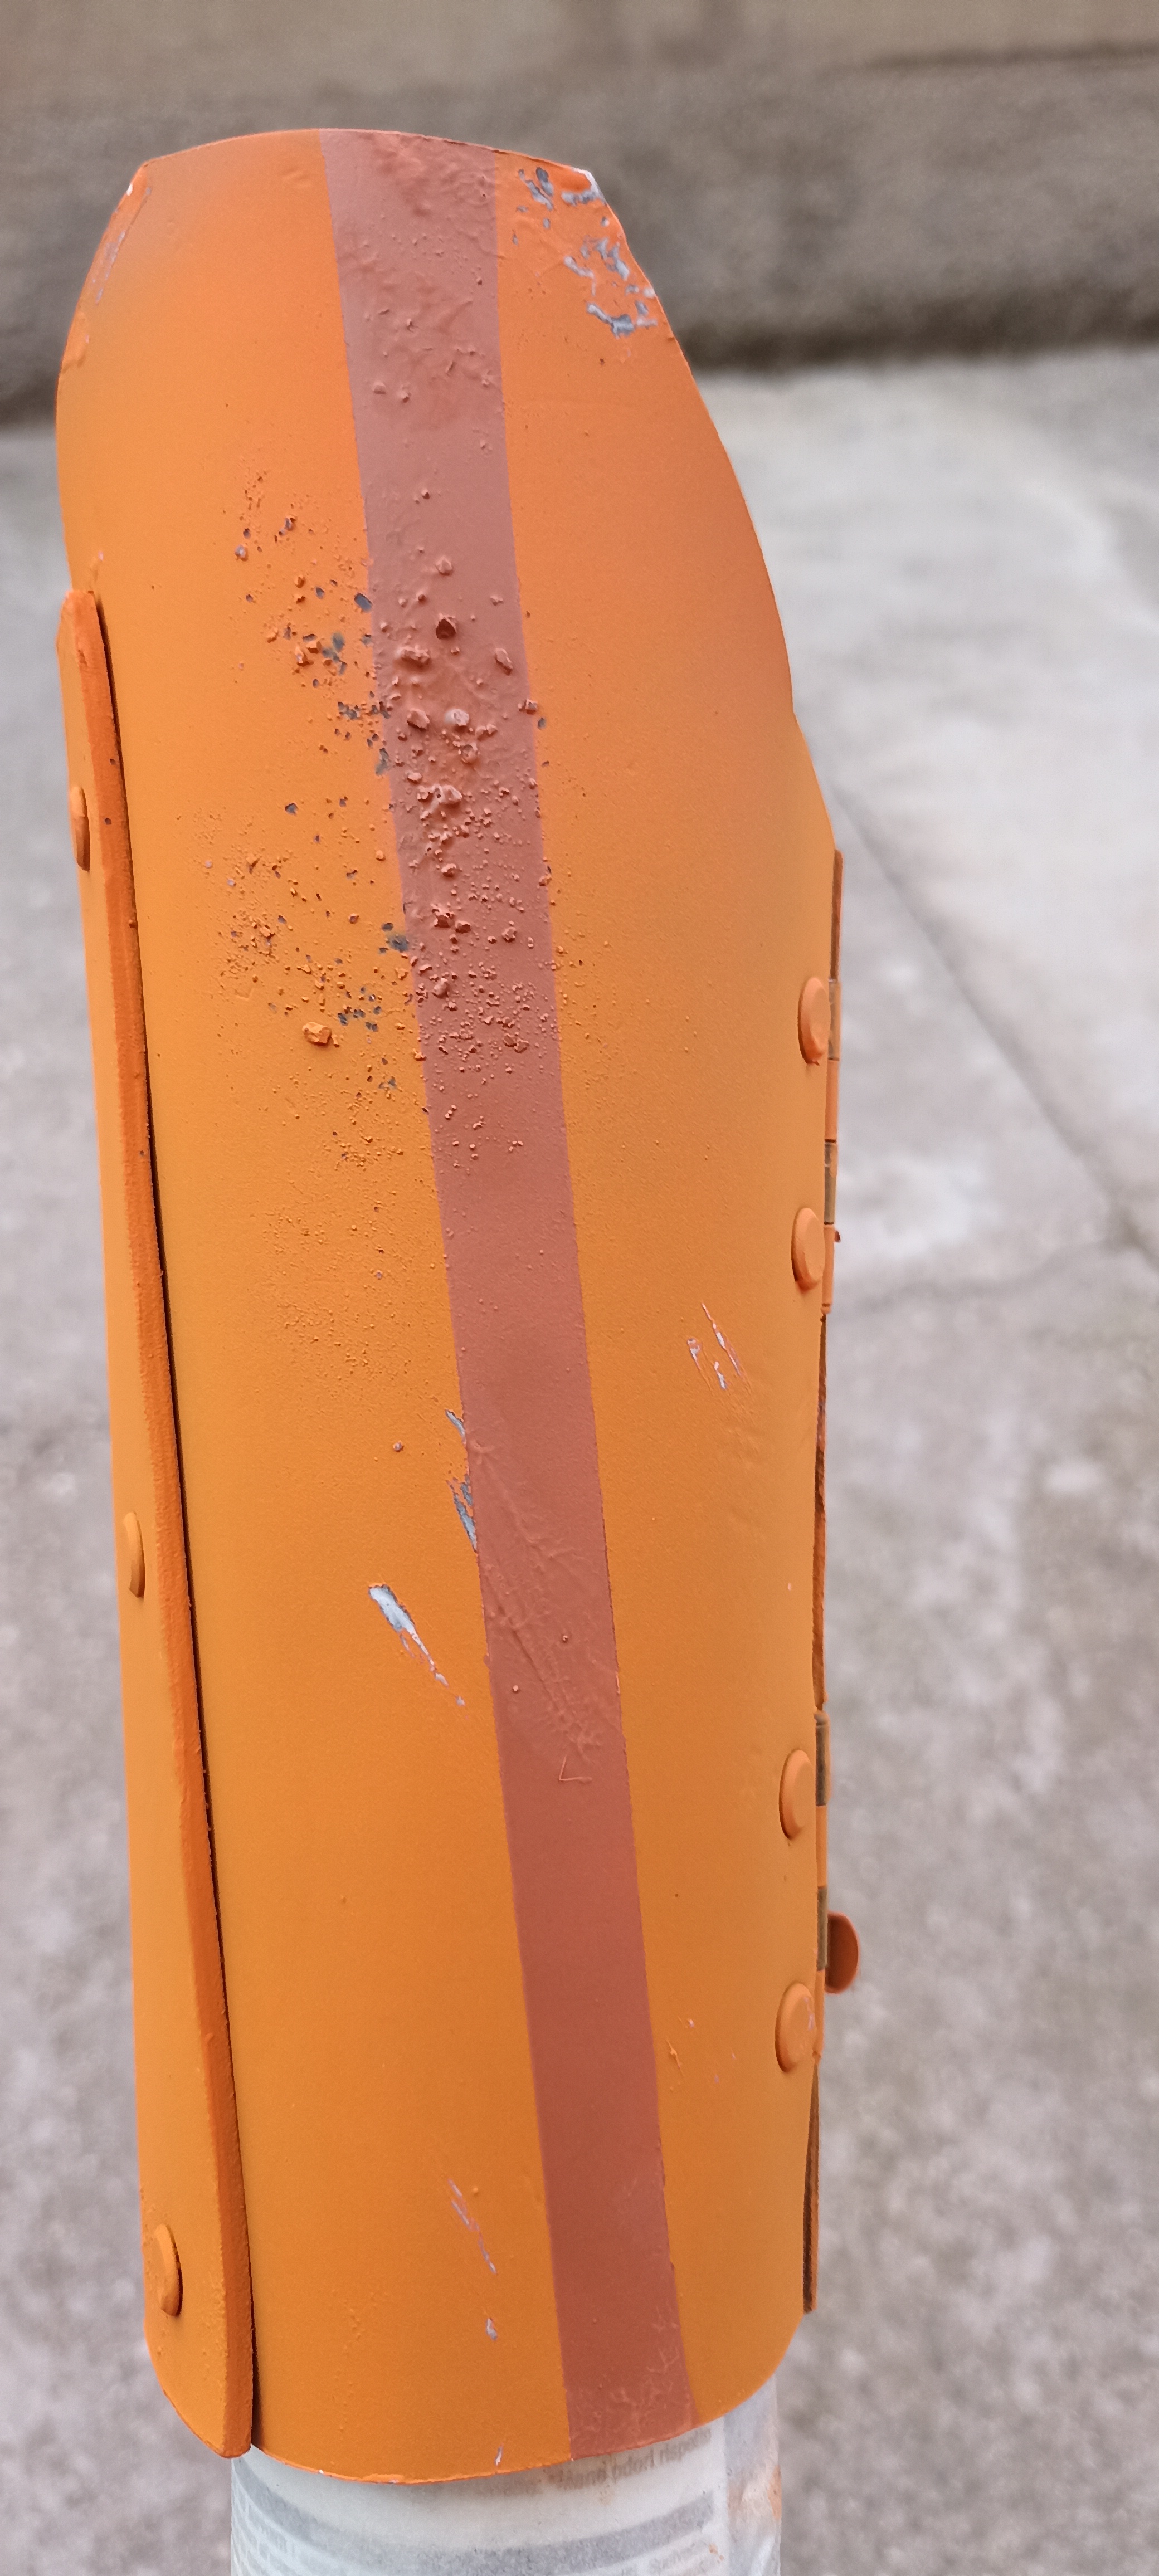 | Details RAL 7516C Brown, in this case a clear brown line |
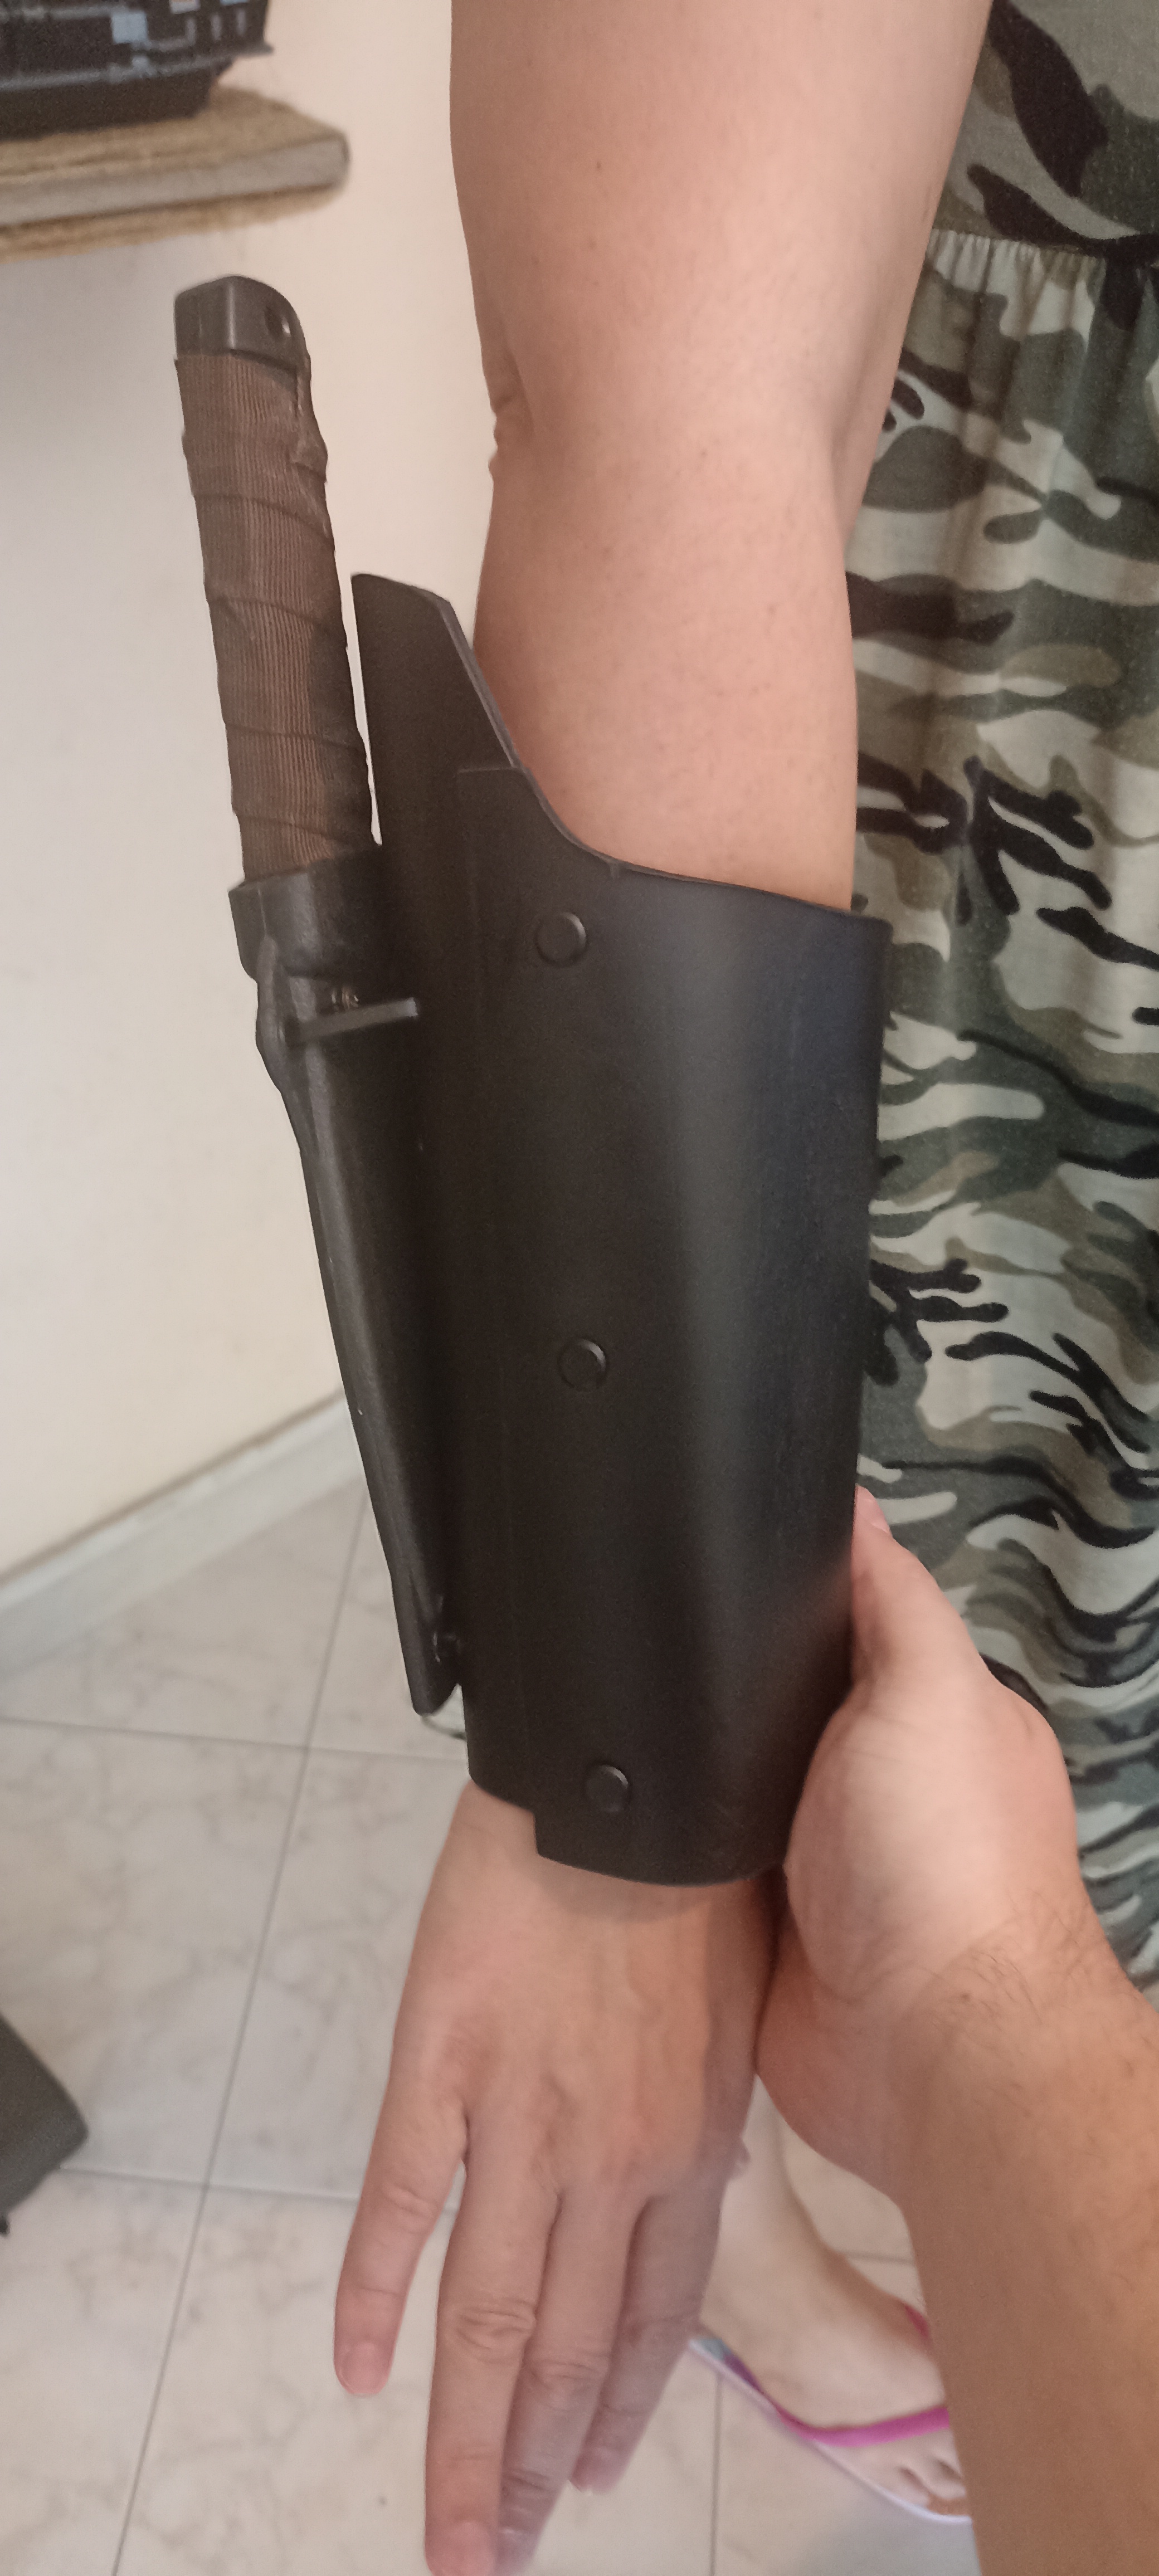
Here you can see some steps for creation of Nadia's Forearm guards accessories
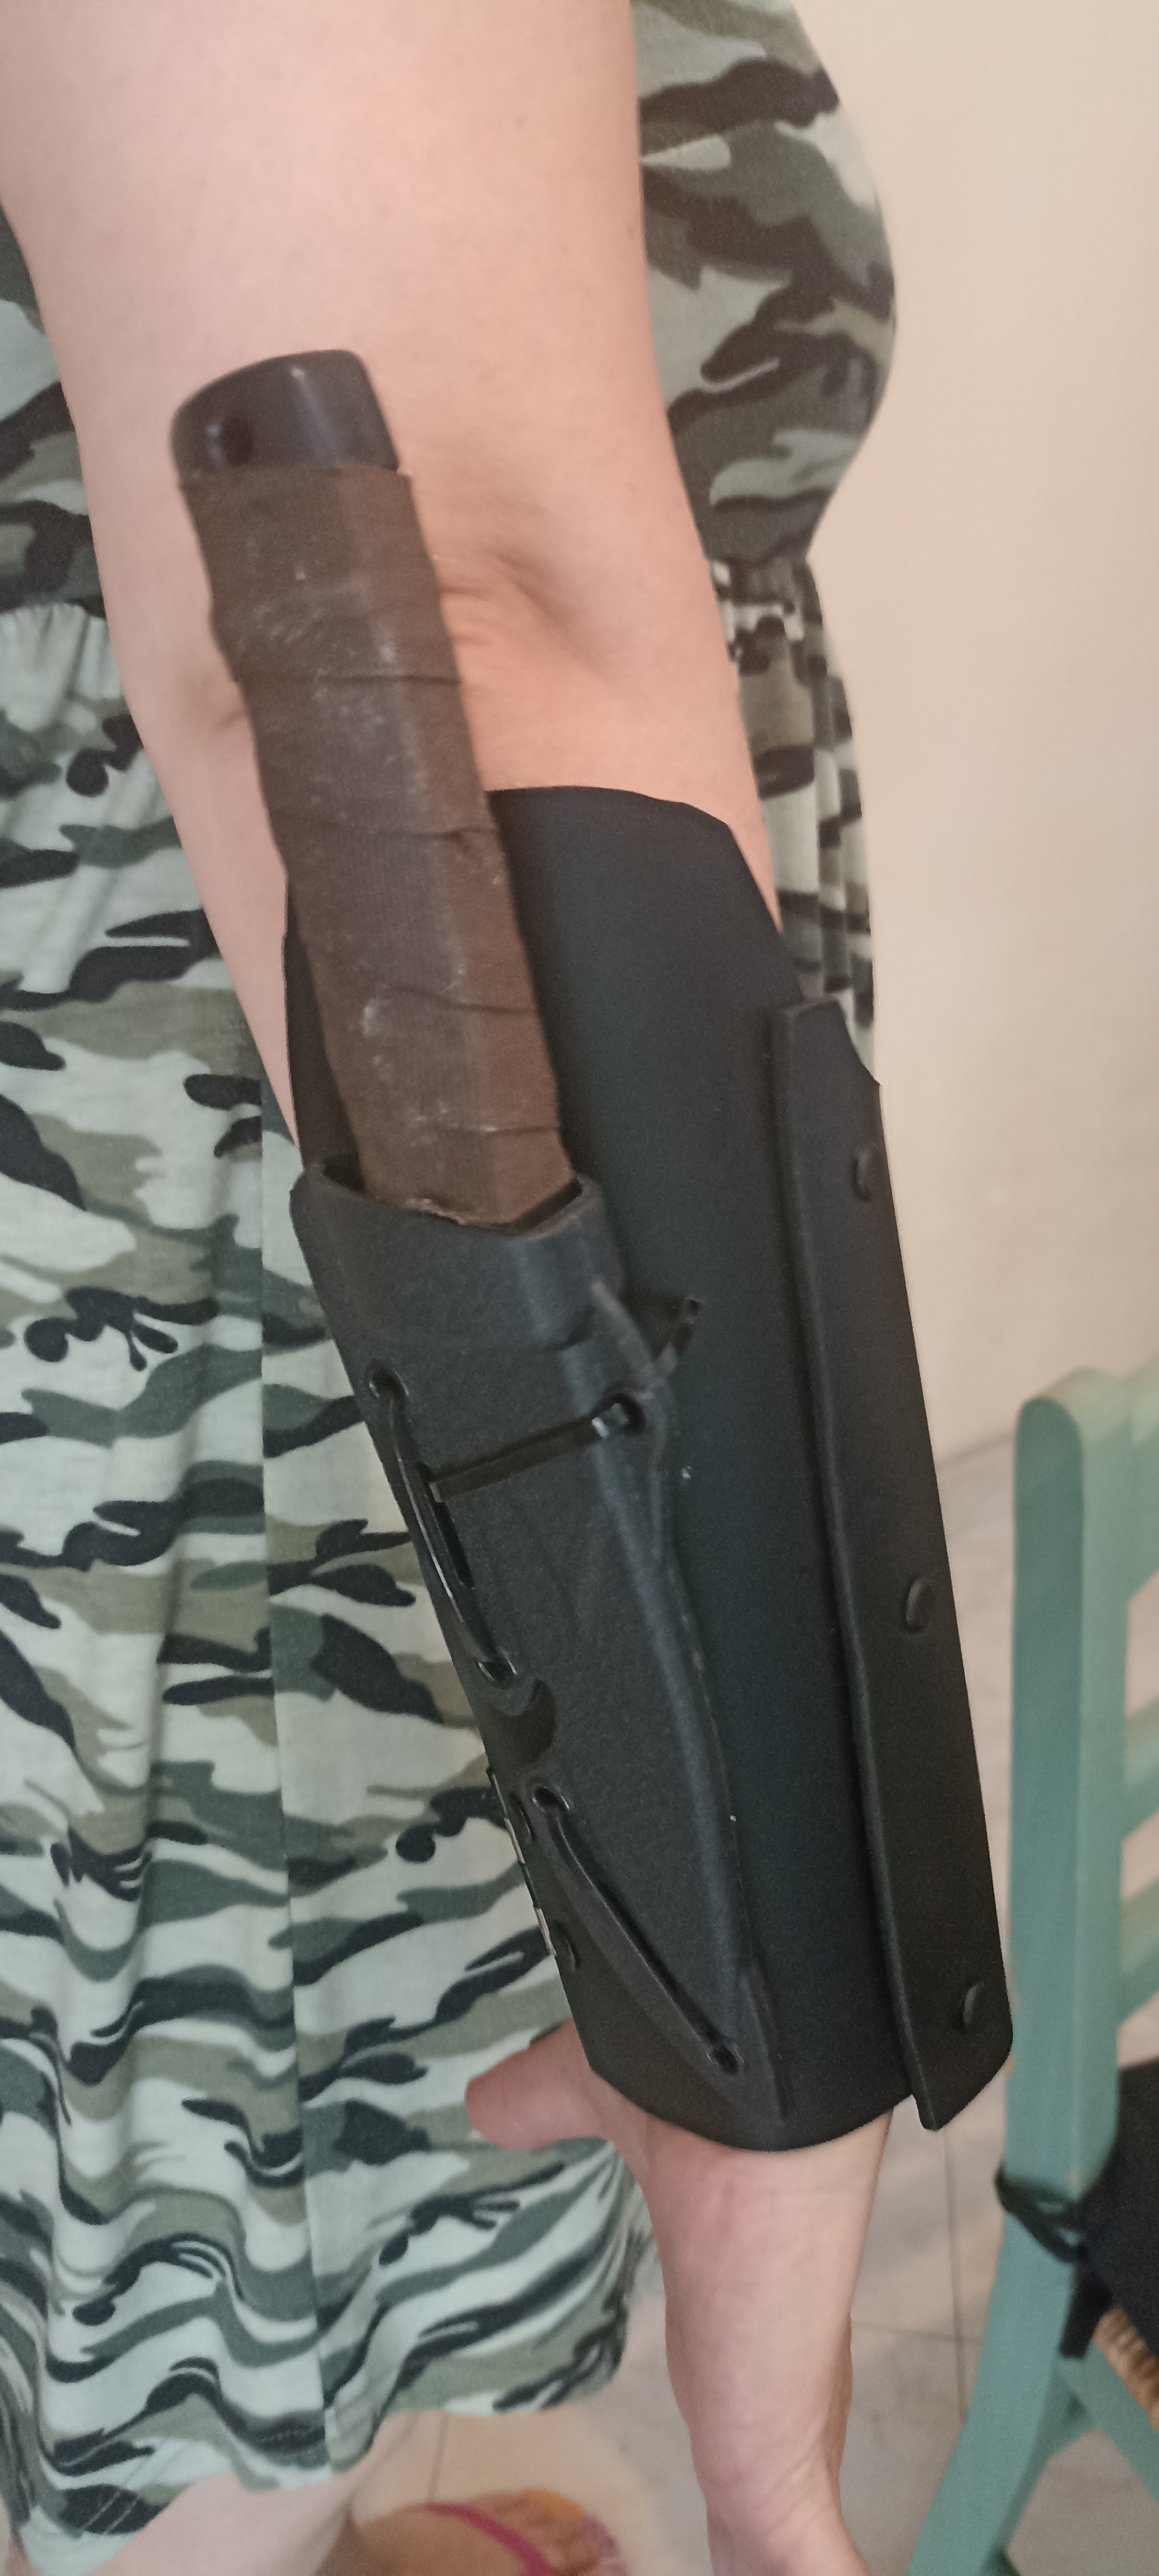
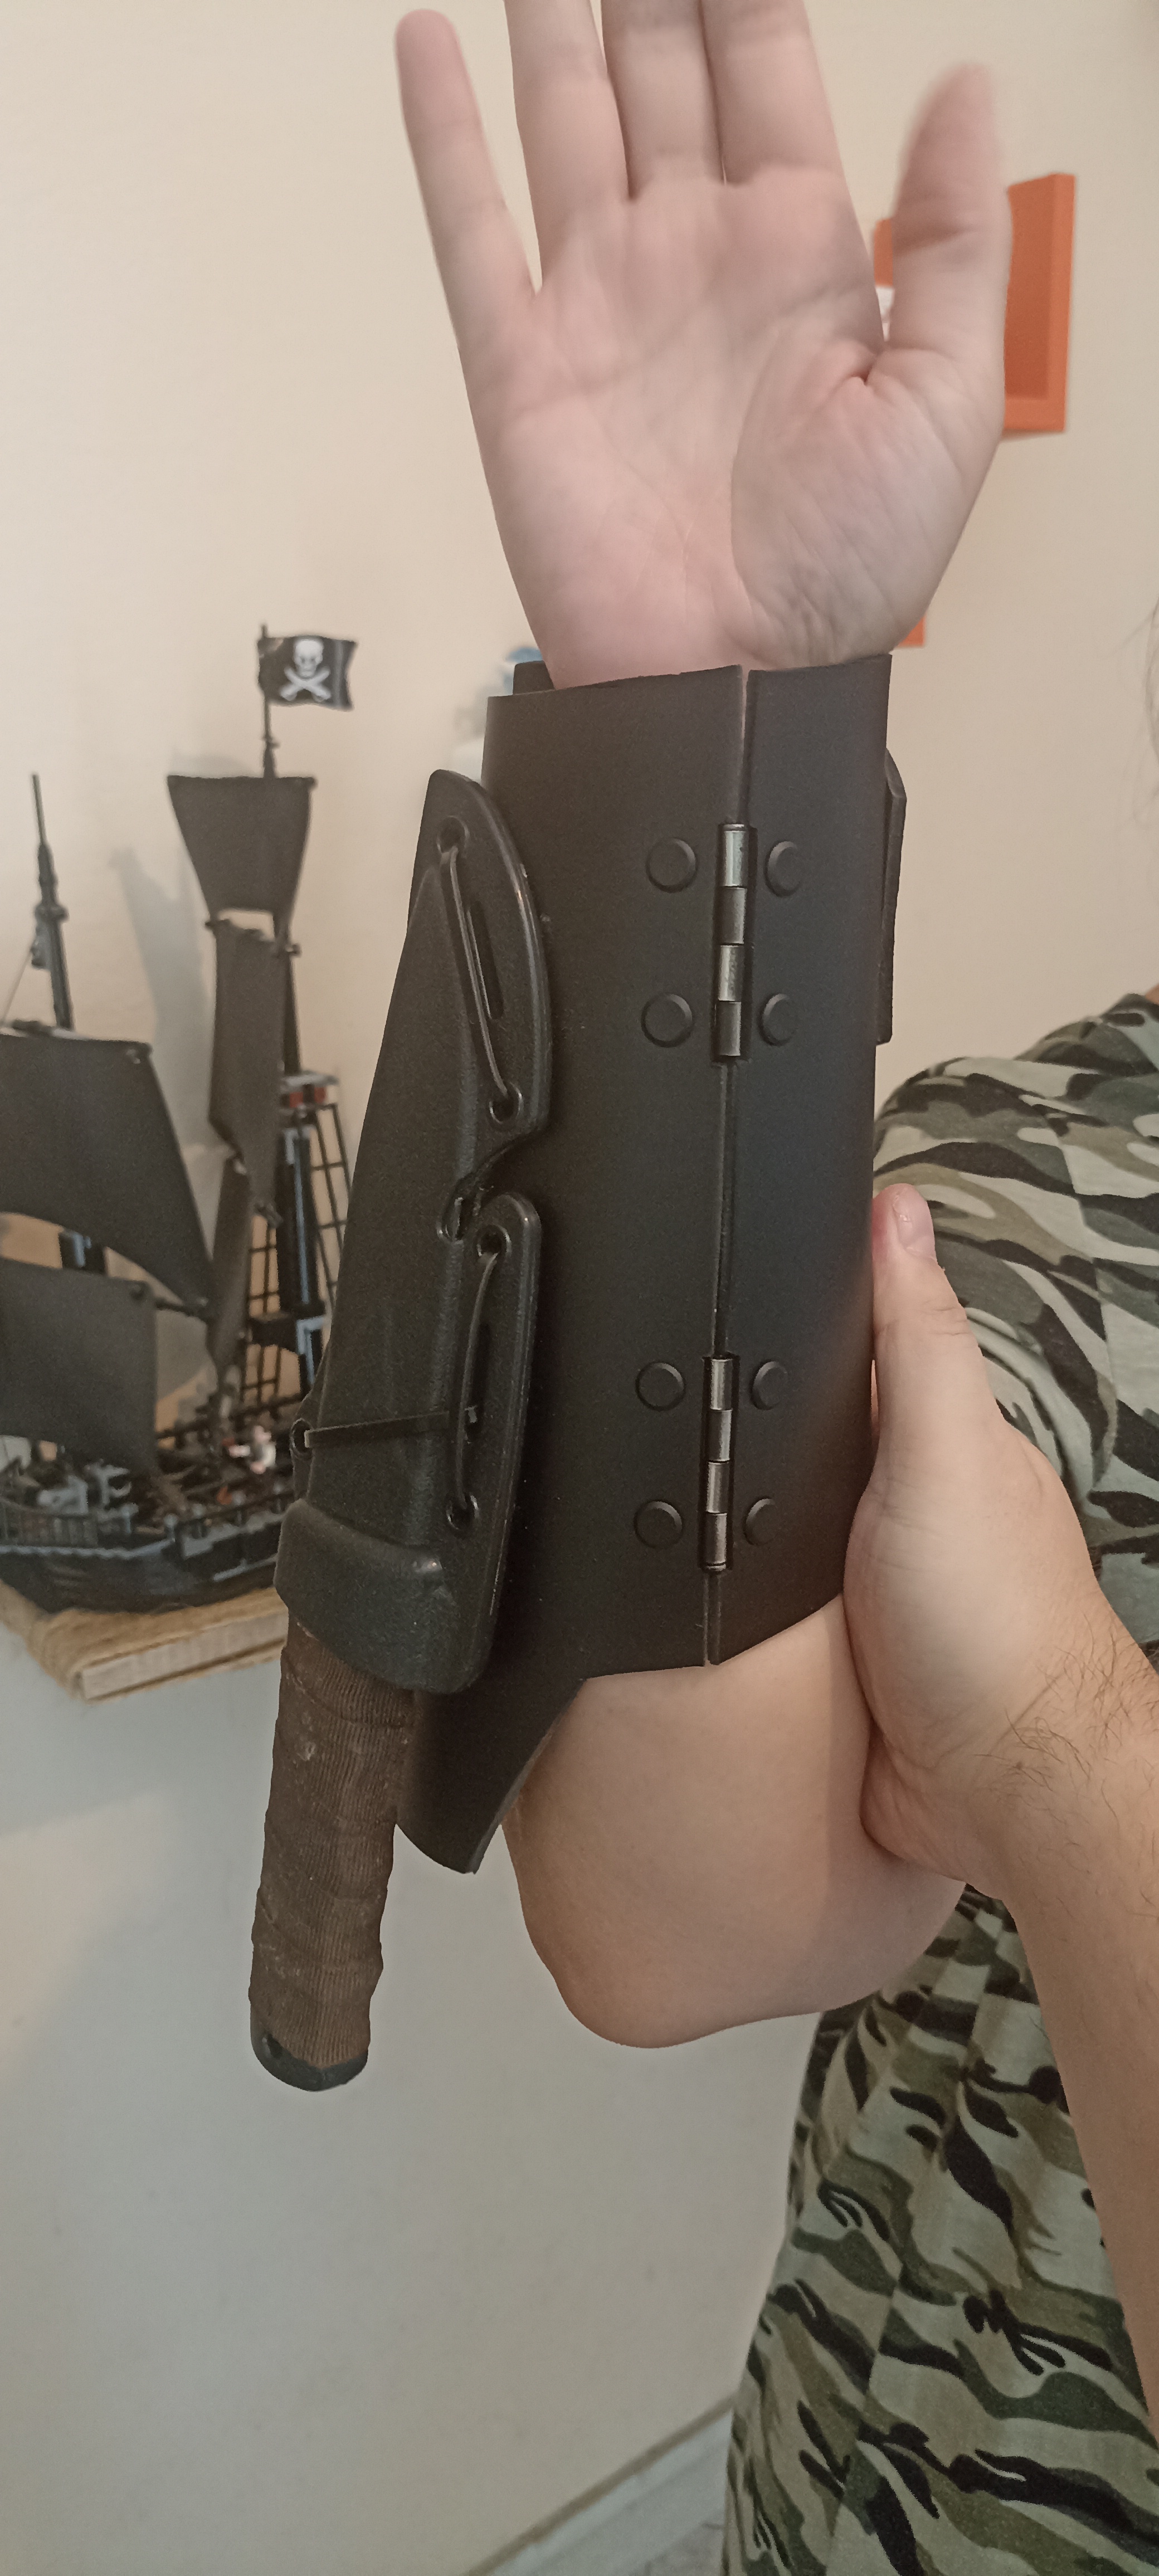 | on the right arm a simple knife. |
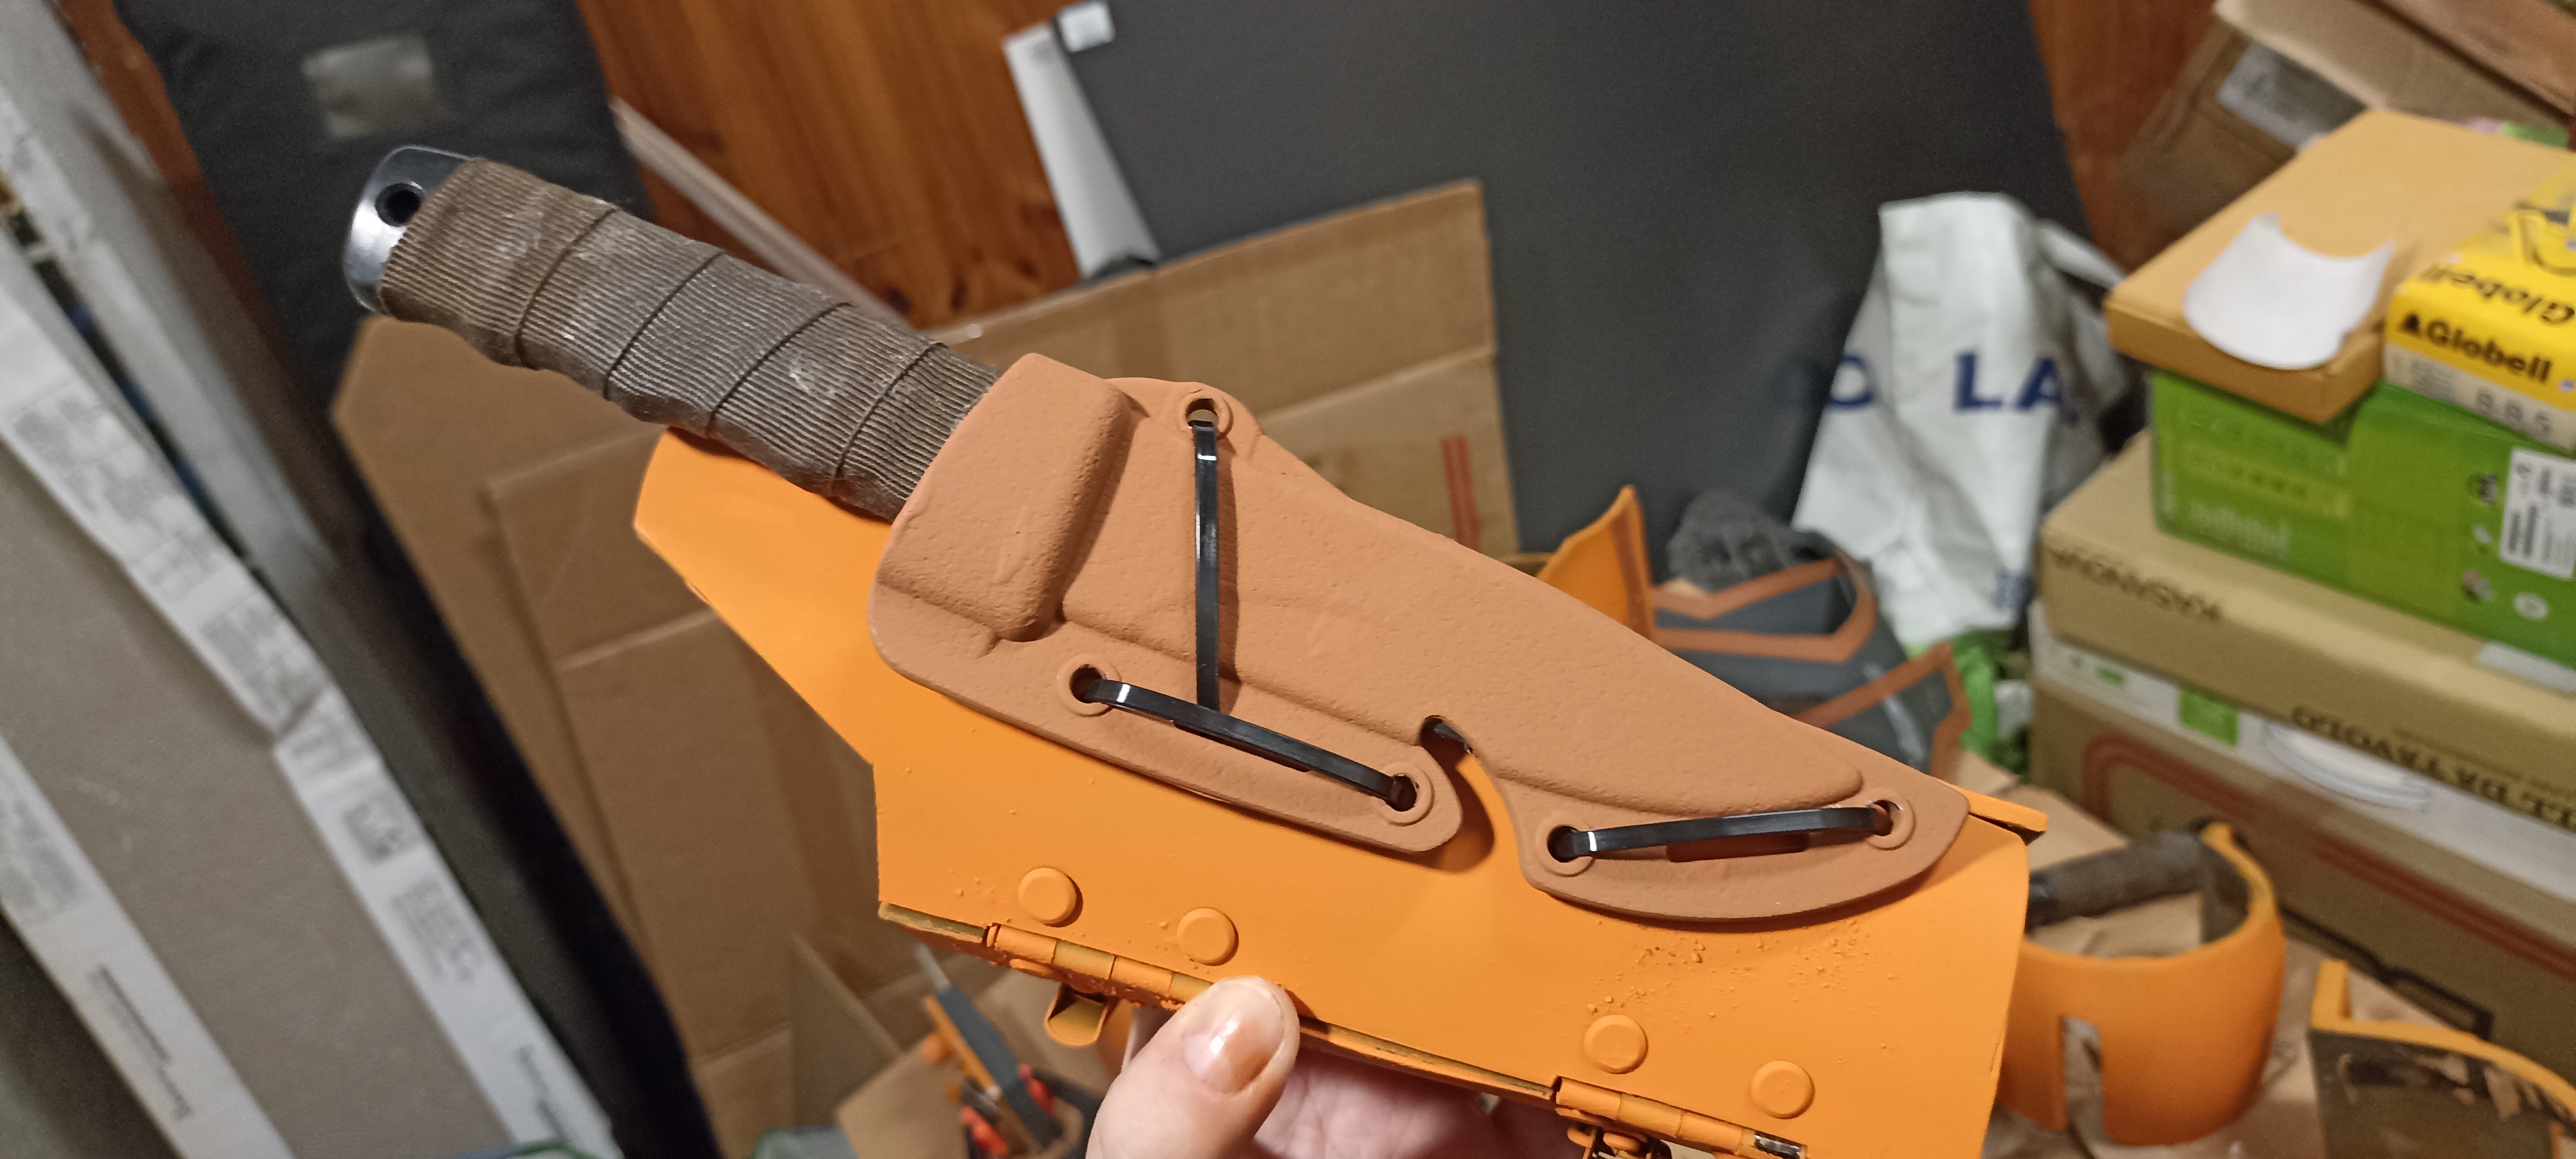
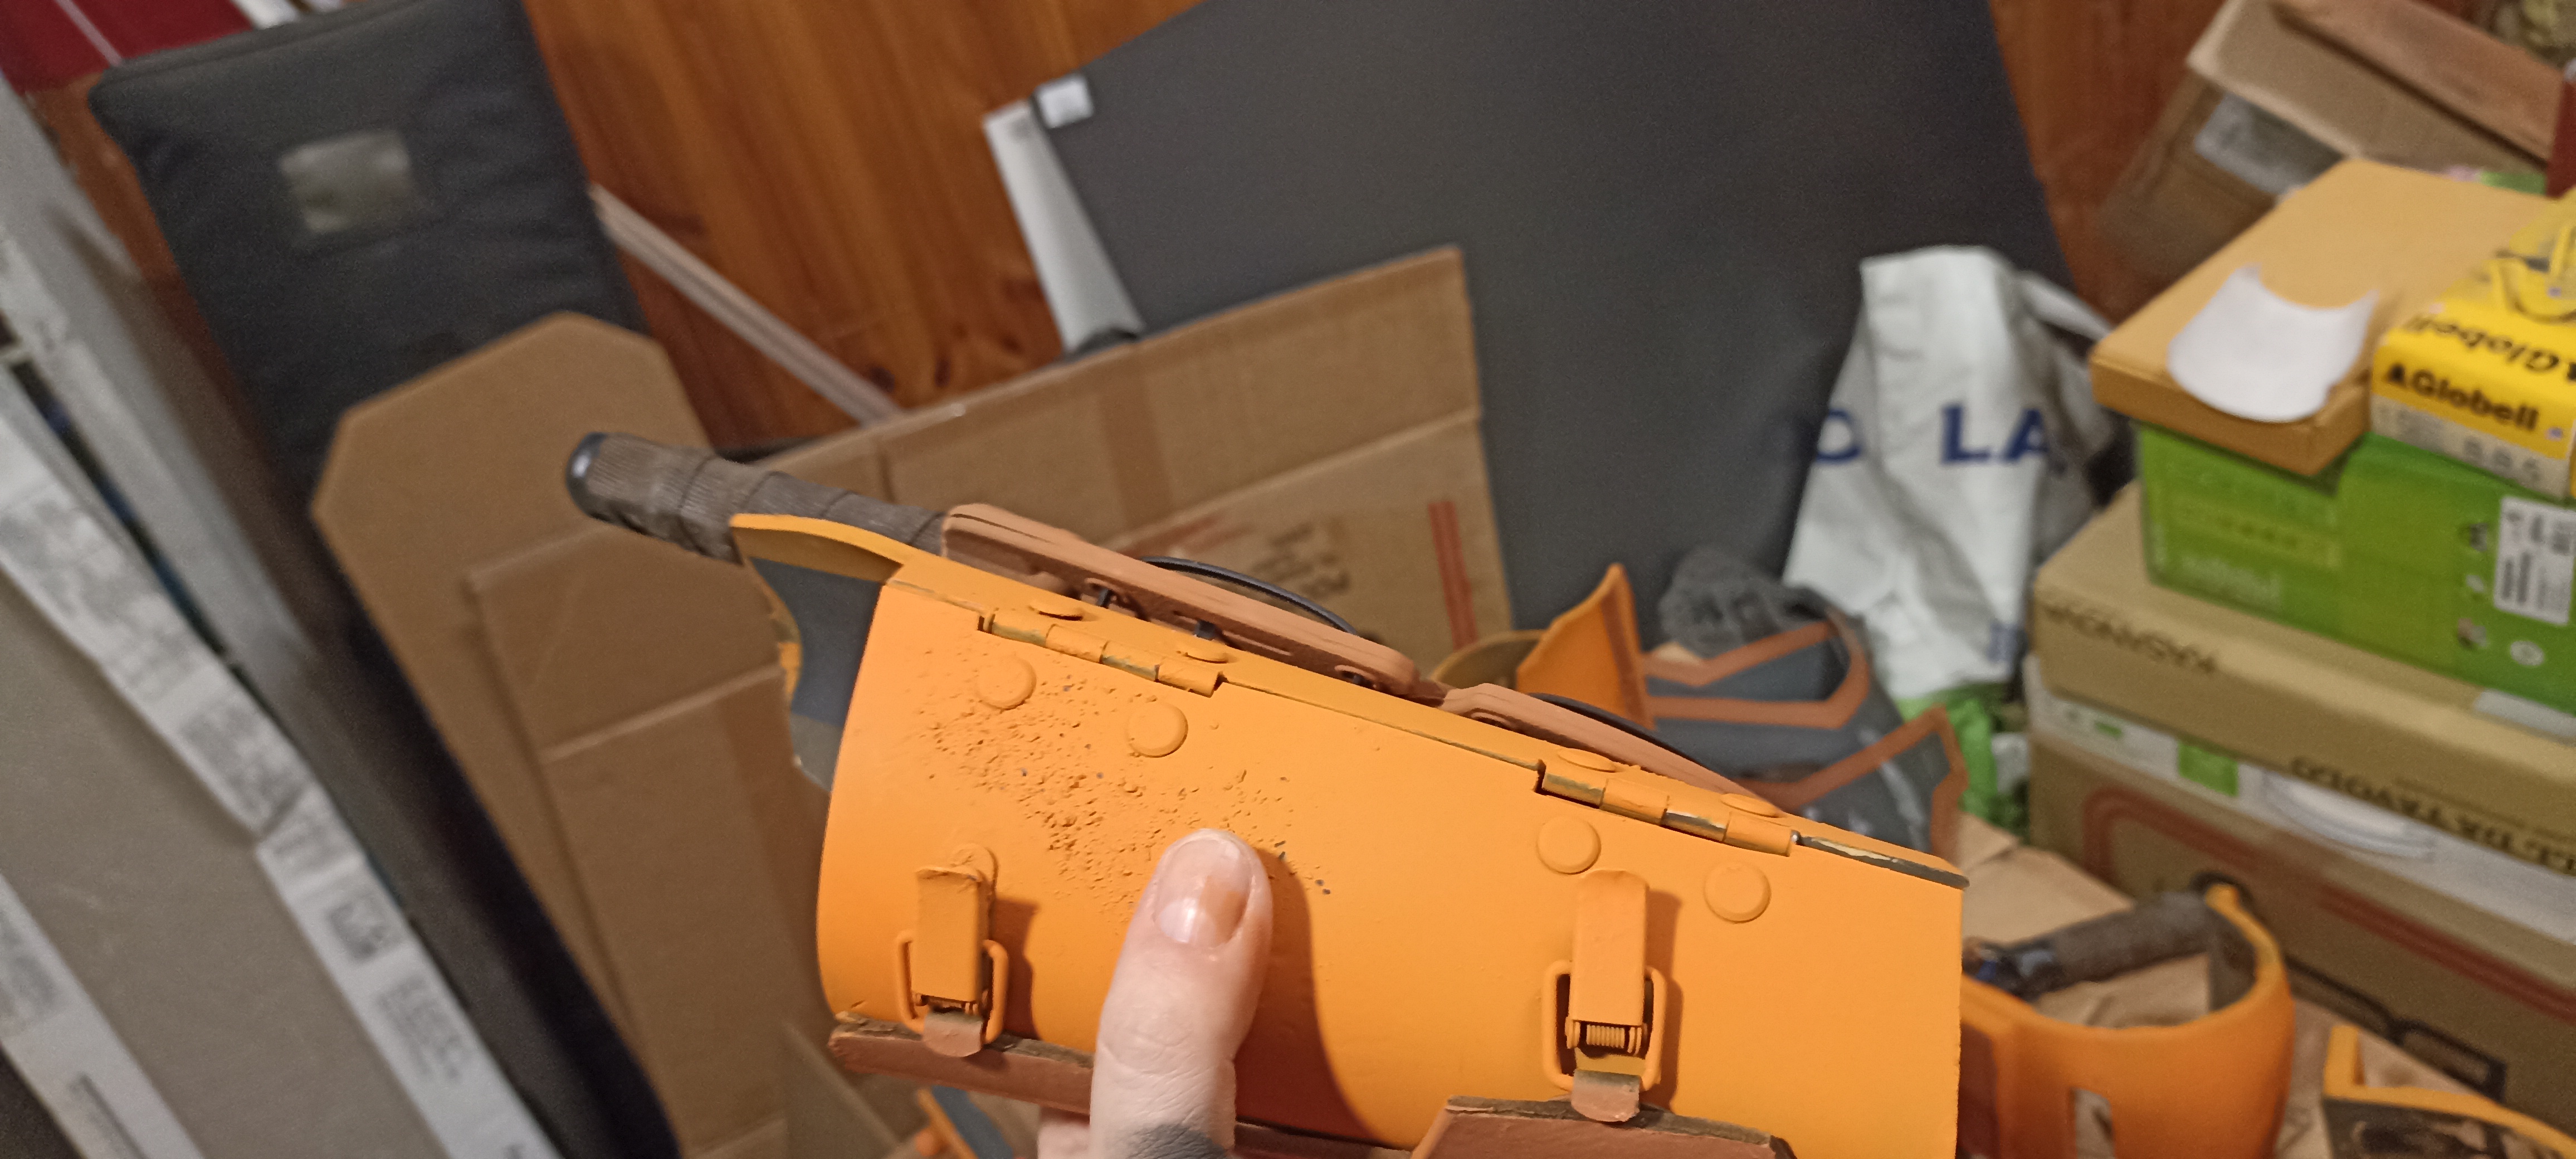 | Right gauntlet terminated. |

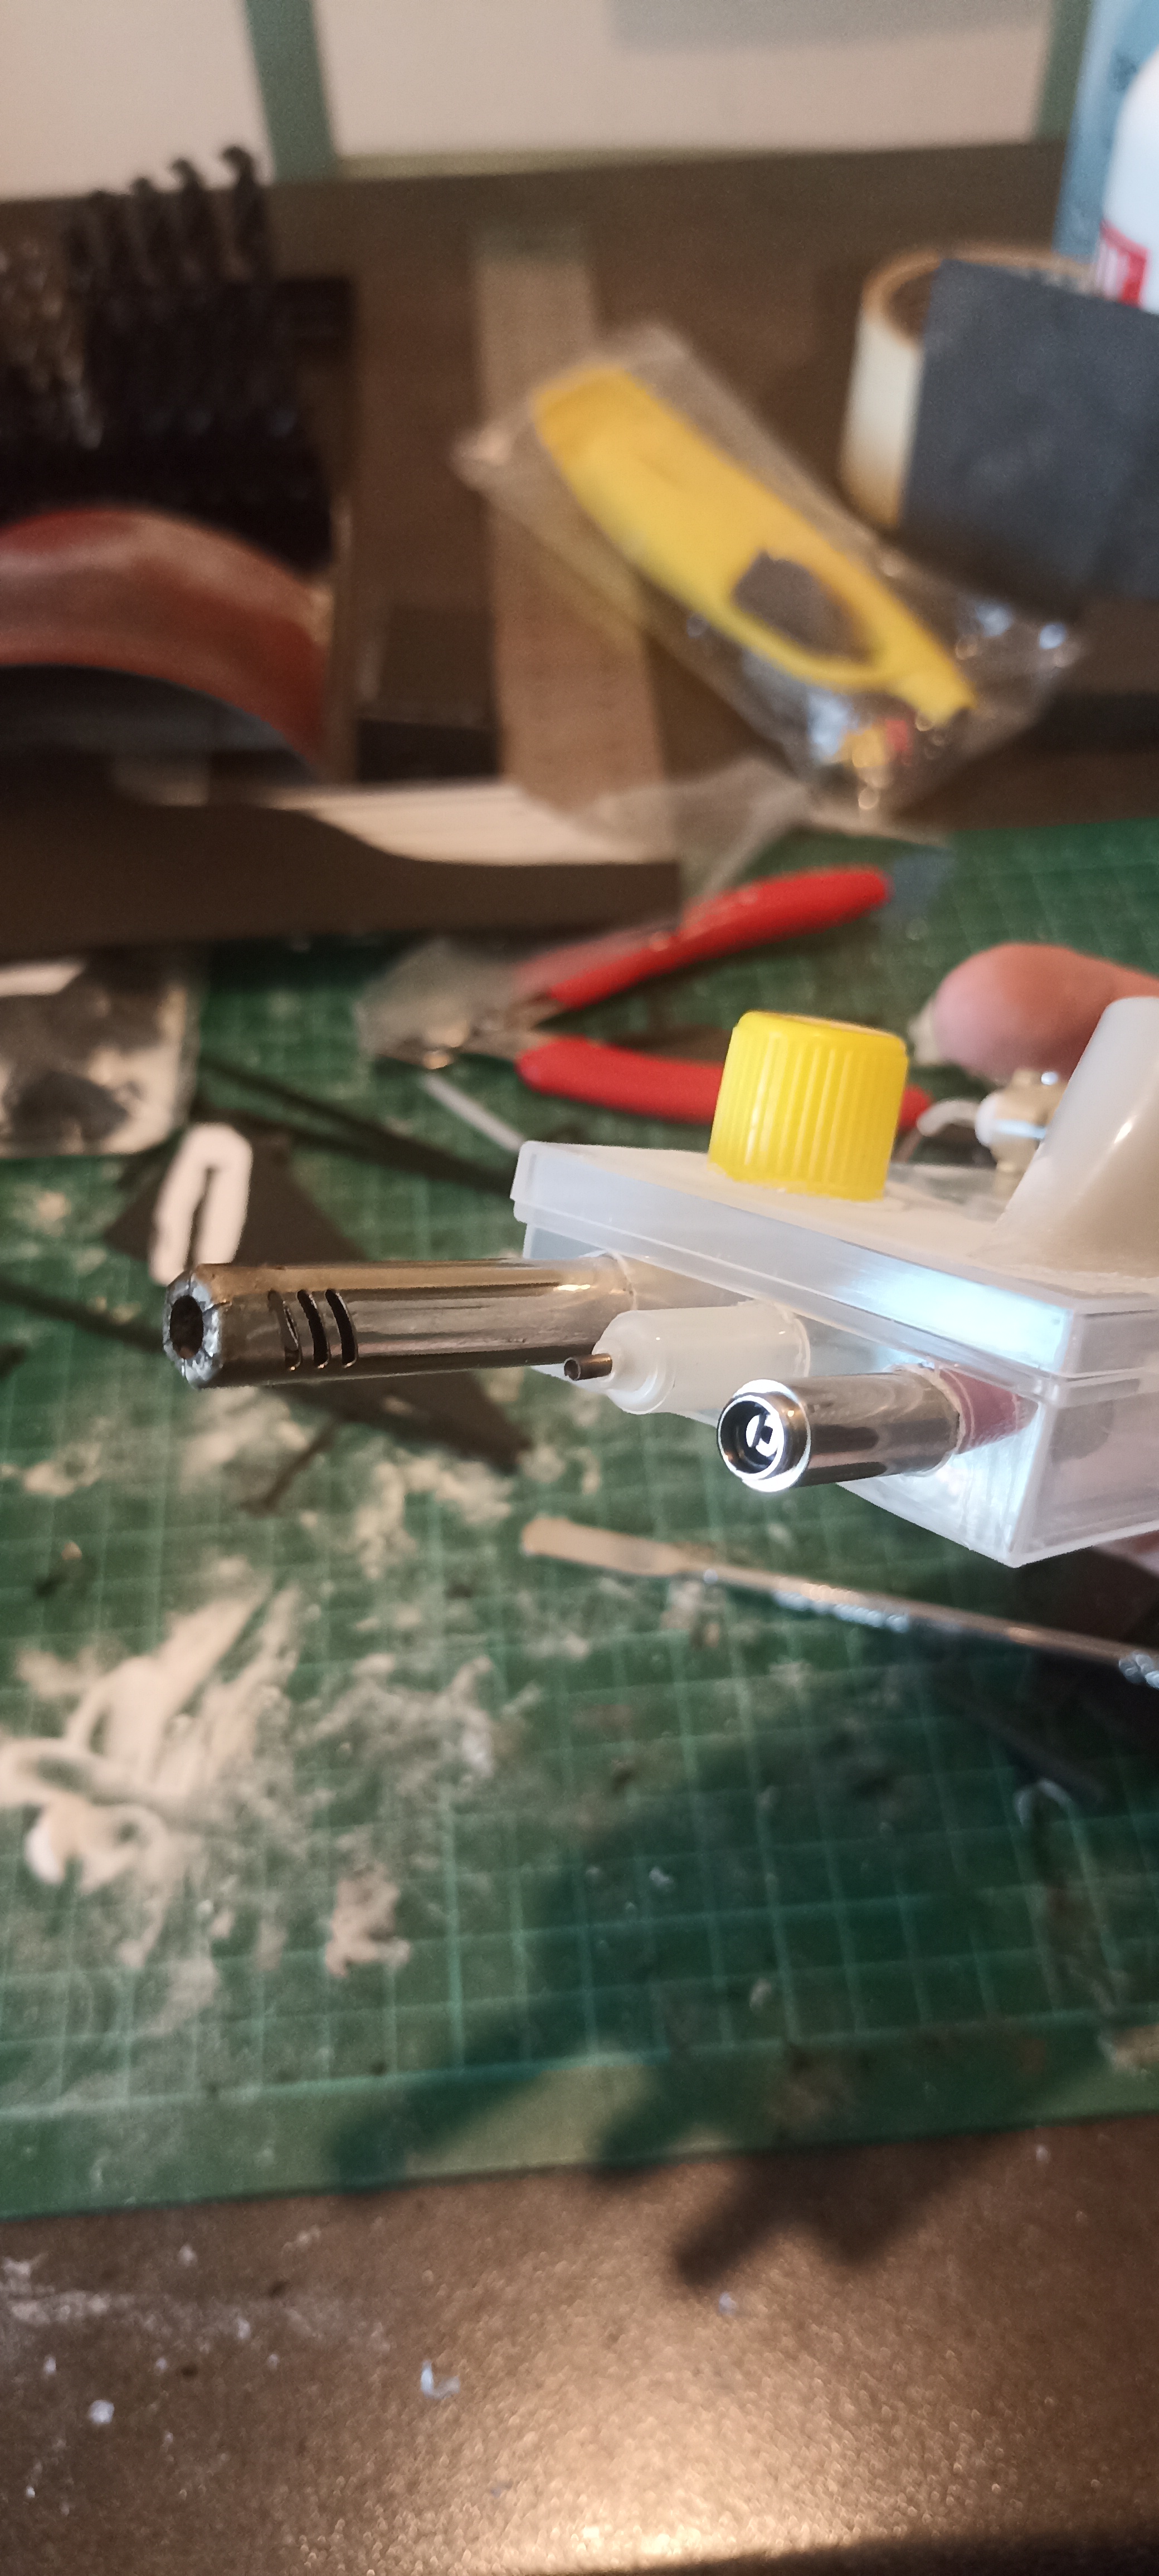
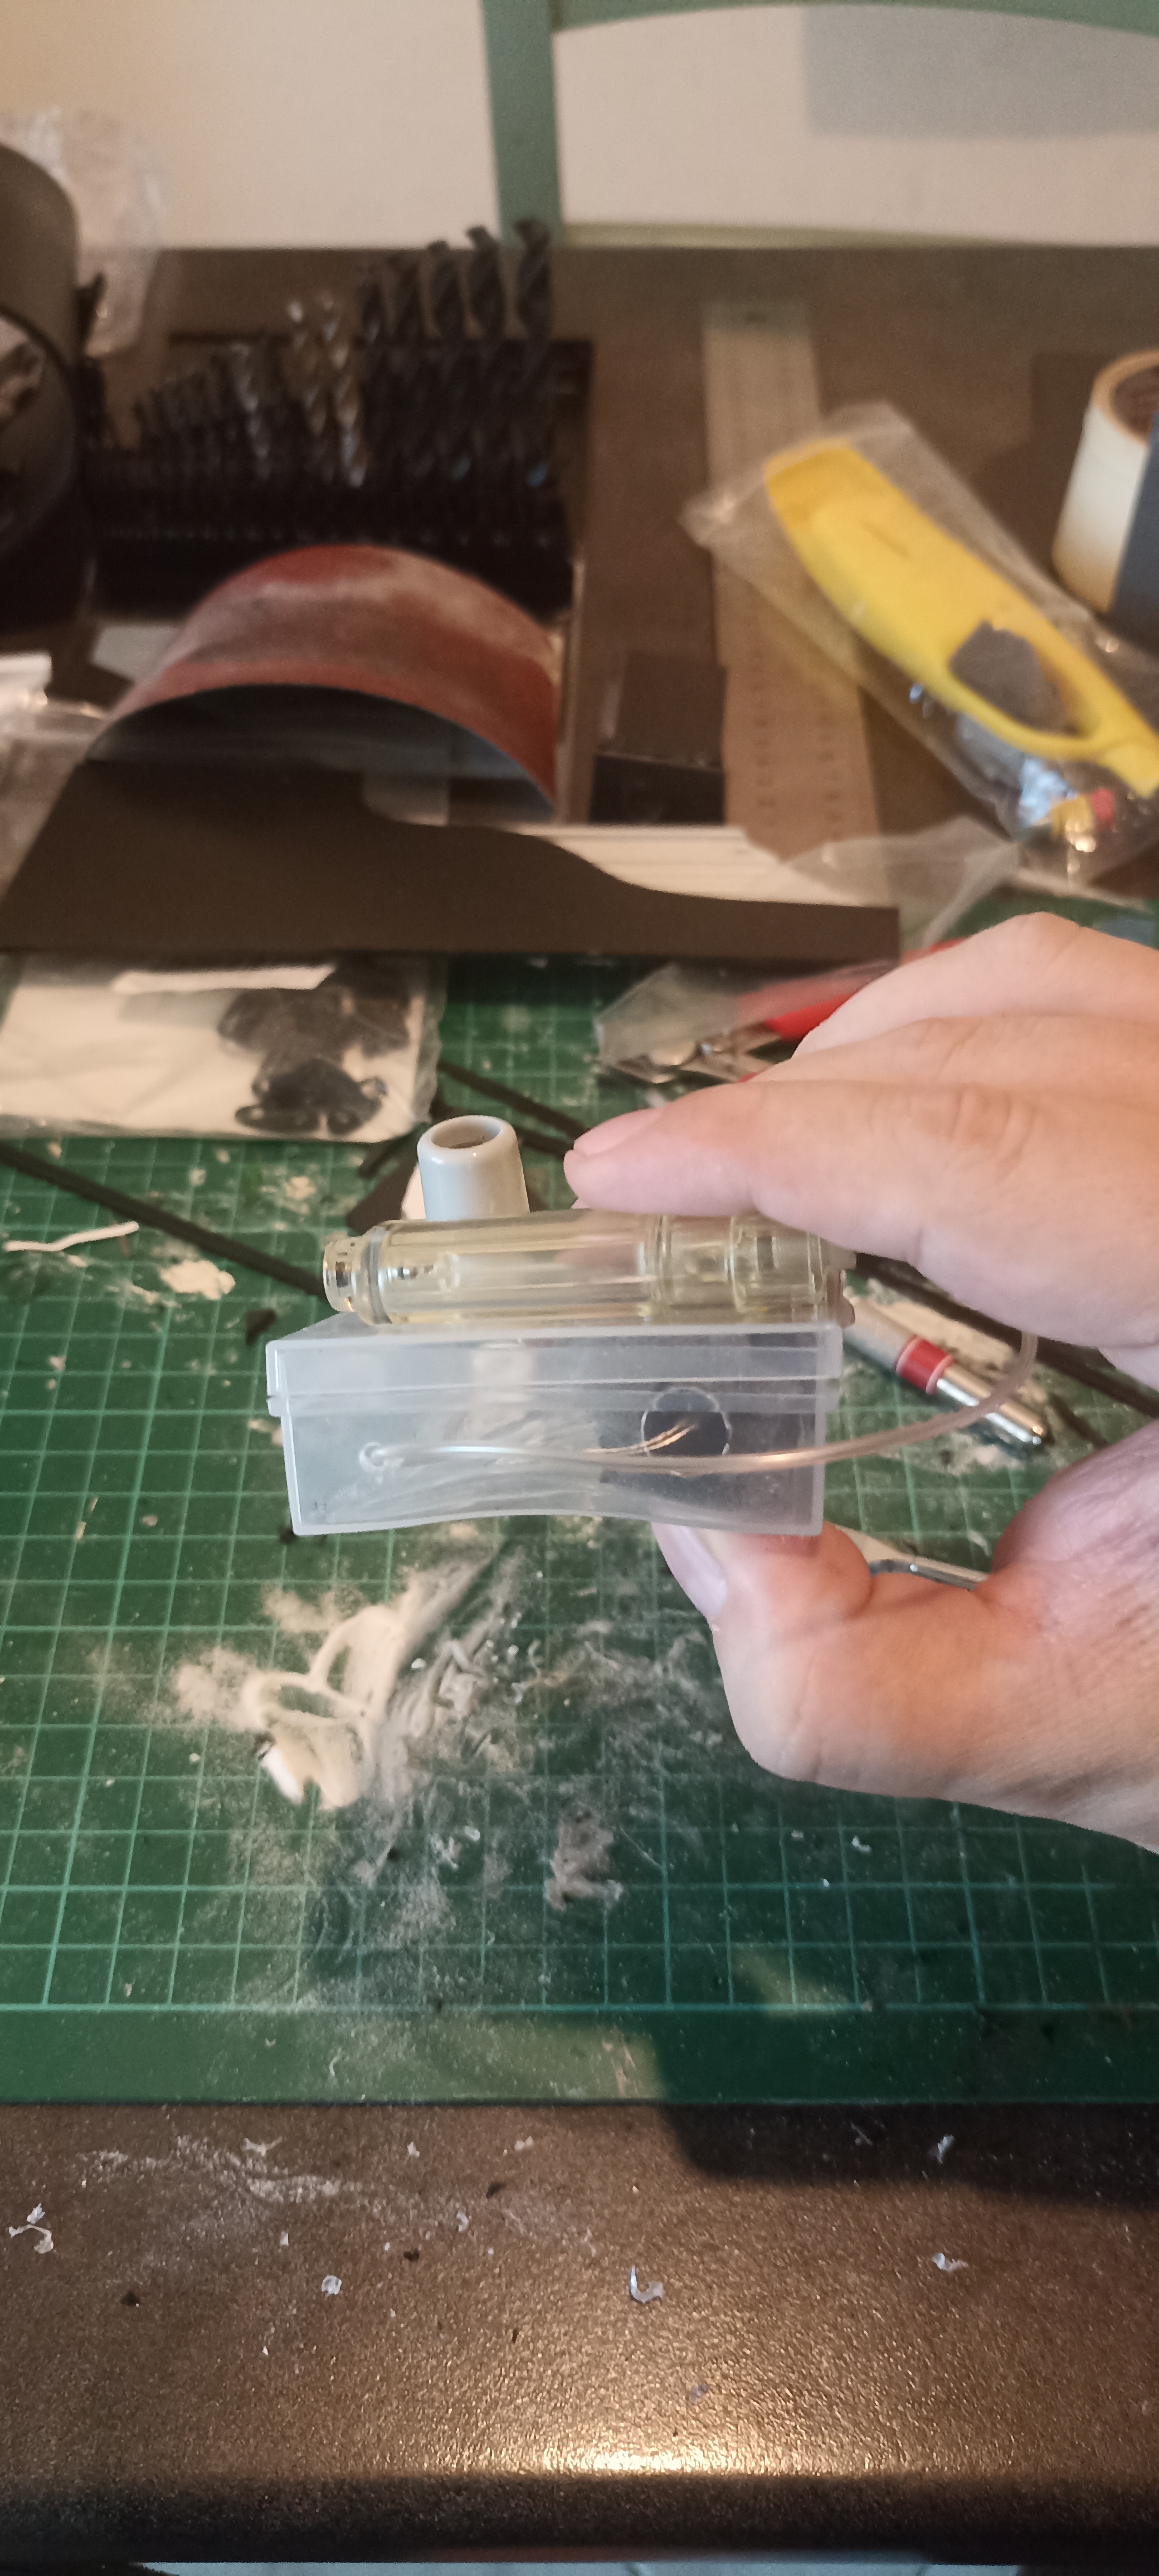 | on the left arm I started to create a custom multi-versatile device. |
 | some masks and basic colors. |
 | Last gluings |
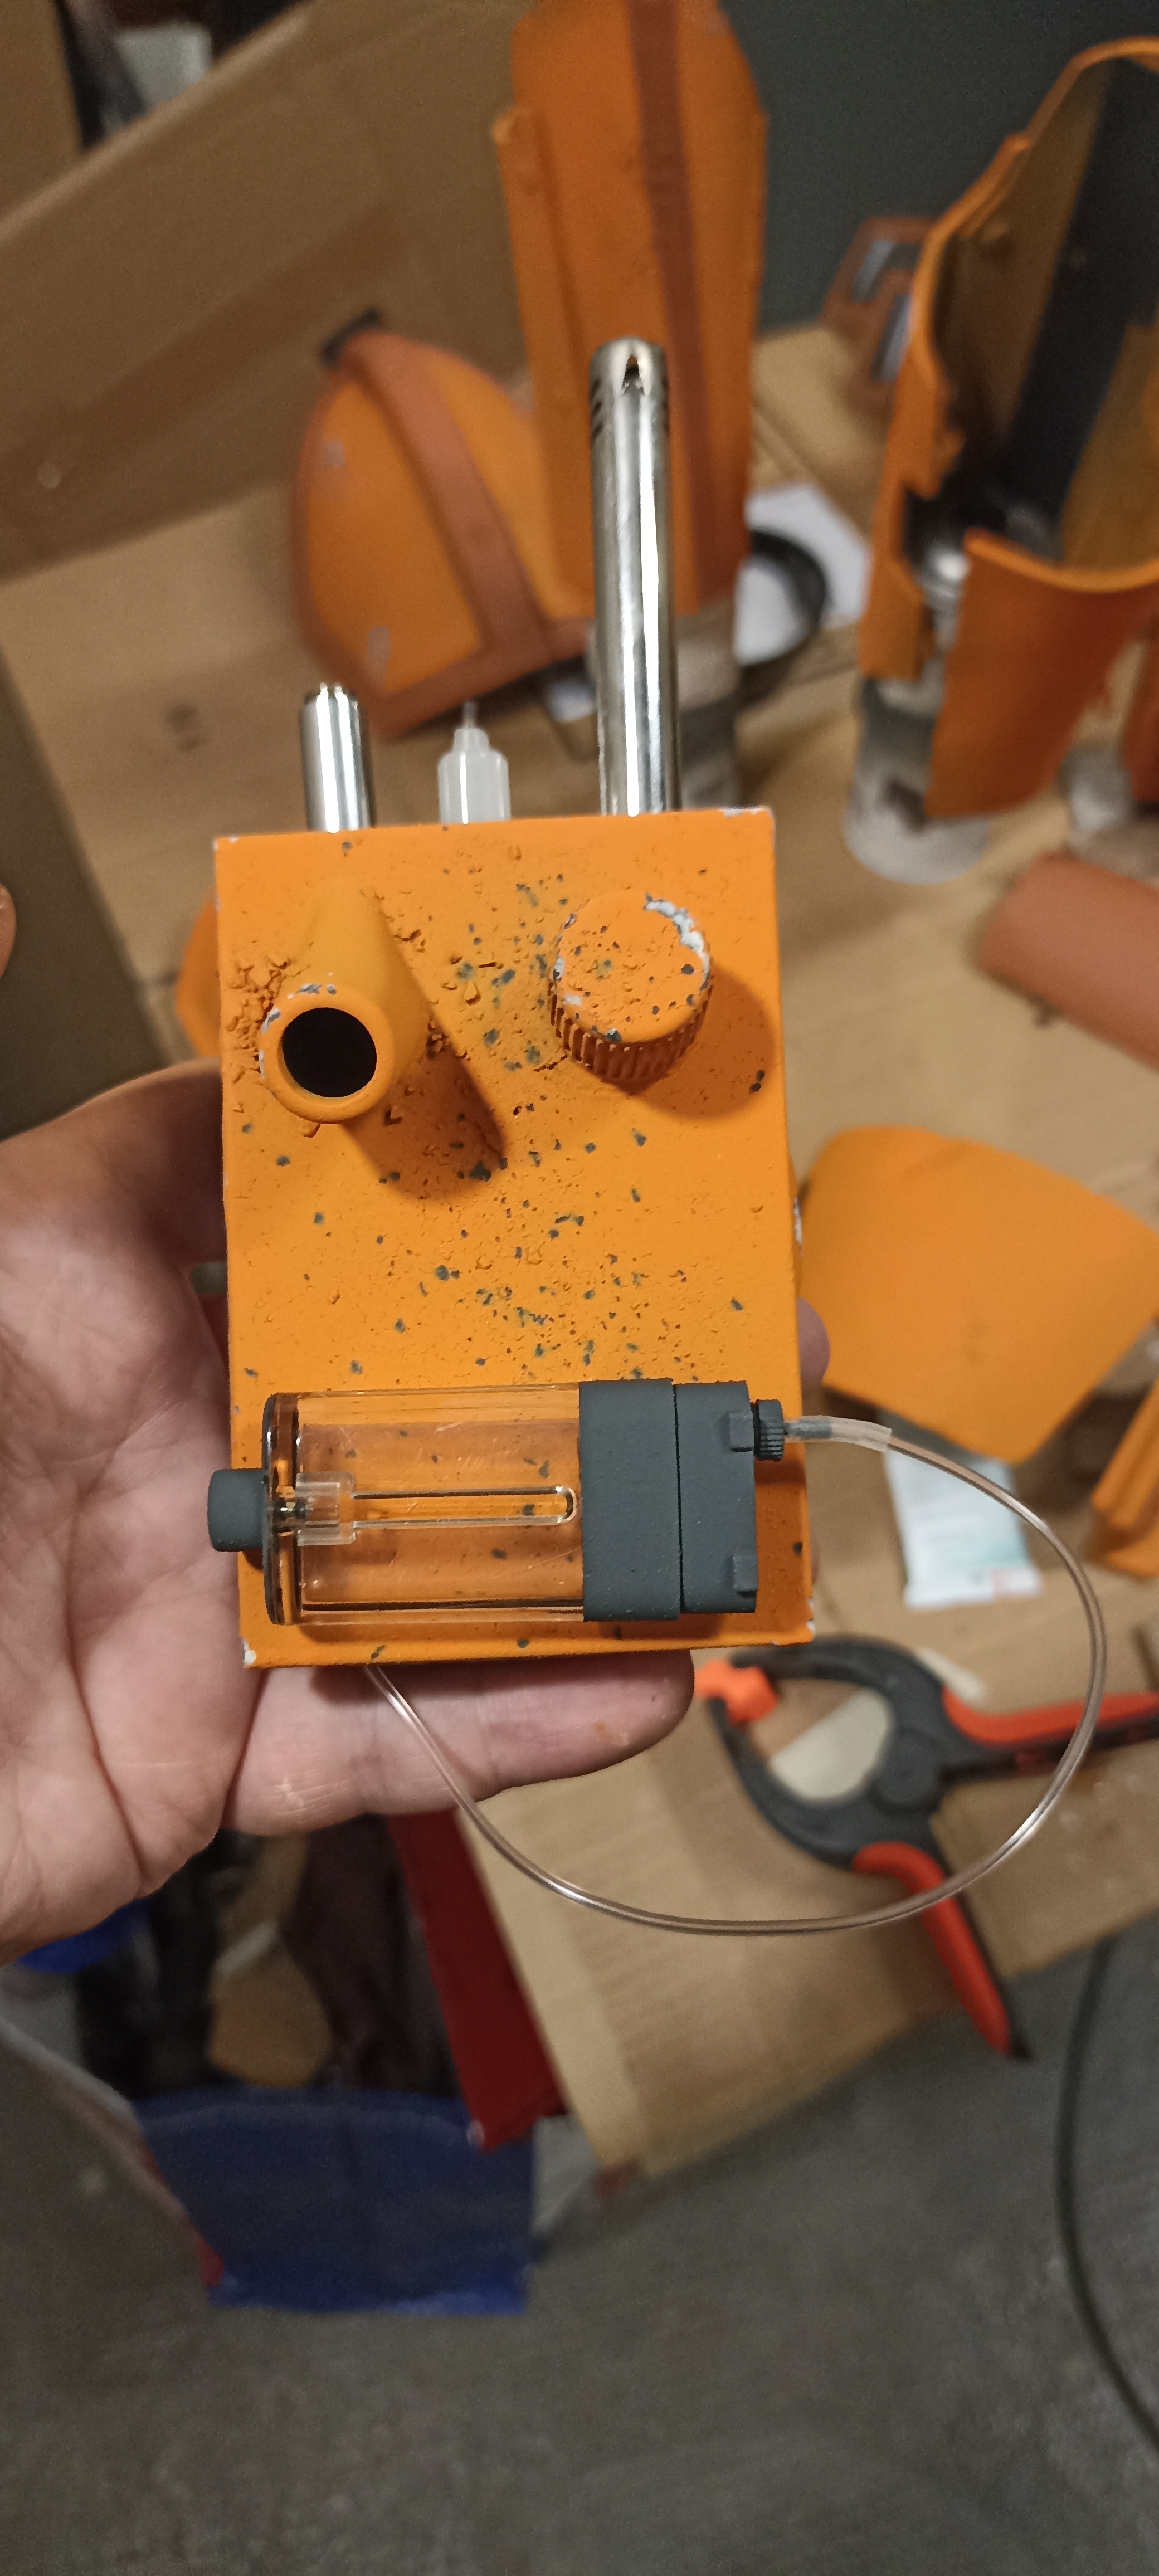
 | Painted multitool device |
 | Left gauntlet terminated. |
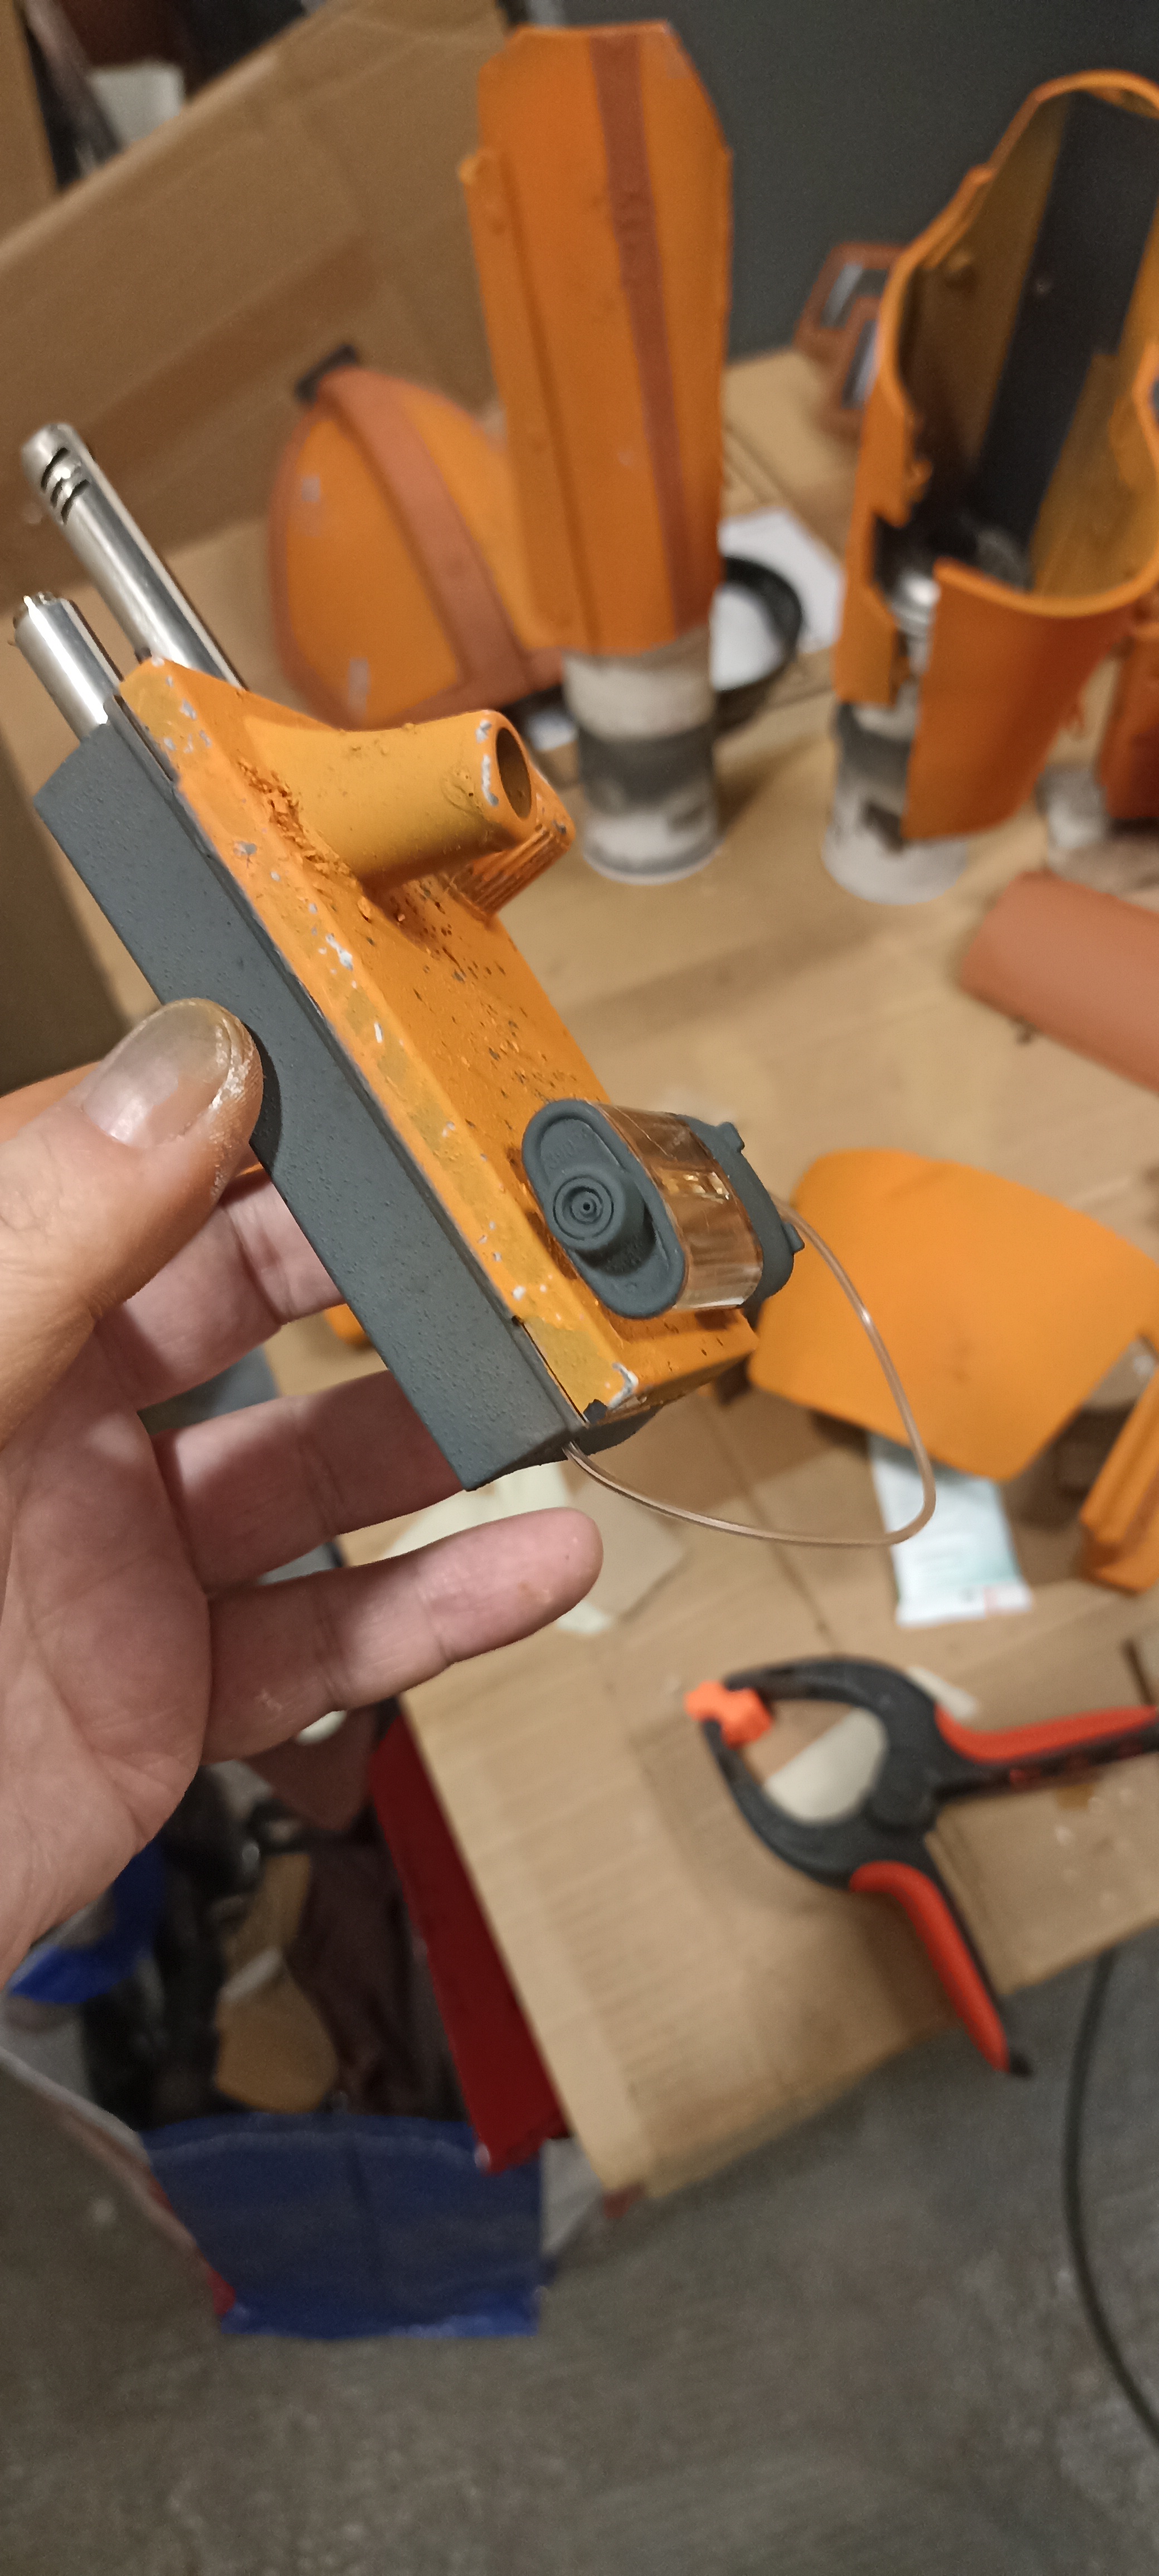
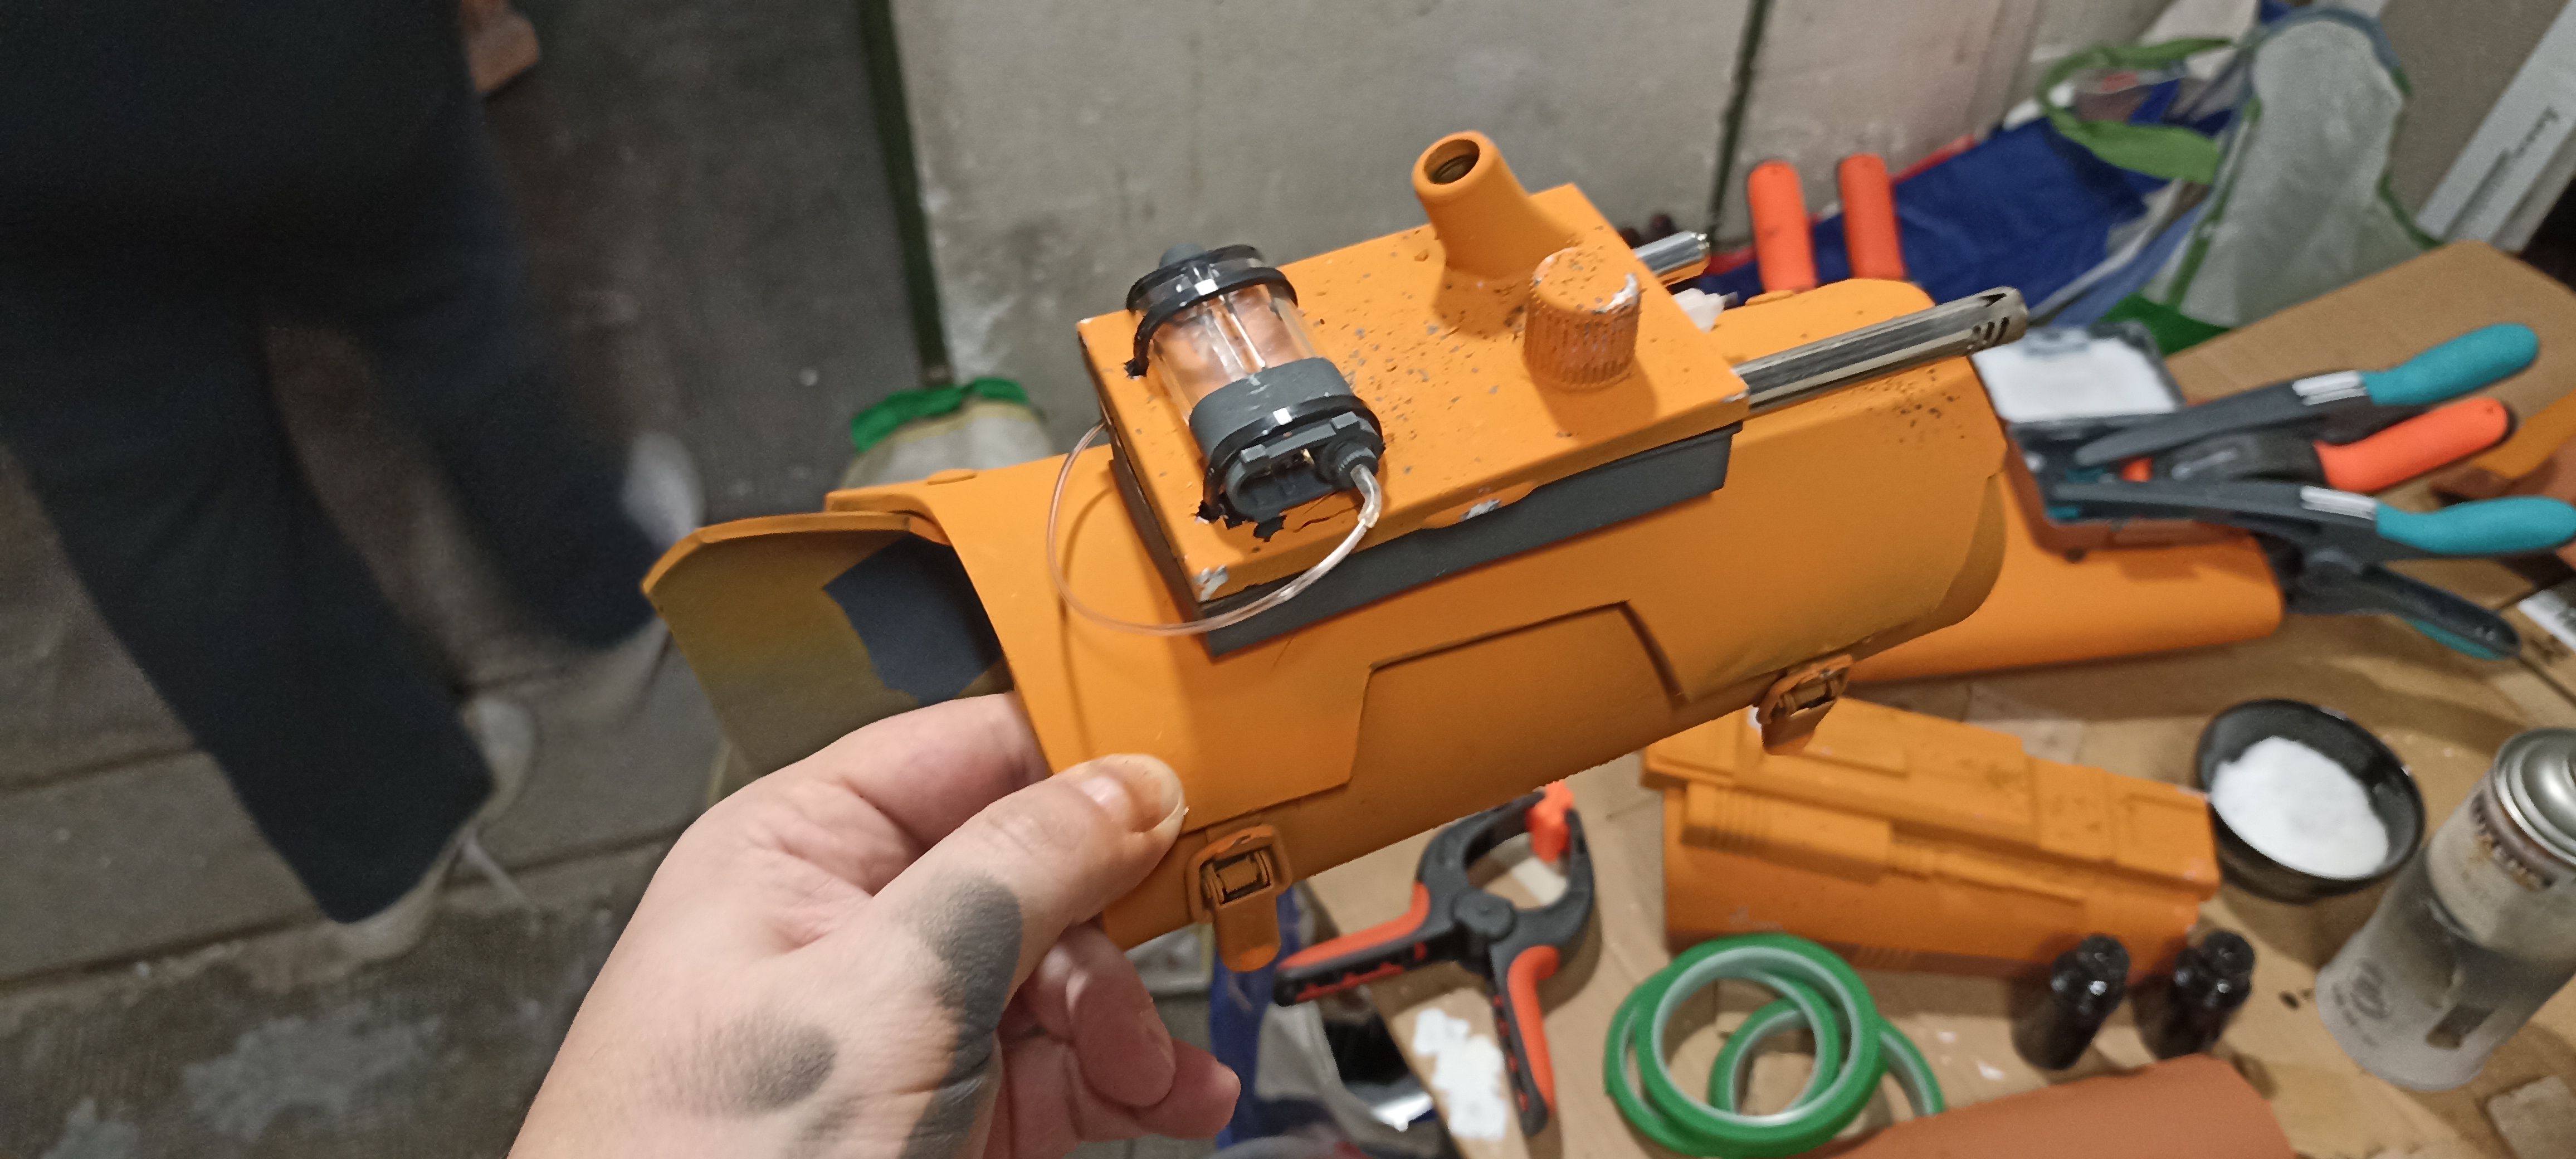
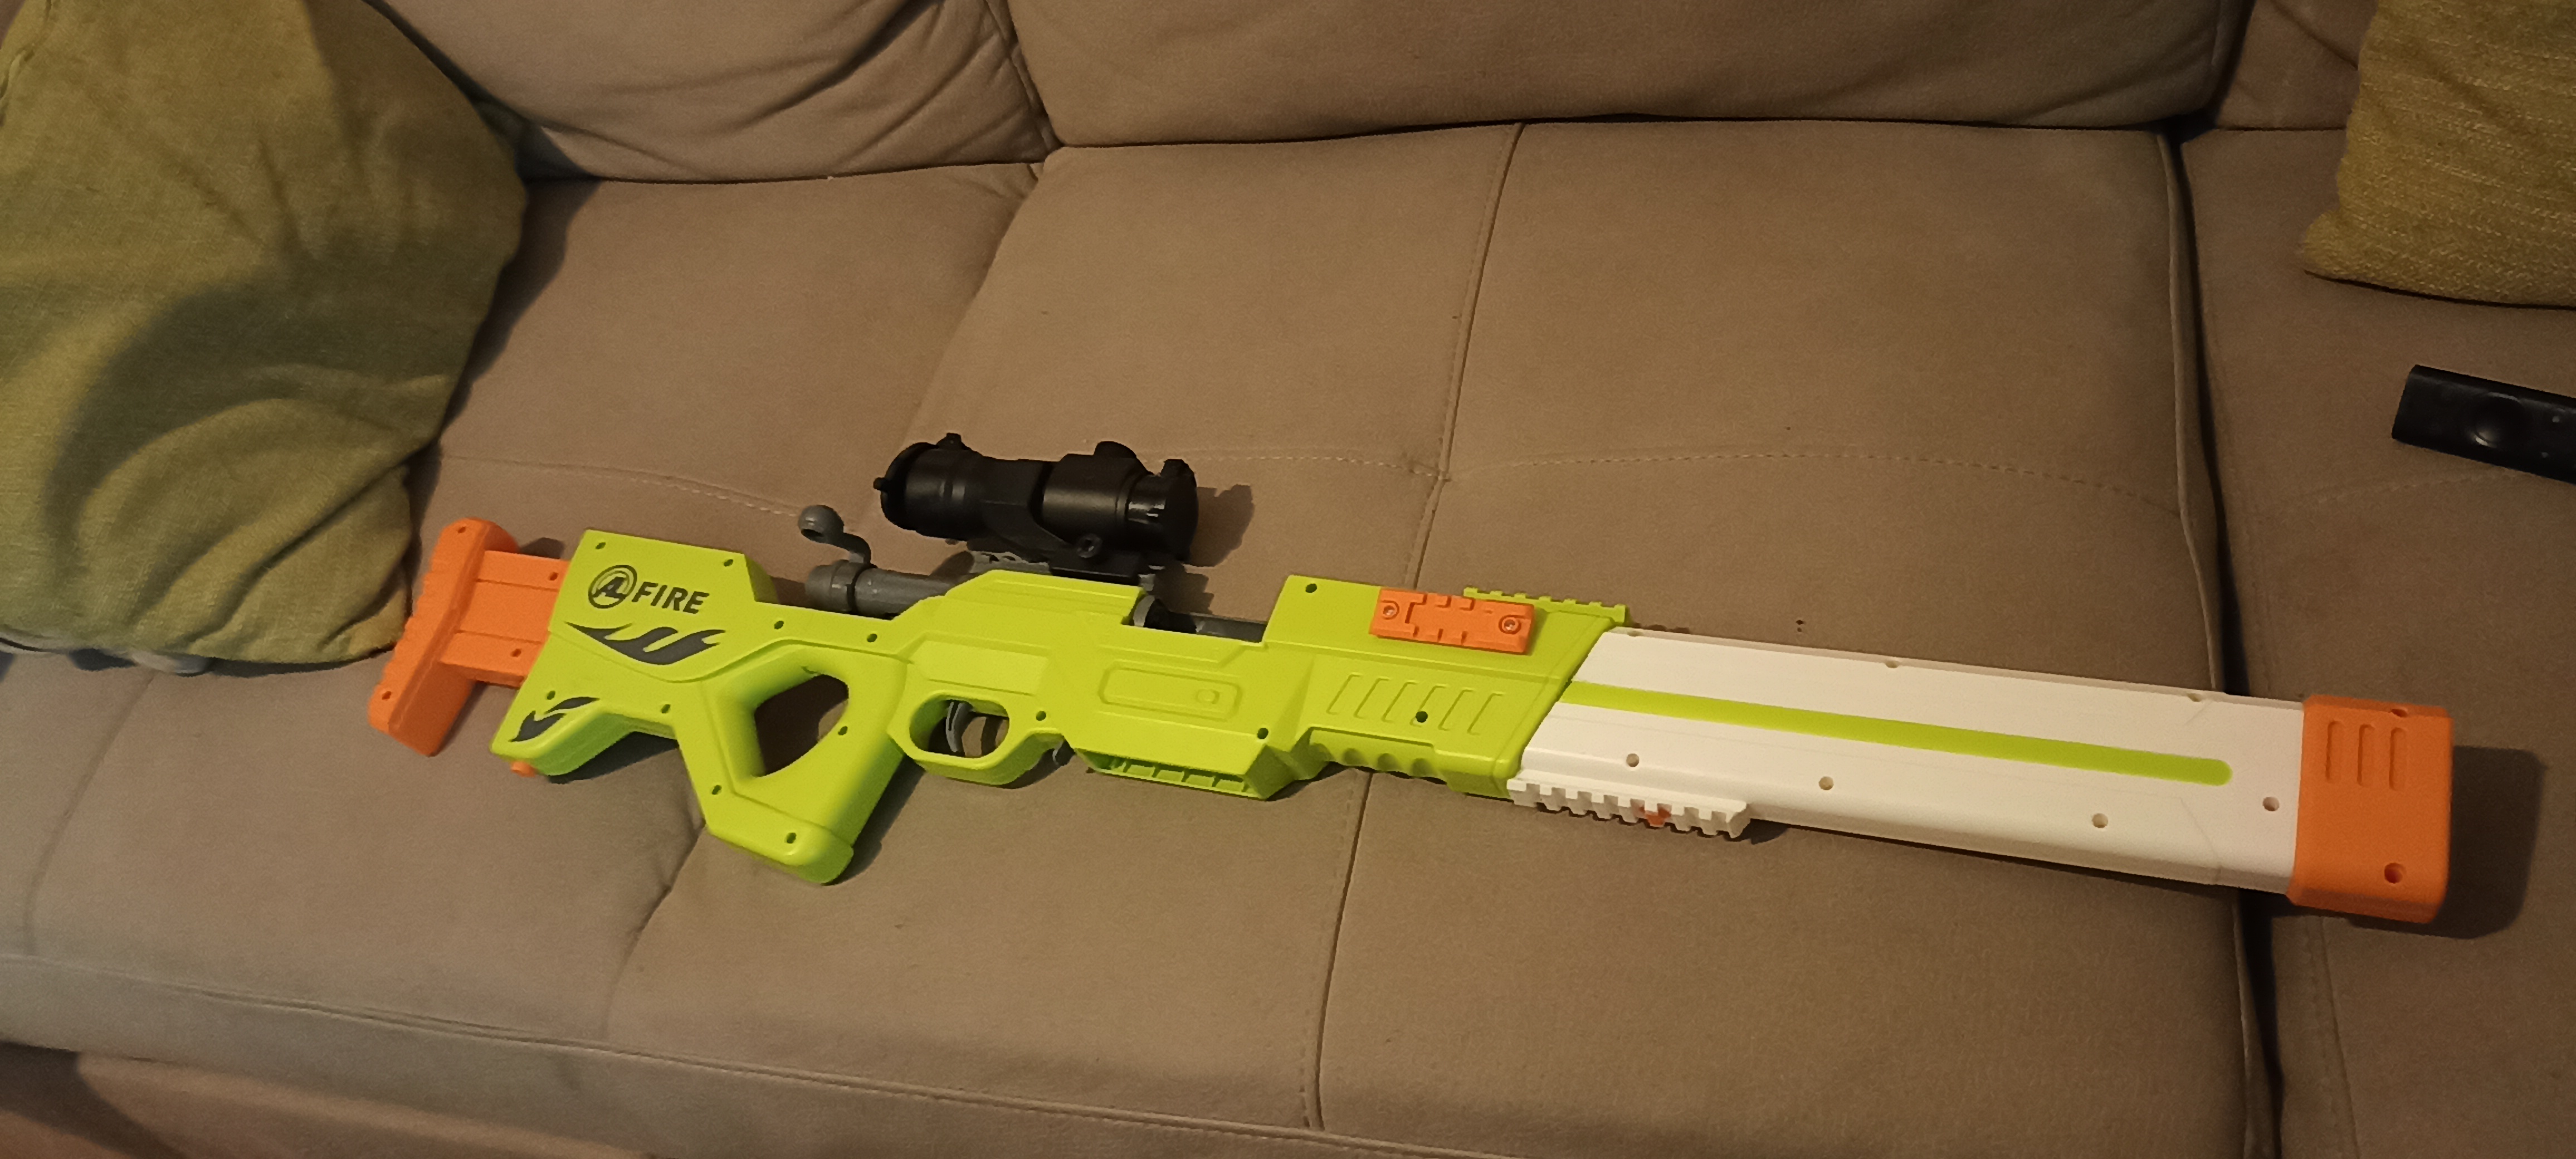
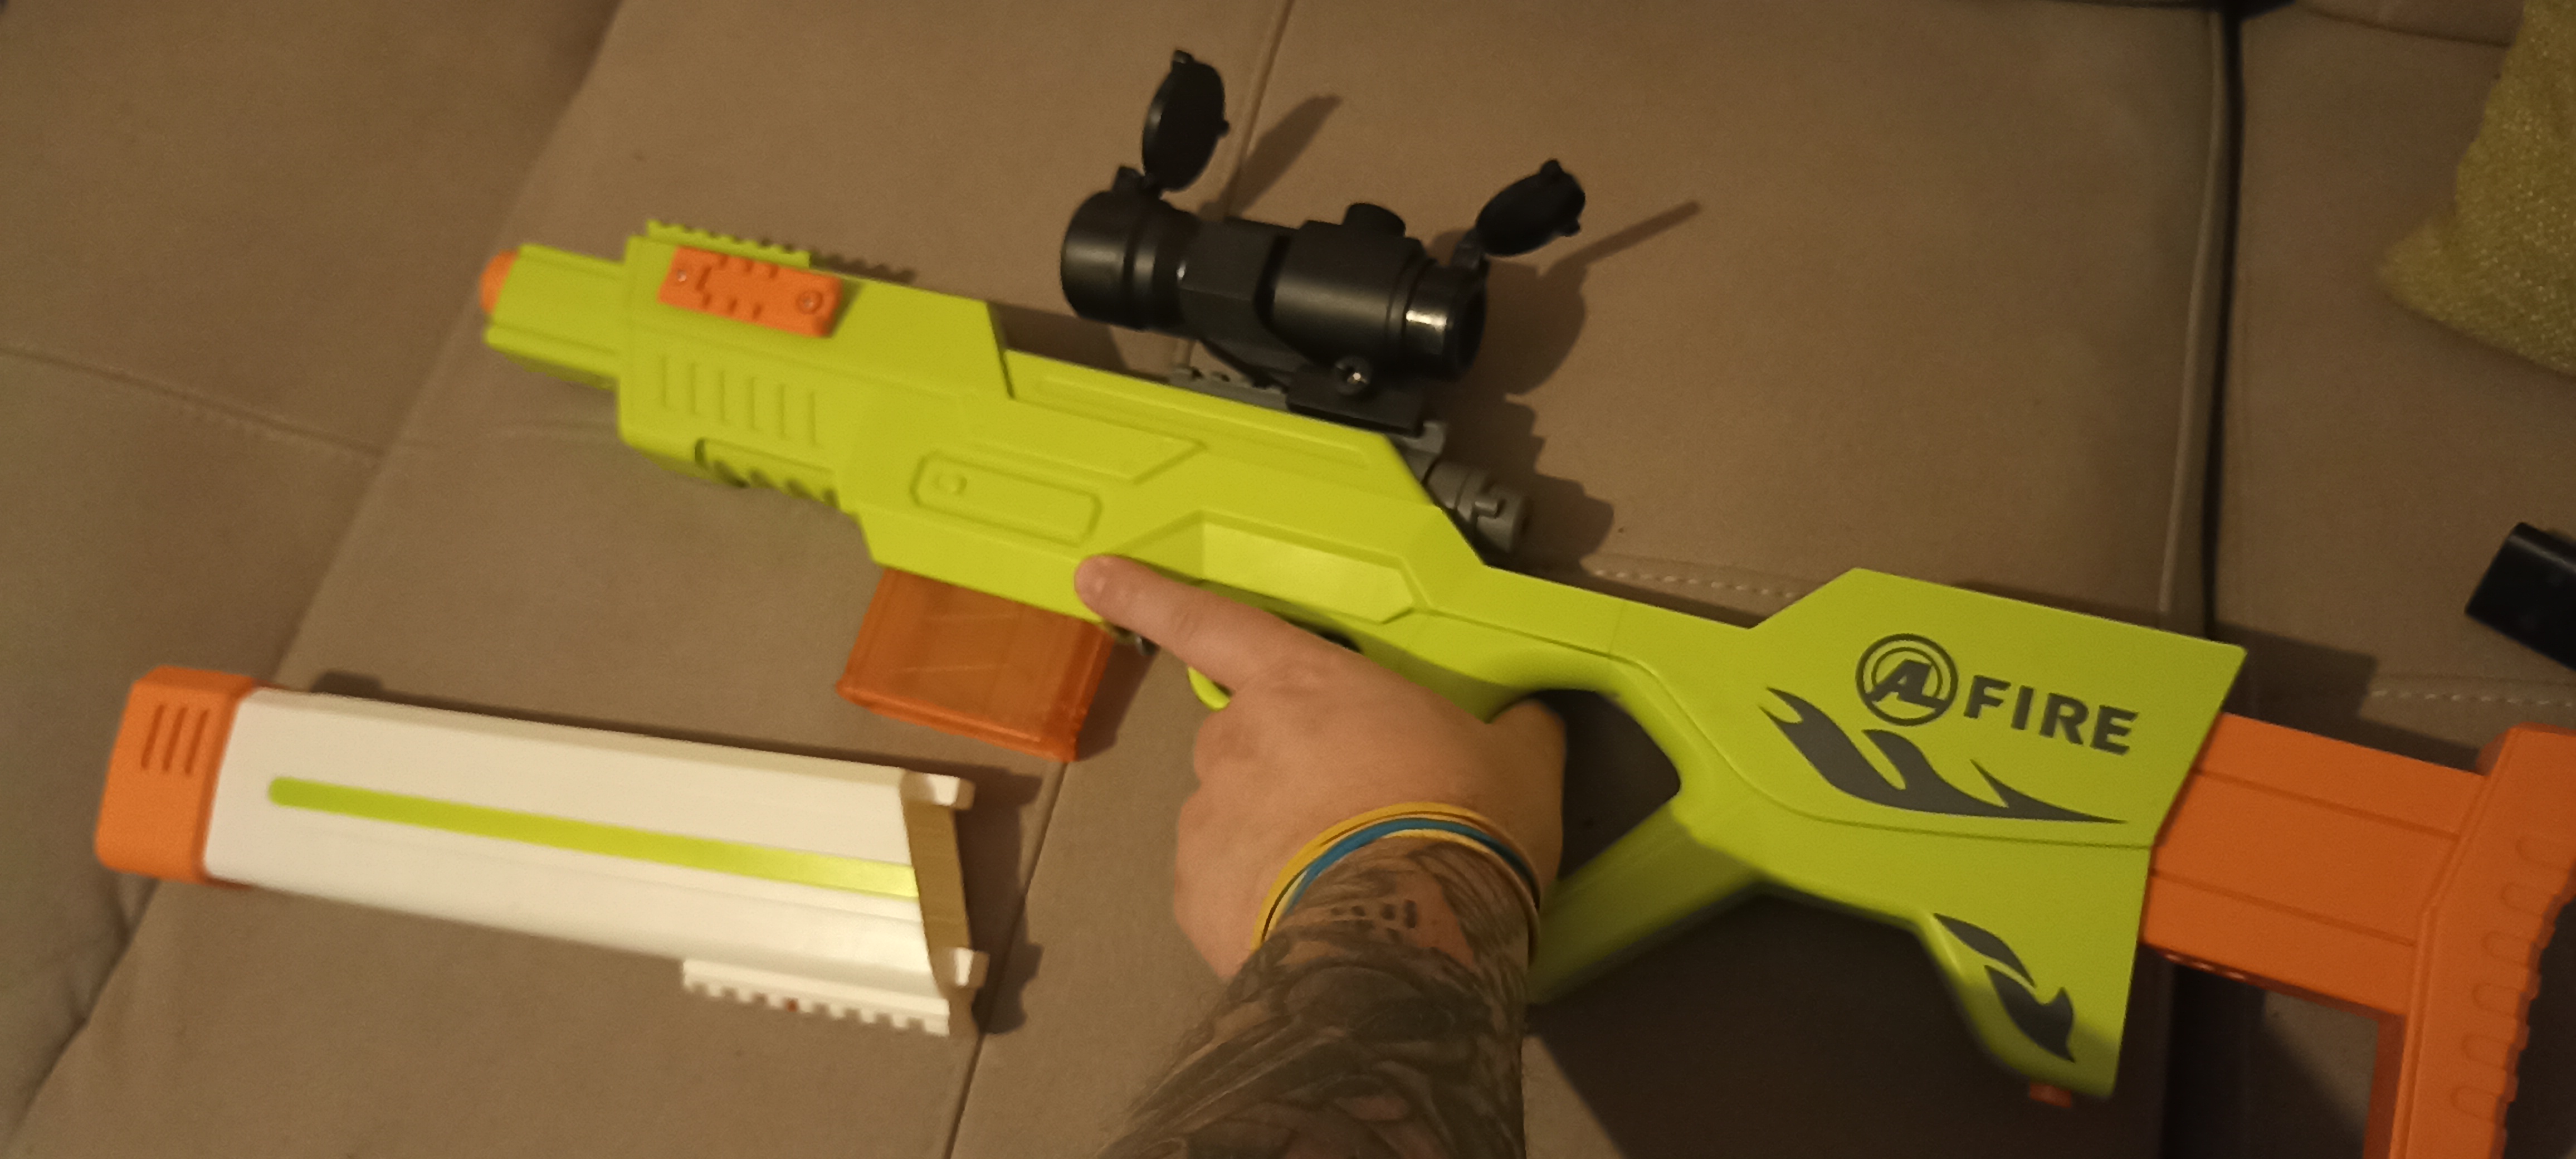
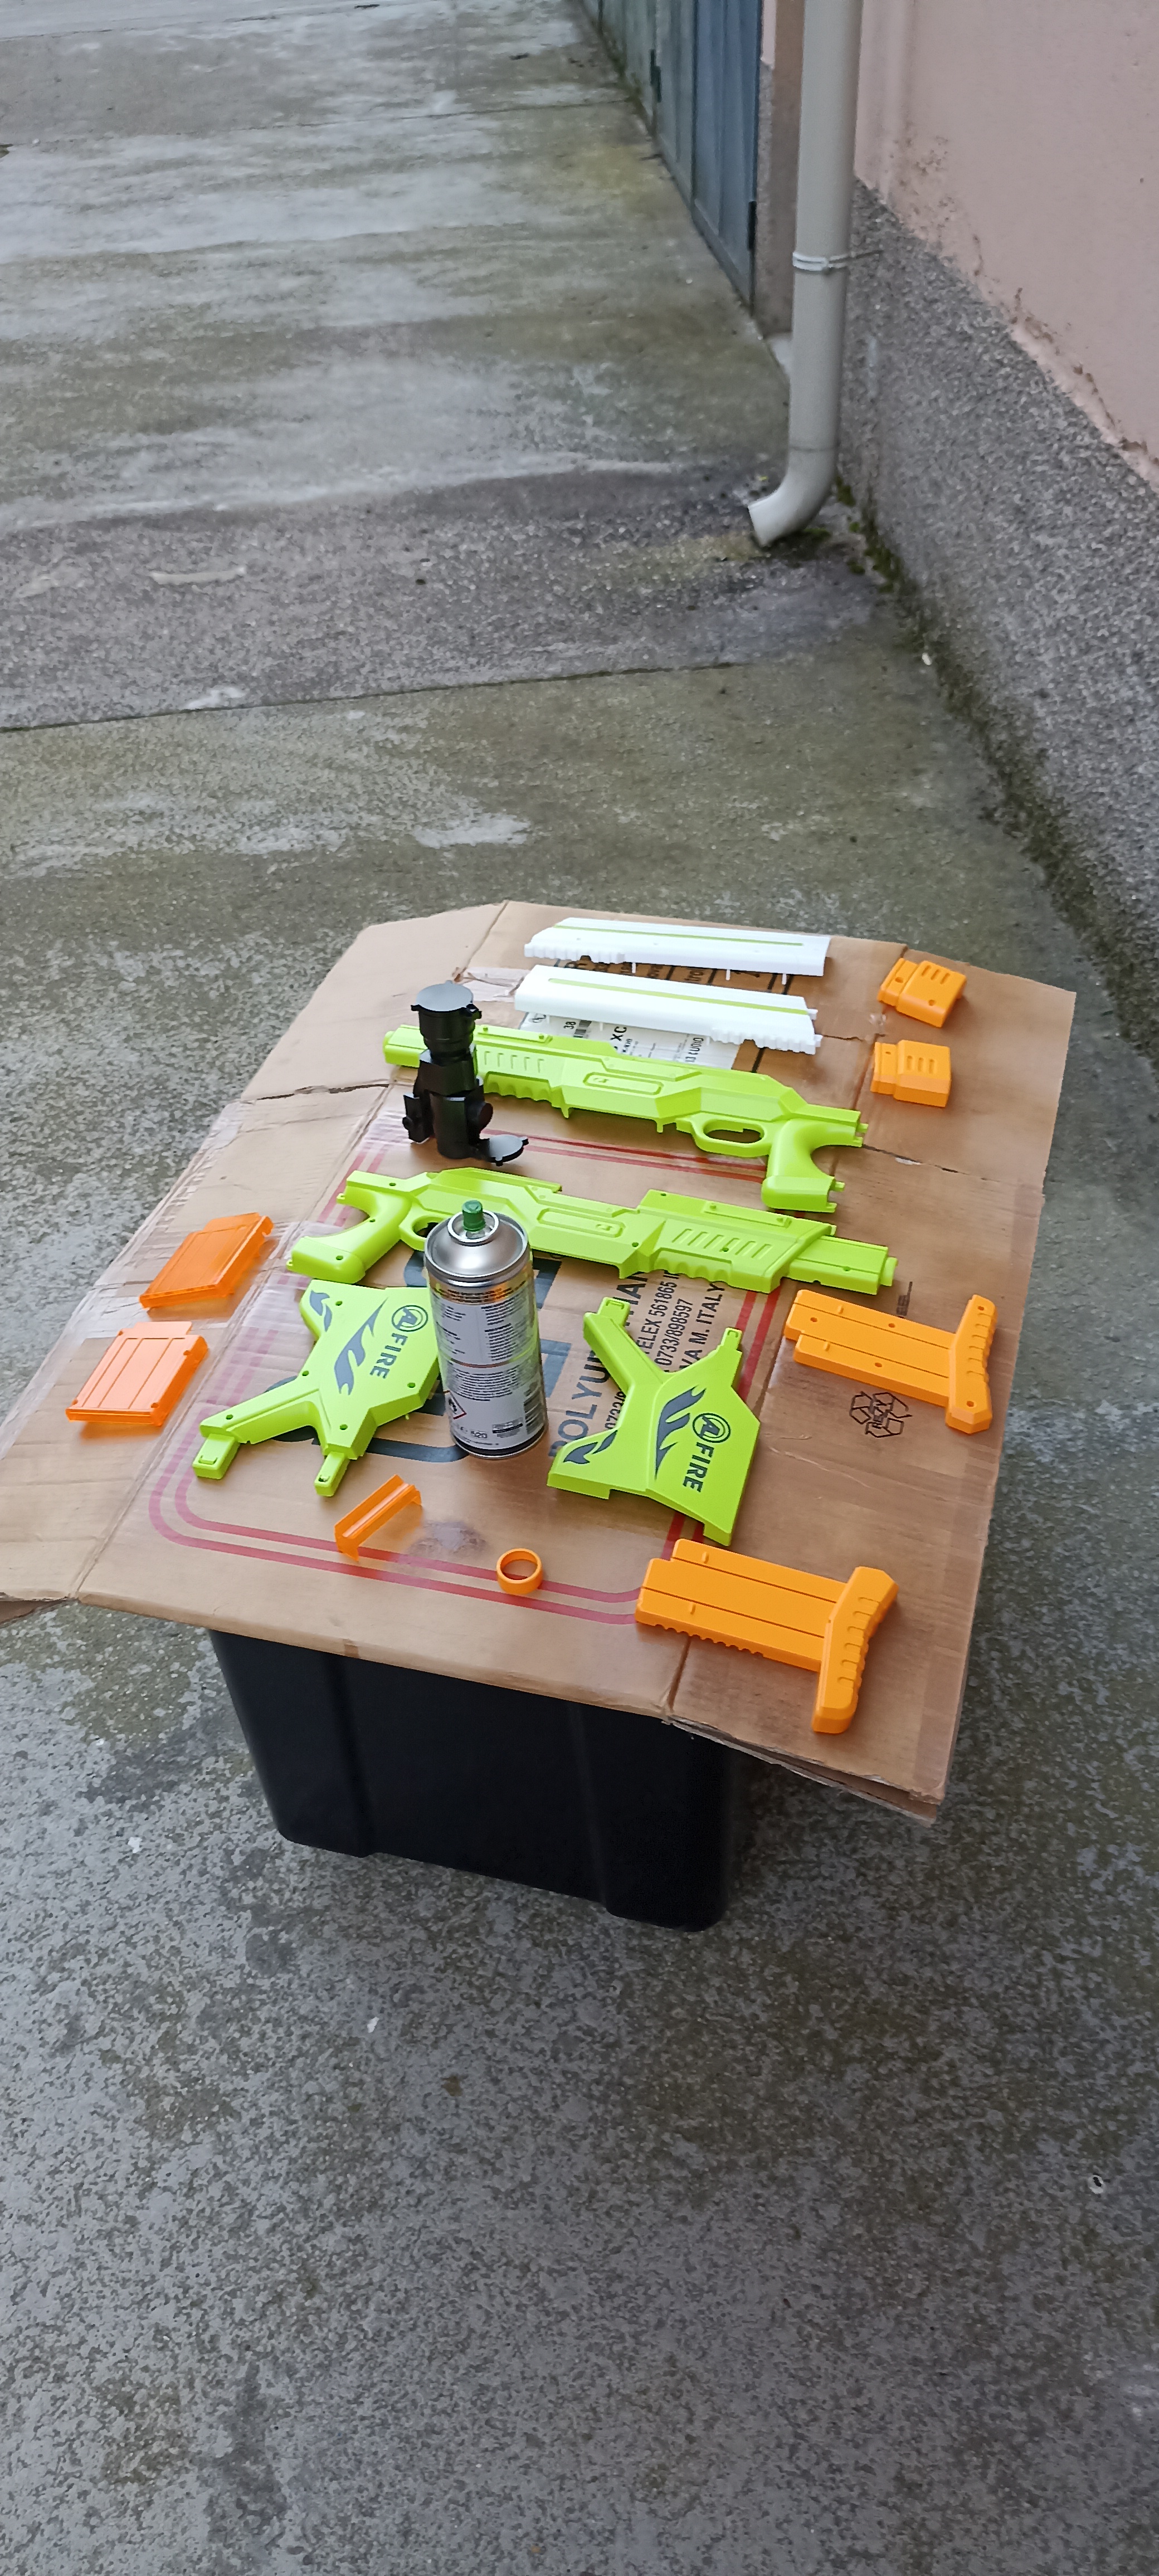
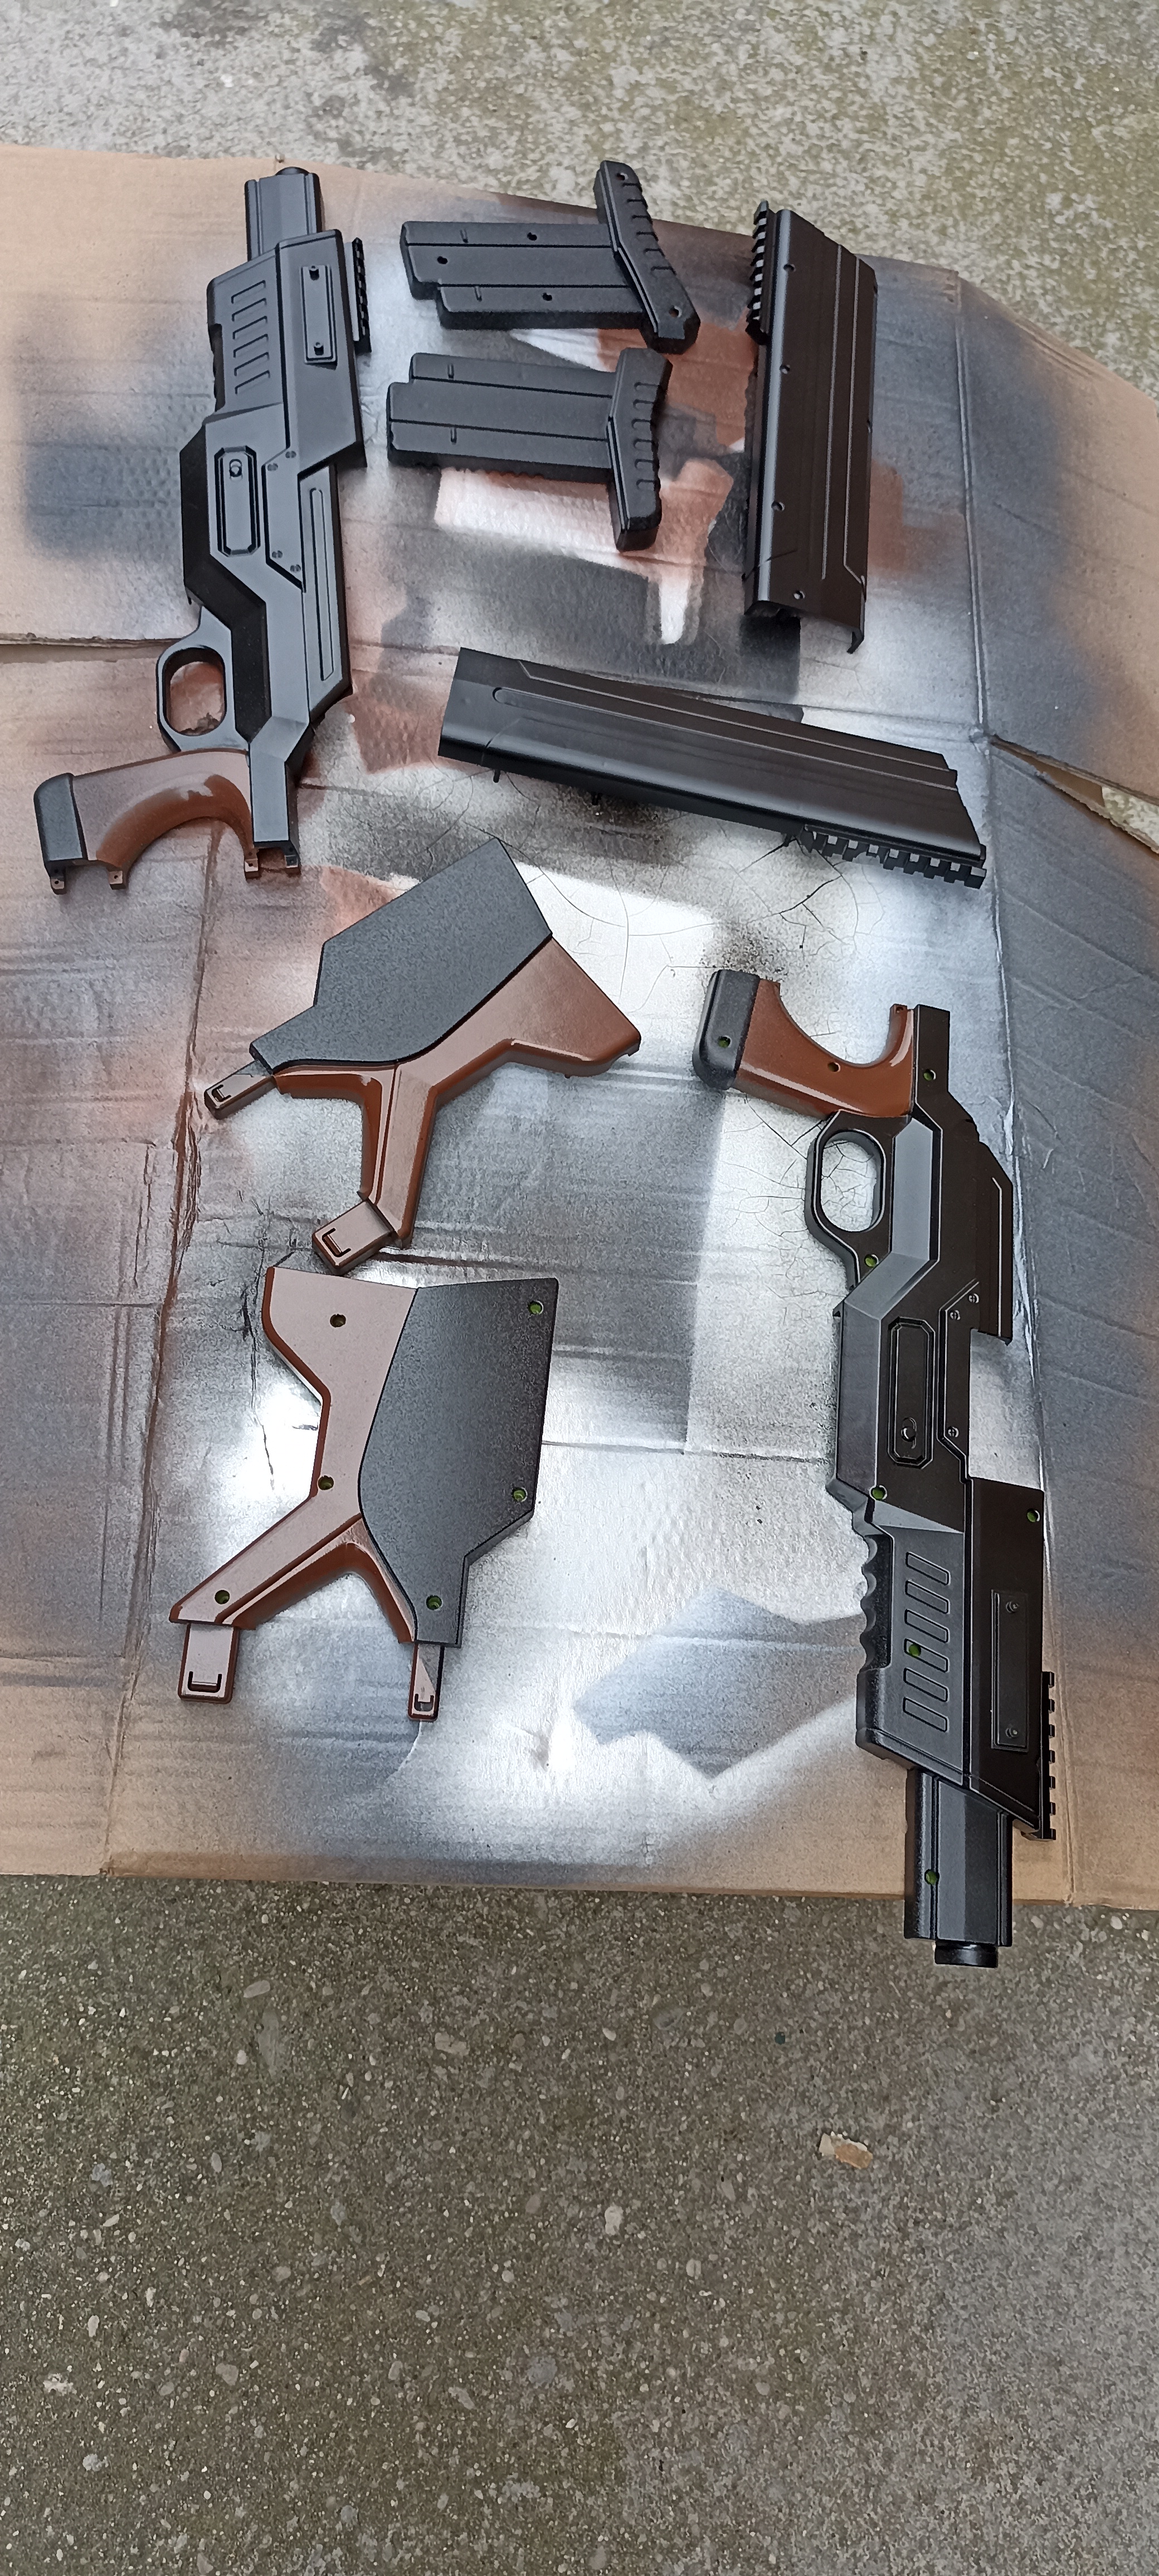
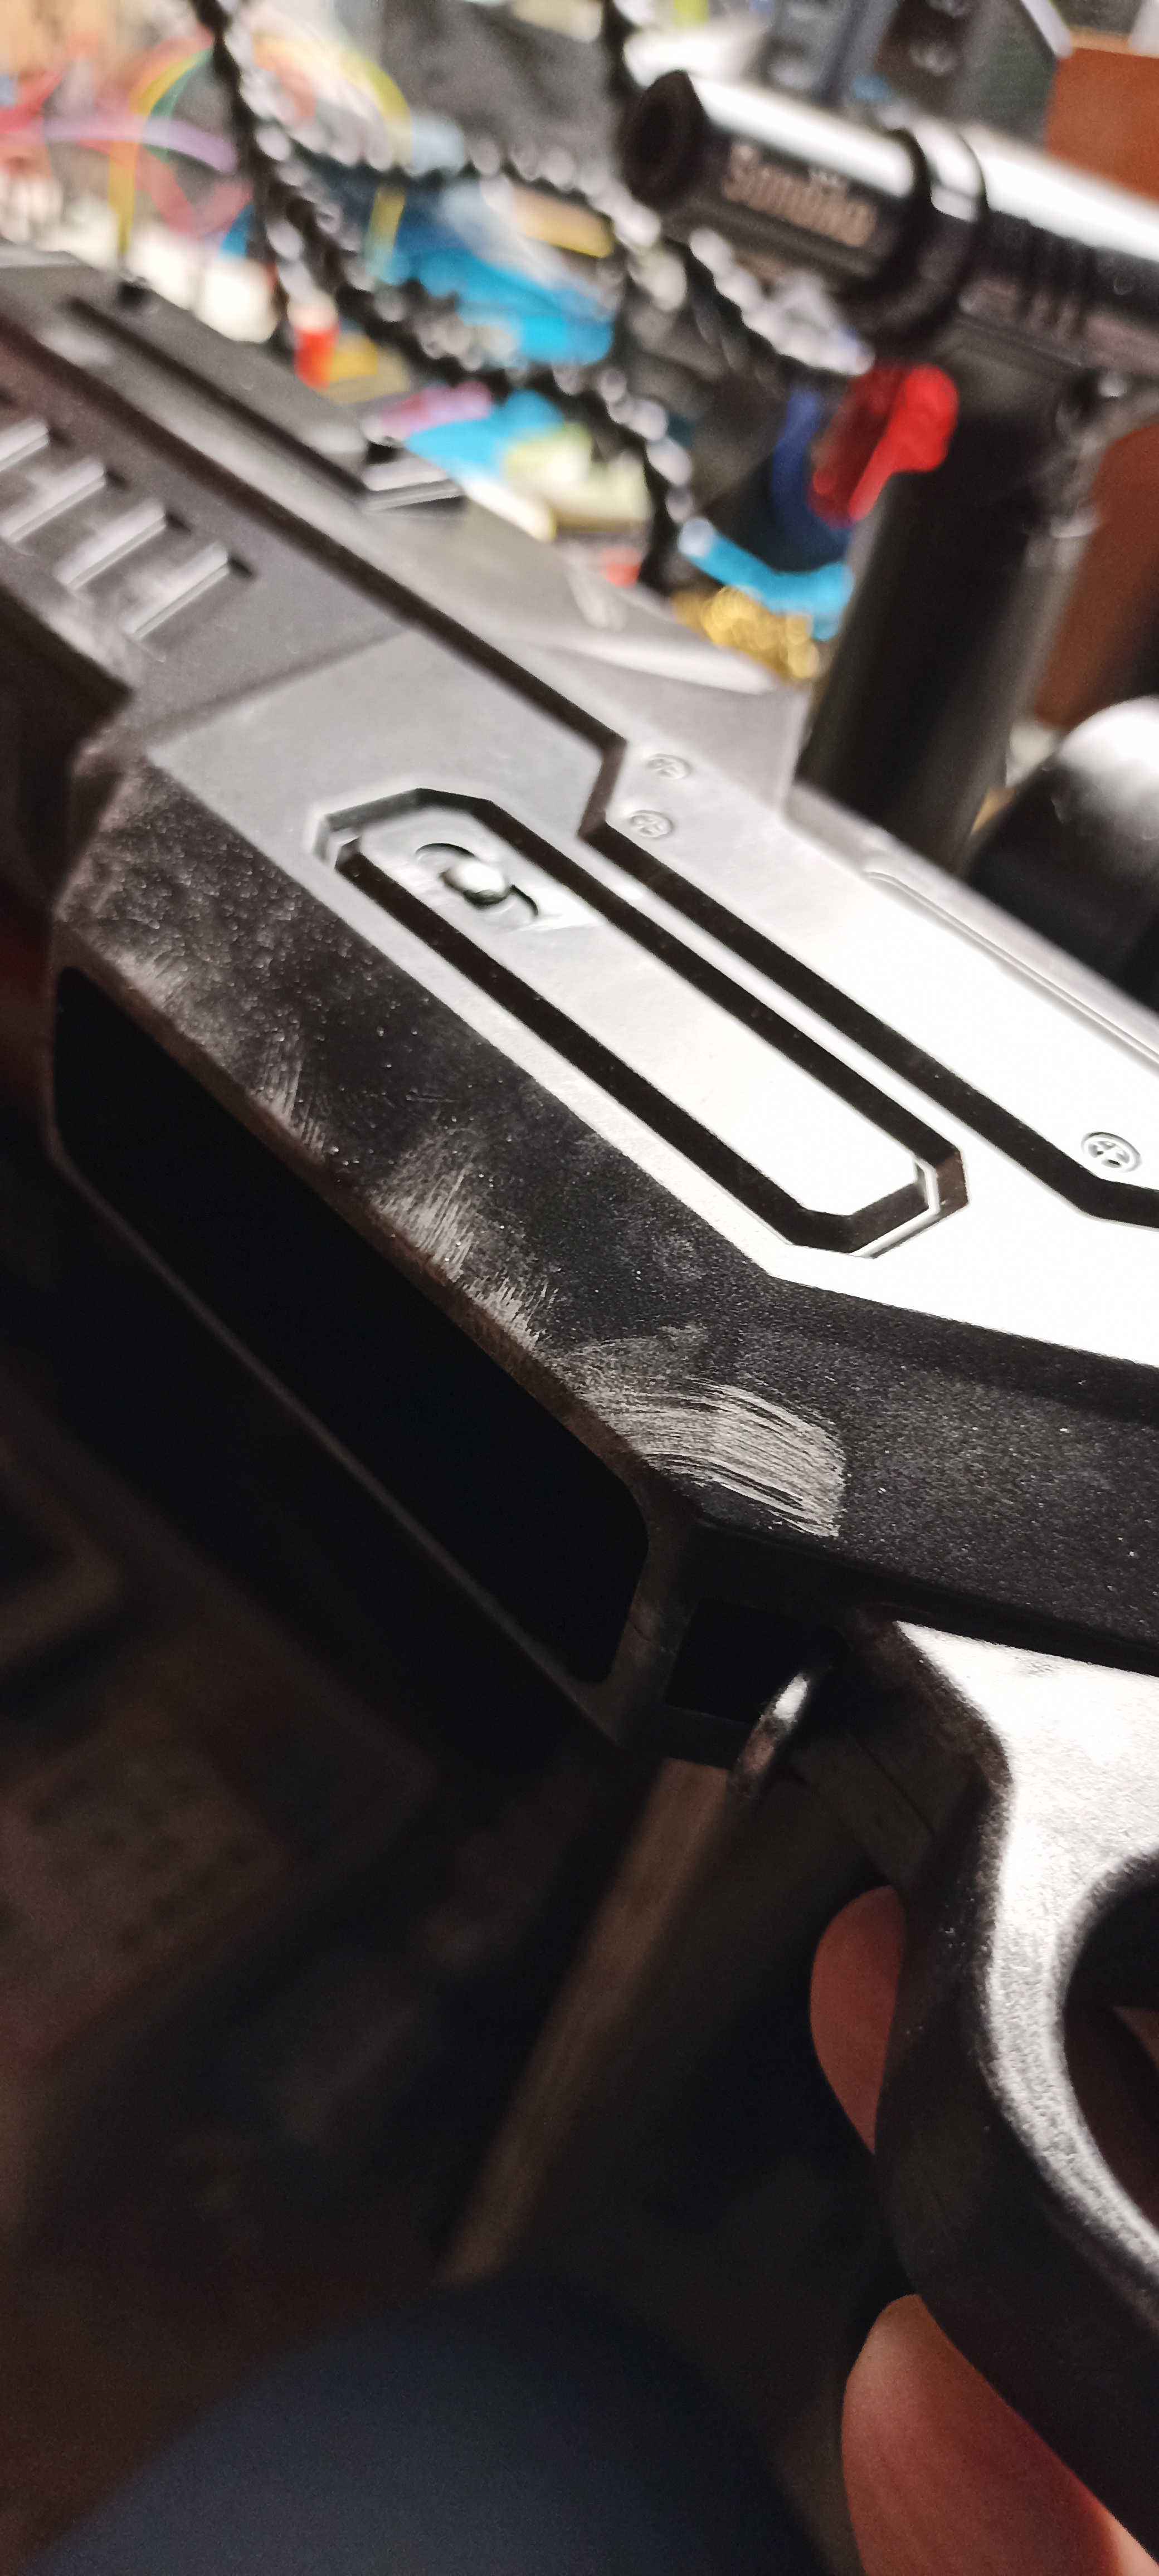
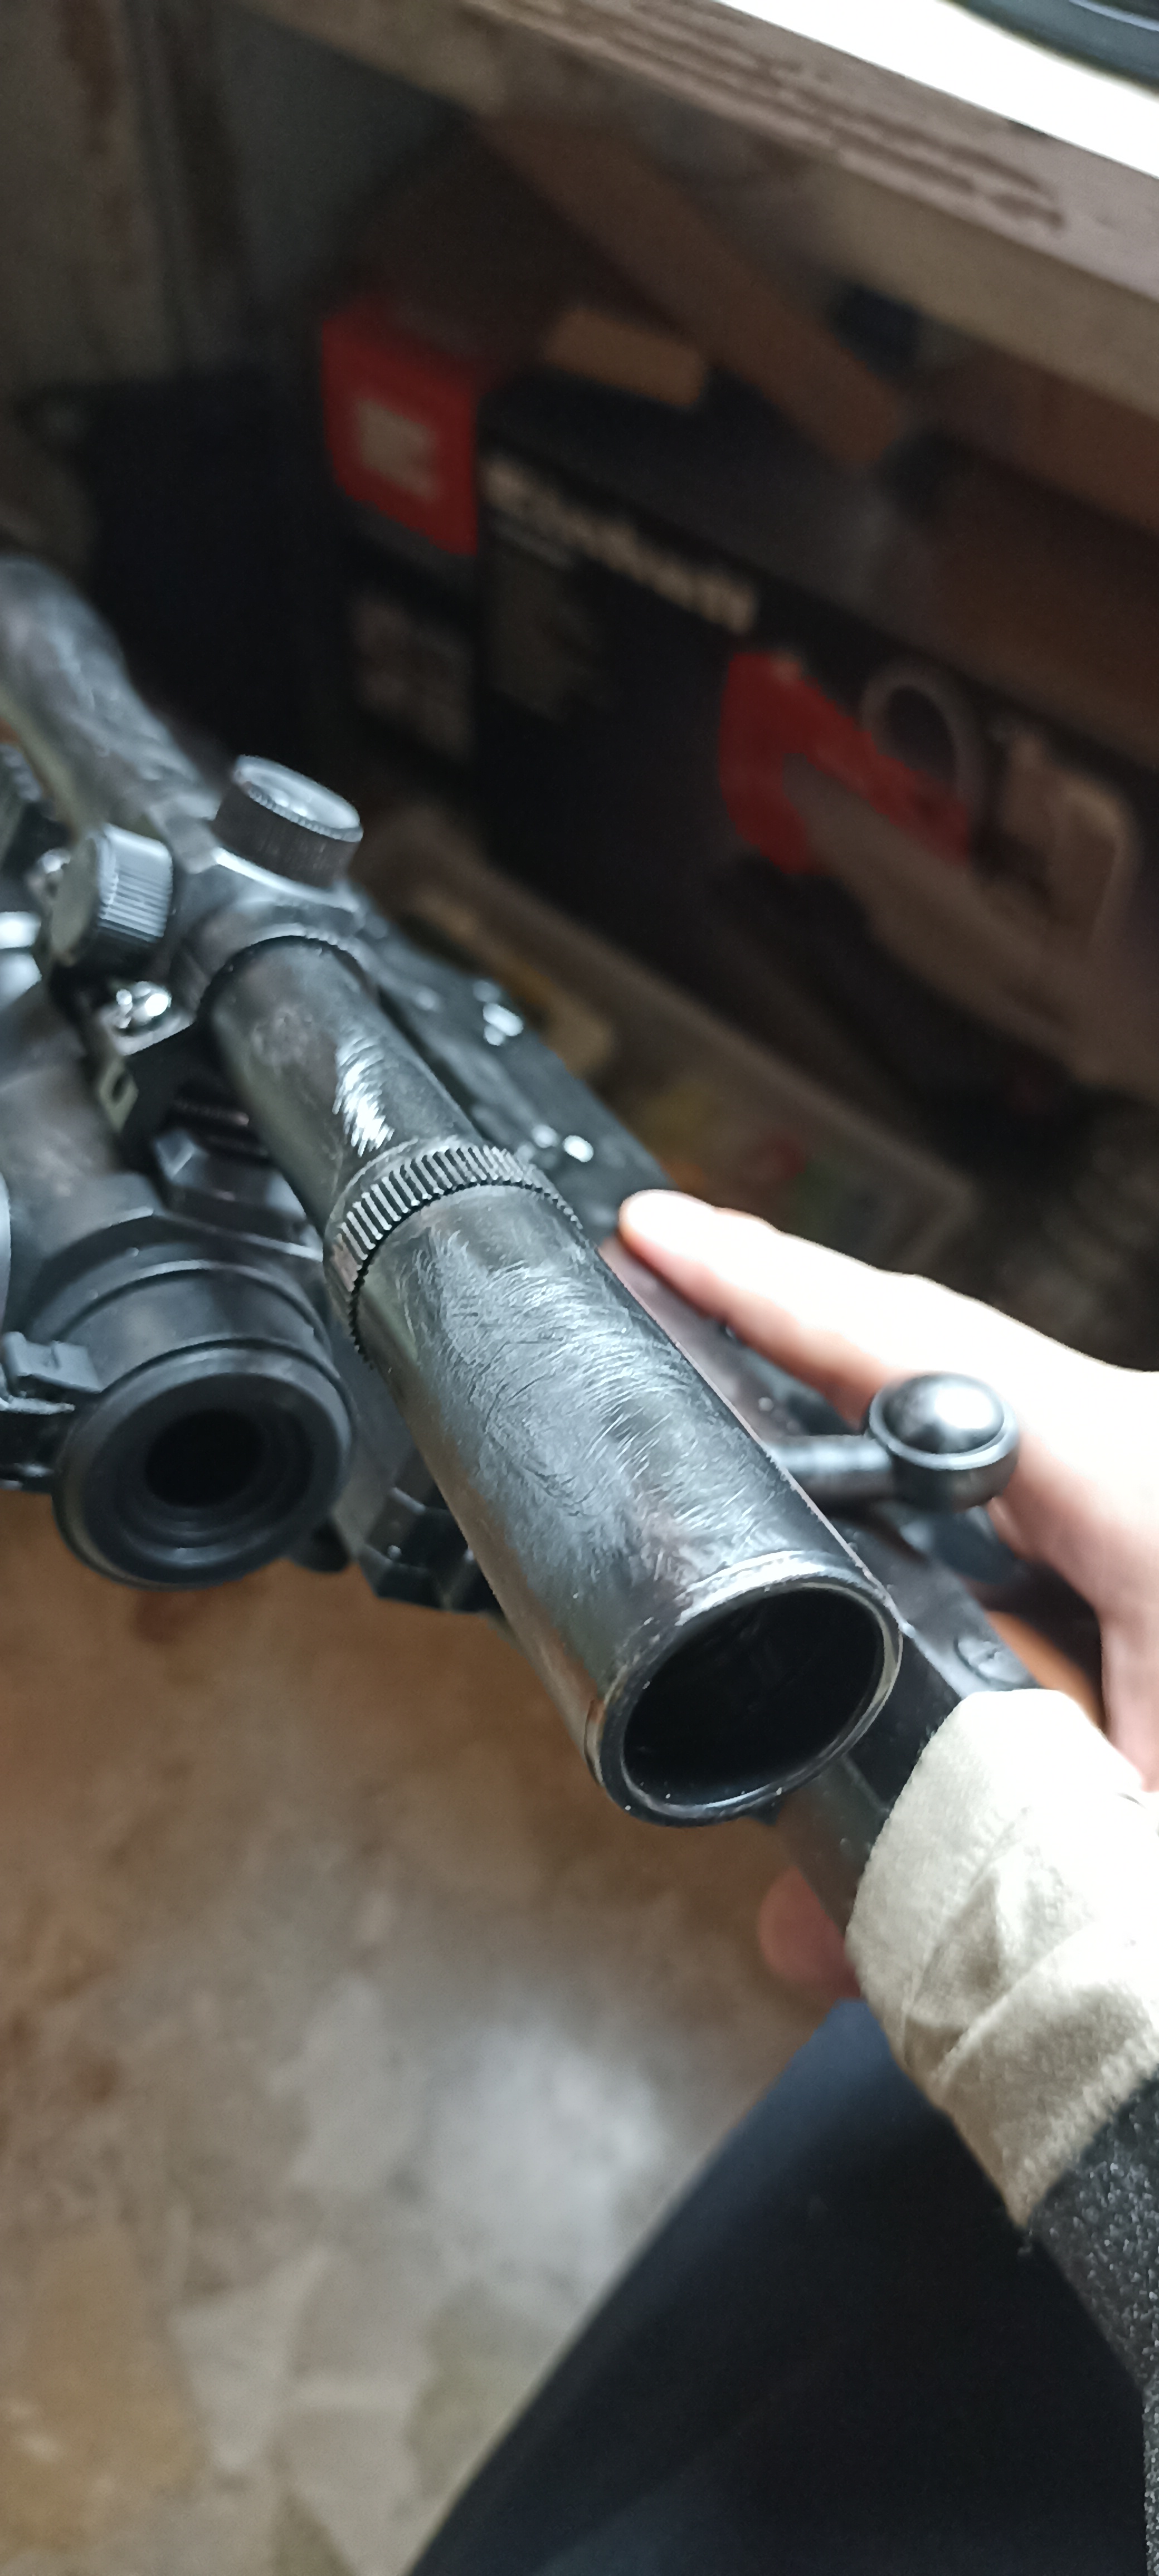
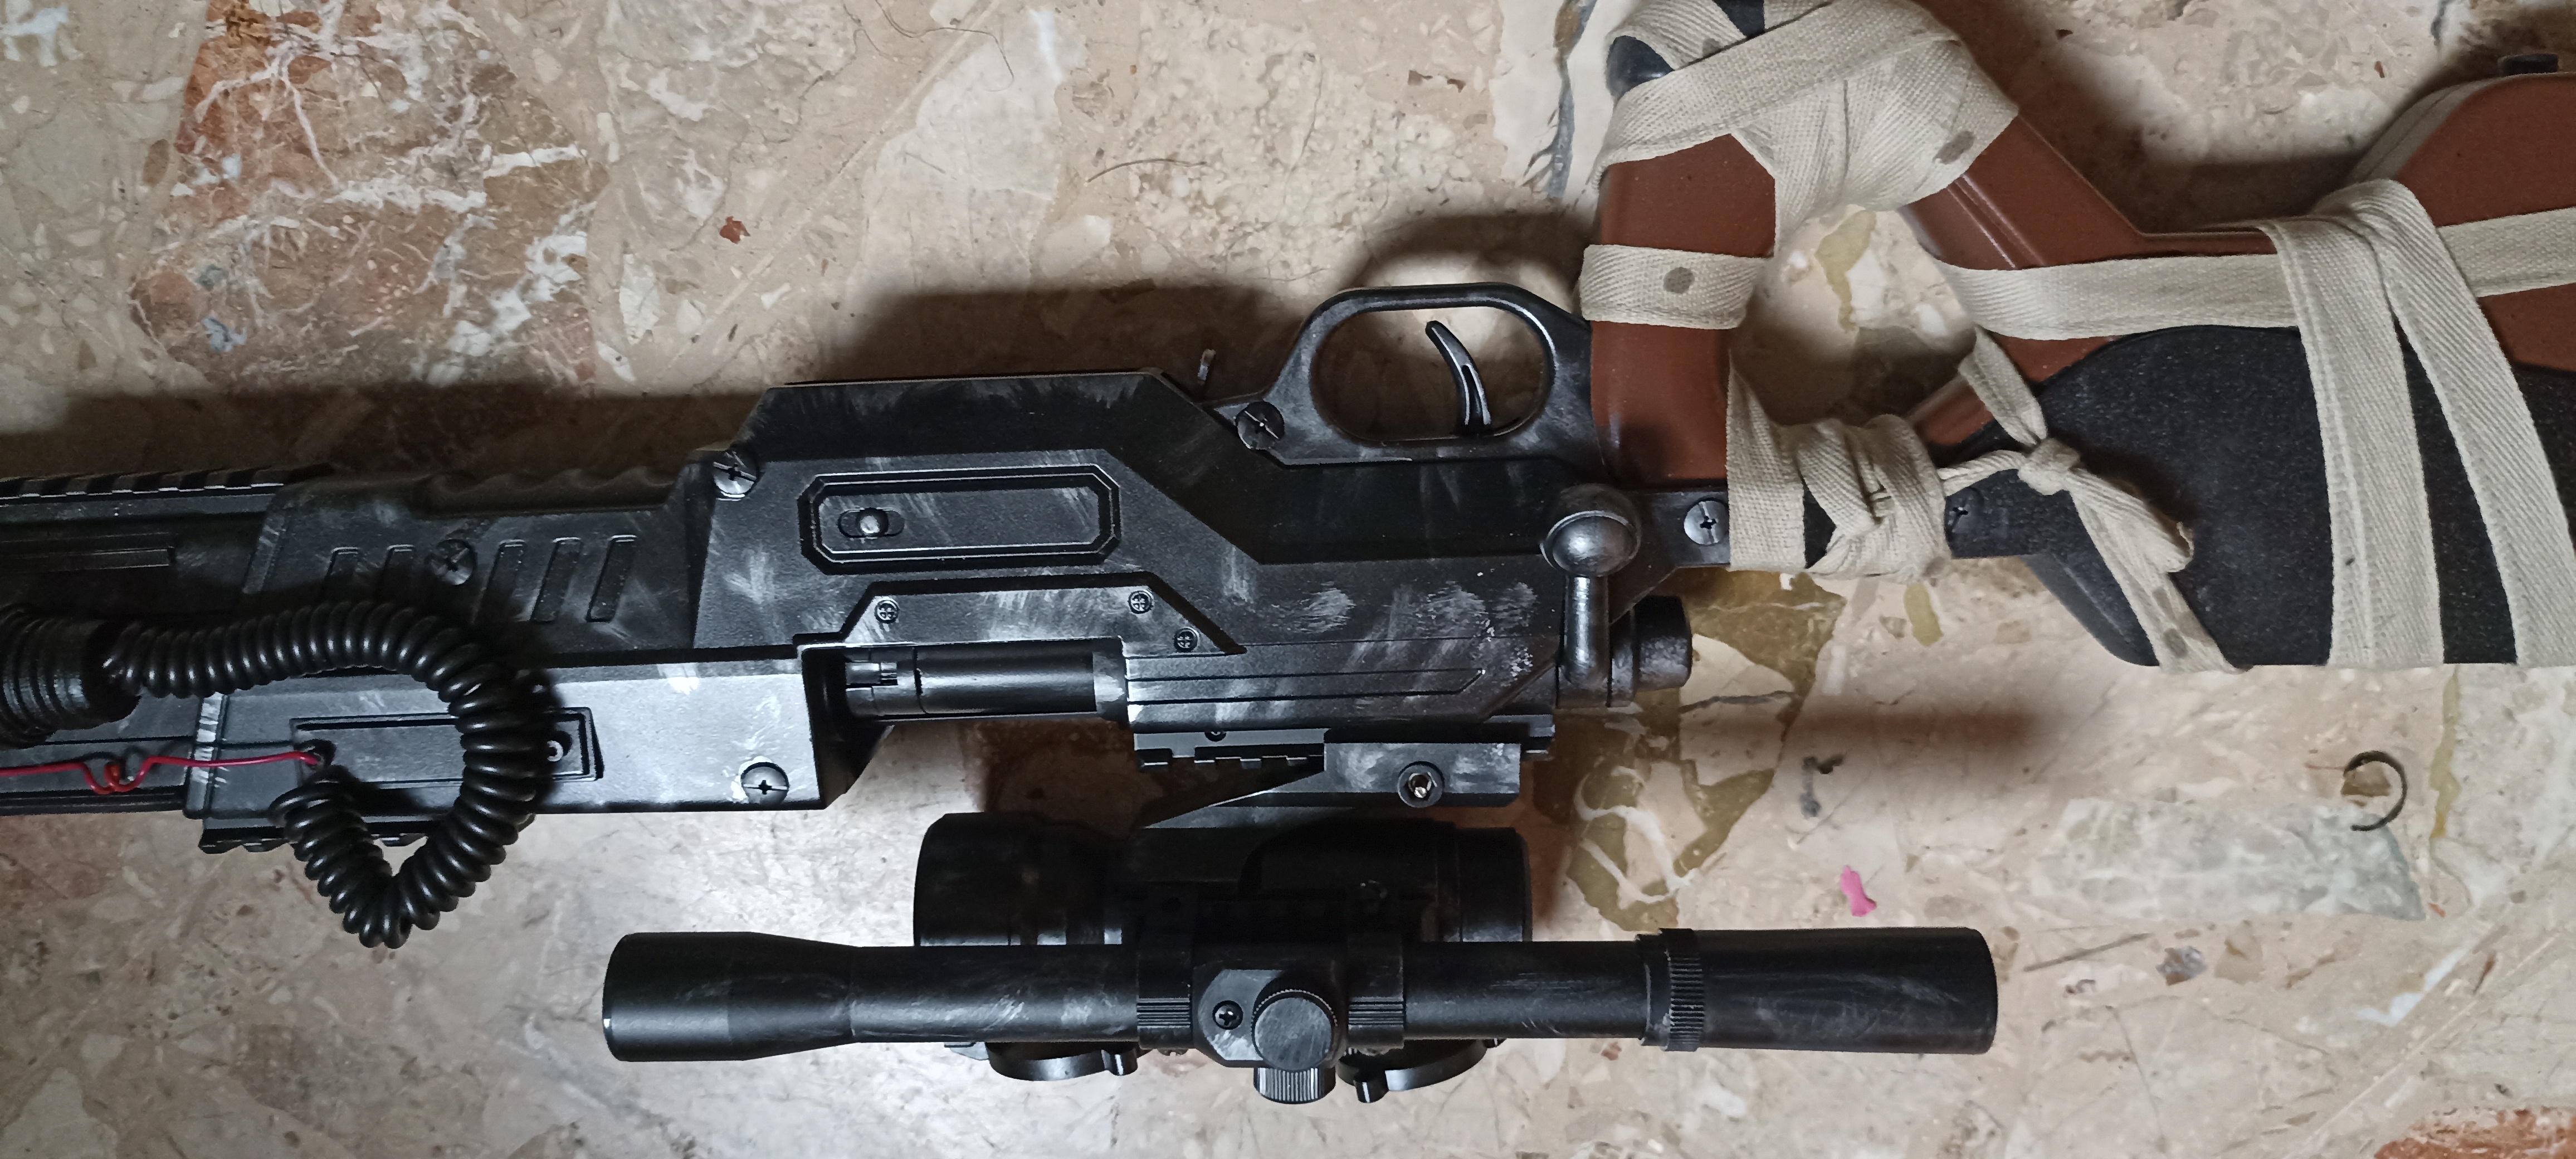
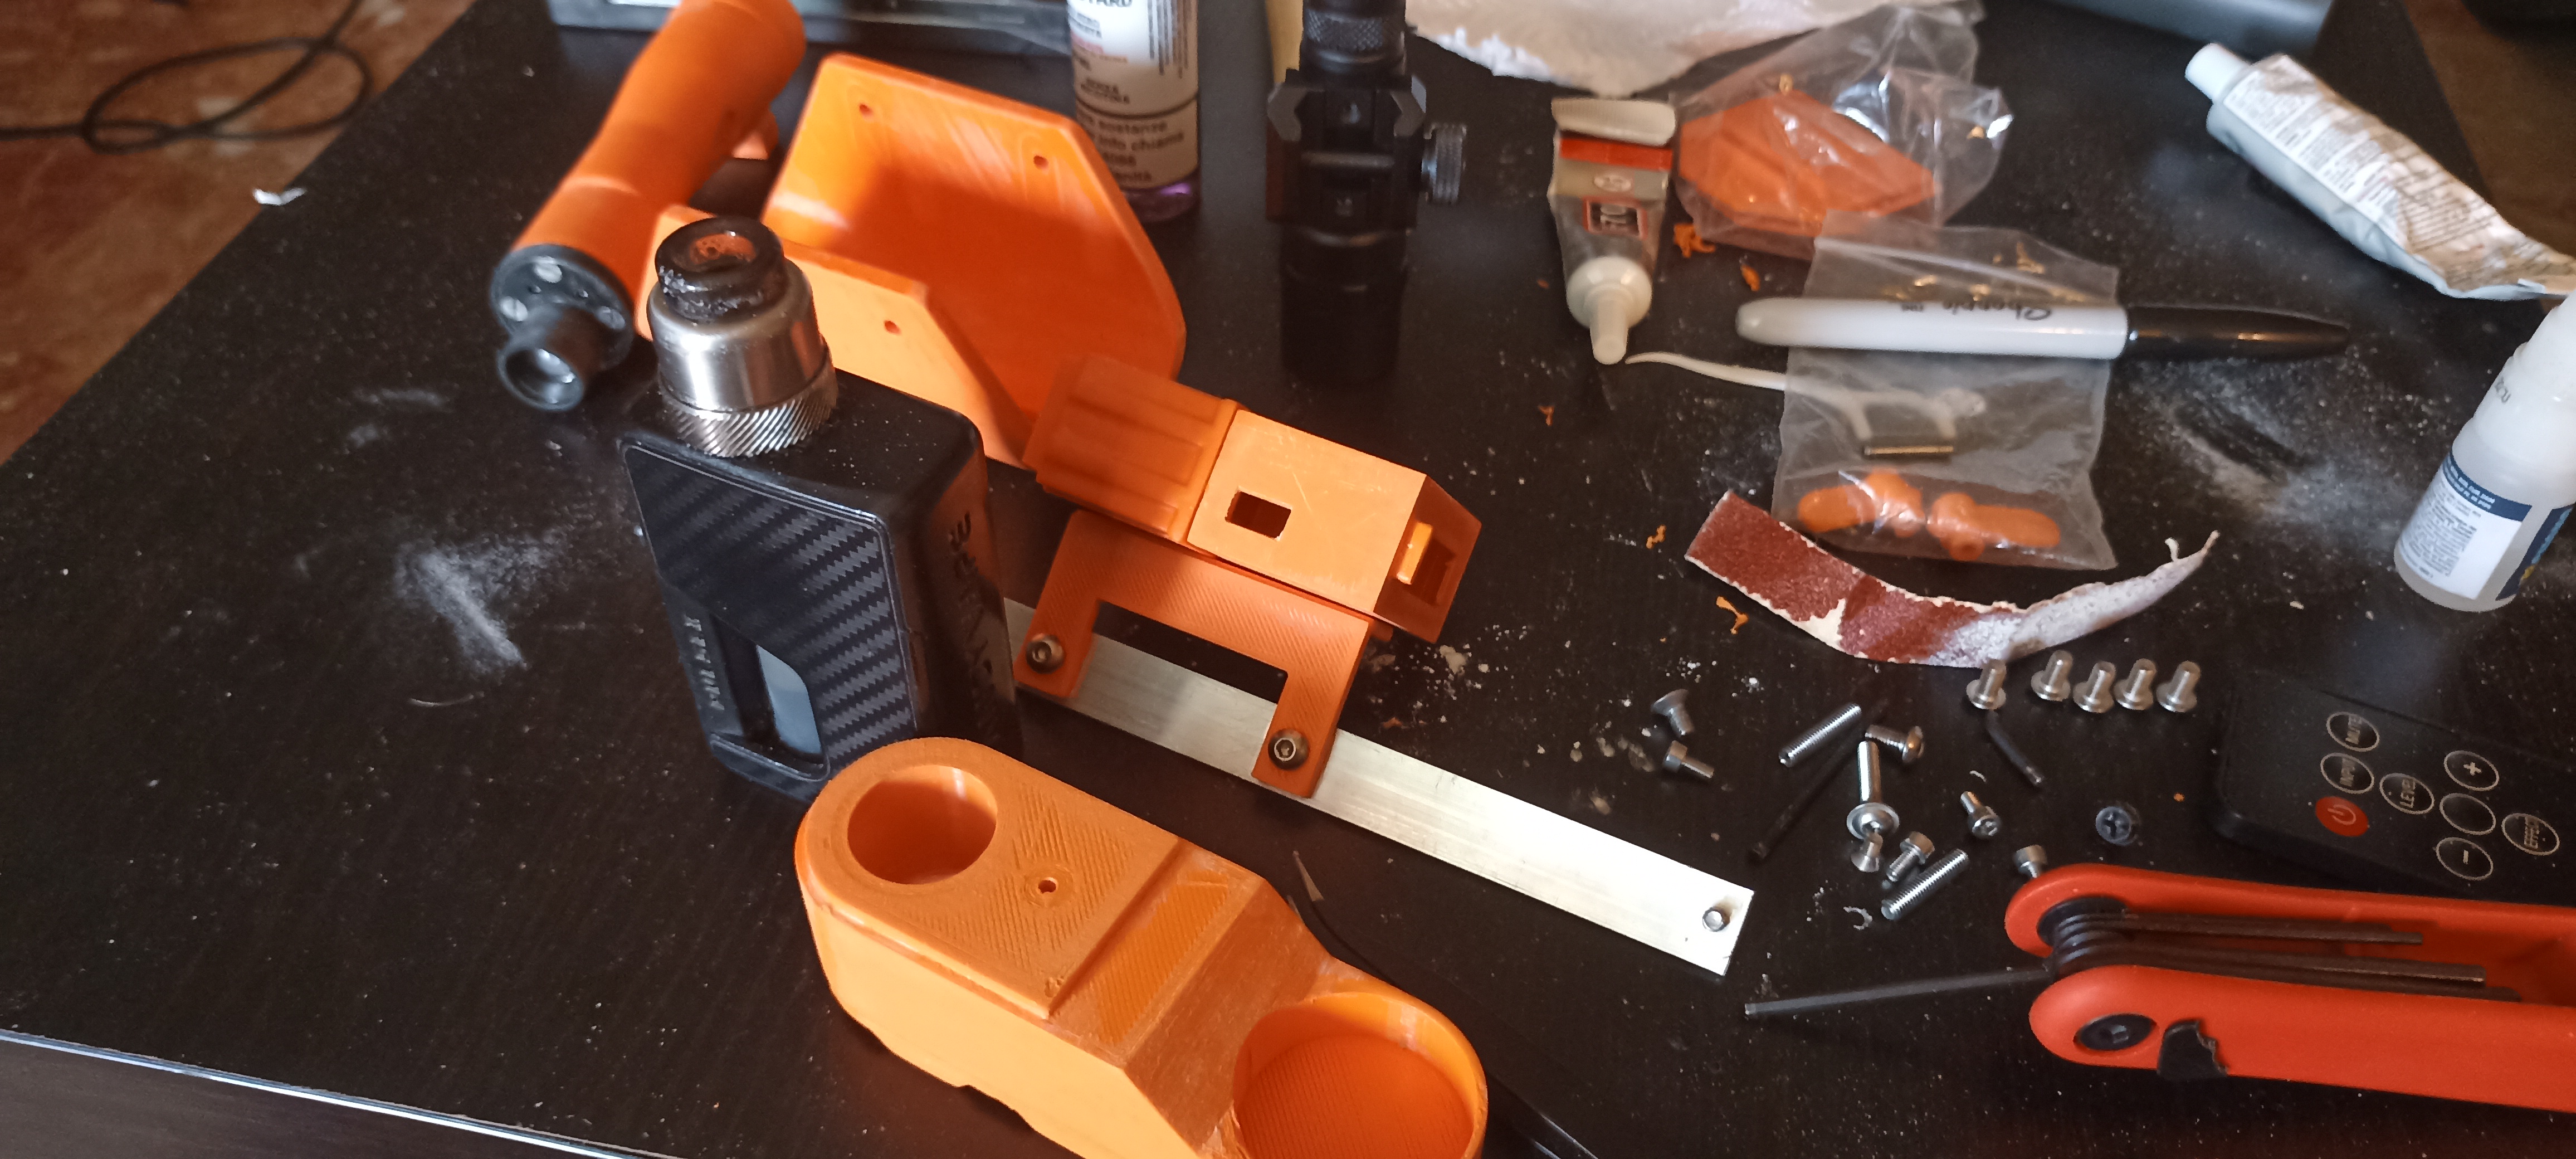
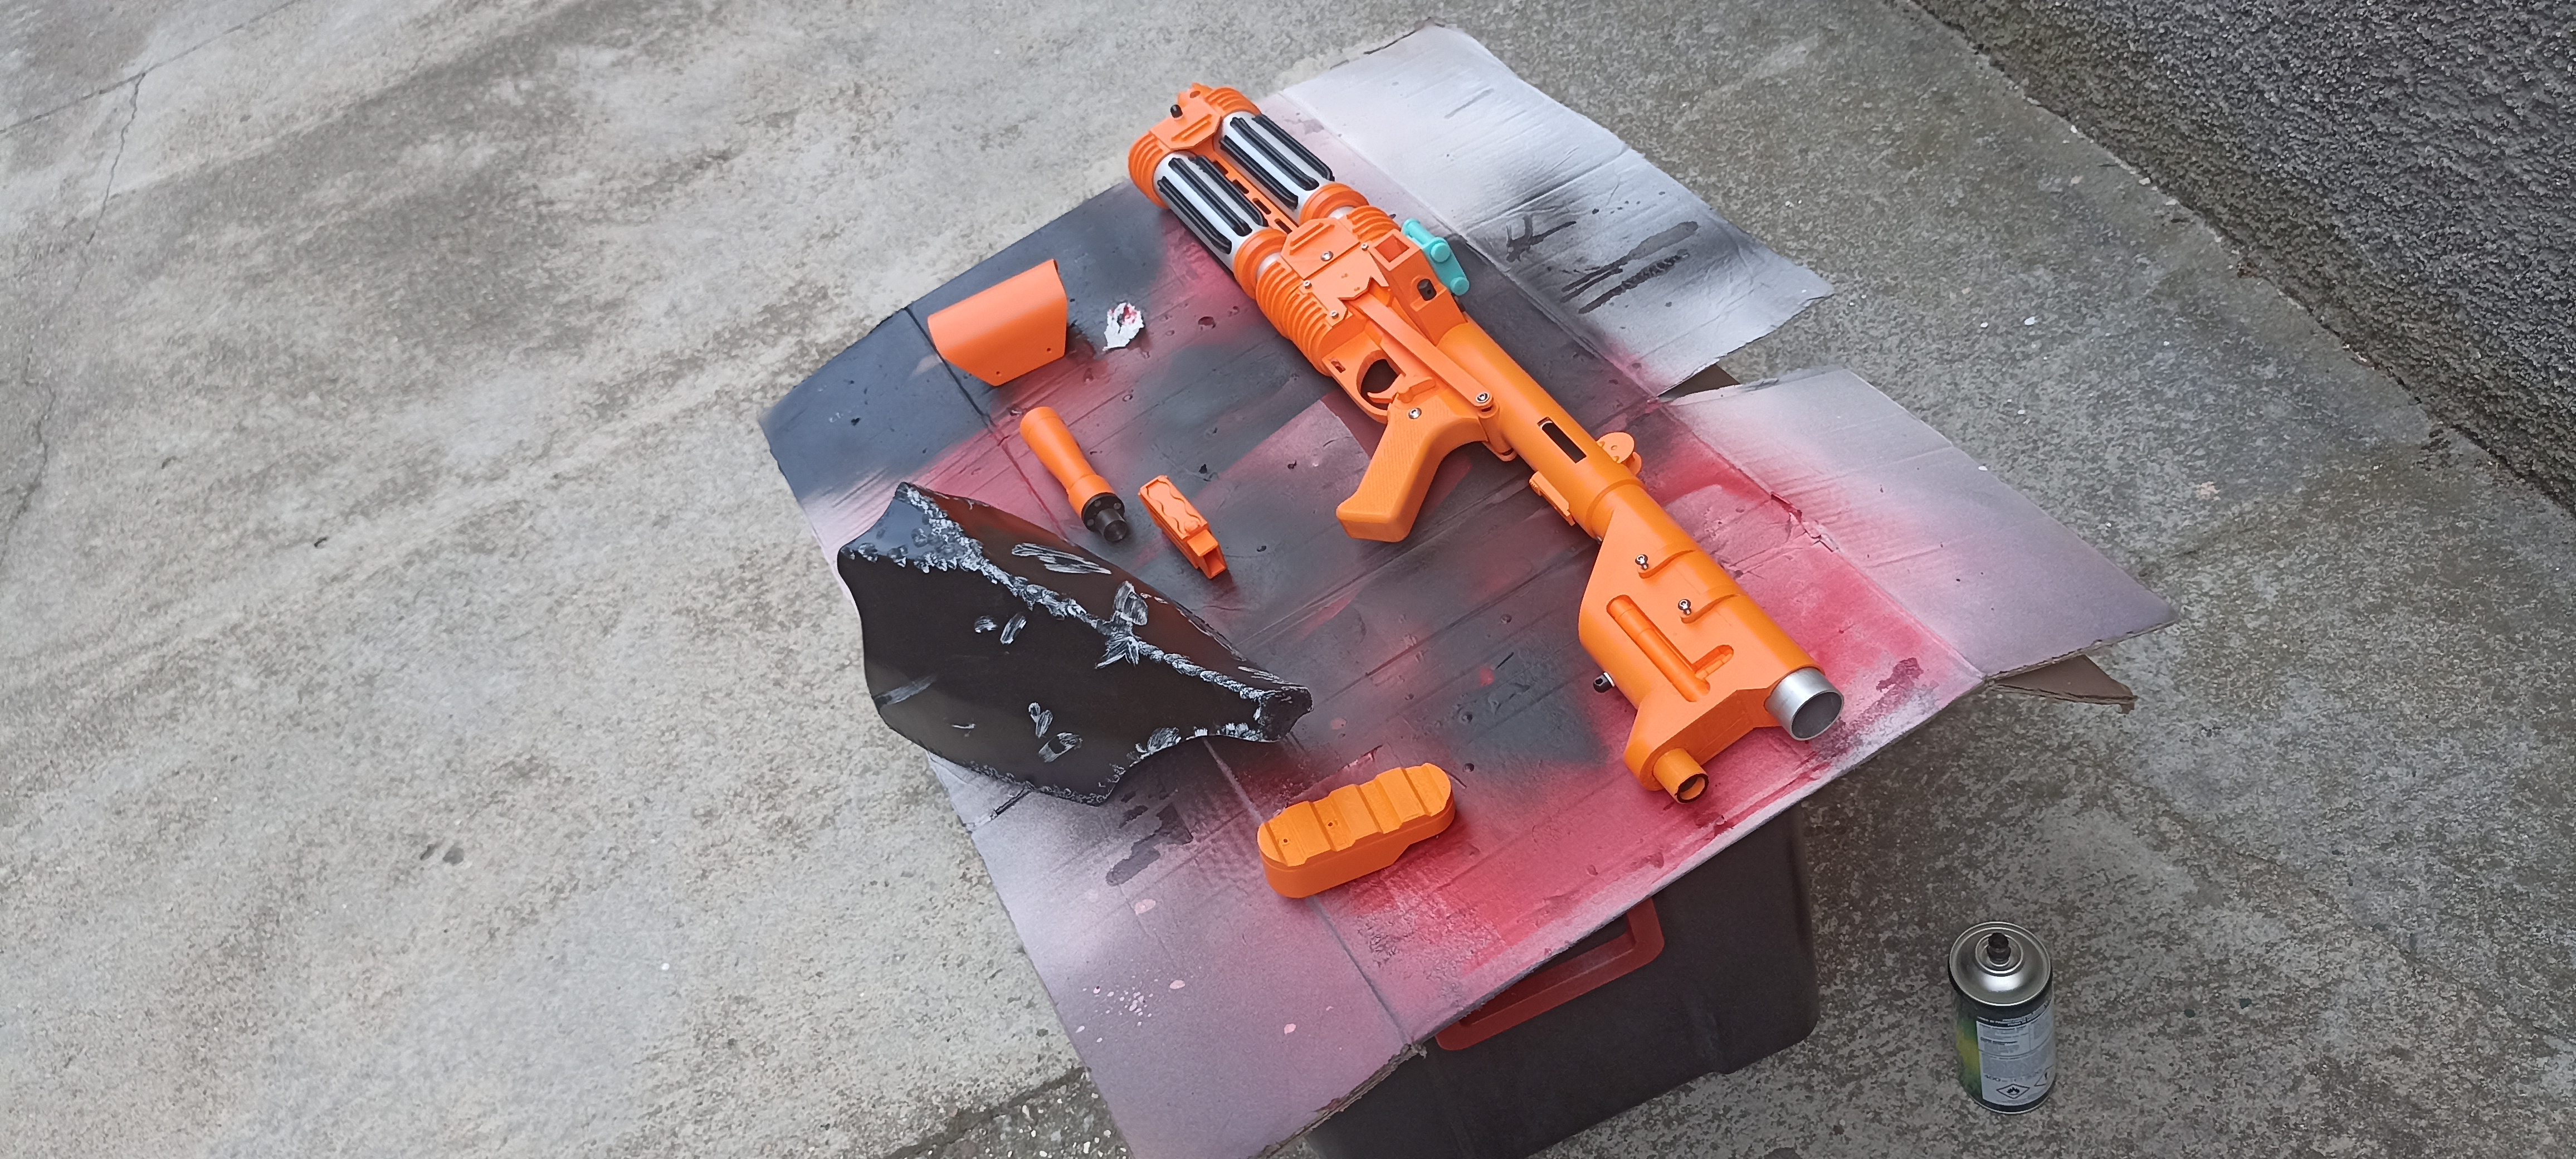
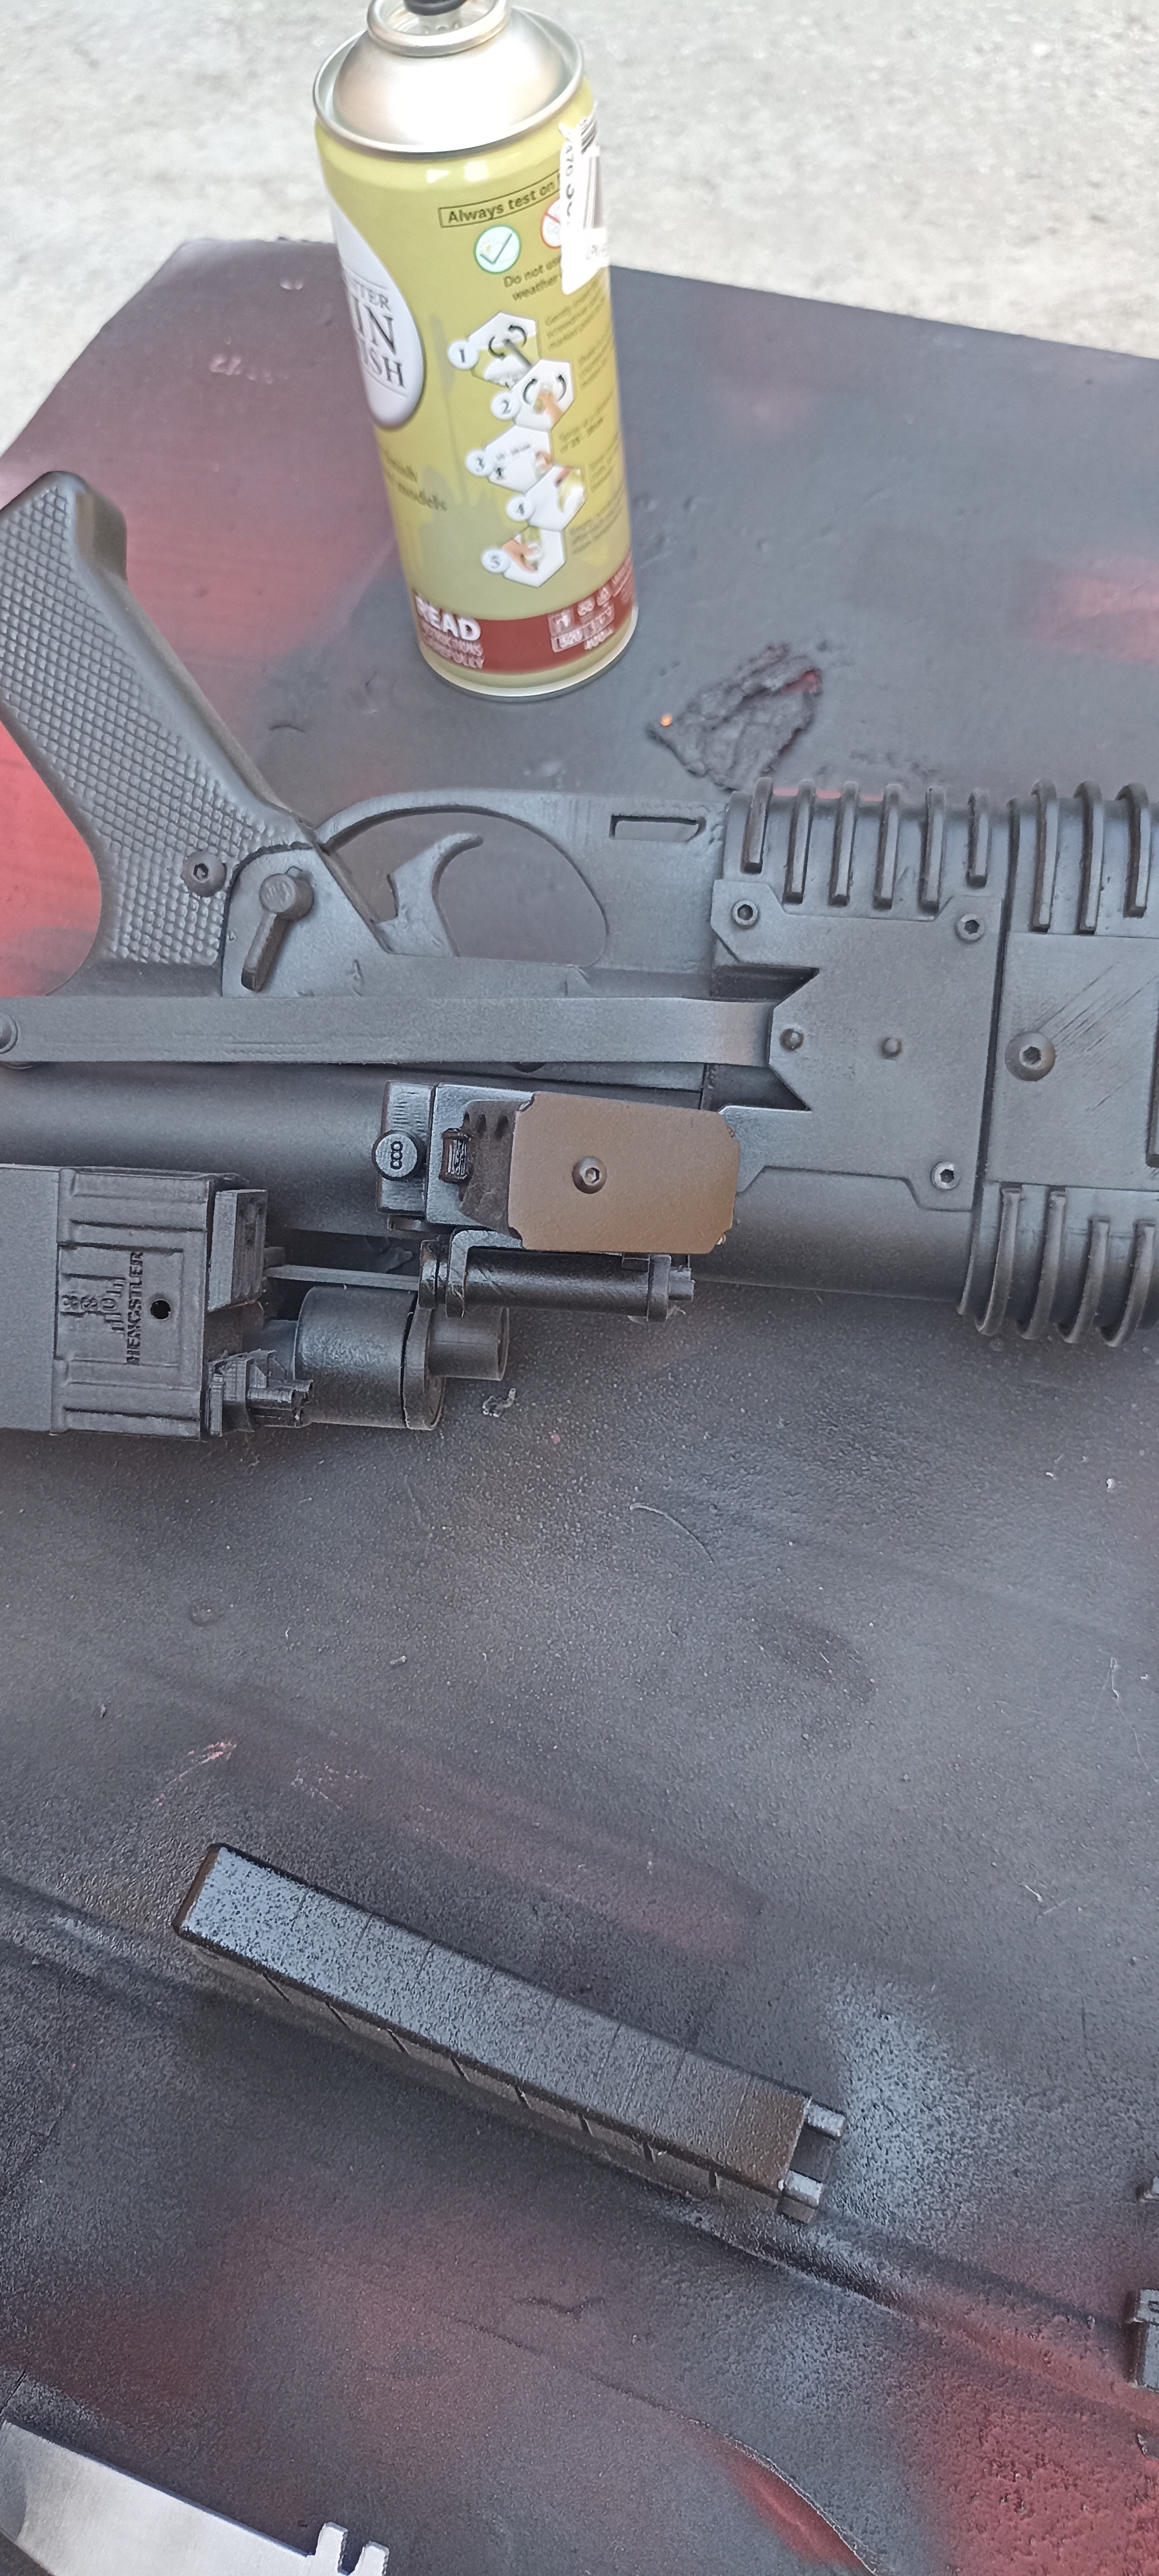
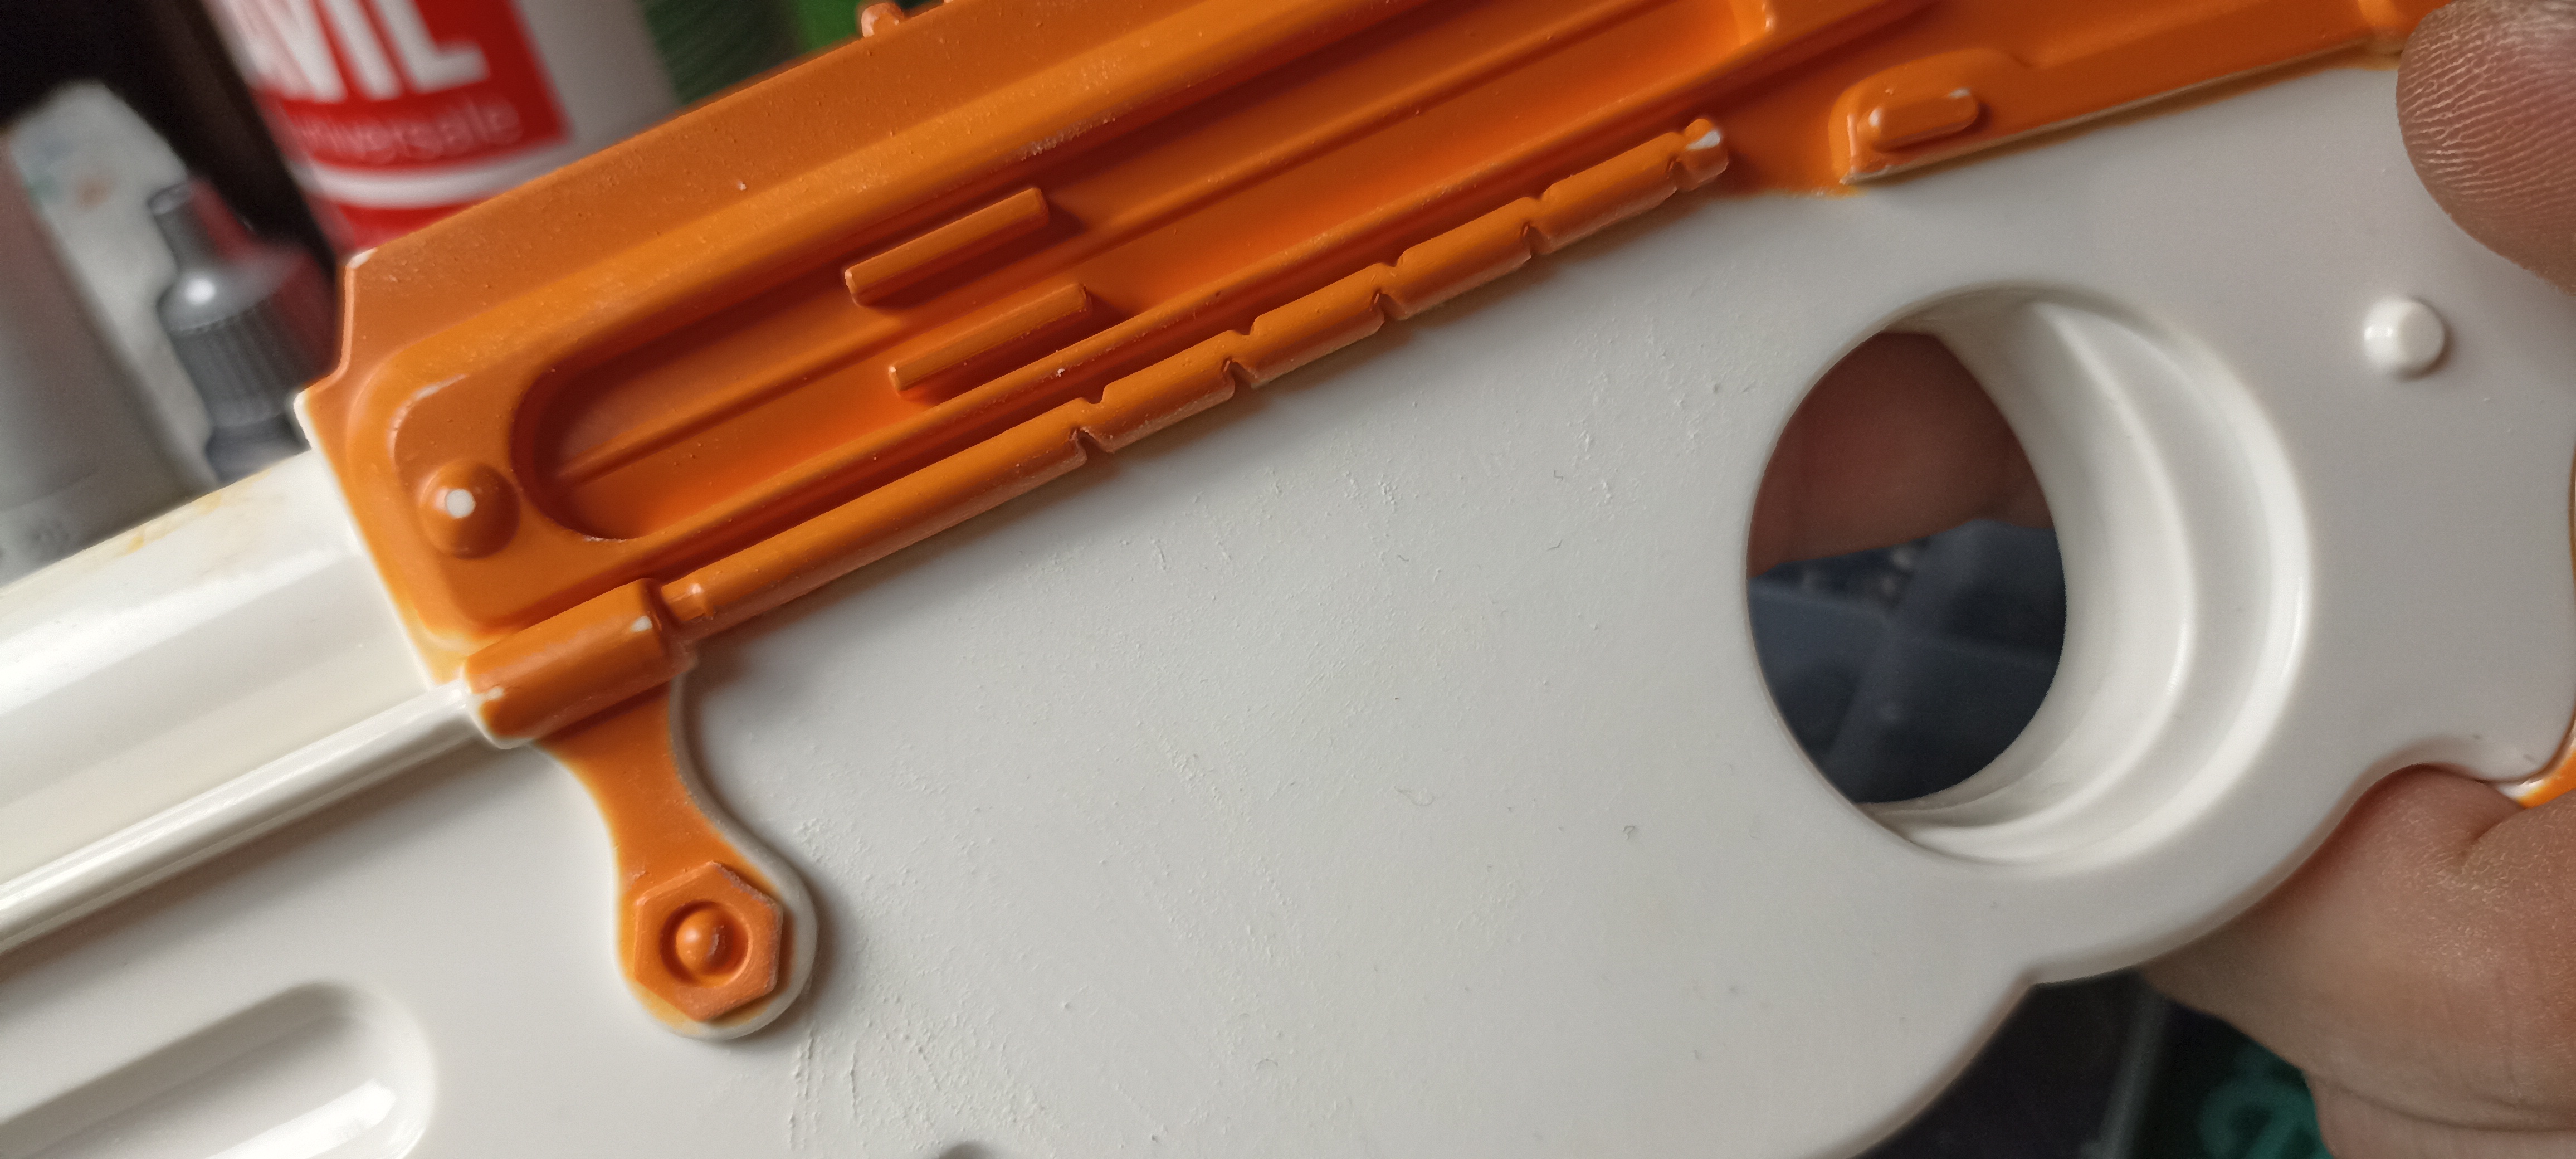
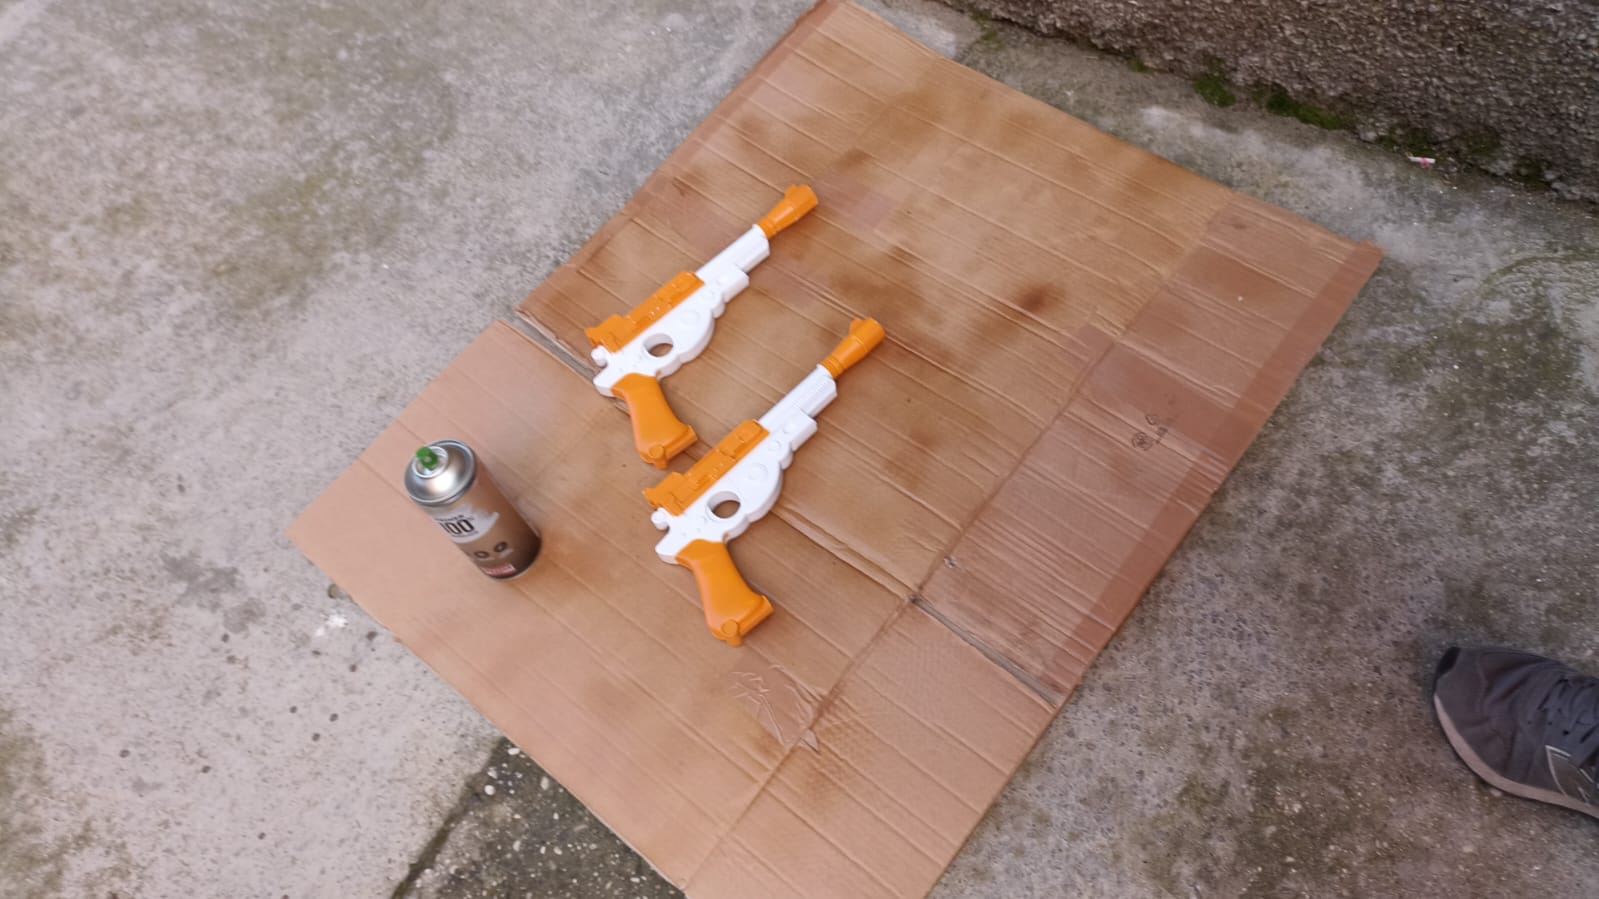
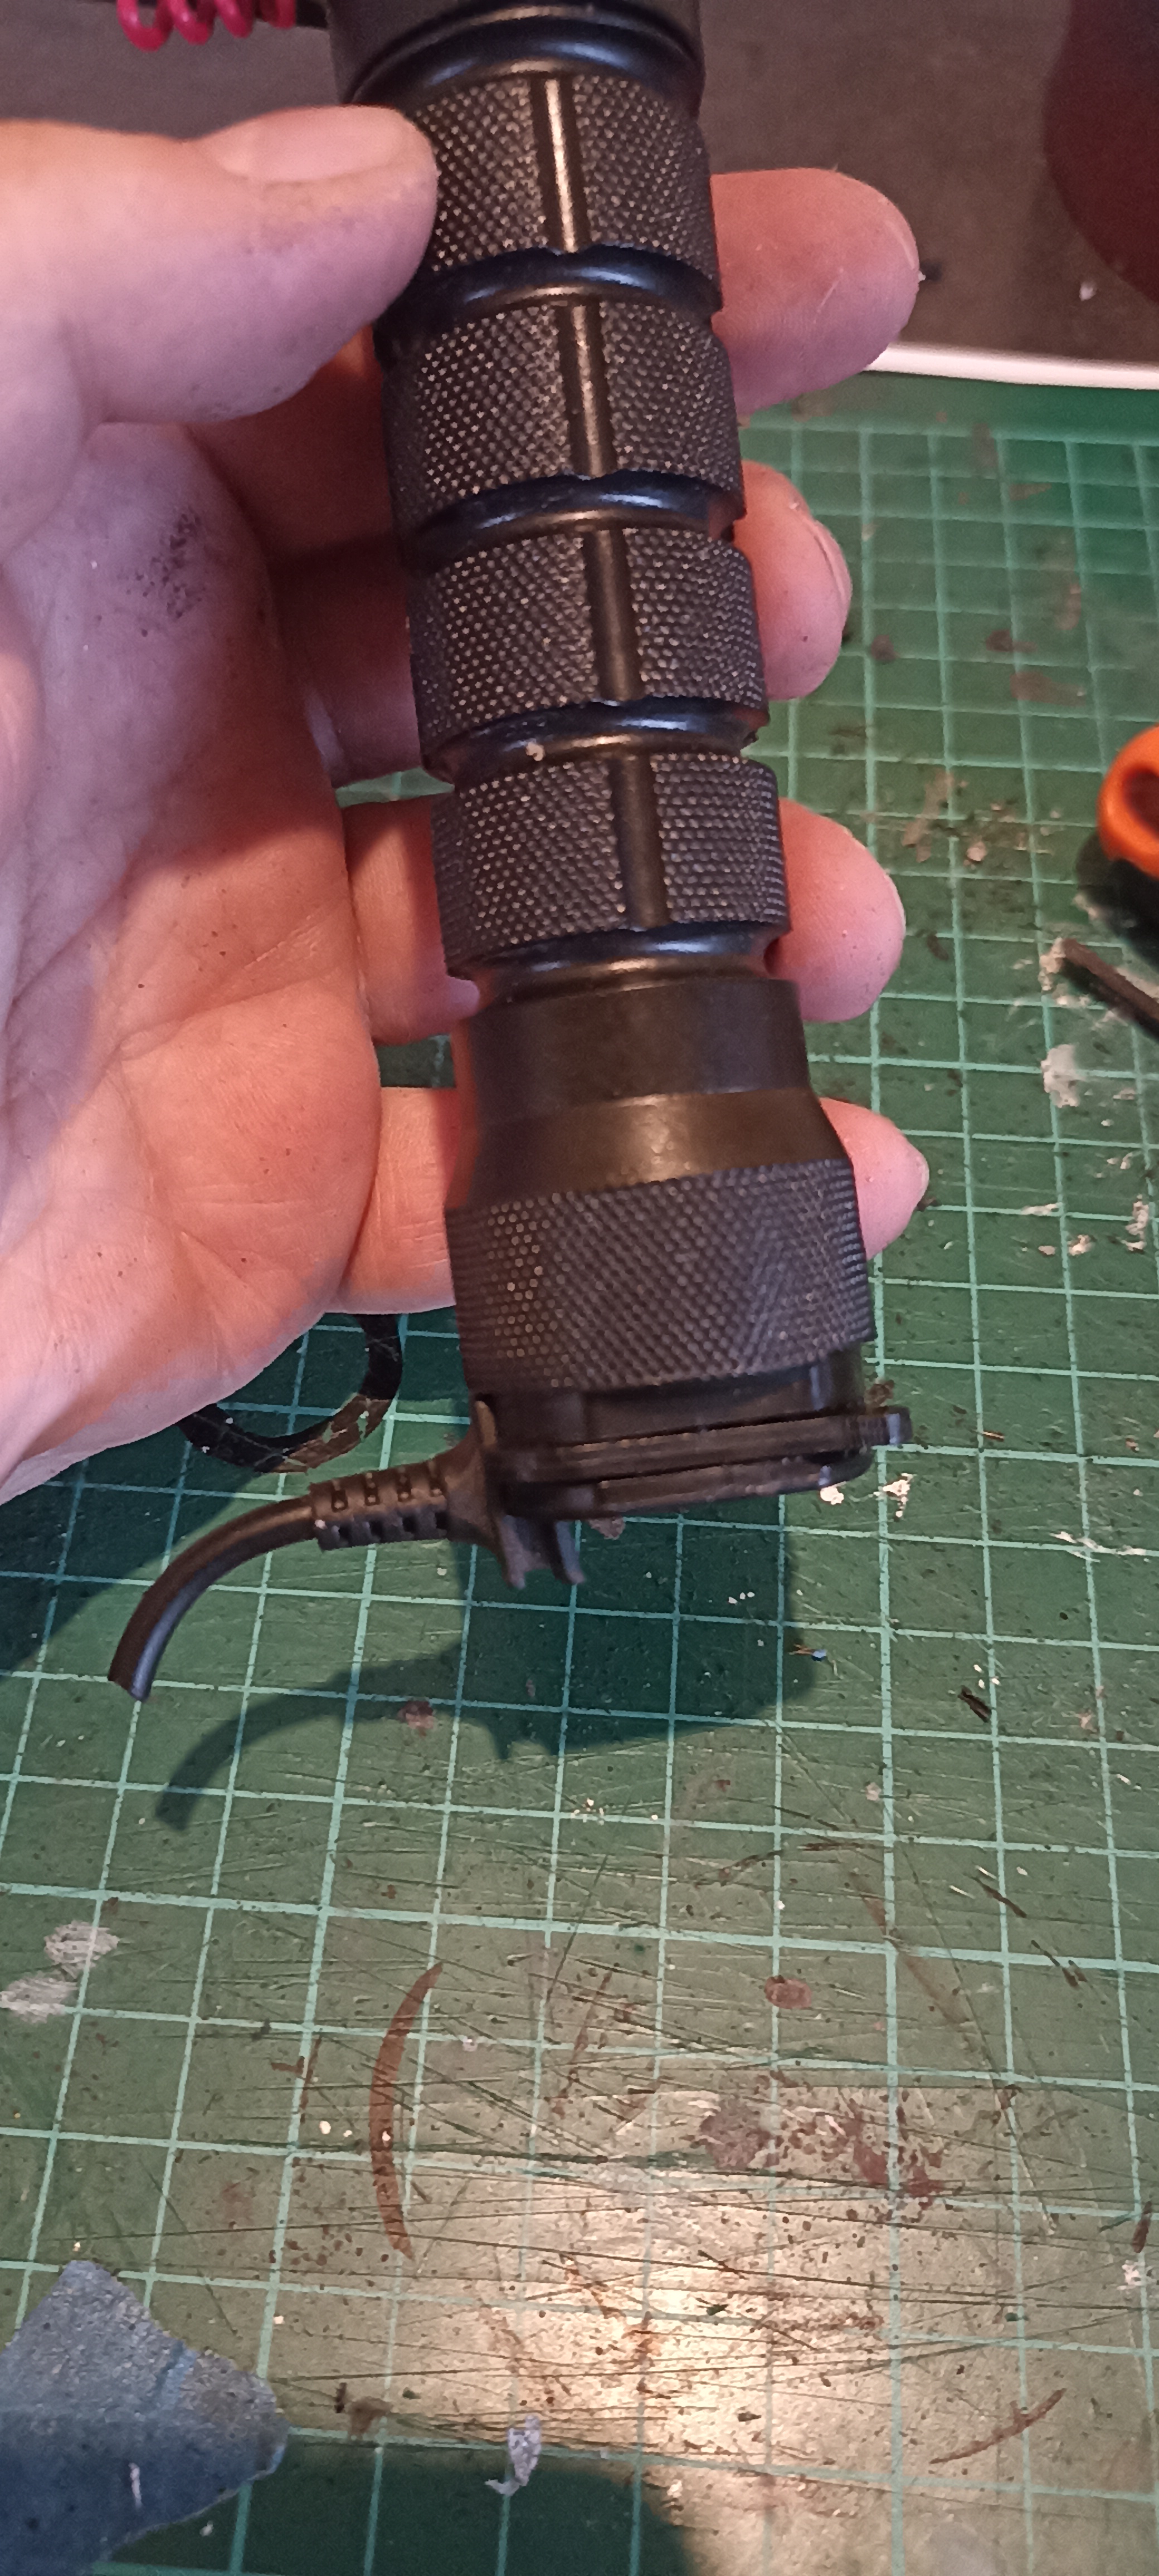
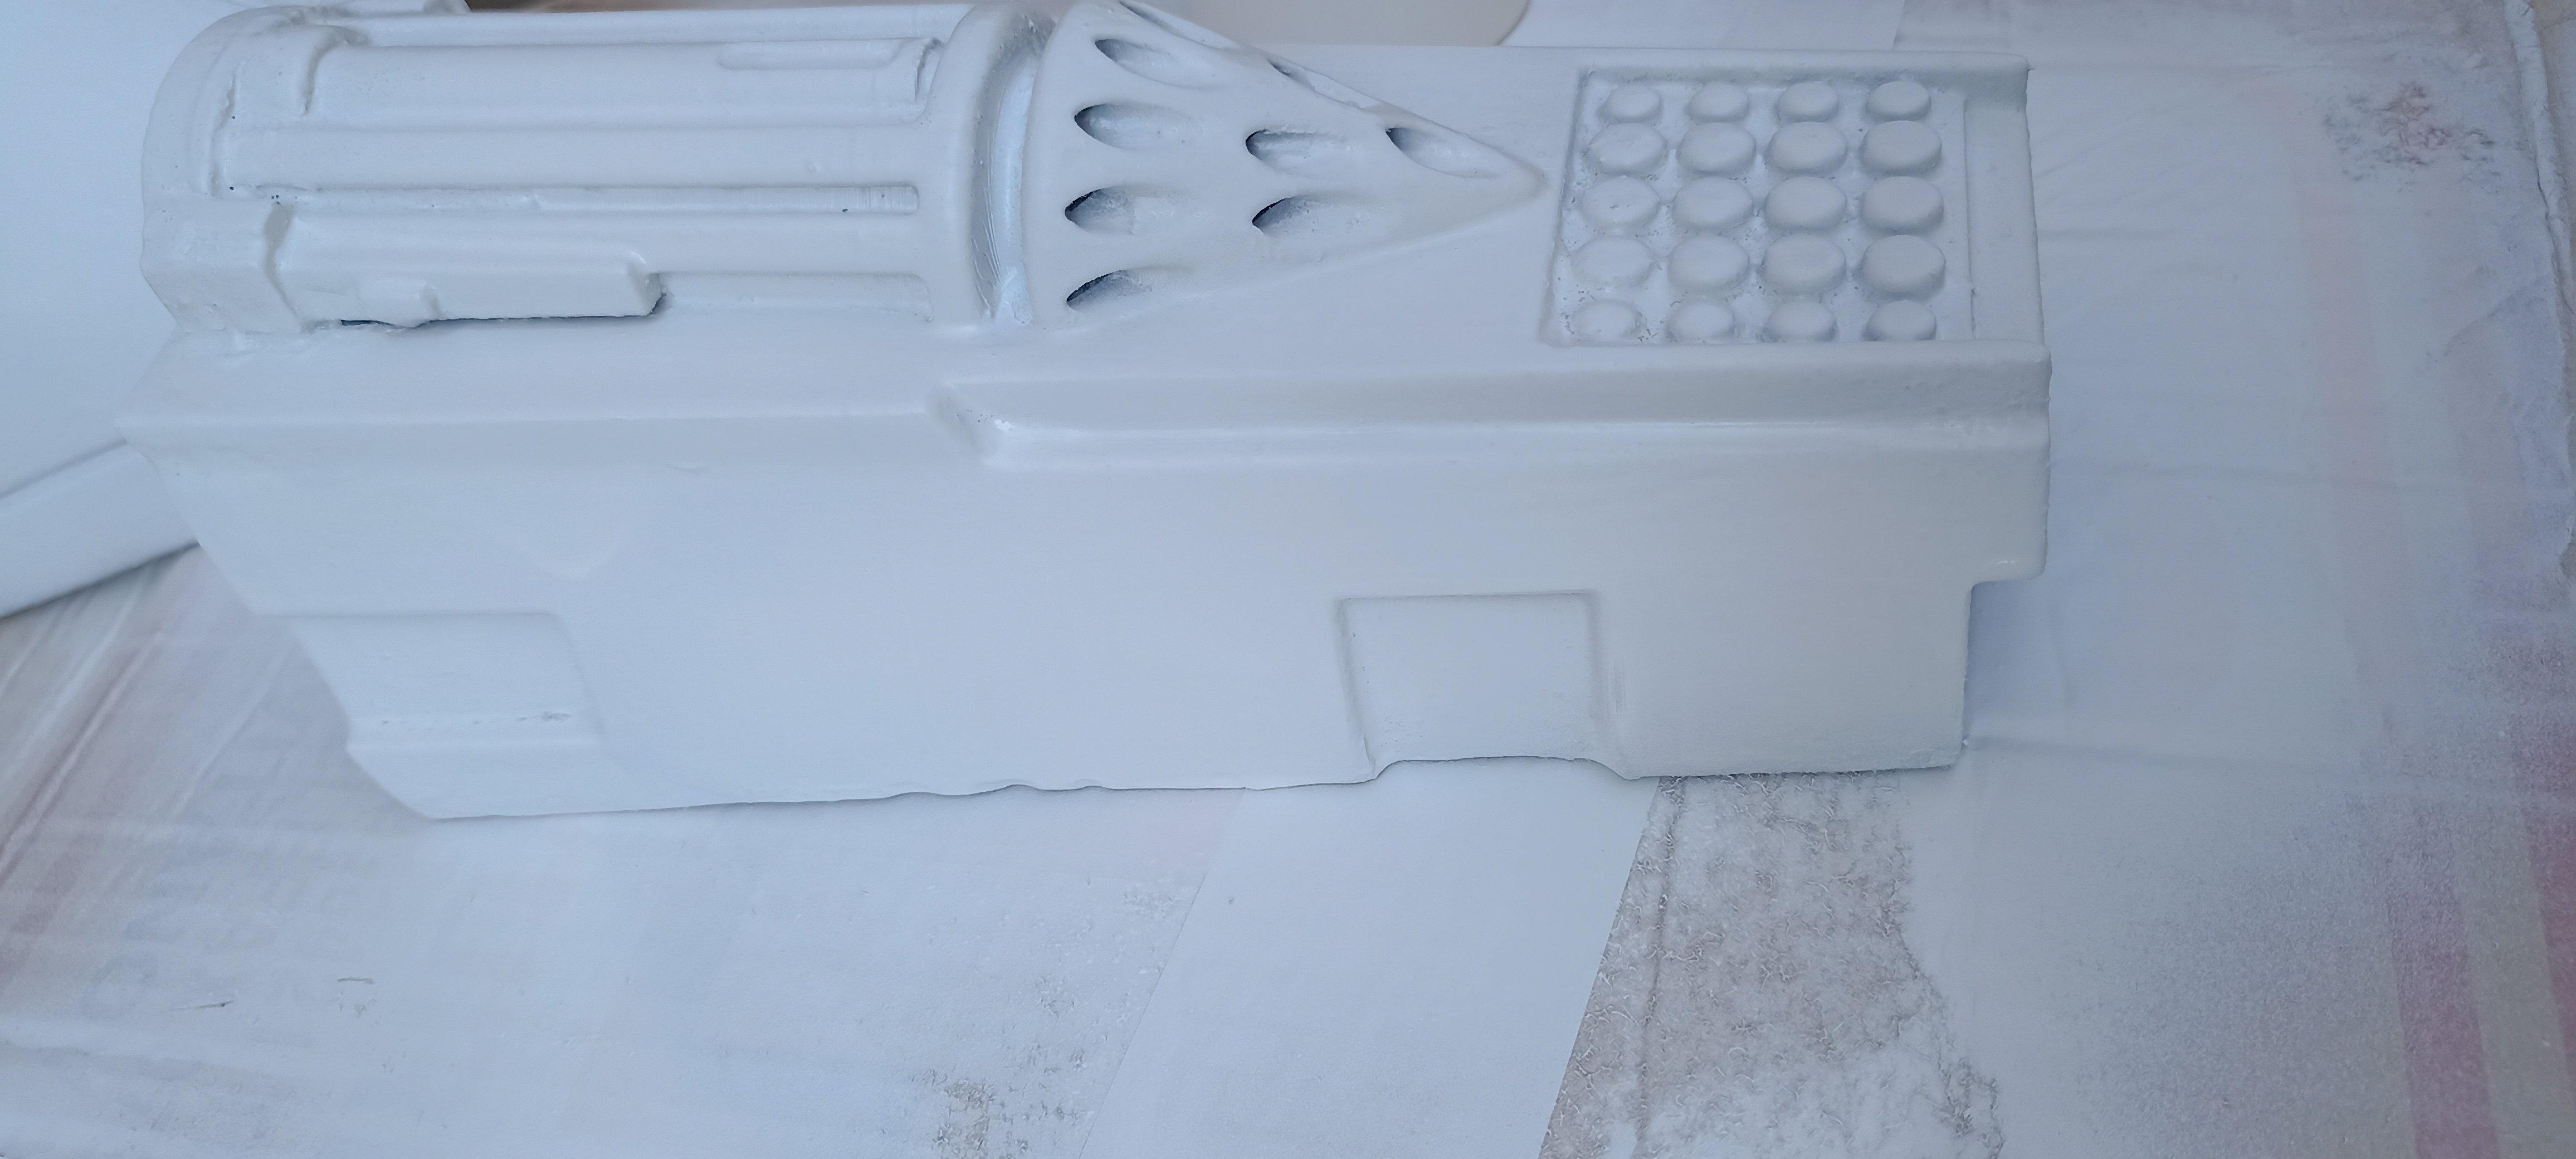
Blaster Rifle Custom
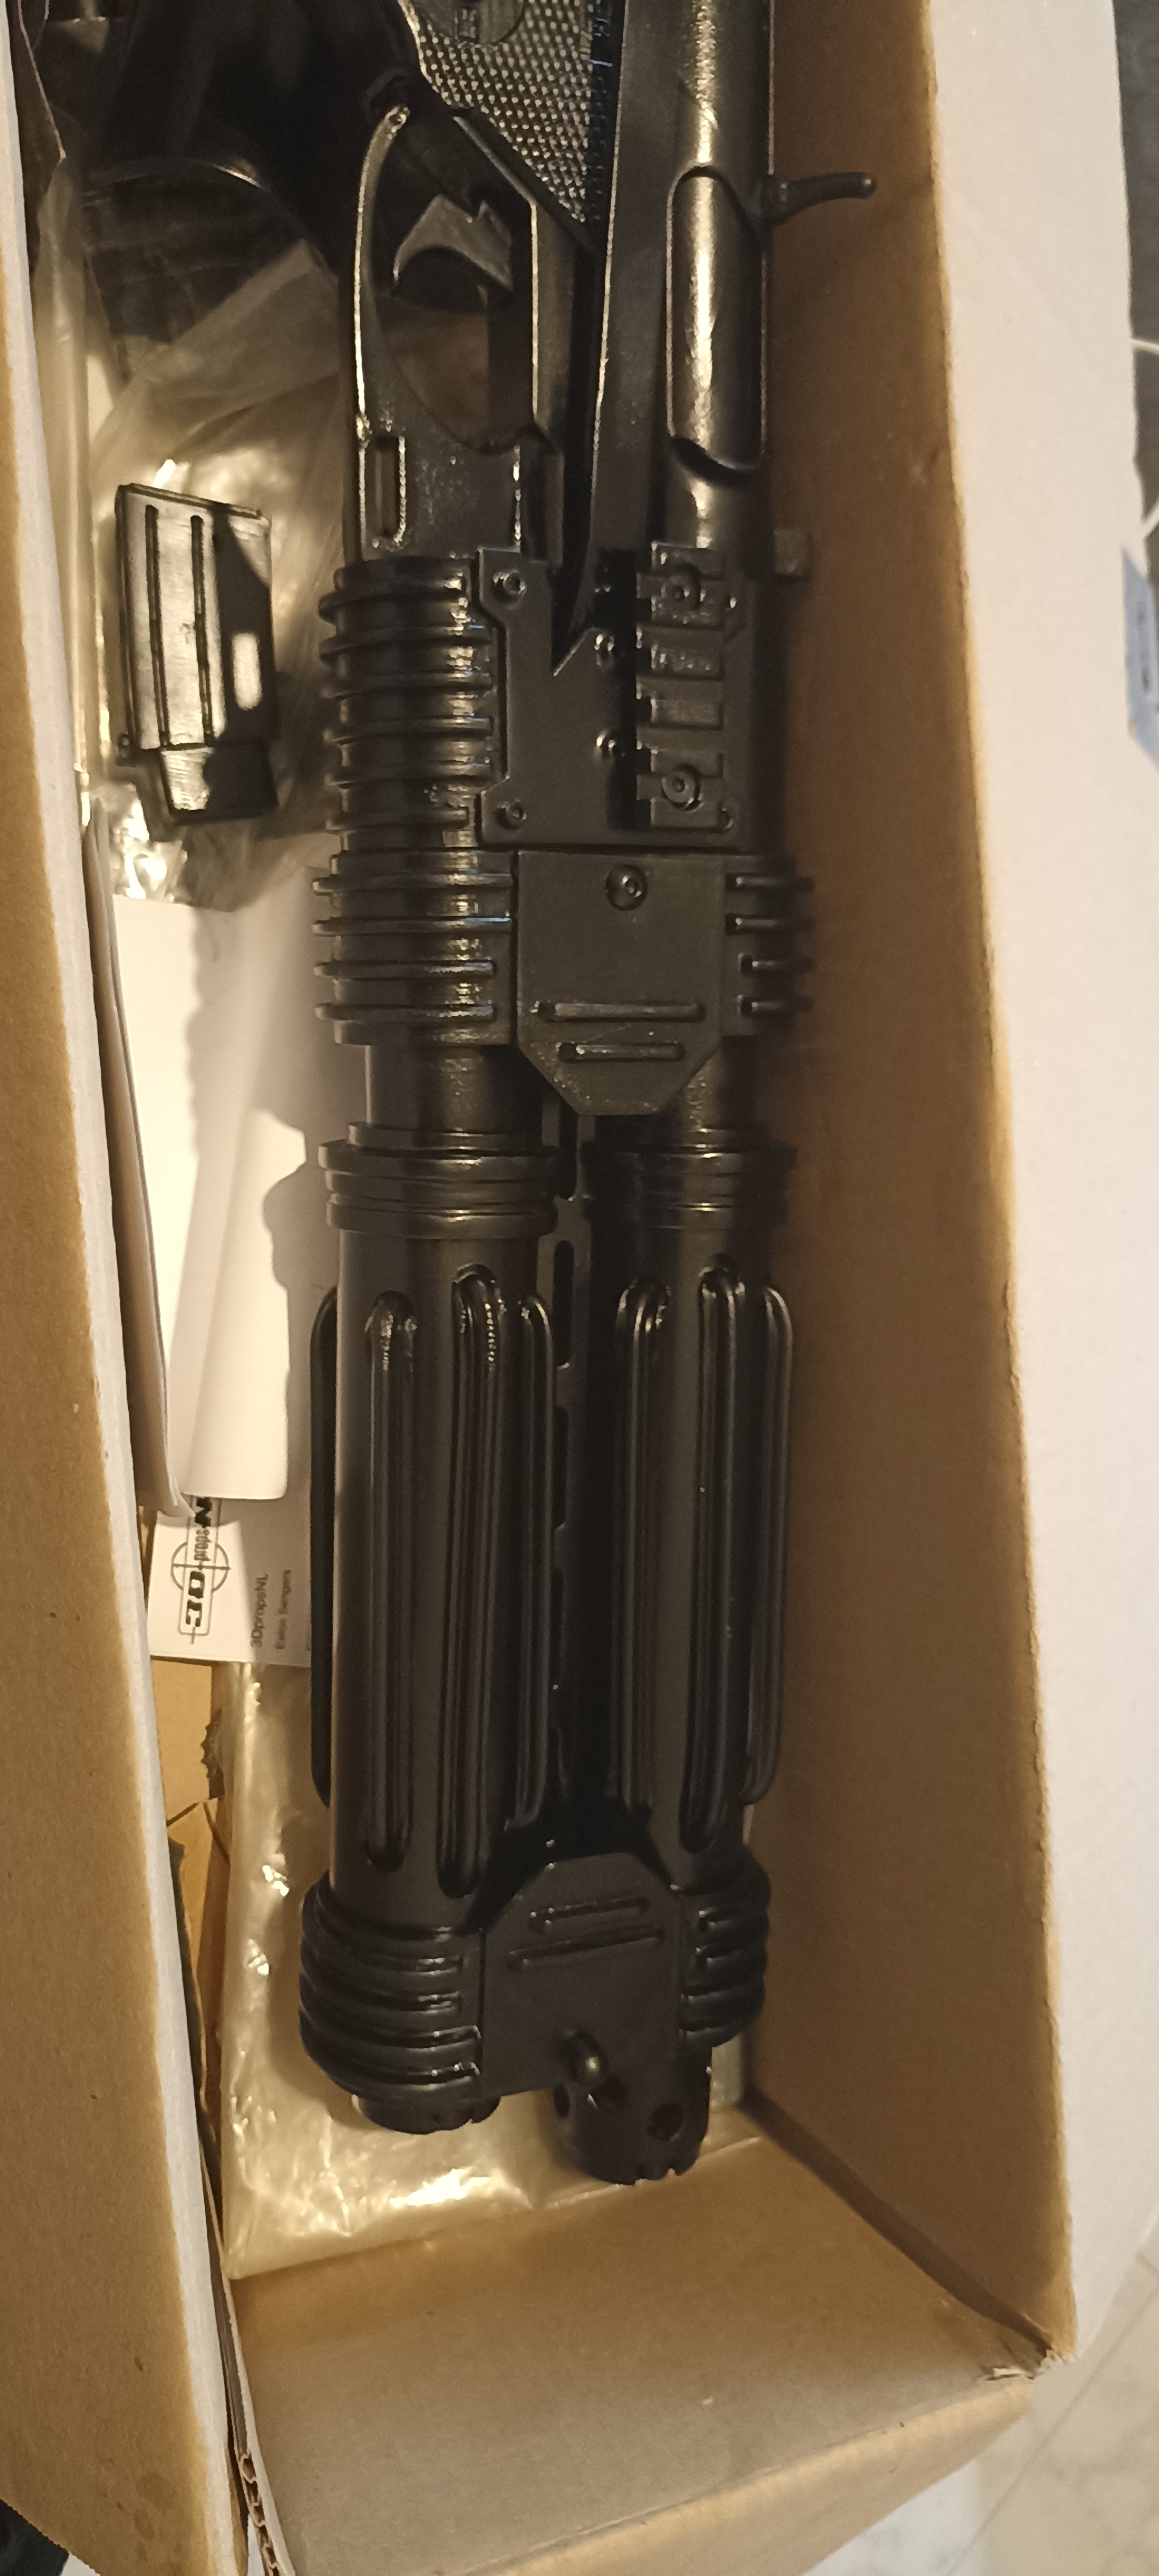
 | Modello Nerf like di partenza. |
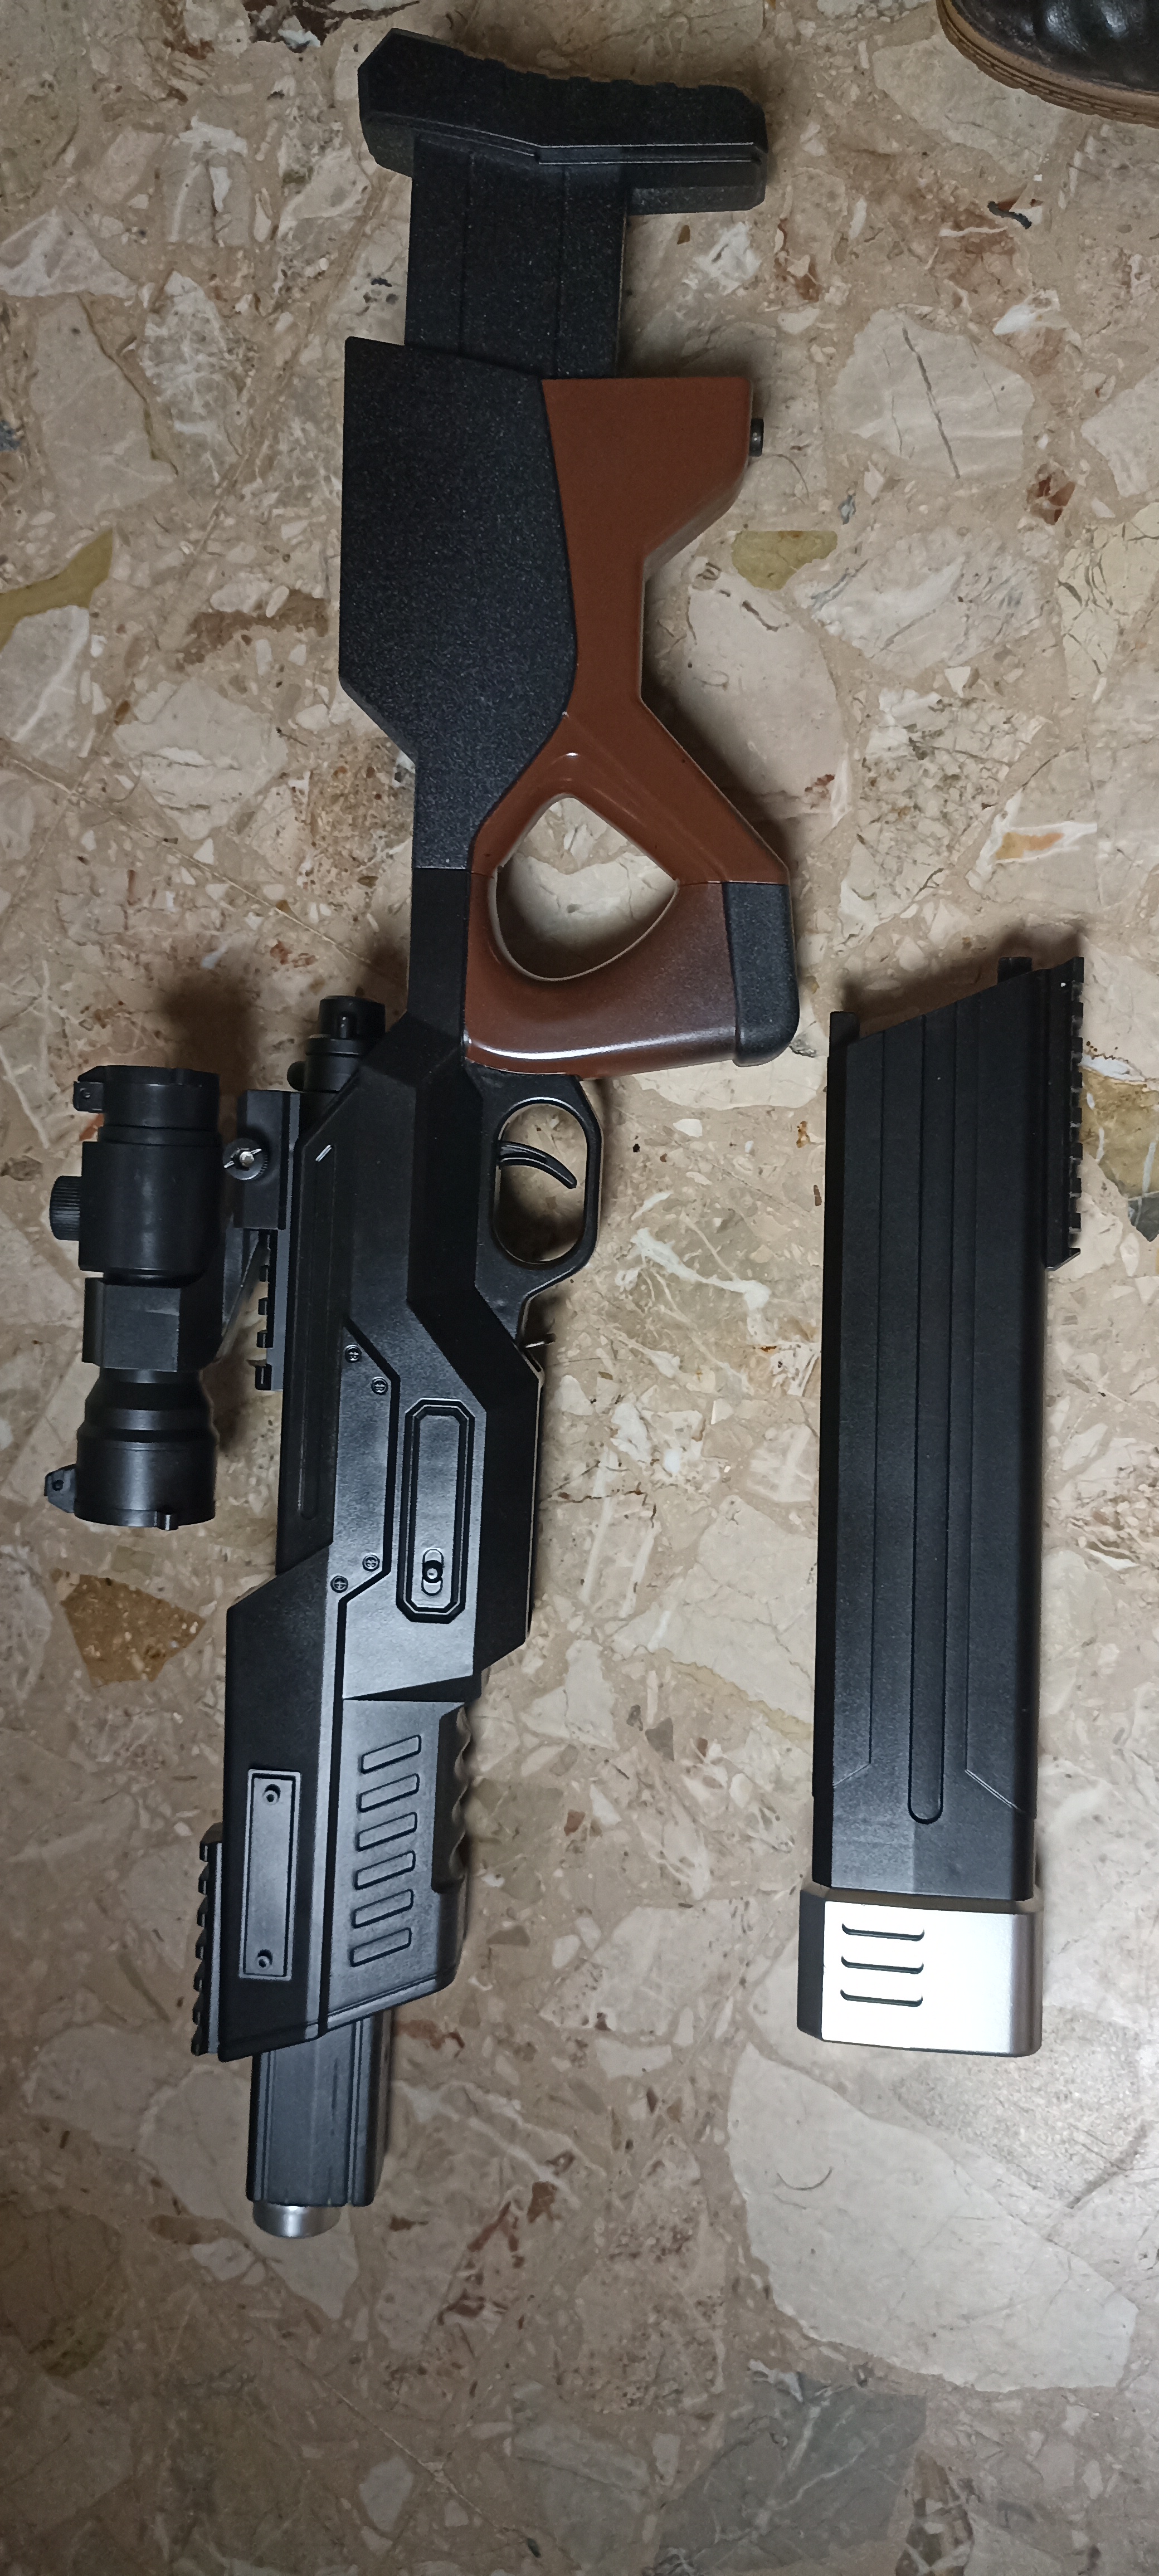
 | La dotazione comprende caricatore, bossoli e il modello è smontabile. |
 | Si parte con un giro di primer trasparente. |
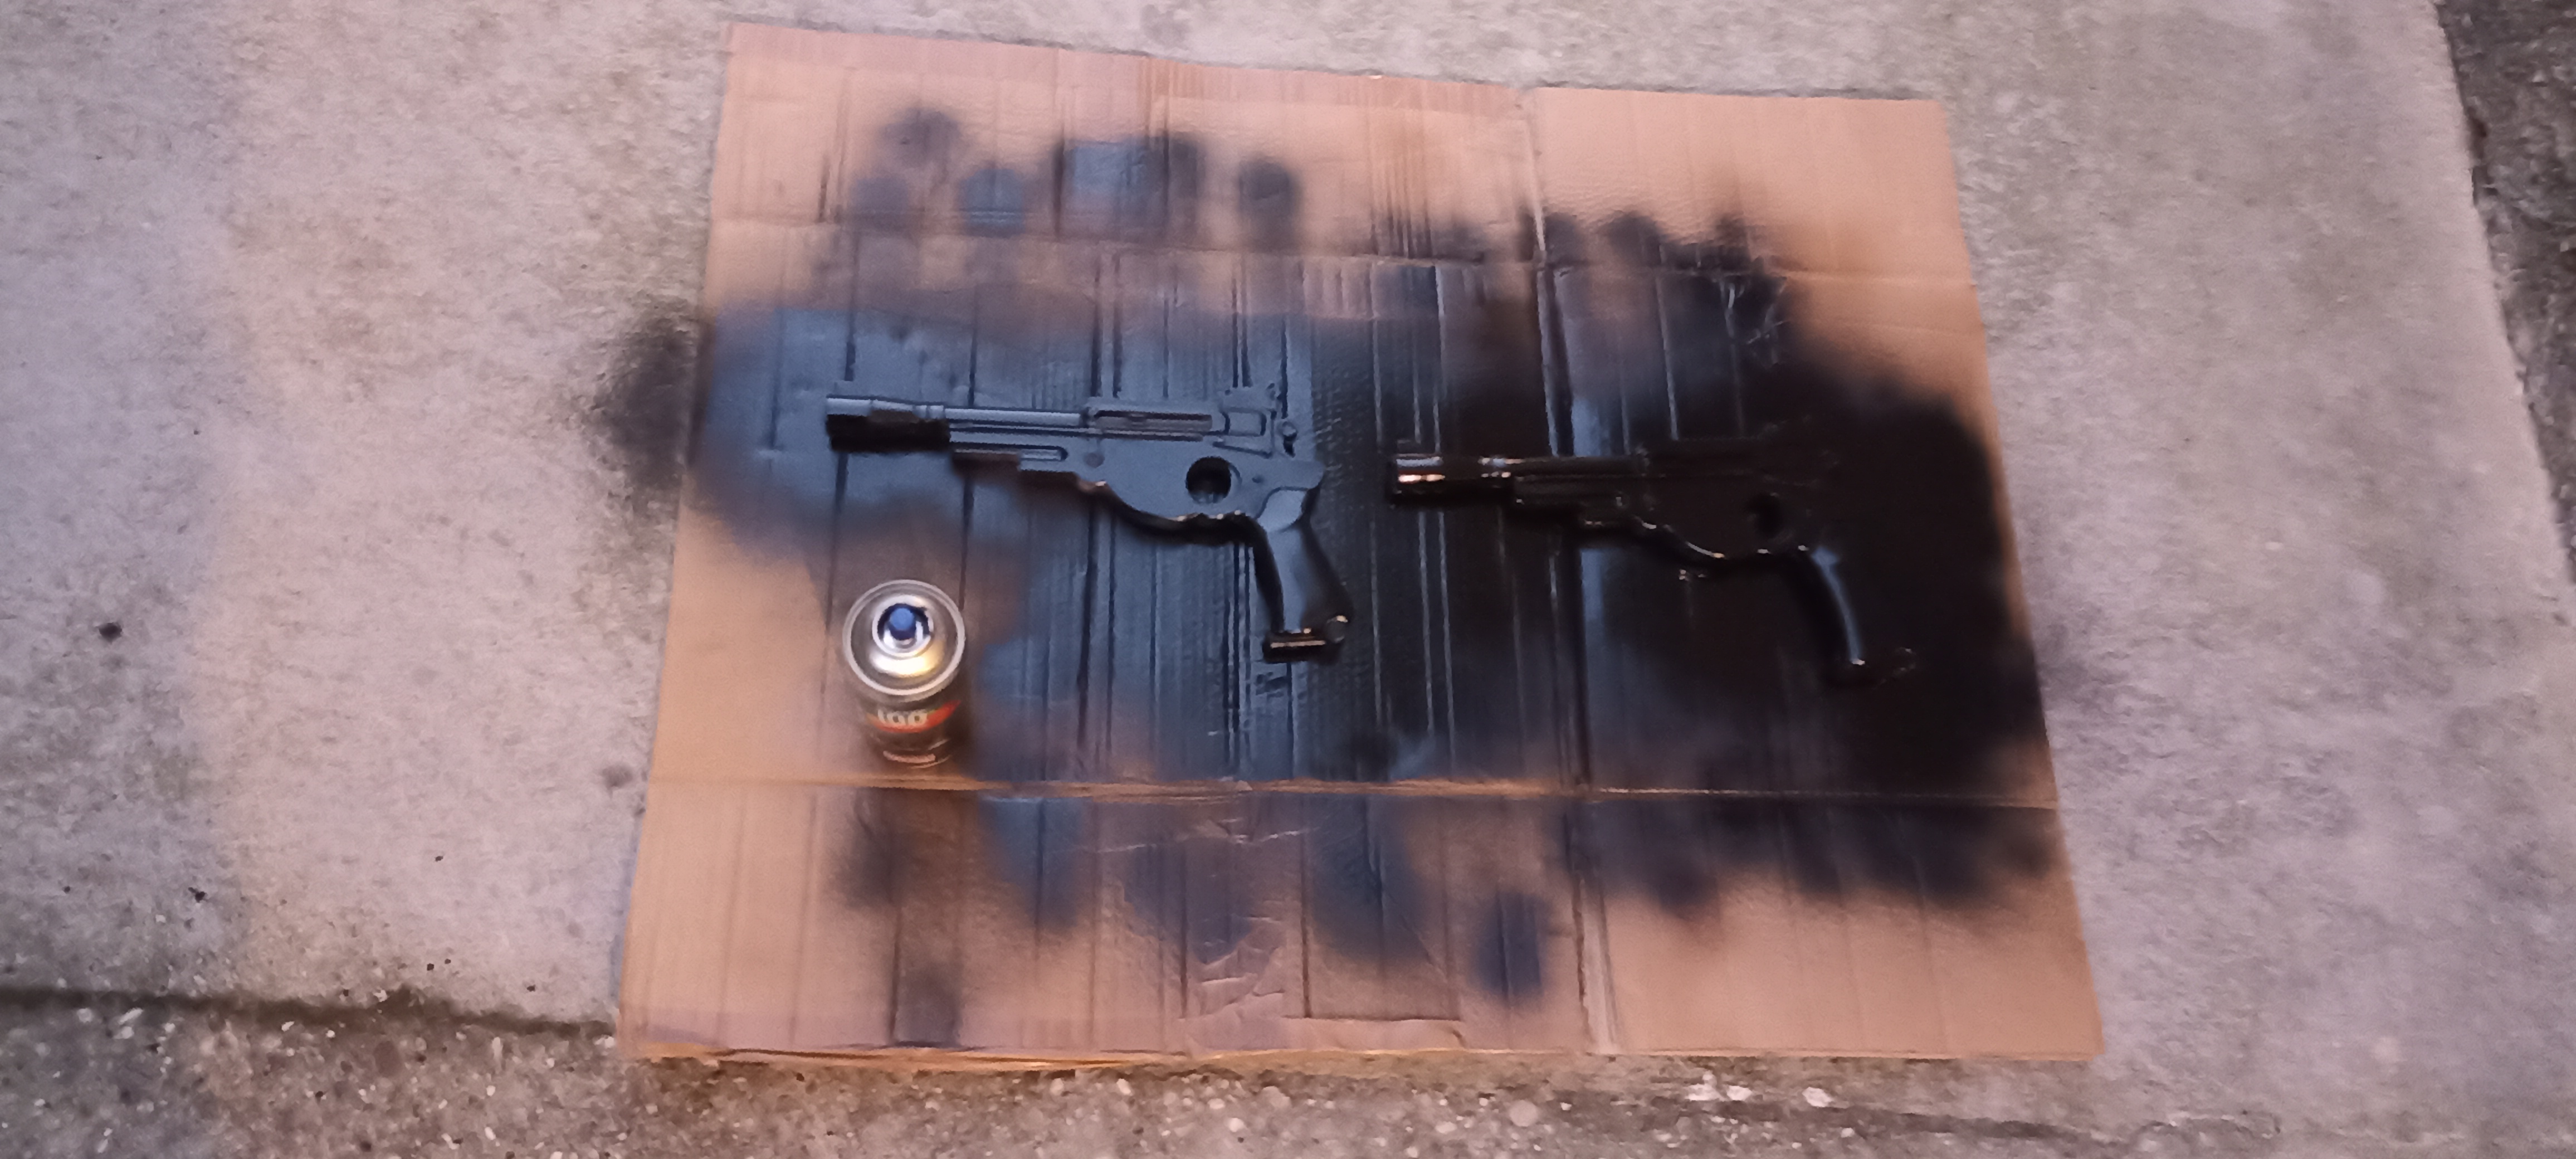
 | Verniciatura bossoli con argento. |
 | Mano di nero bello coprente e lucido. |
 | Un po' di maschere per mettere il marrone. |
 | Argento su alcuni dettagli e parti. |
 | Velo di marrone. |
 | Effetto ruvido su alcune parti. |
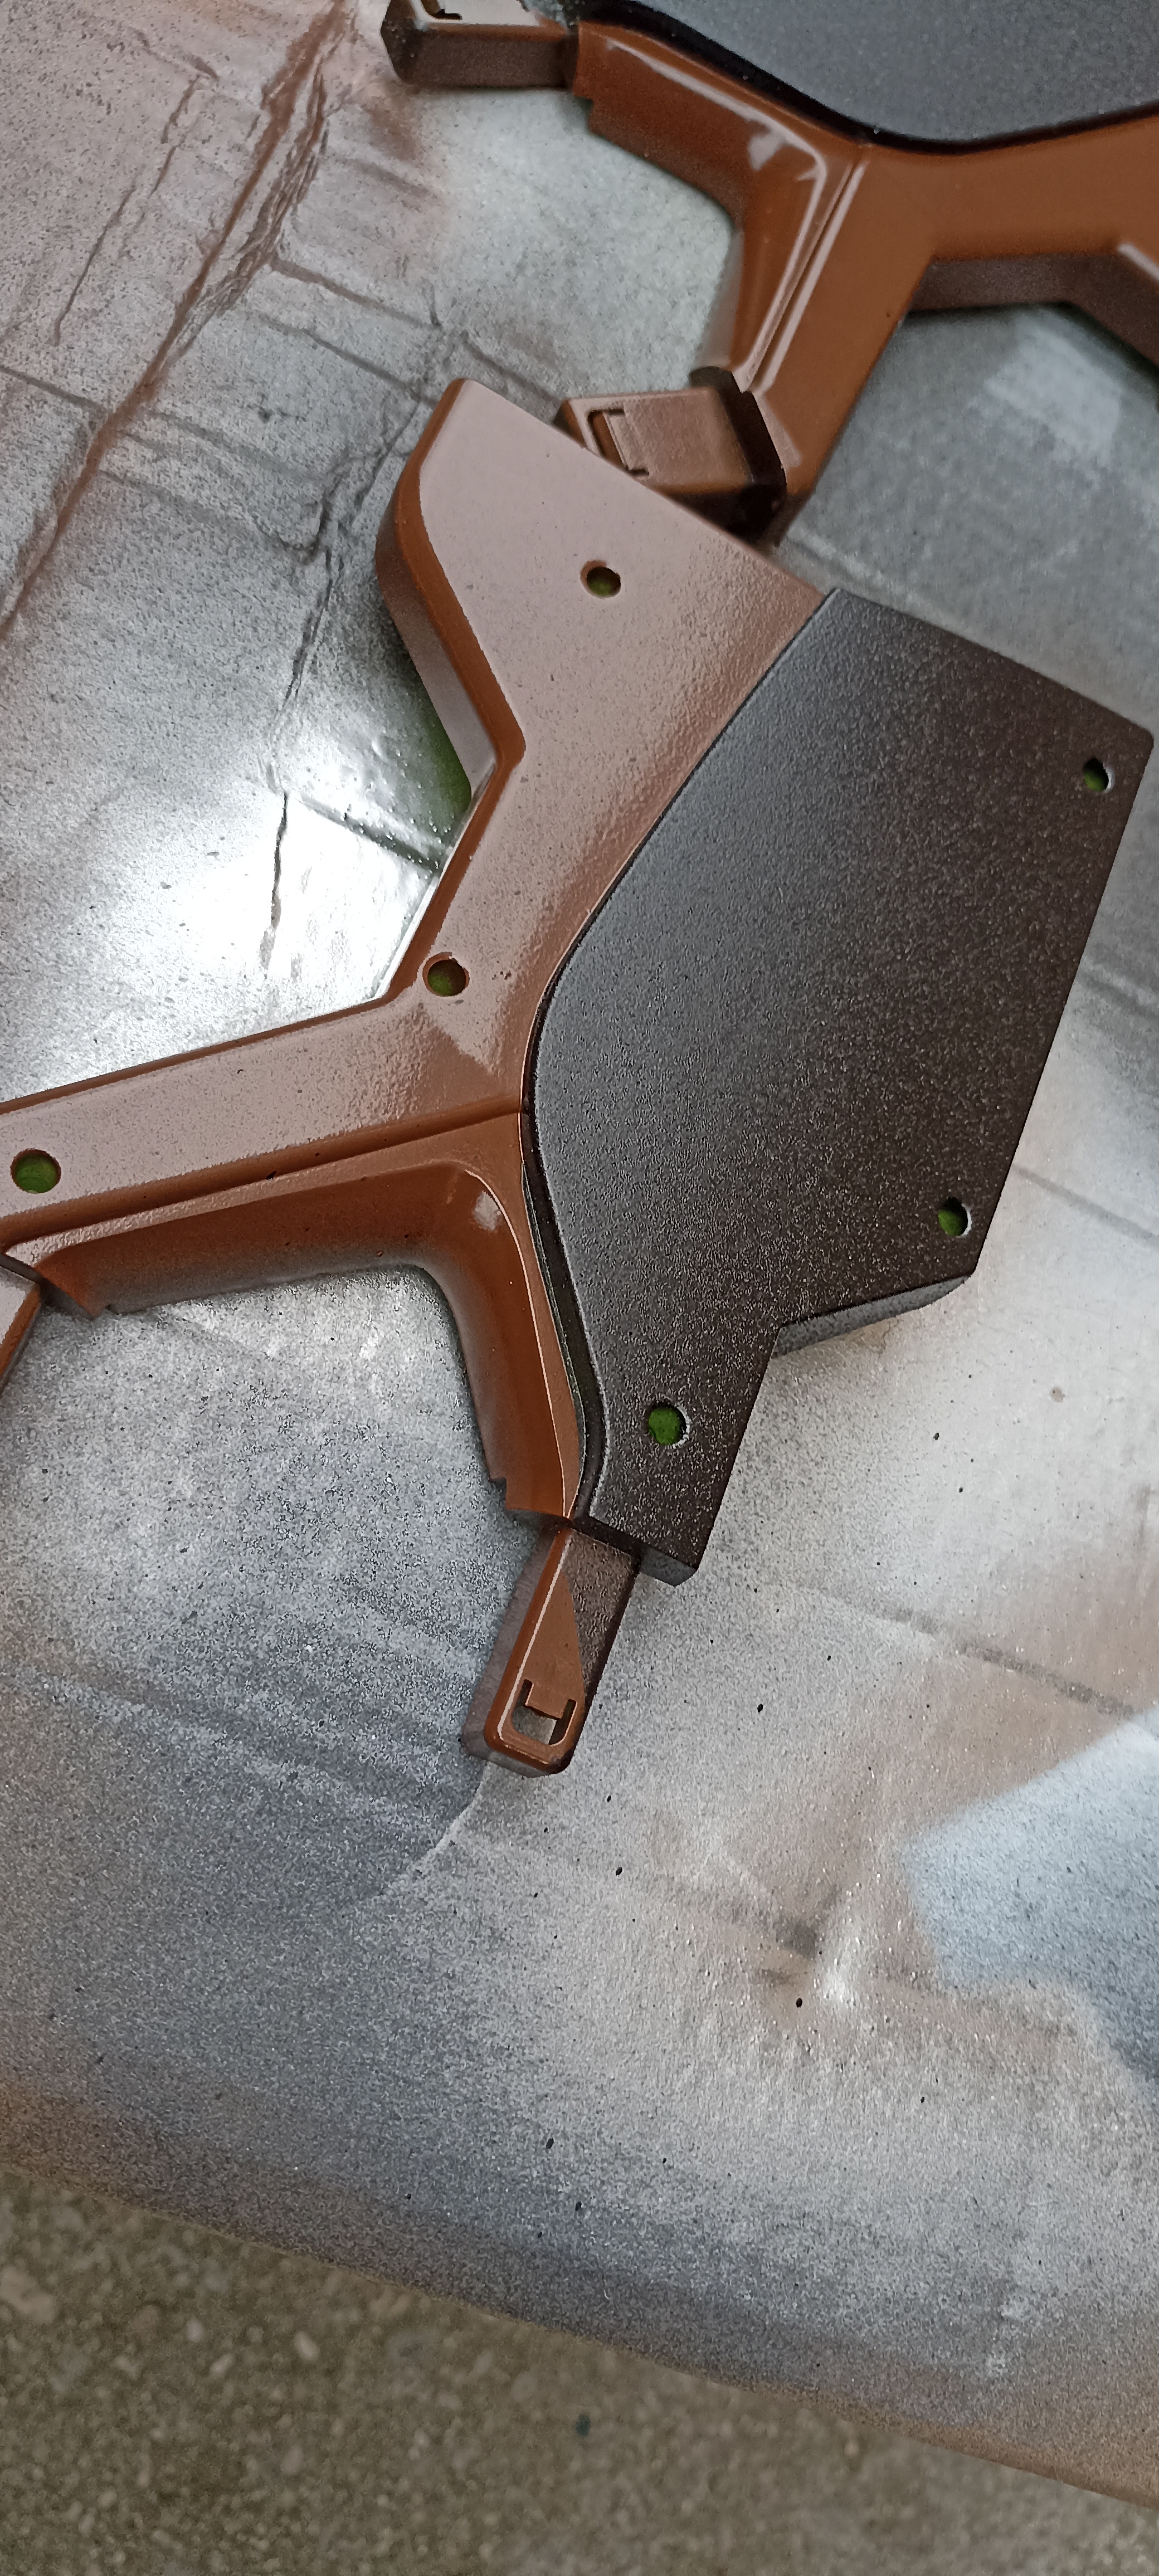 | Togliamo le maschere per il Marrone. |
 | Veniciatura base completata. |
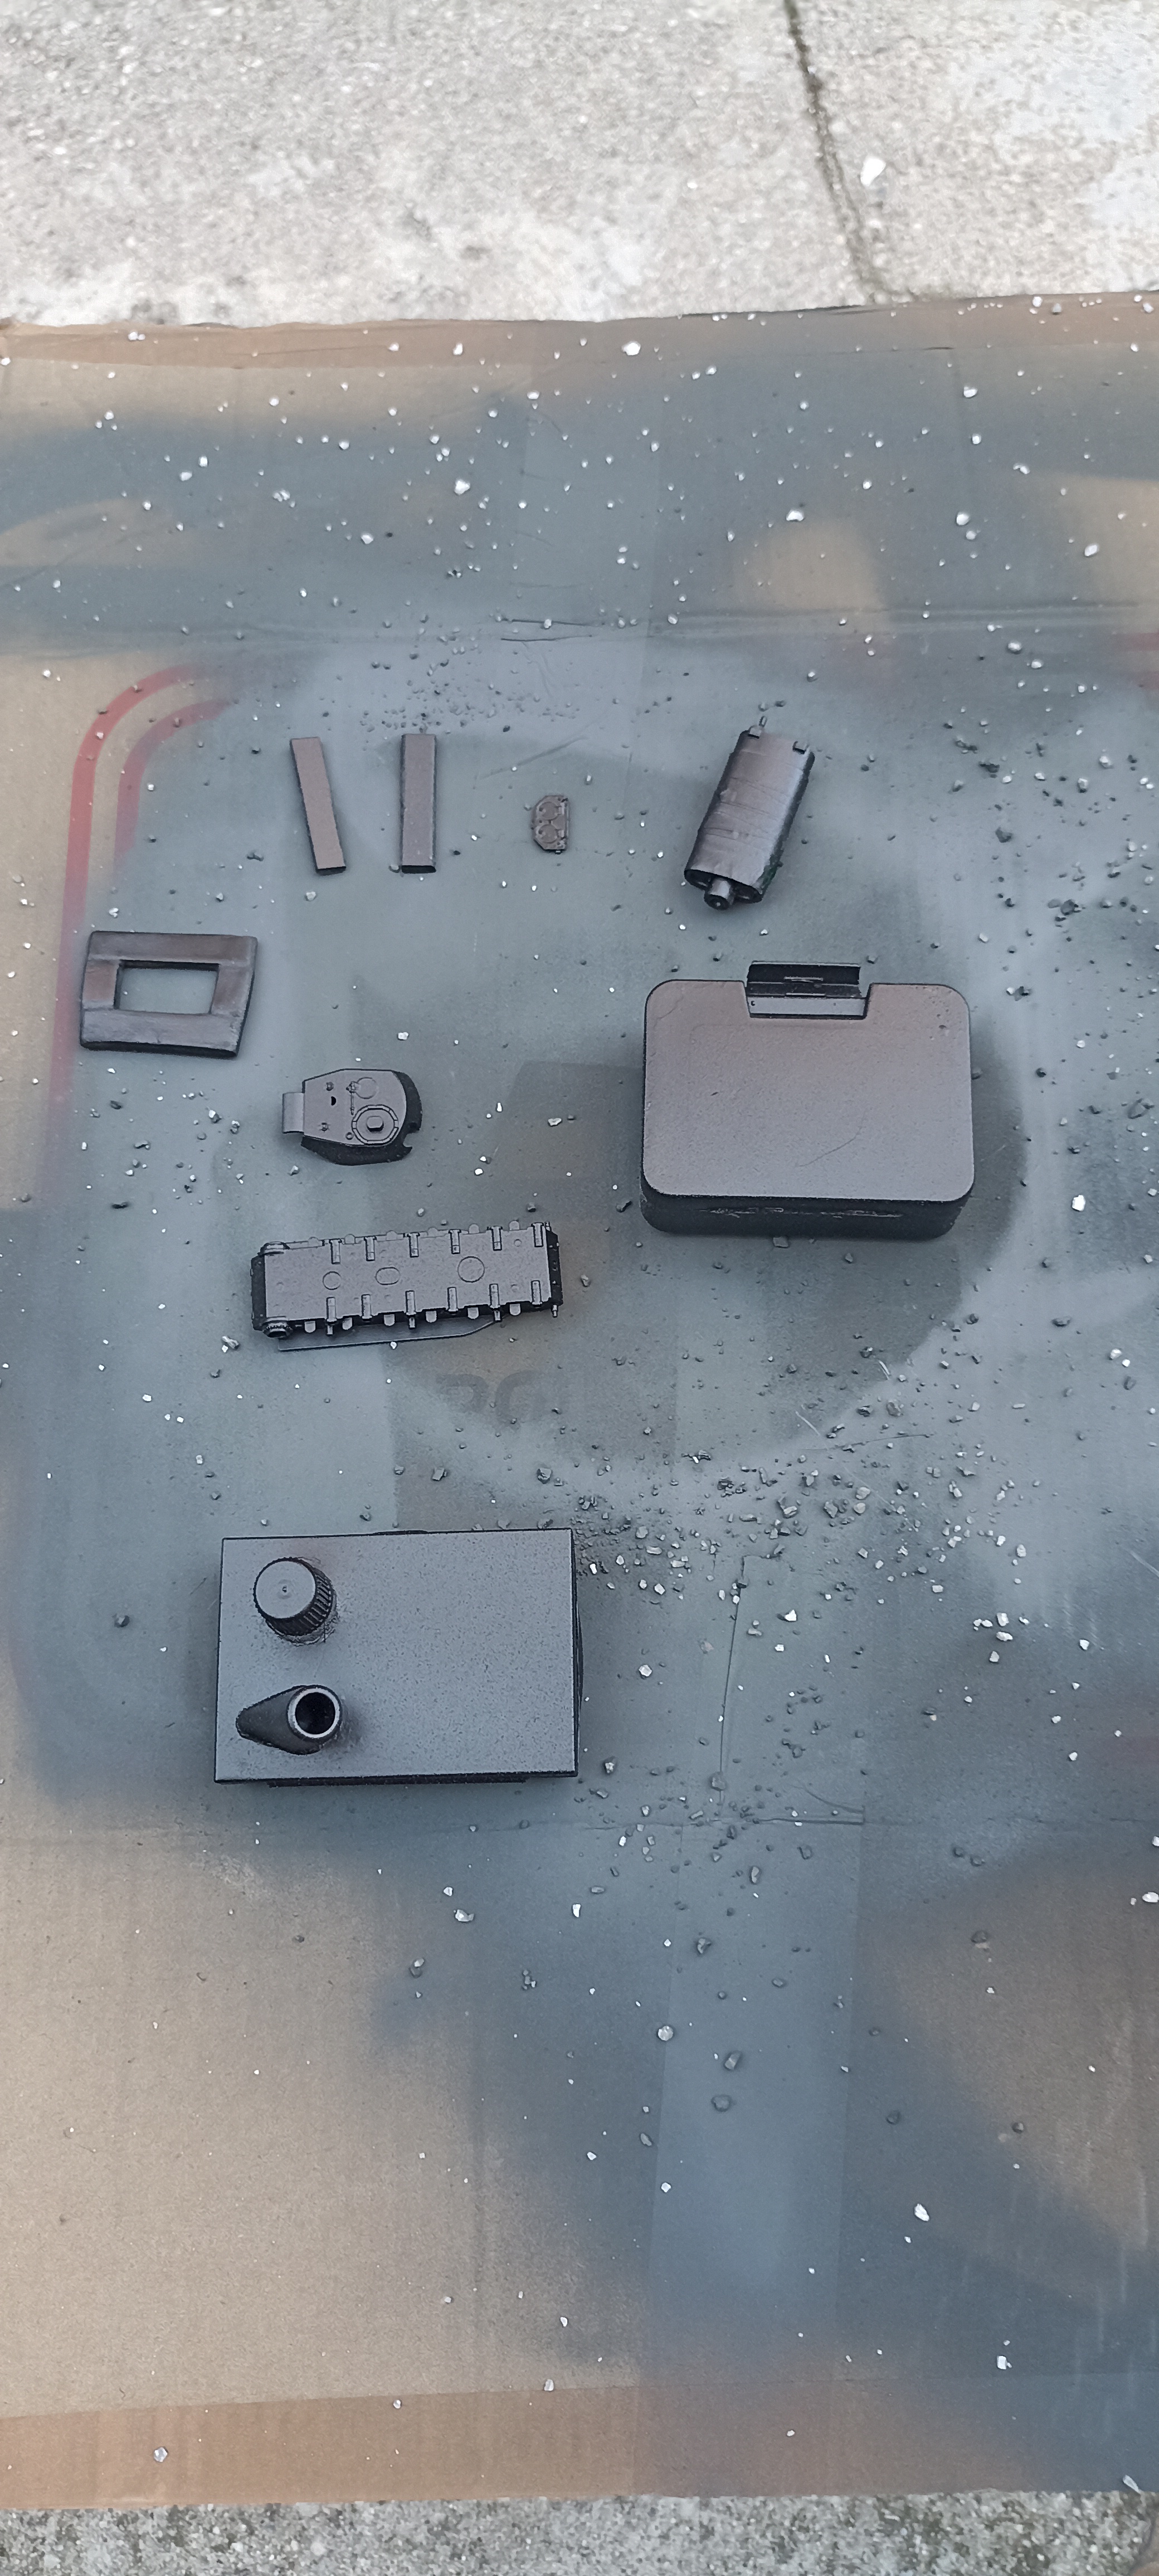
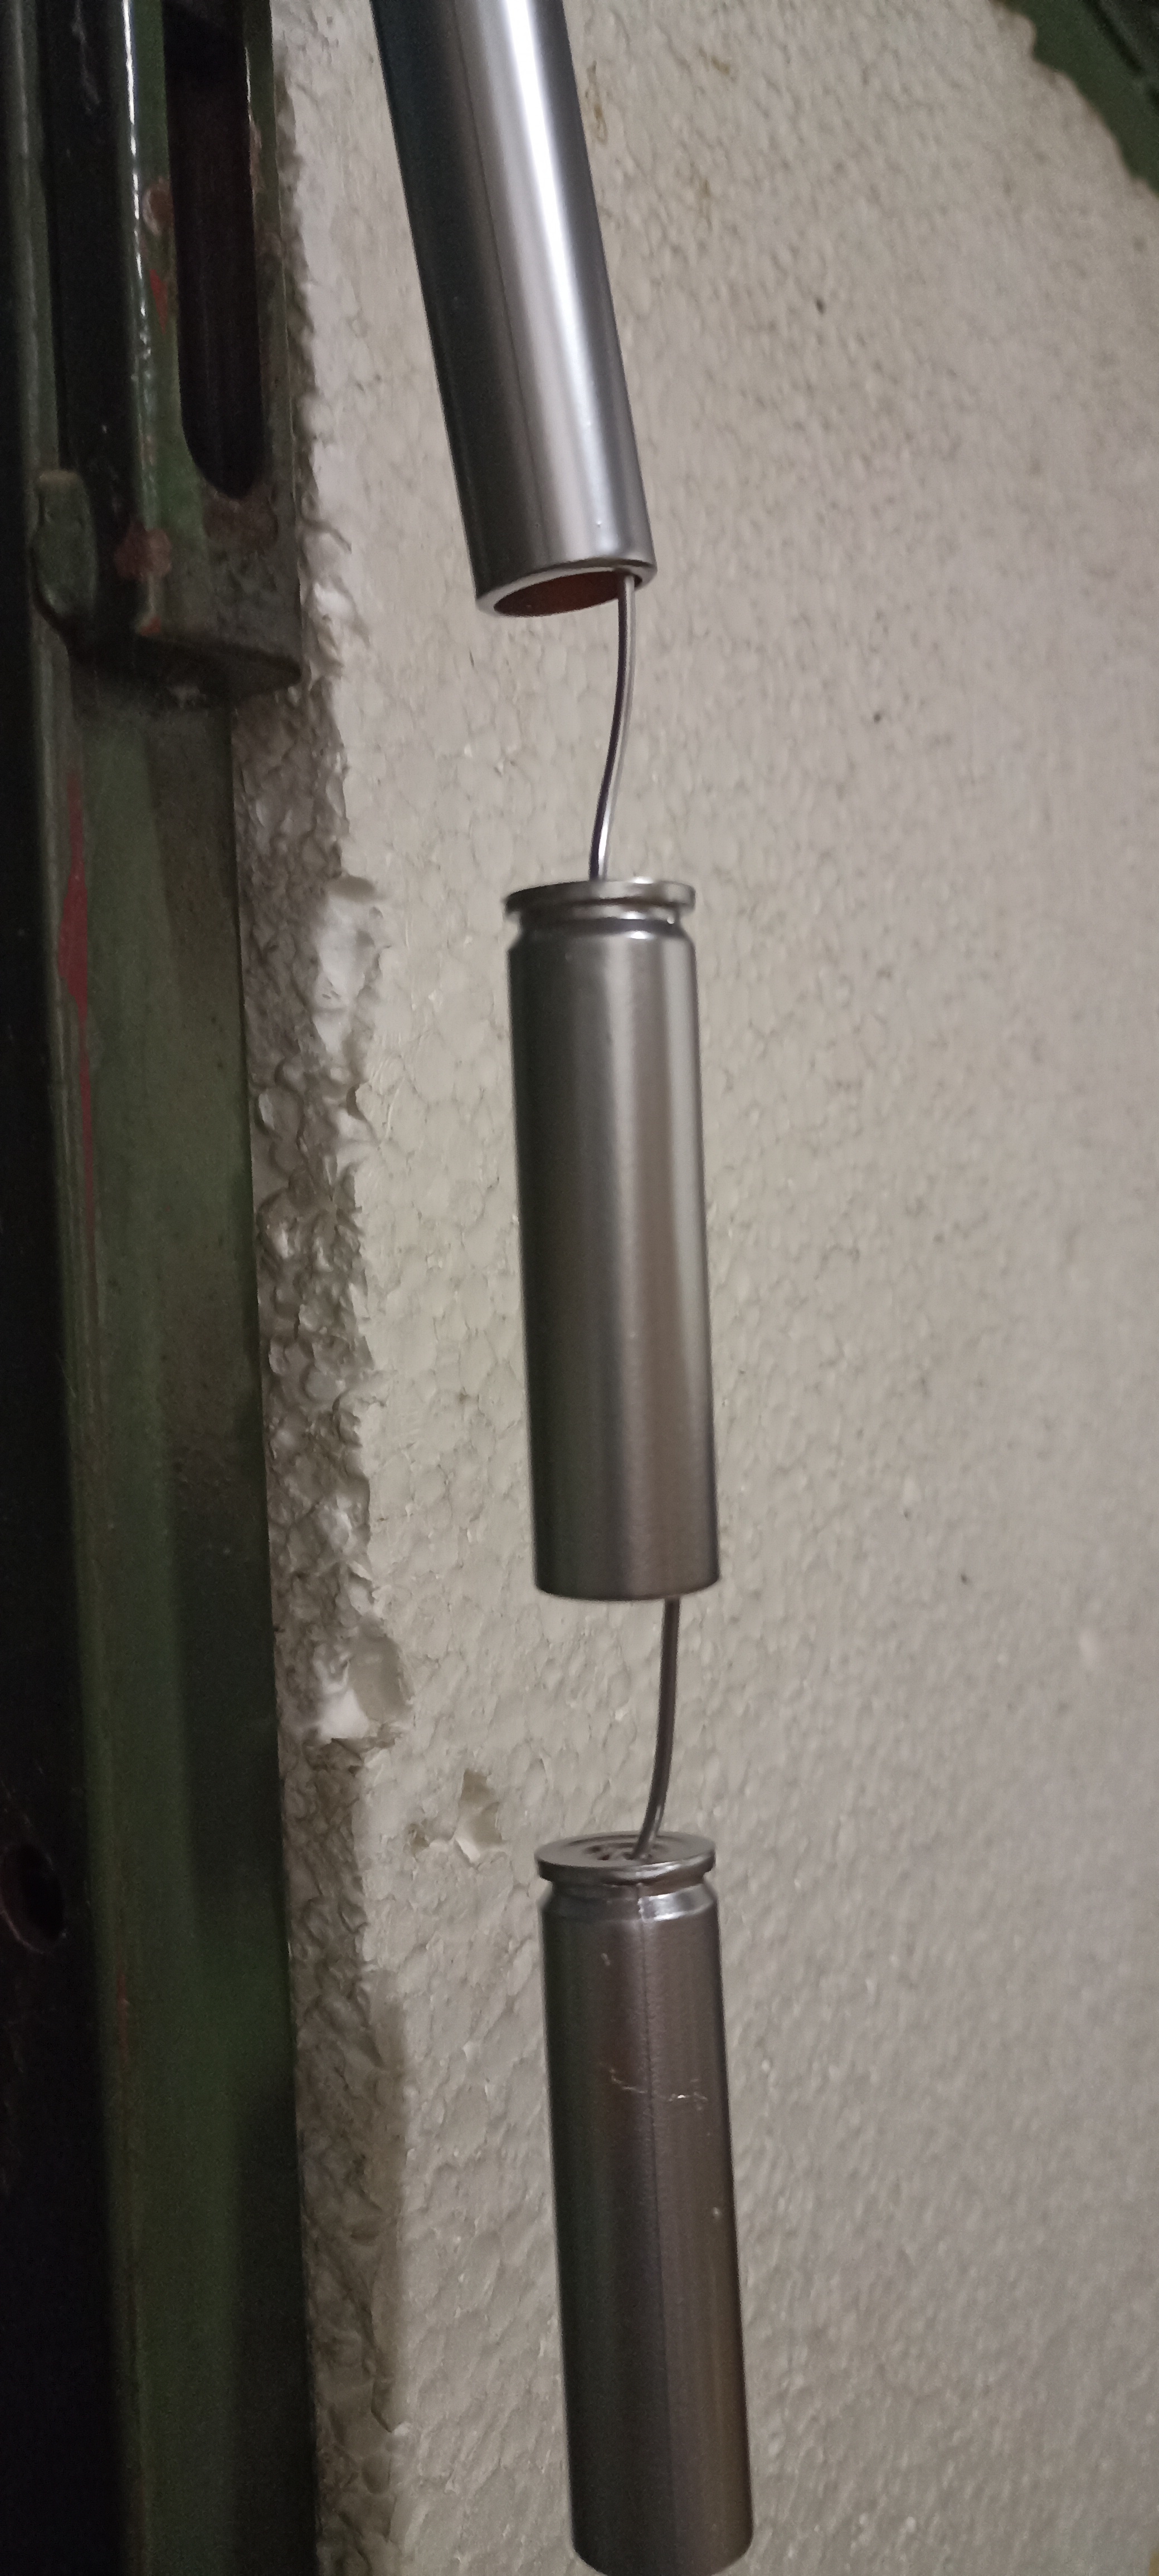
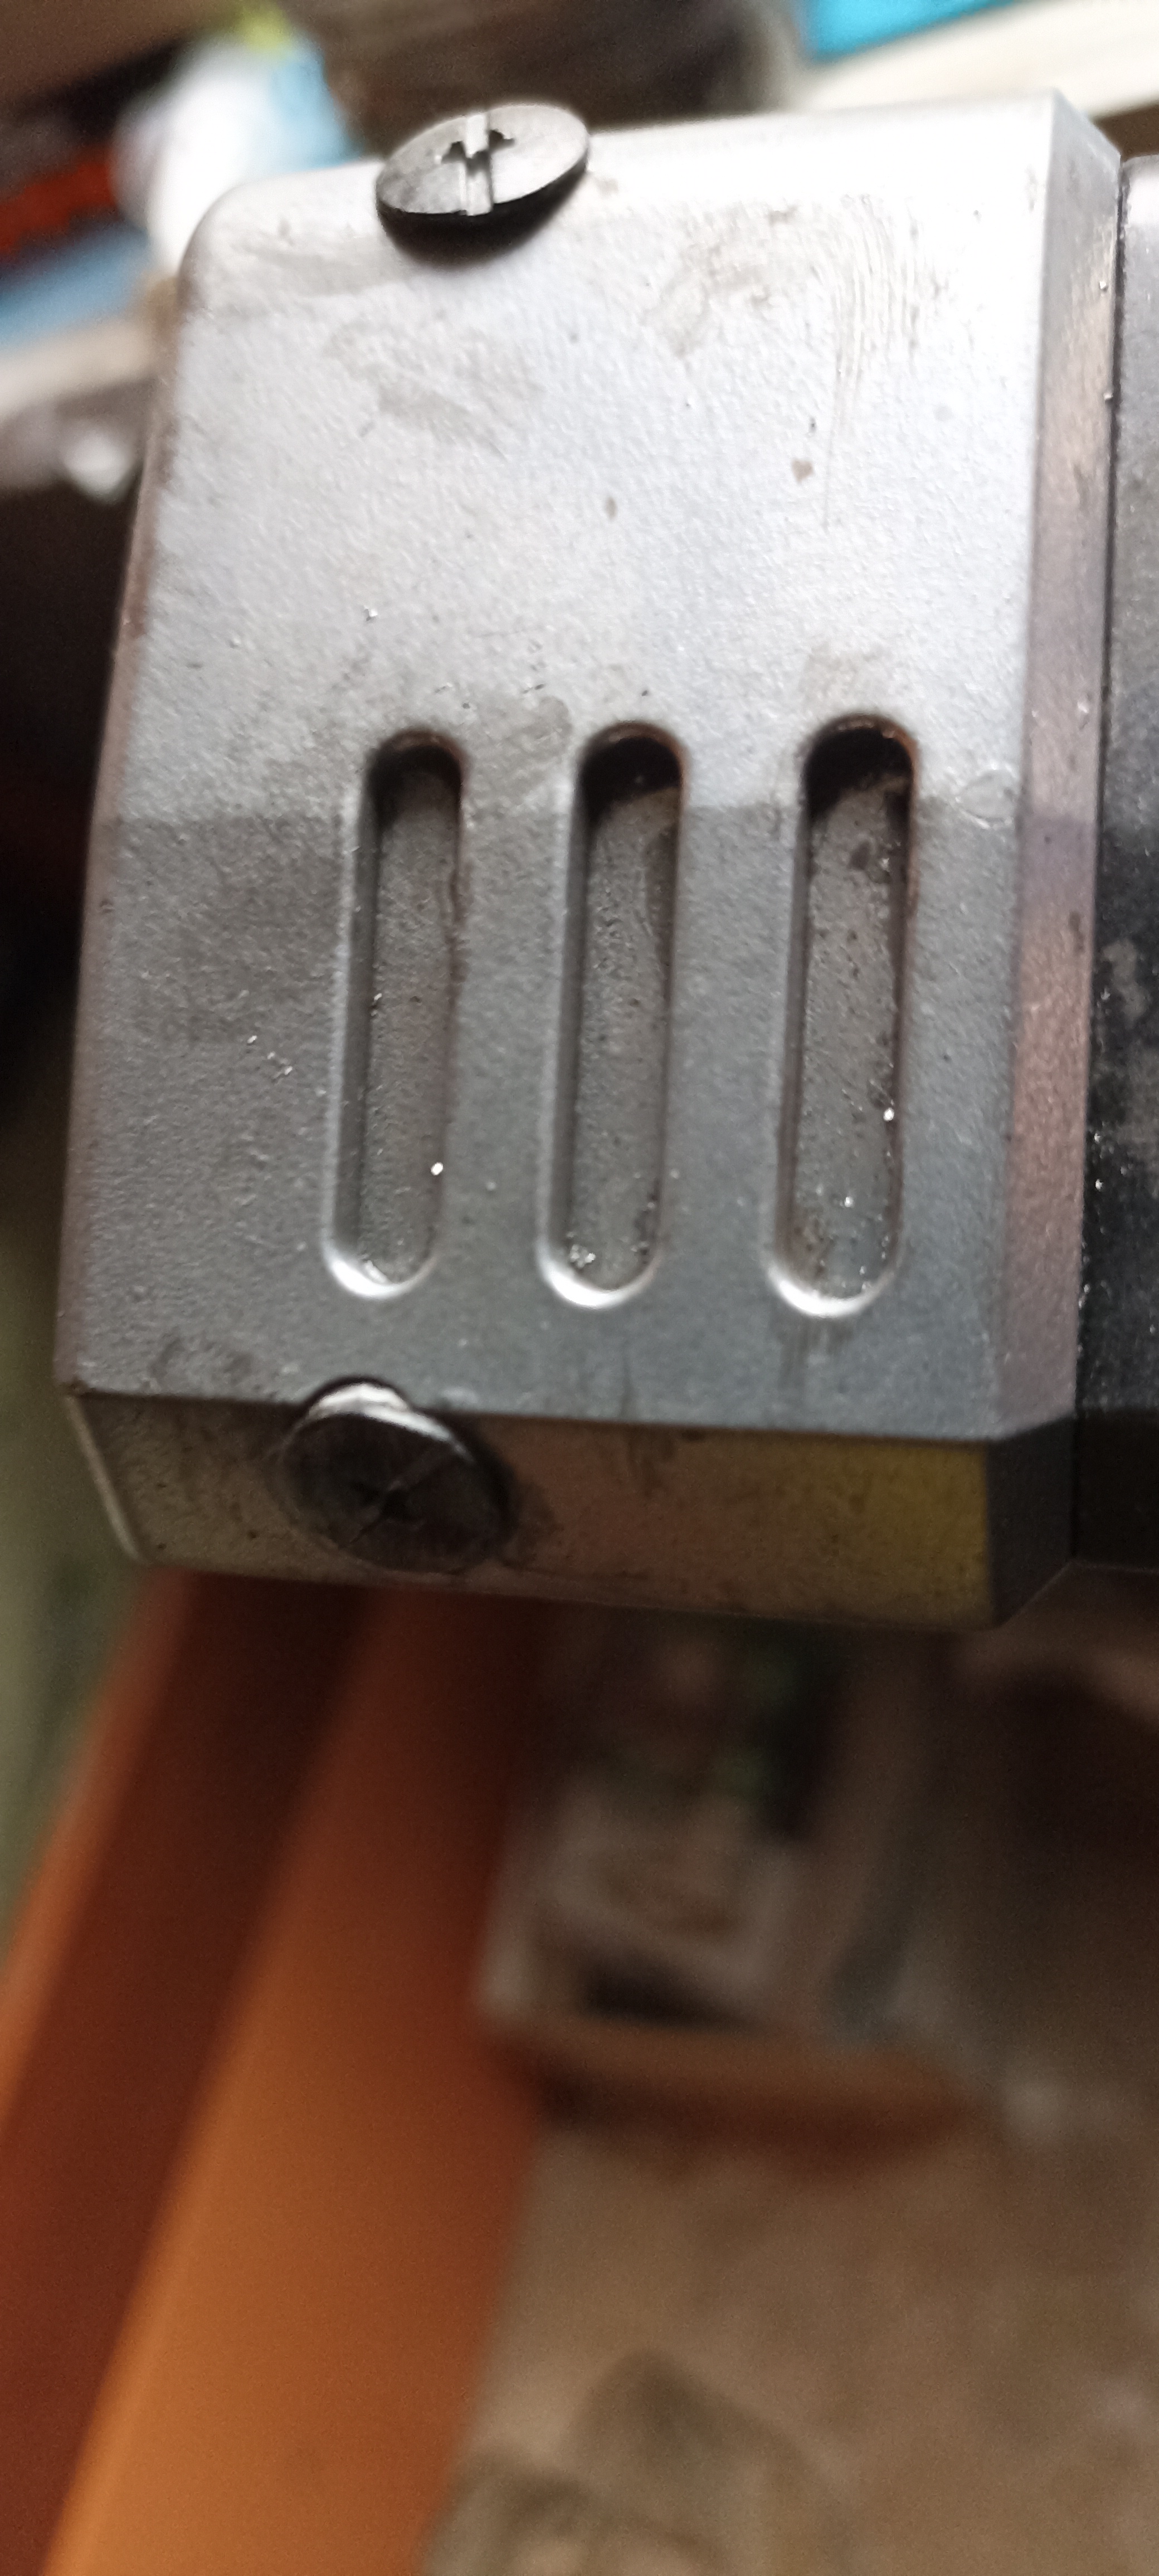
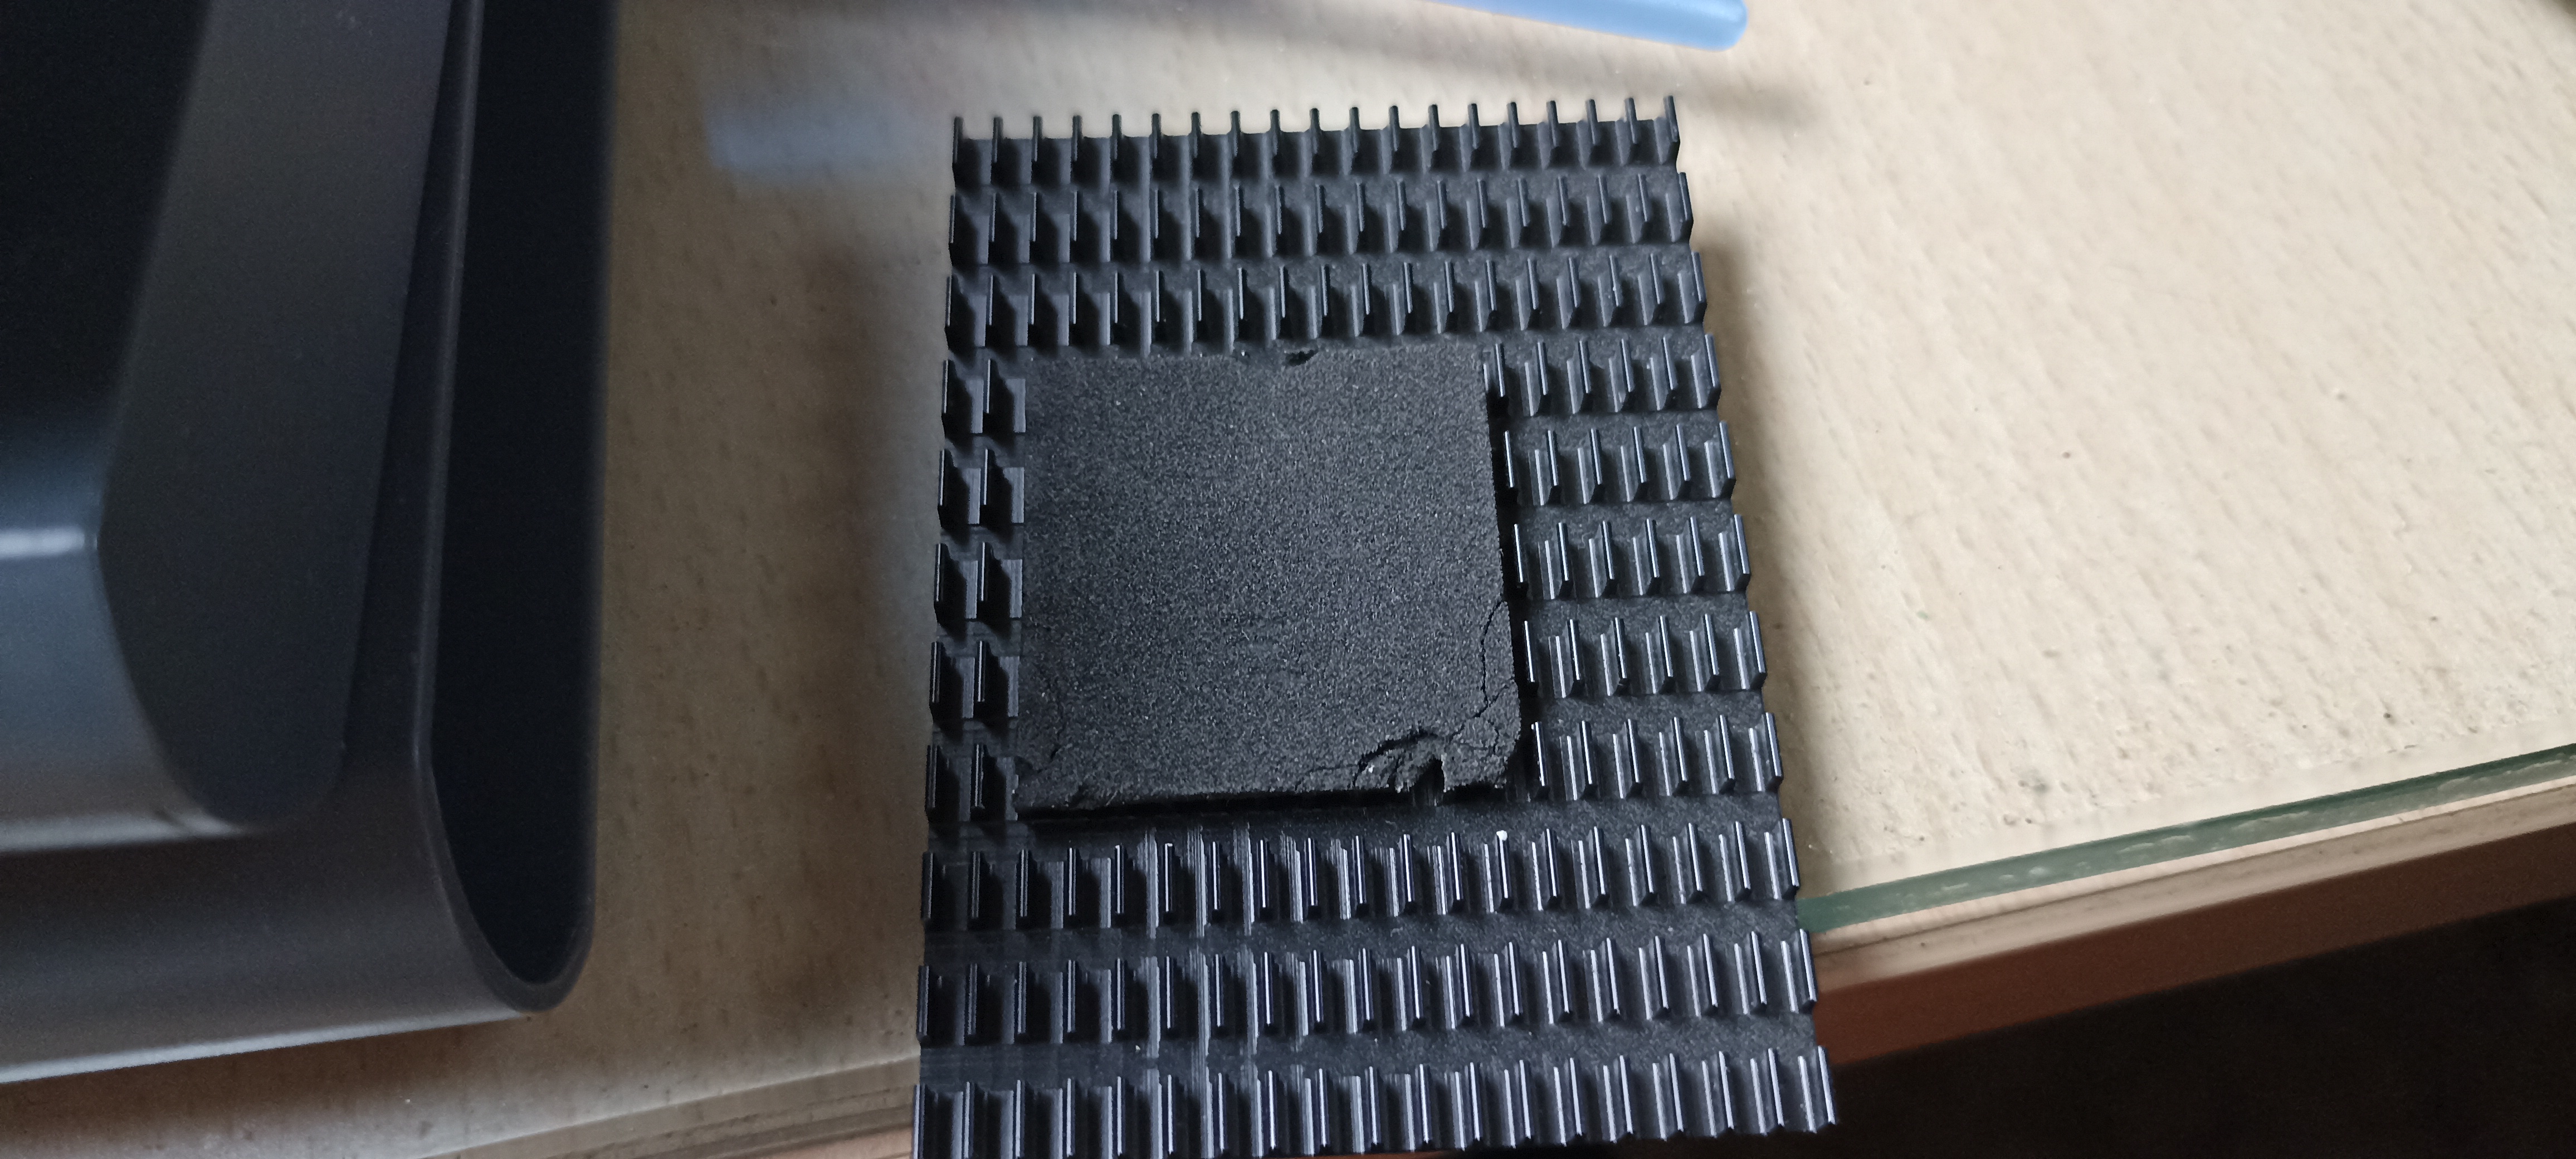 | Dettaglio Grebbles, questa è una piastra di dissipazione di un vecchio router. |
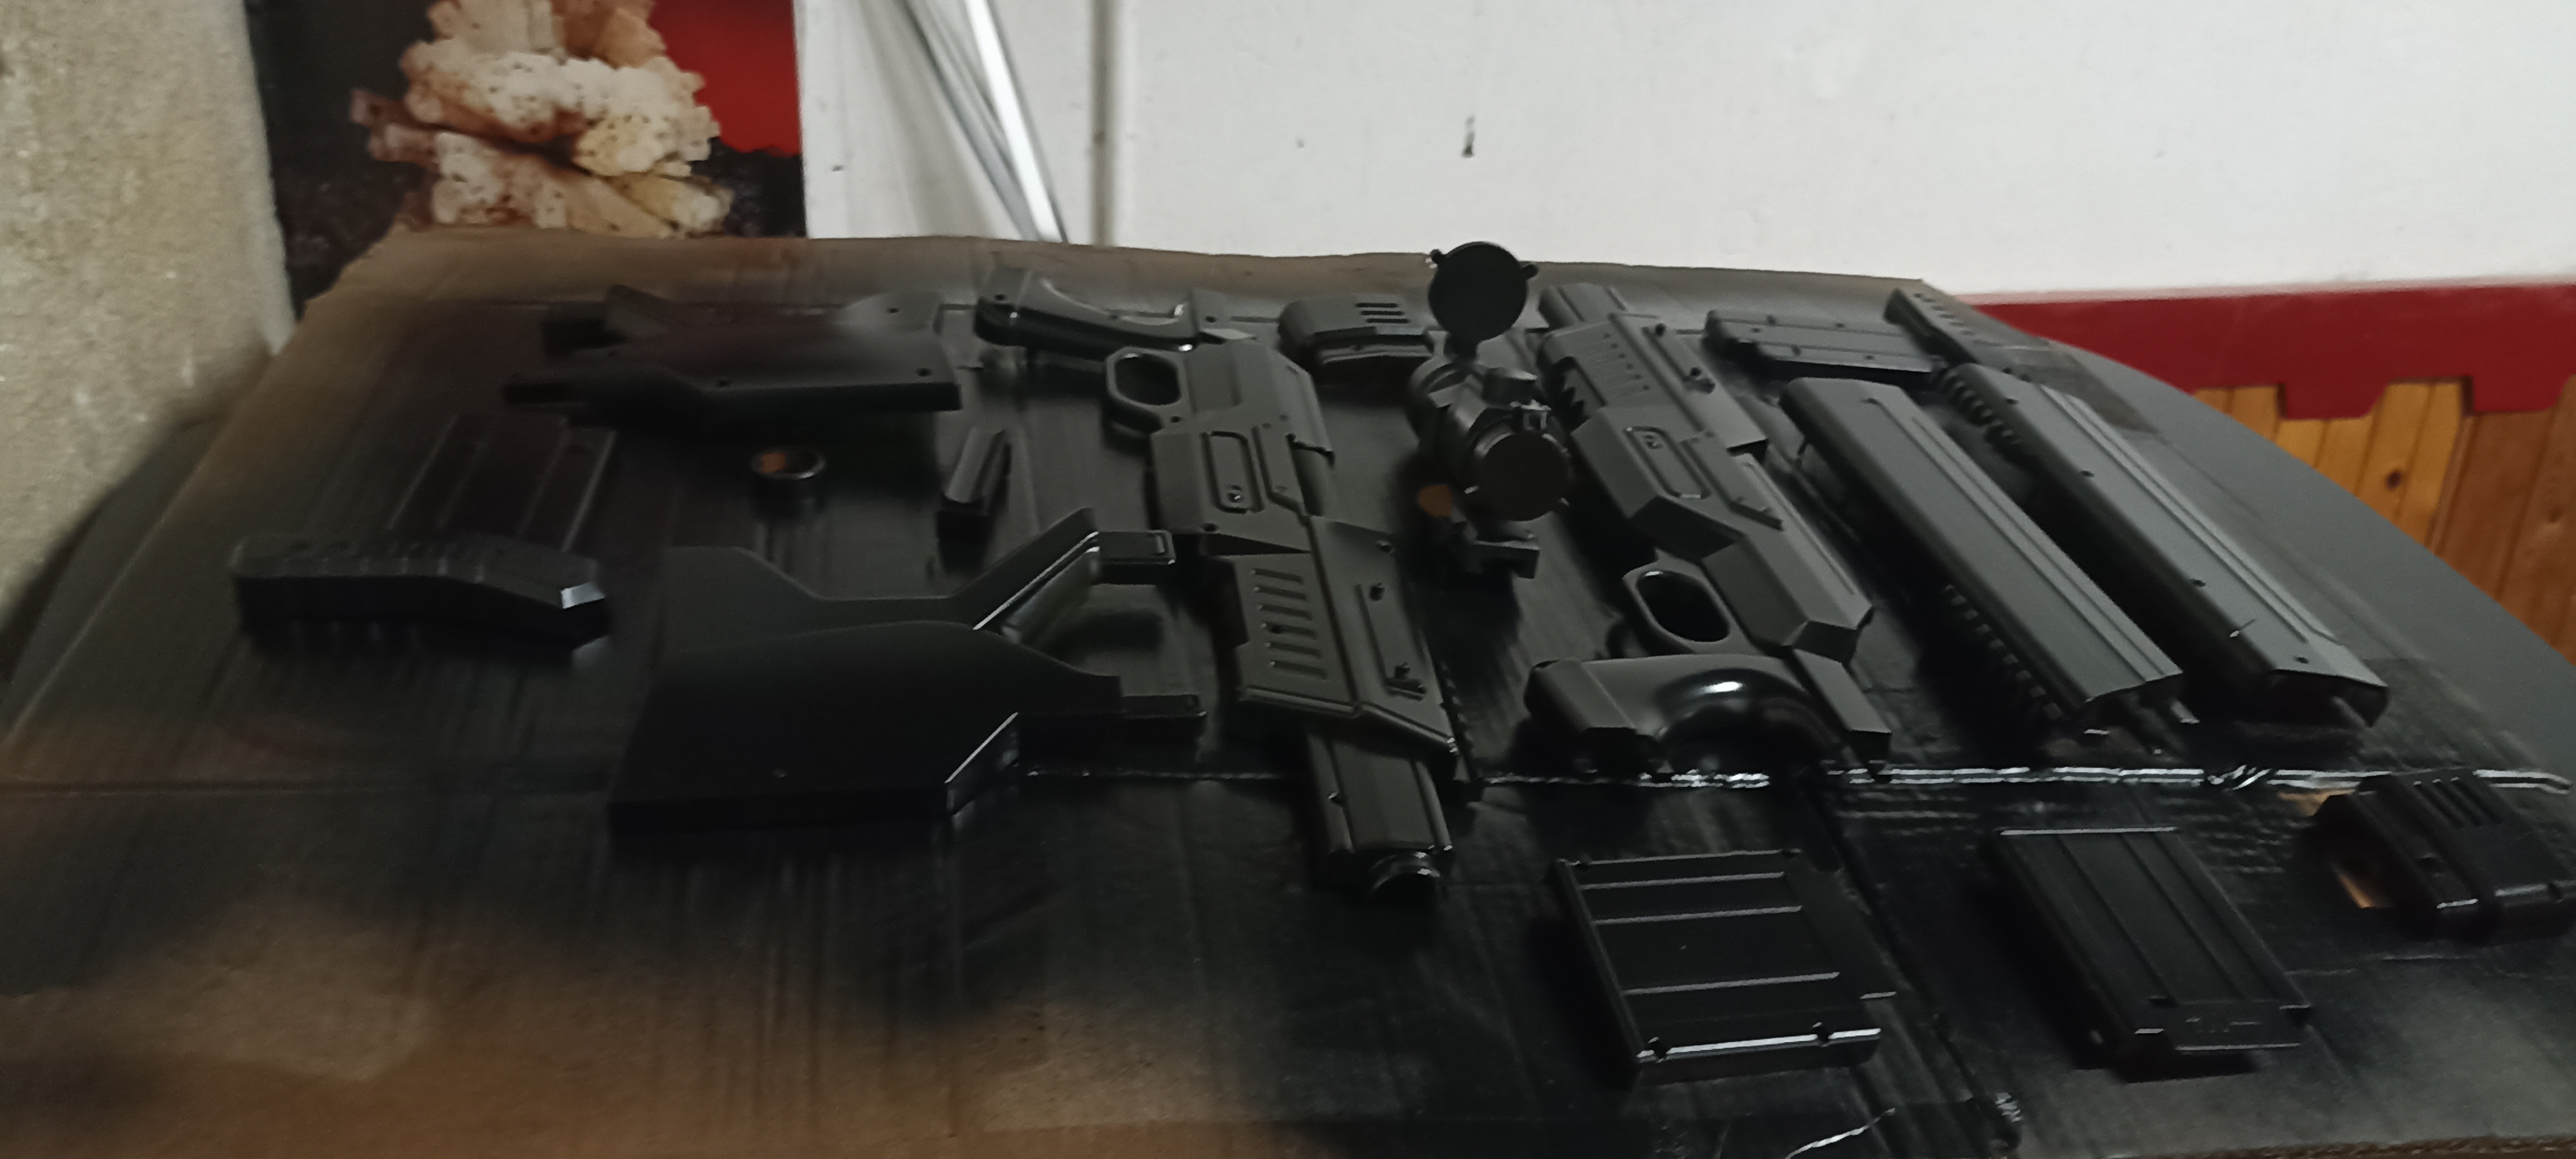
 | Dettagli fucile smontato. |
 | Esempio di Cicago Screw per chiudere i buchi, poi ho optato per un altro modello. |
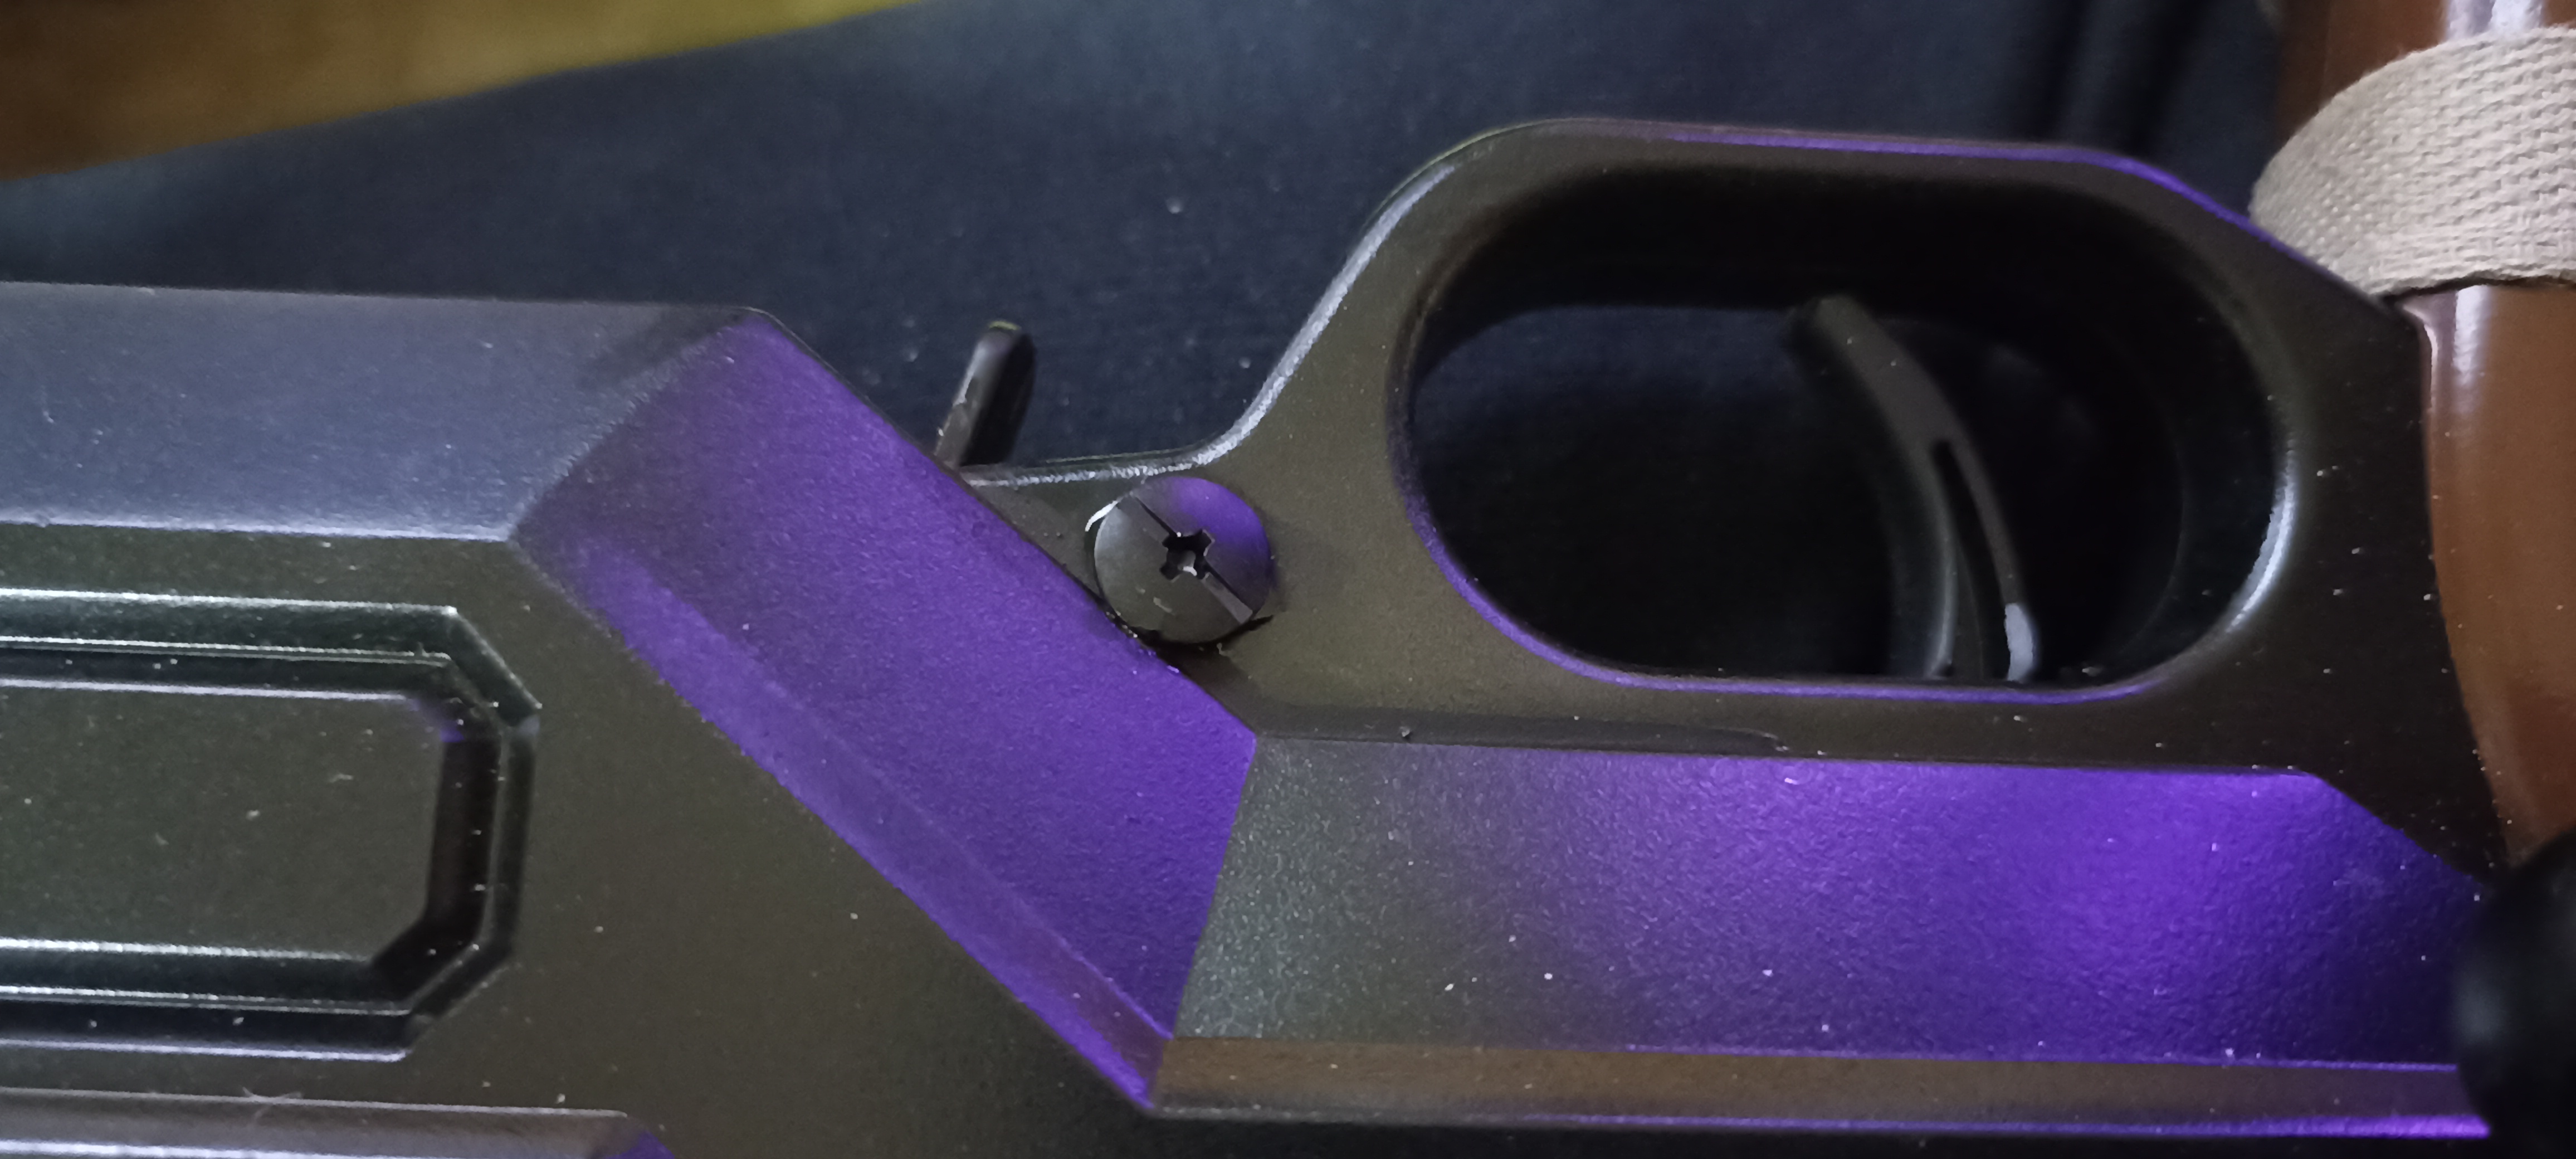 | Dettaglio buco prima e dopo Chicago screw. |
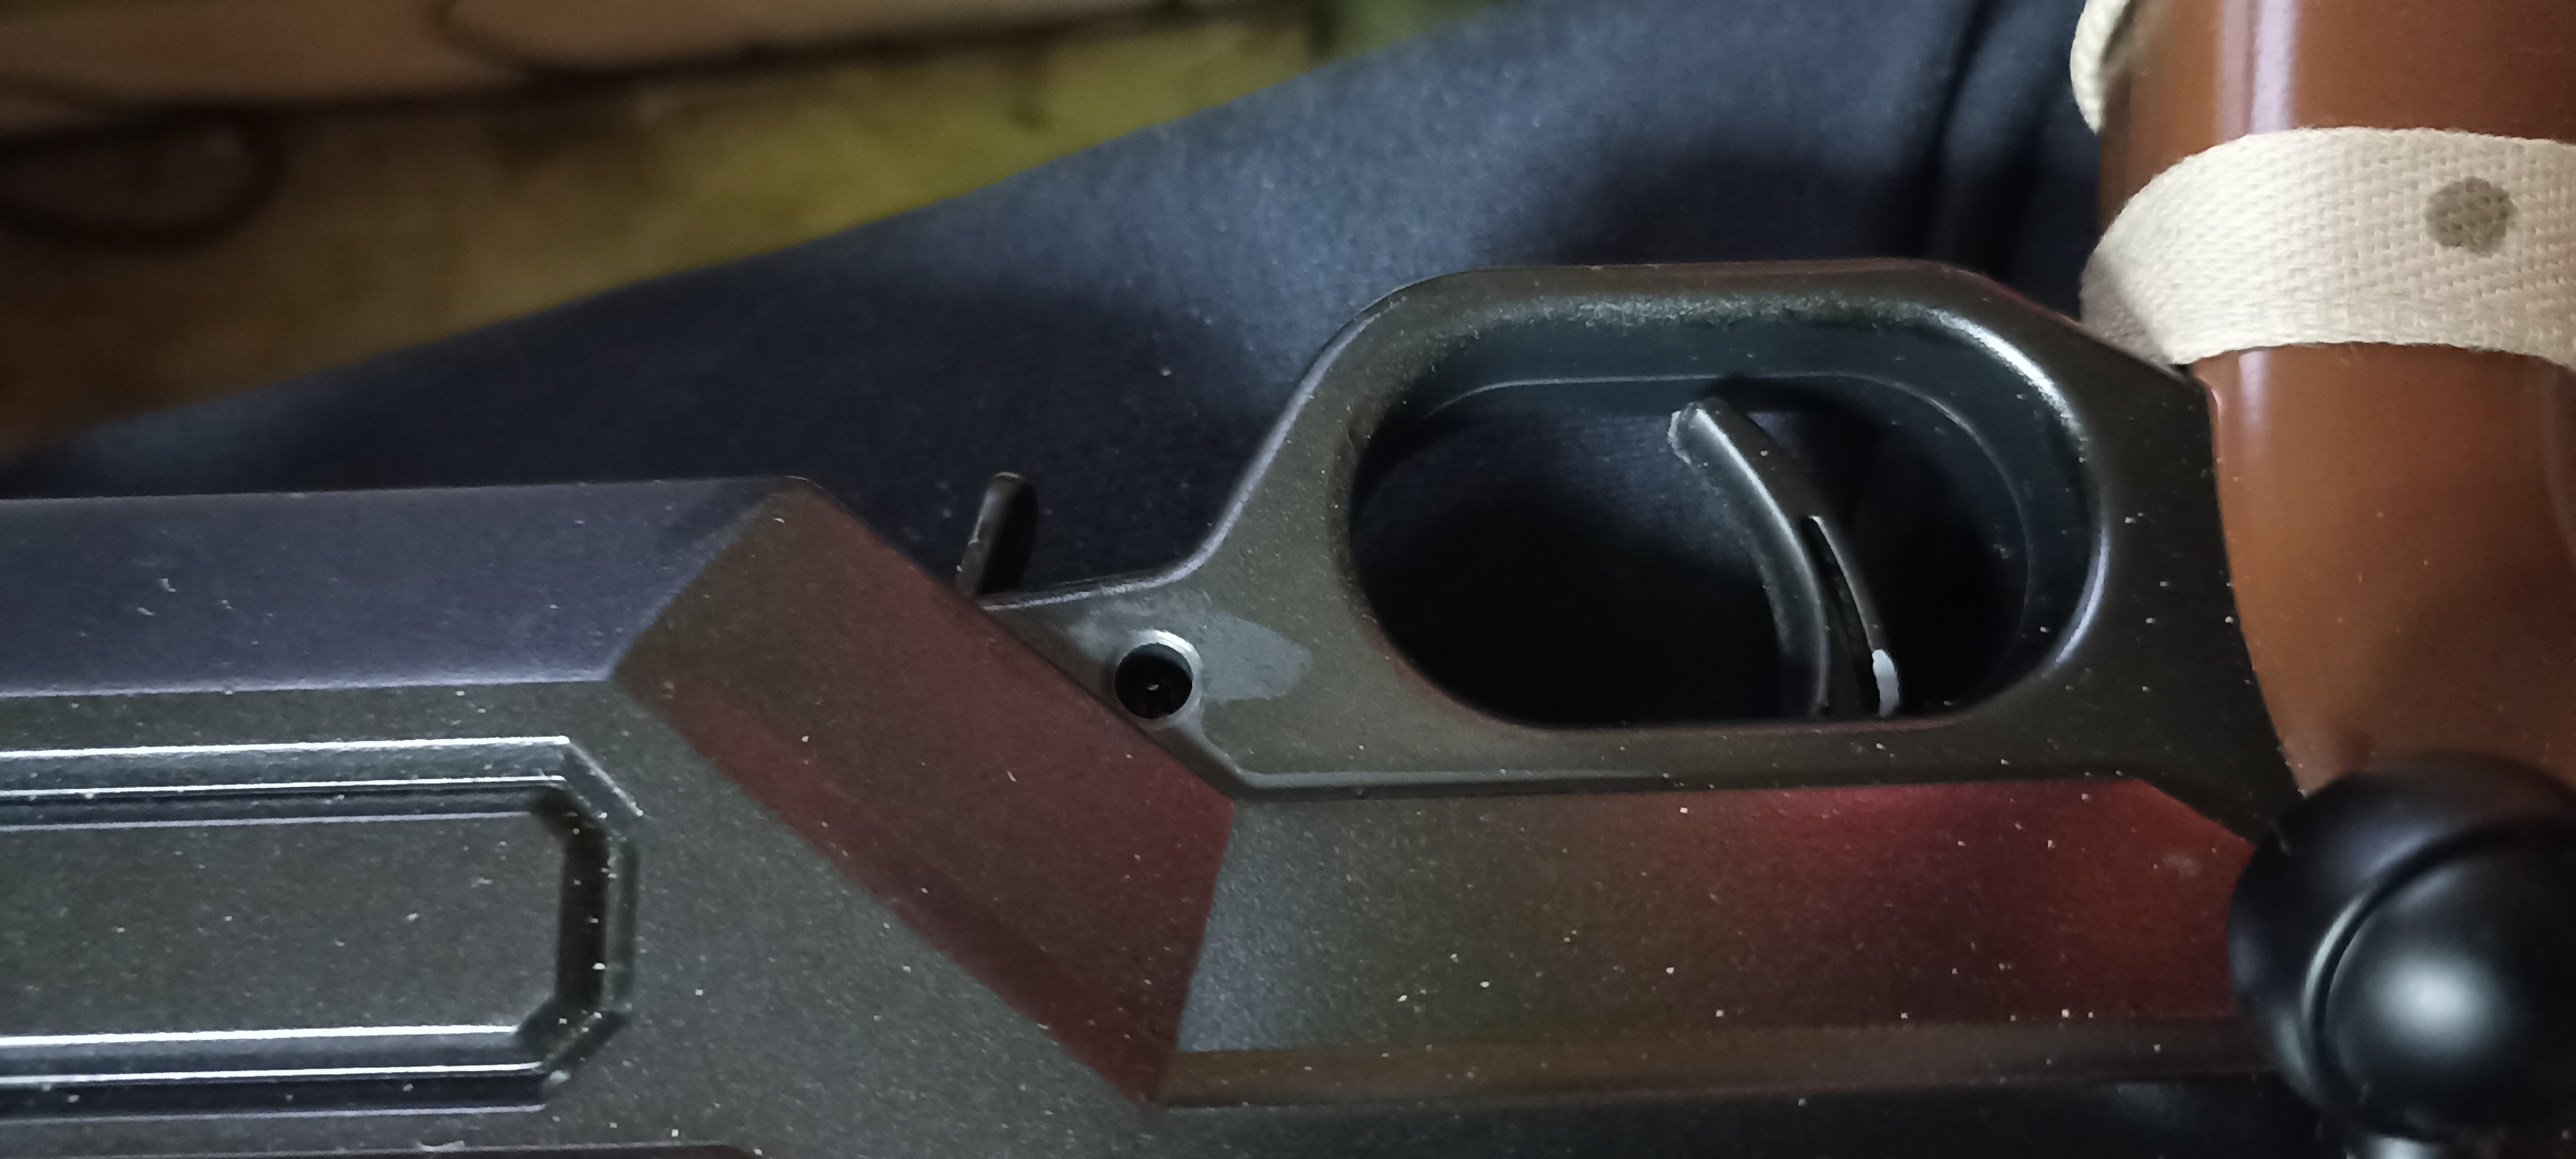
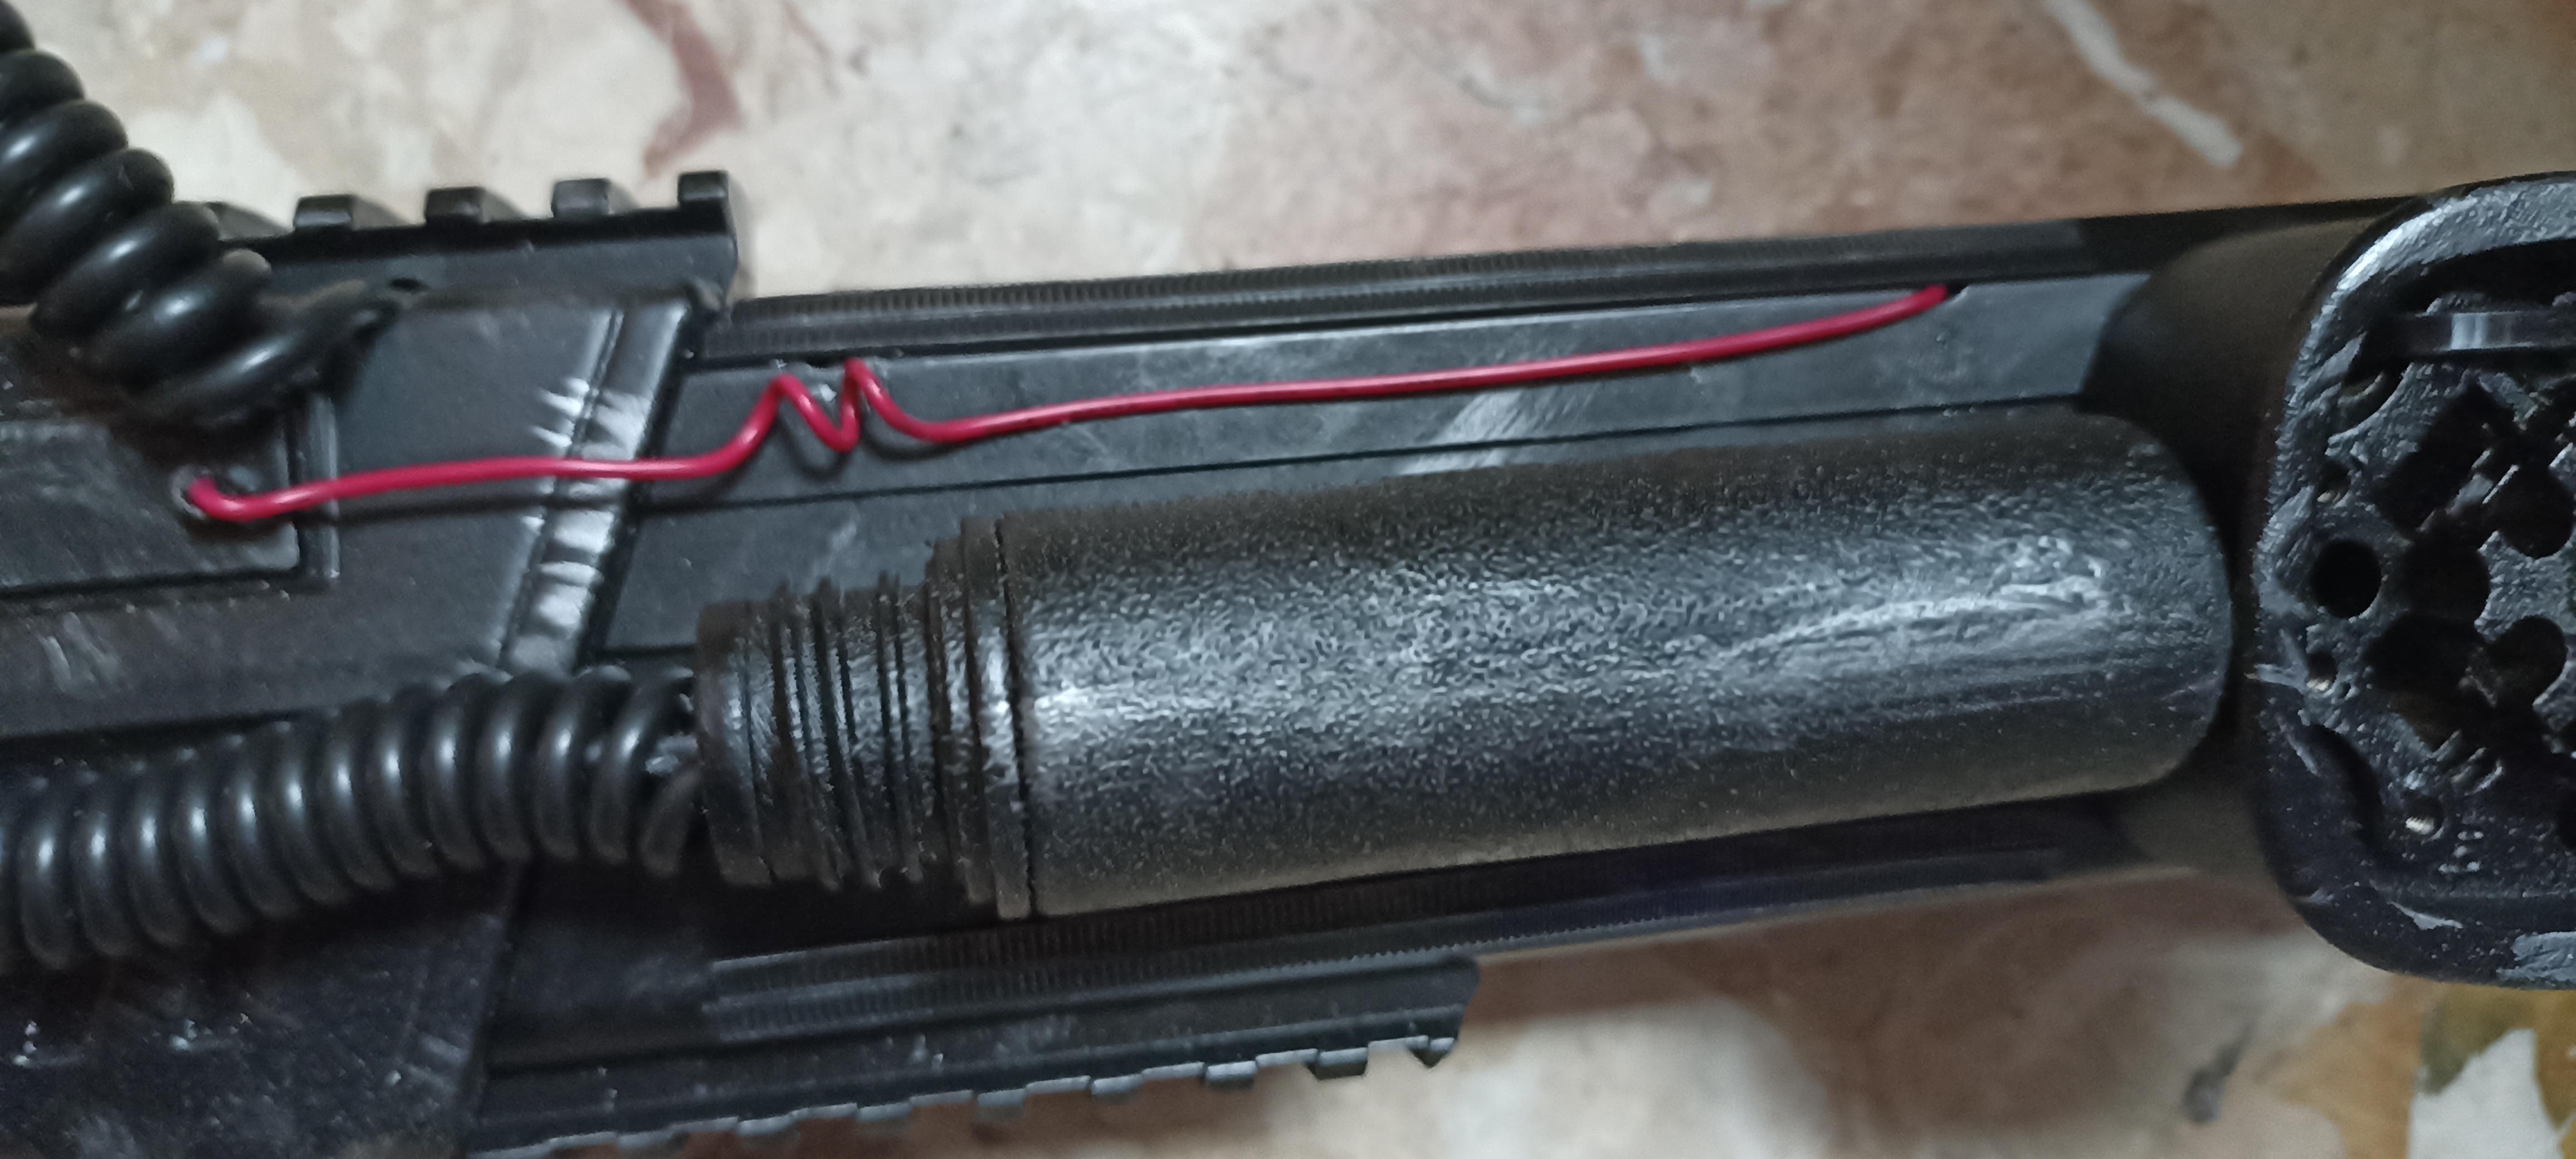
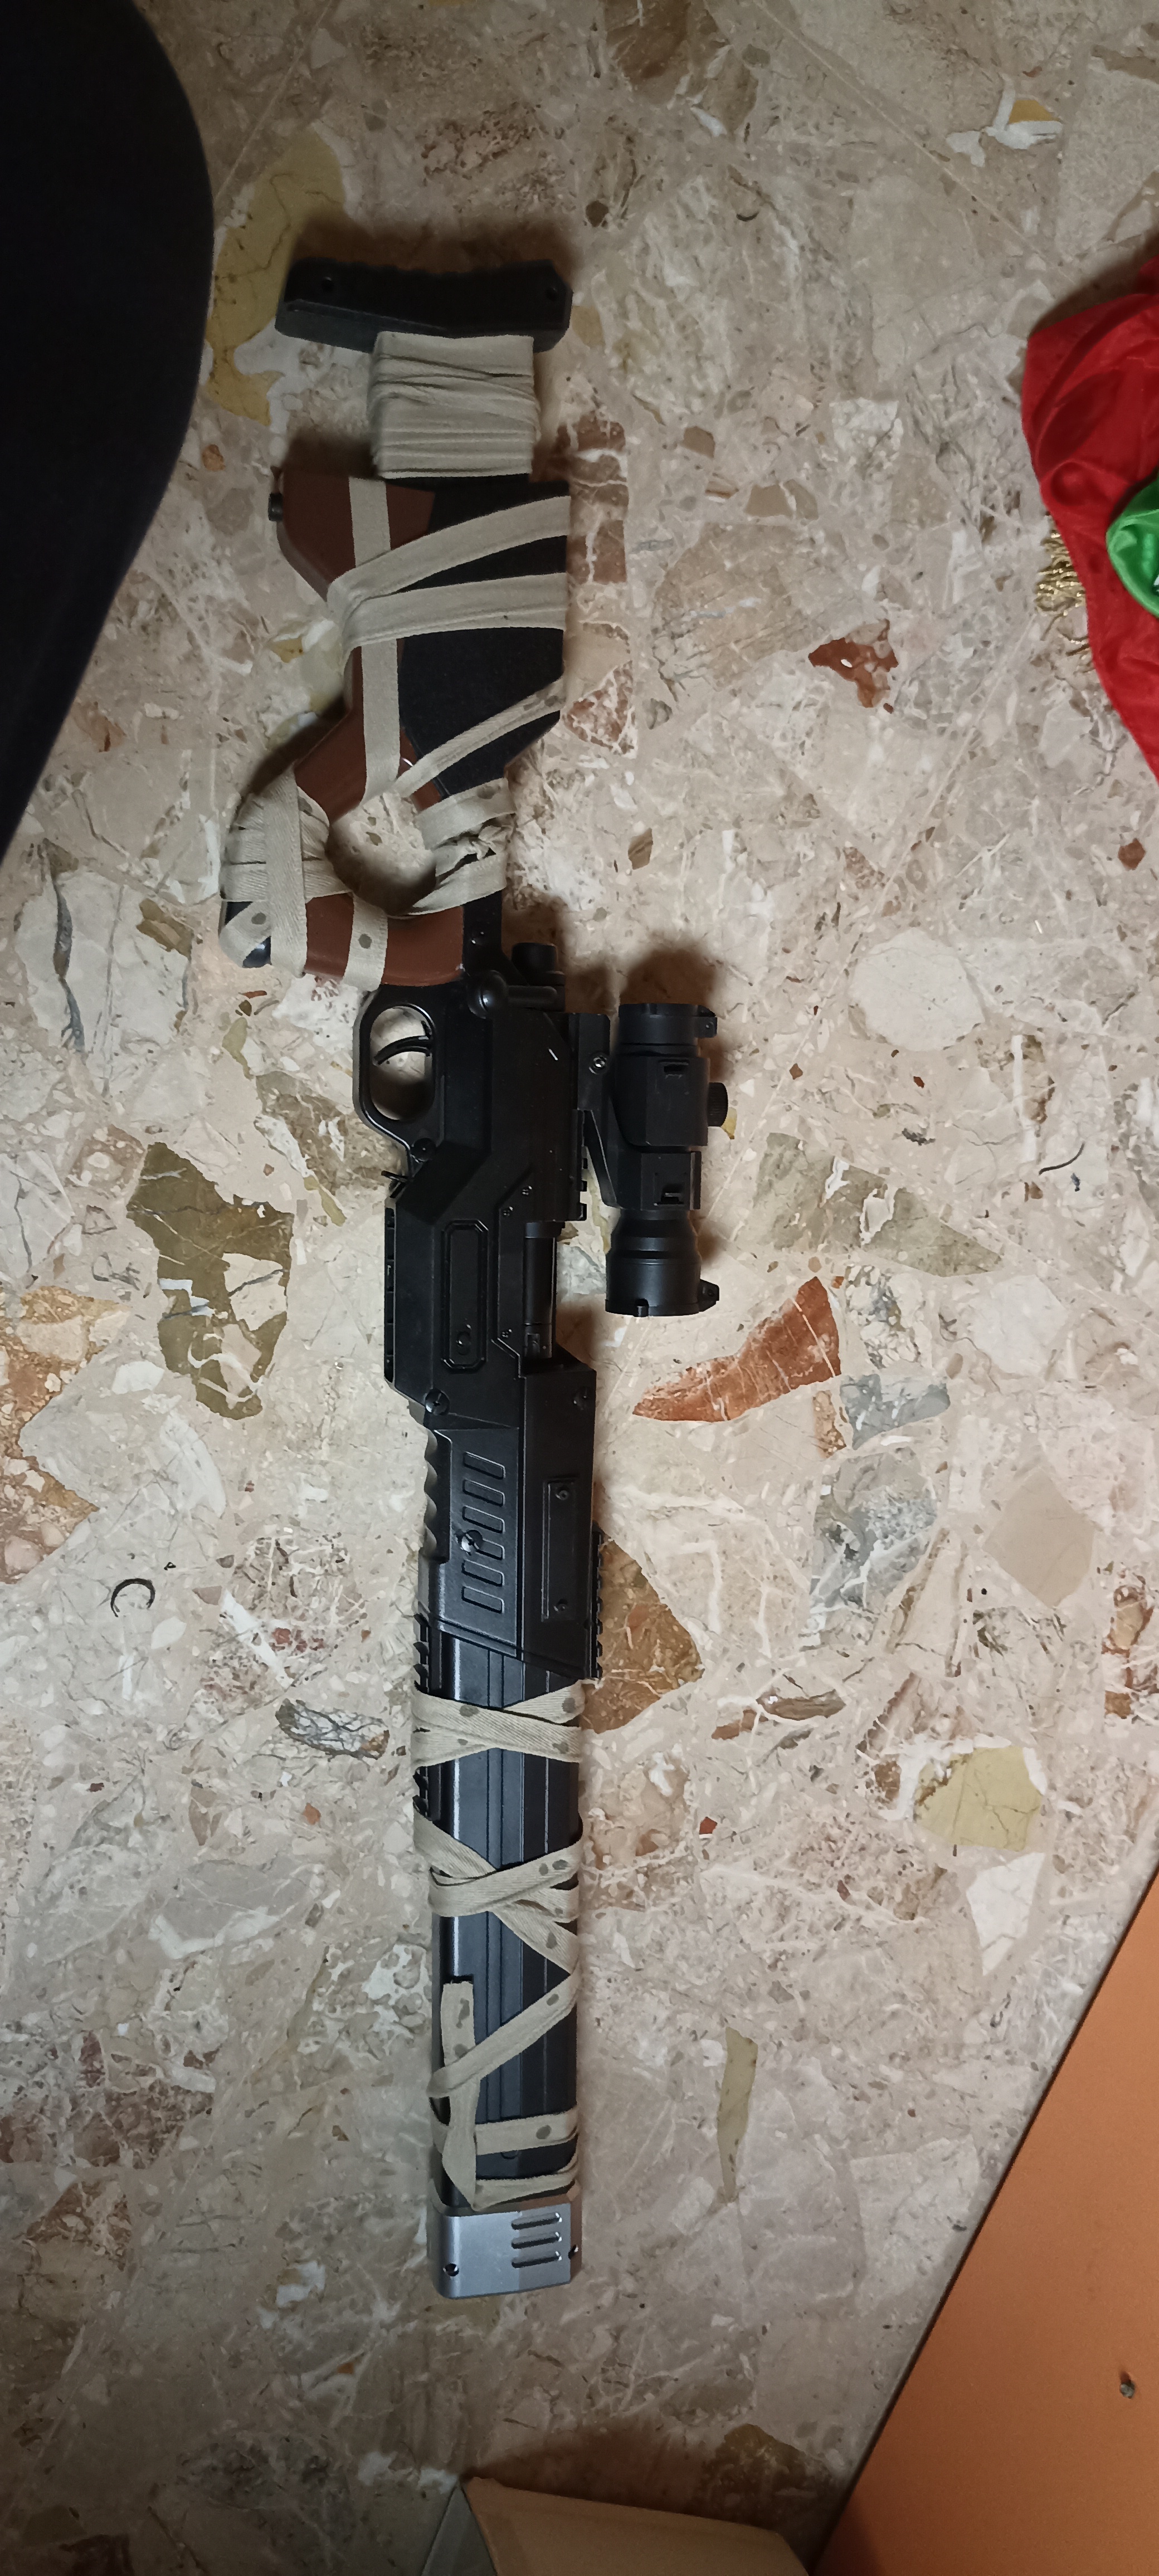 | Prova fasciature. |
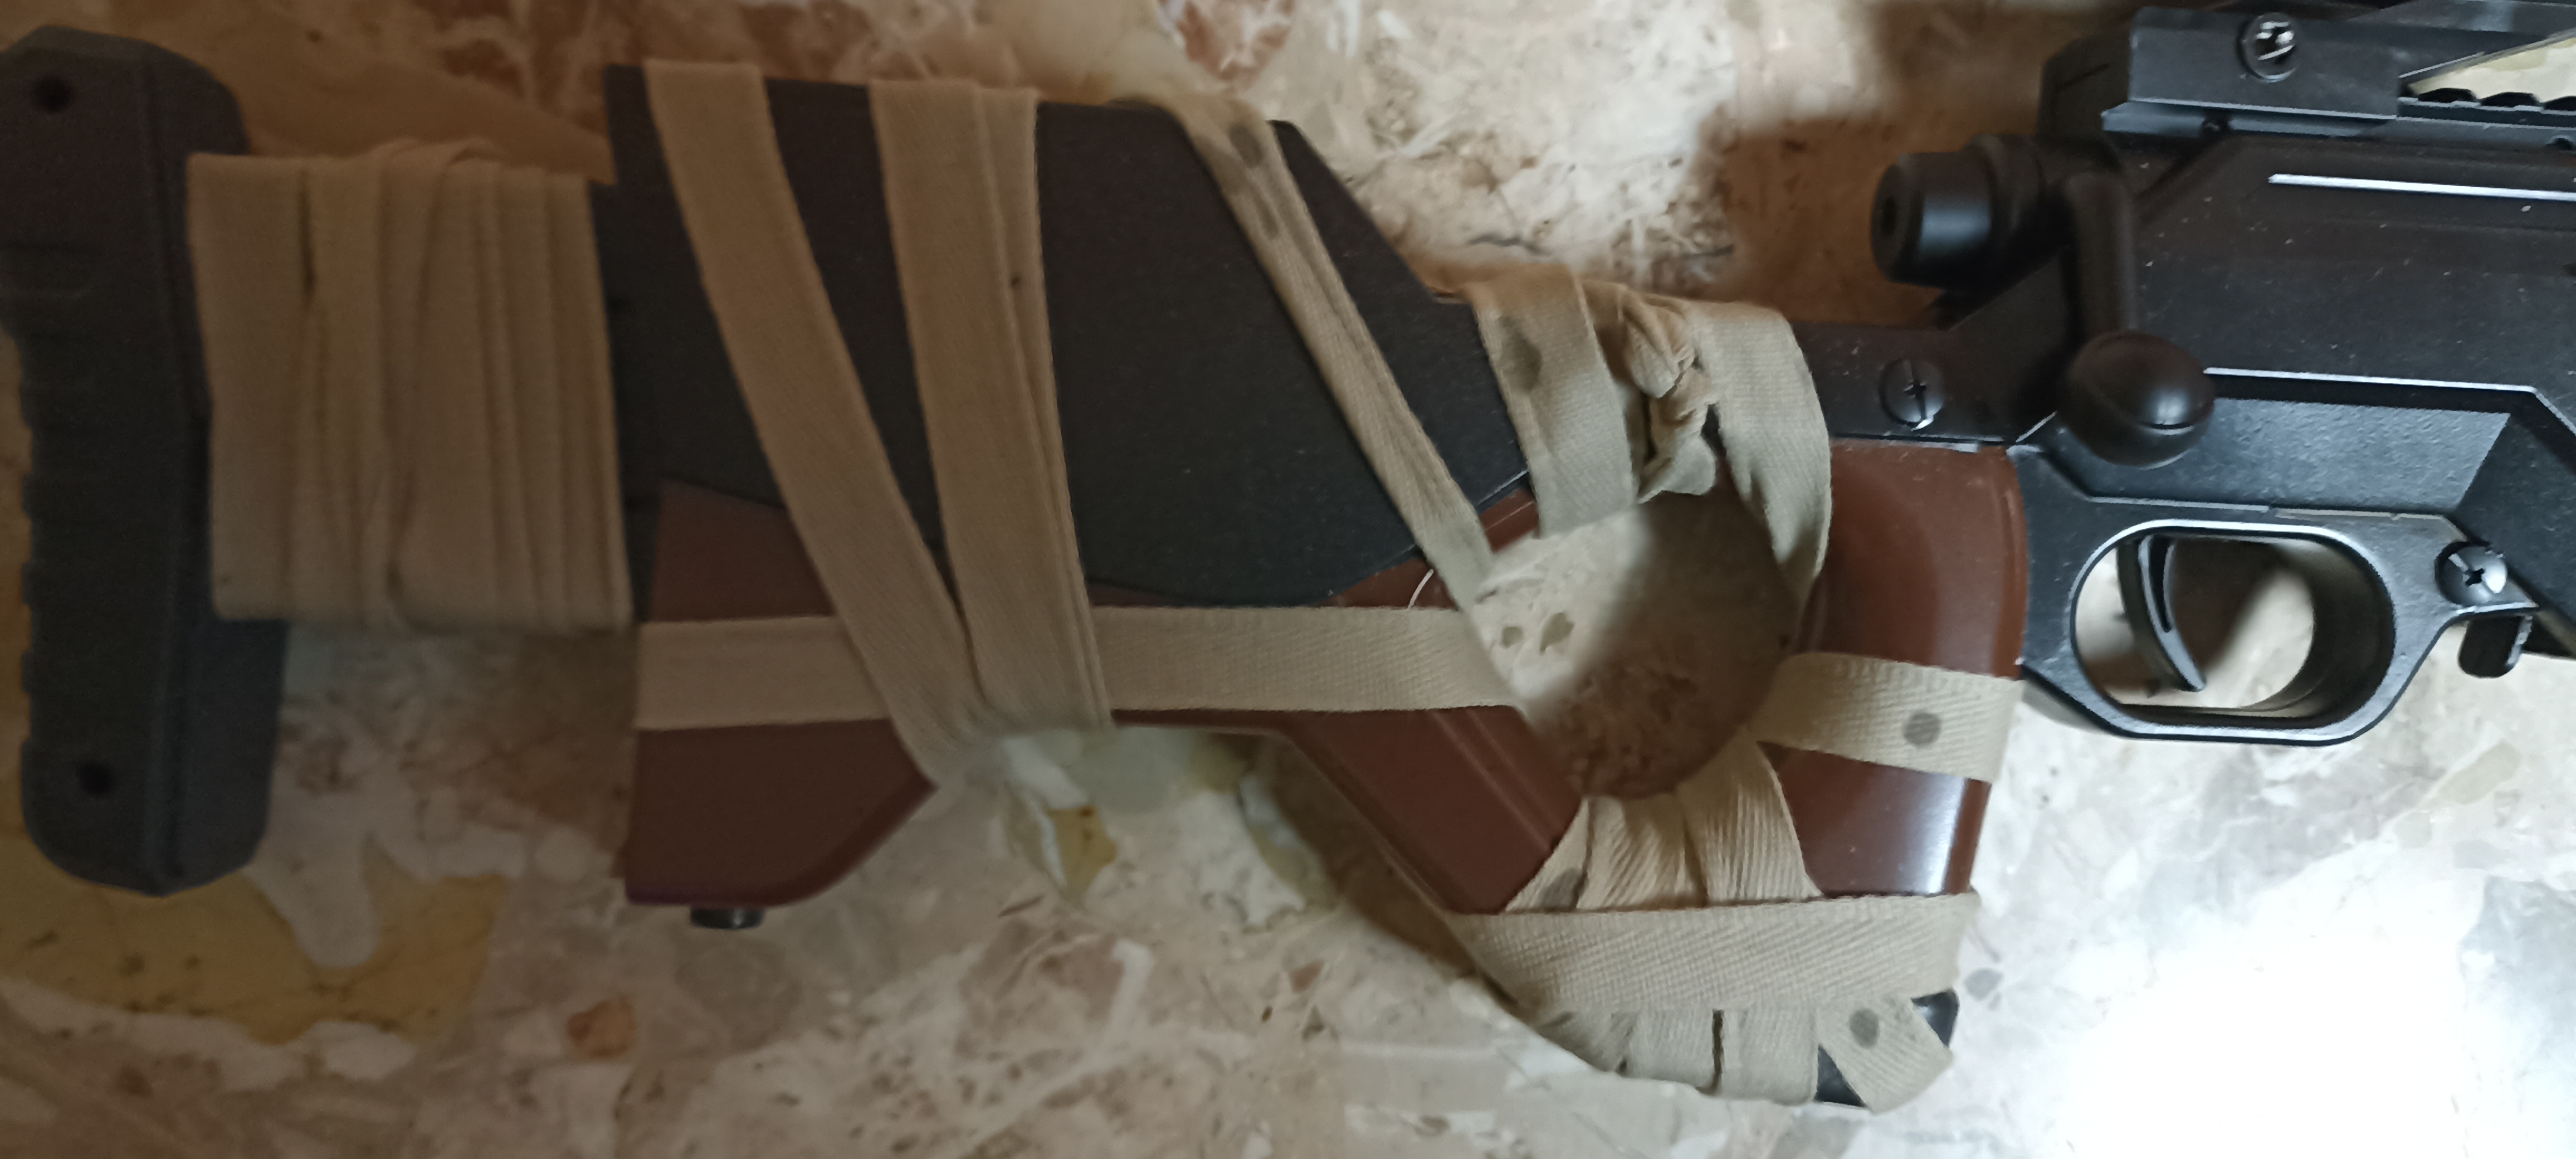 | Dettaglio fasciature calcio. |
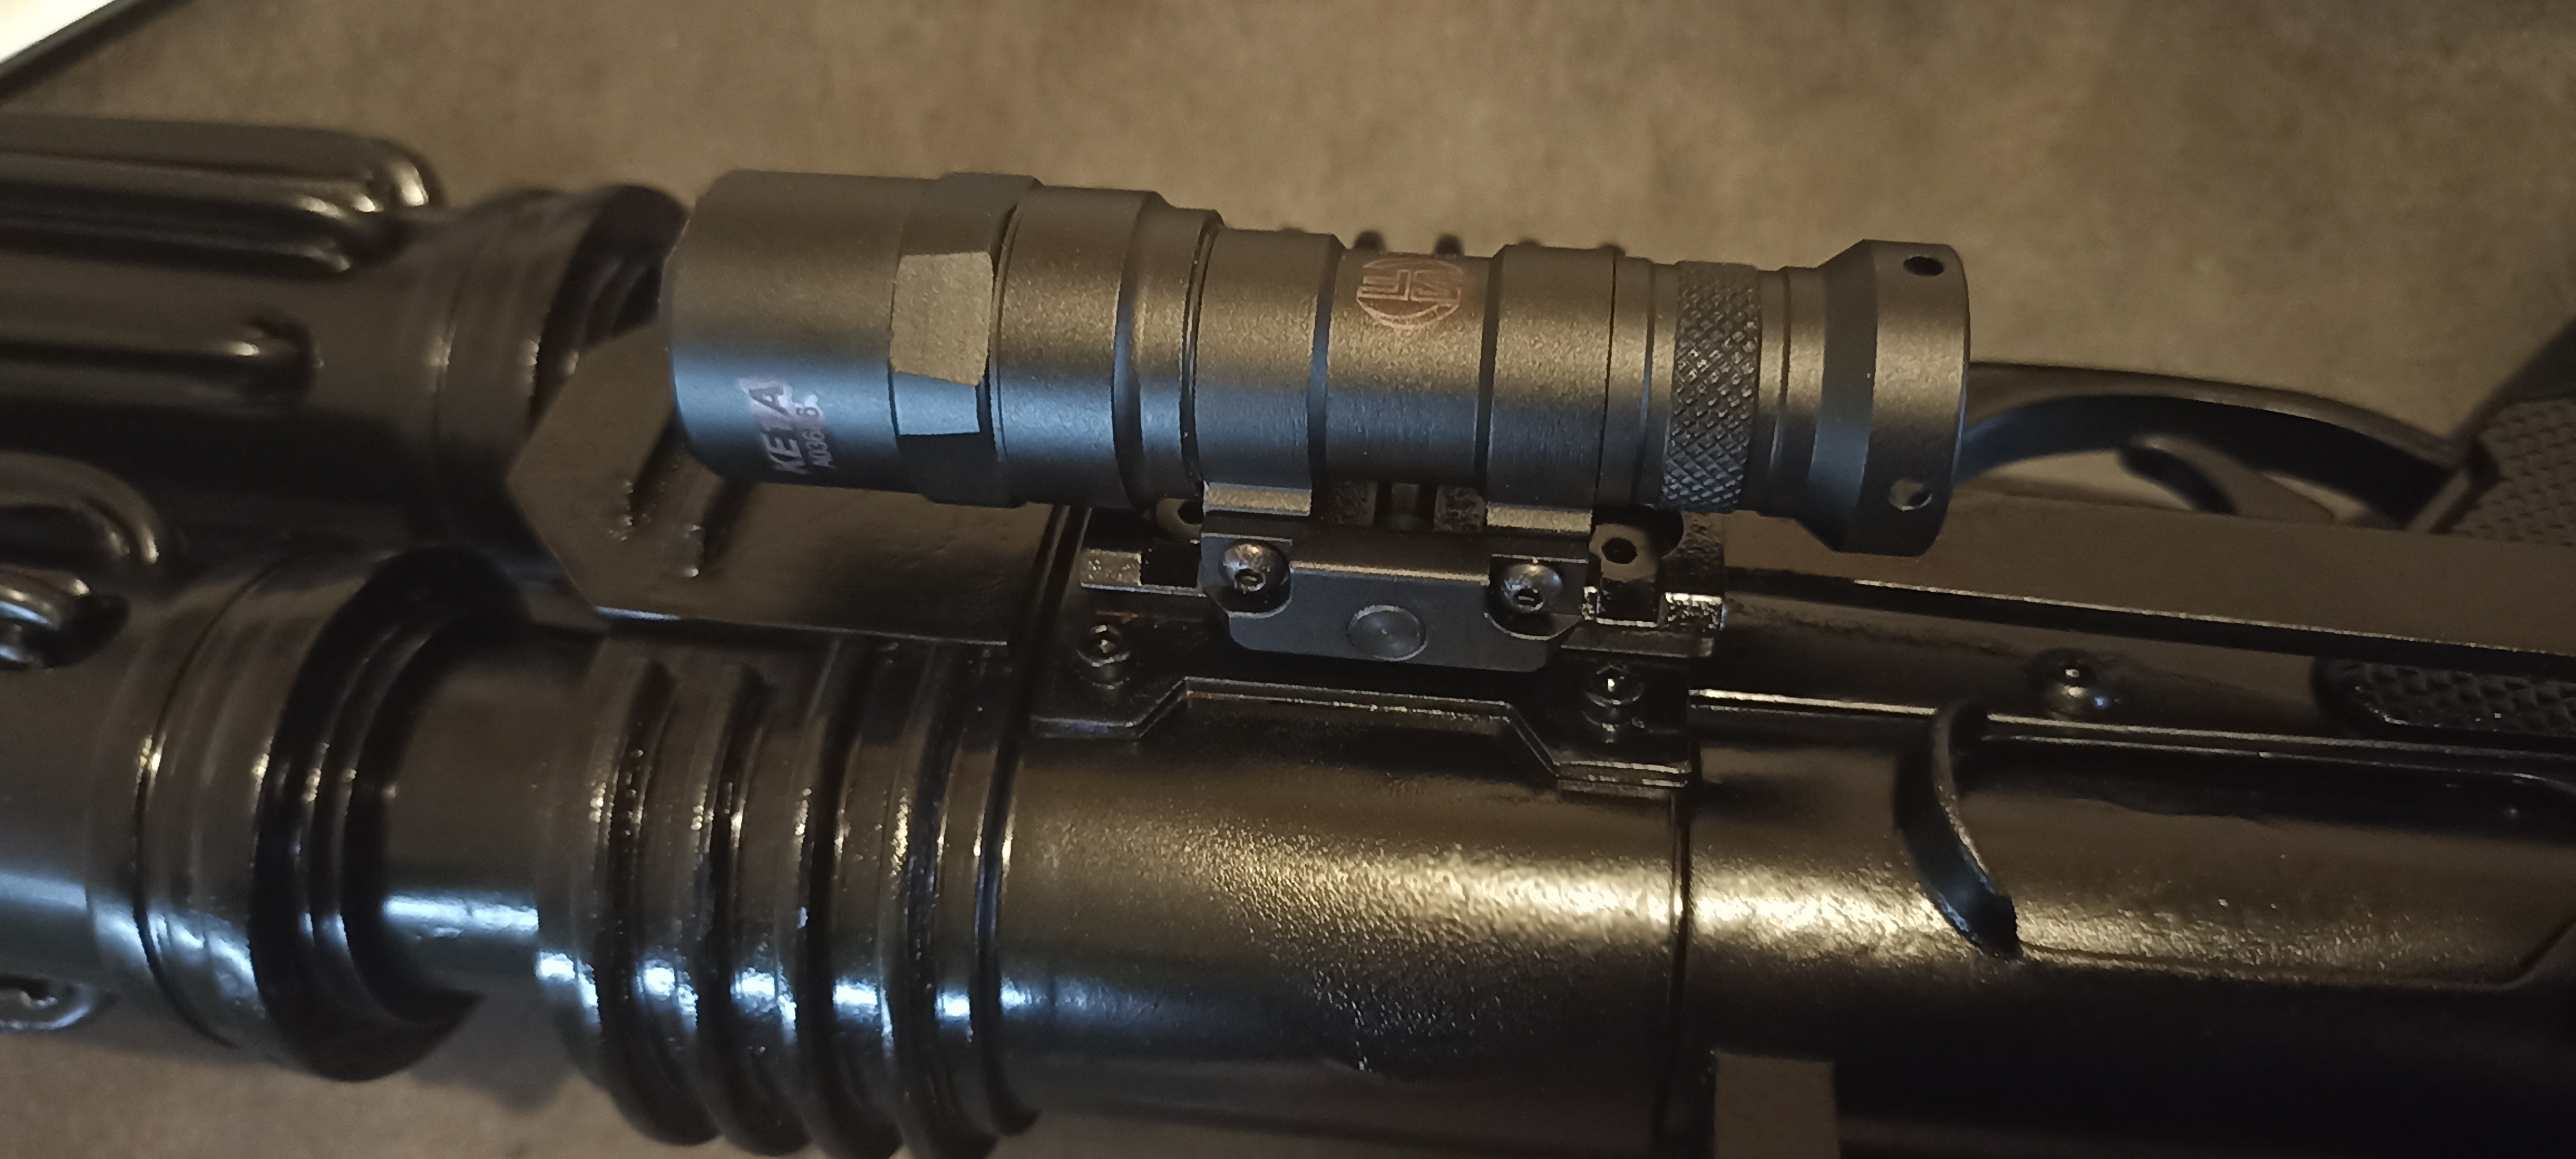
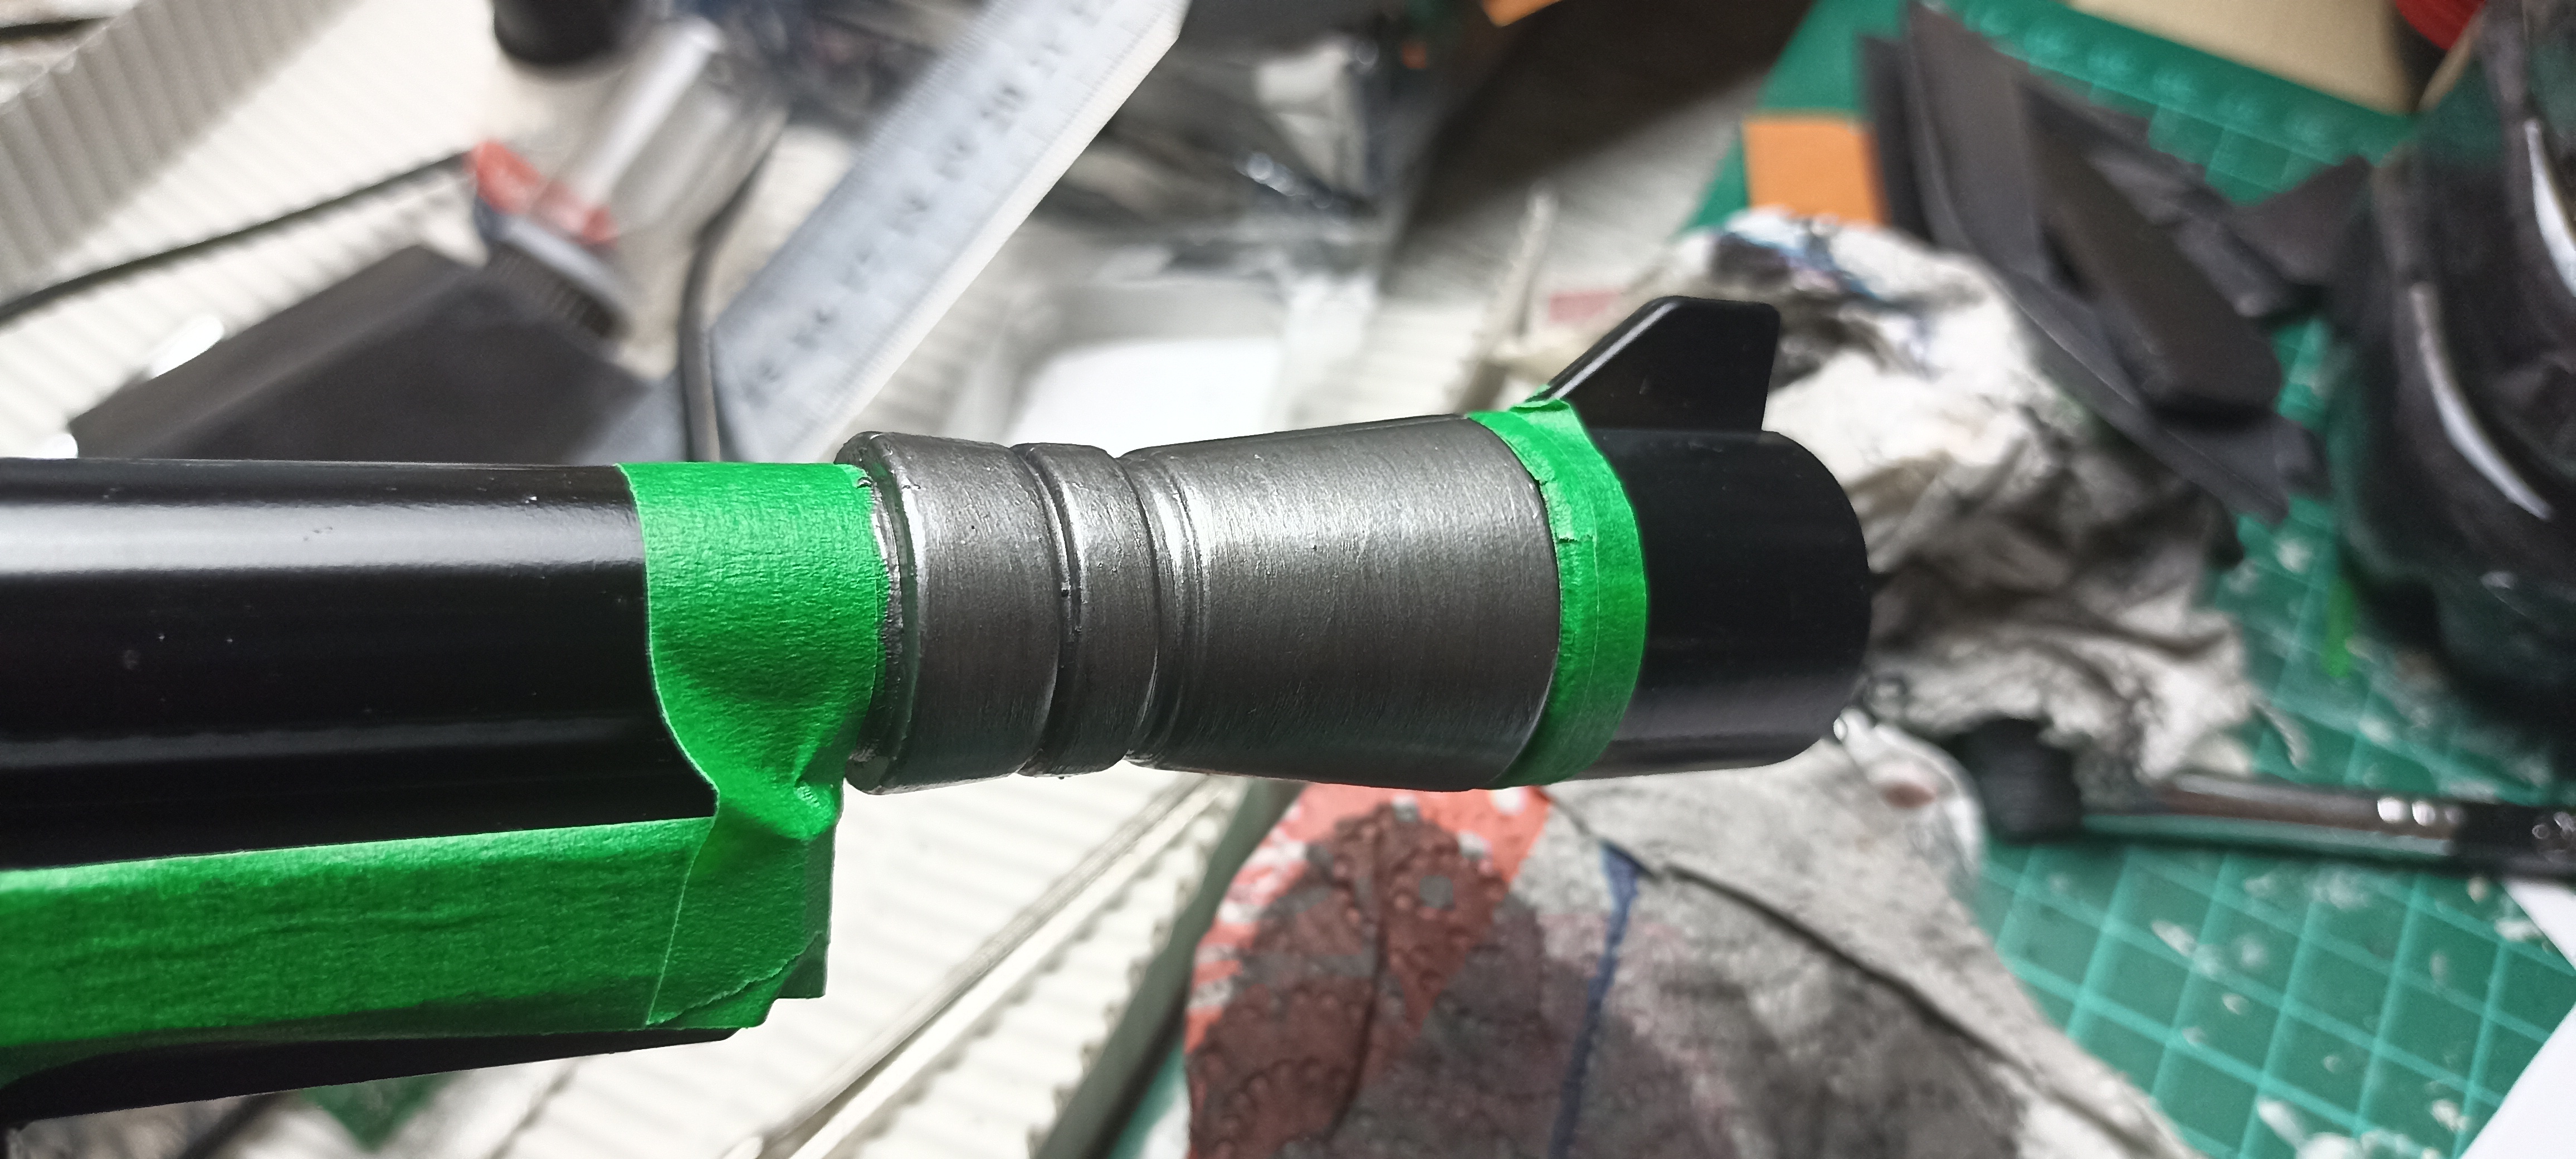
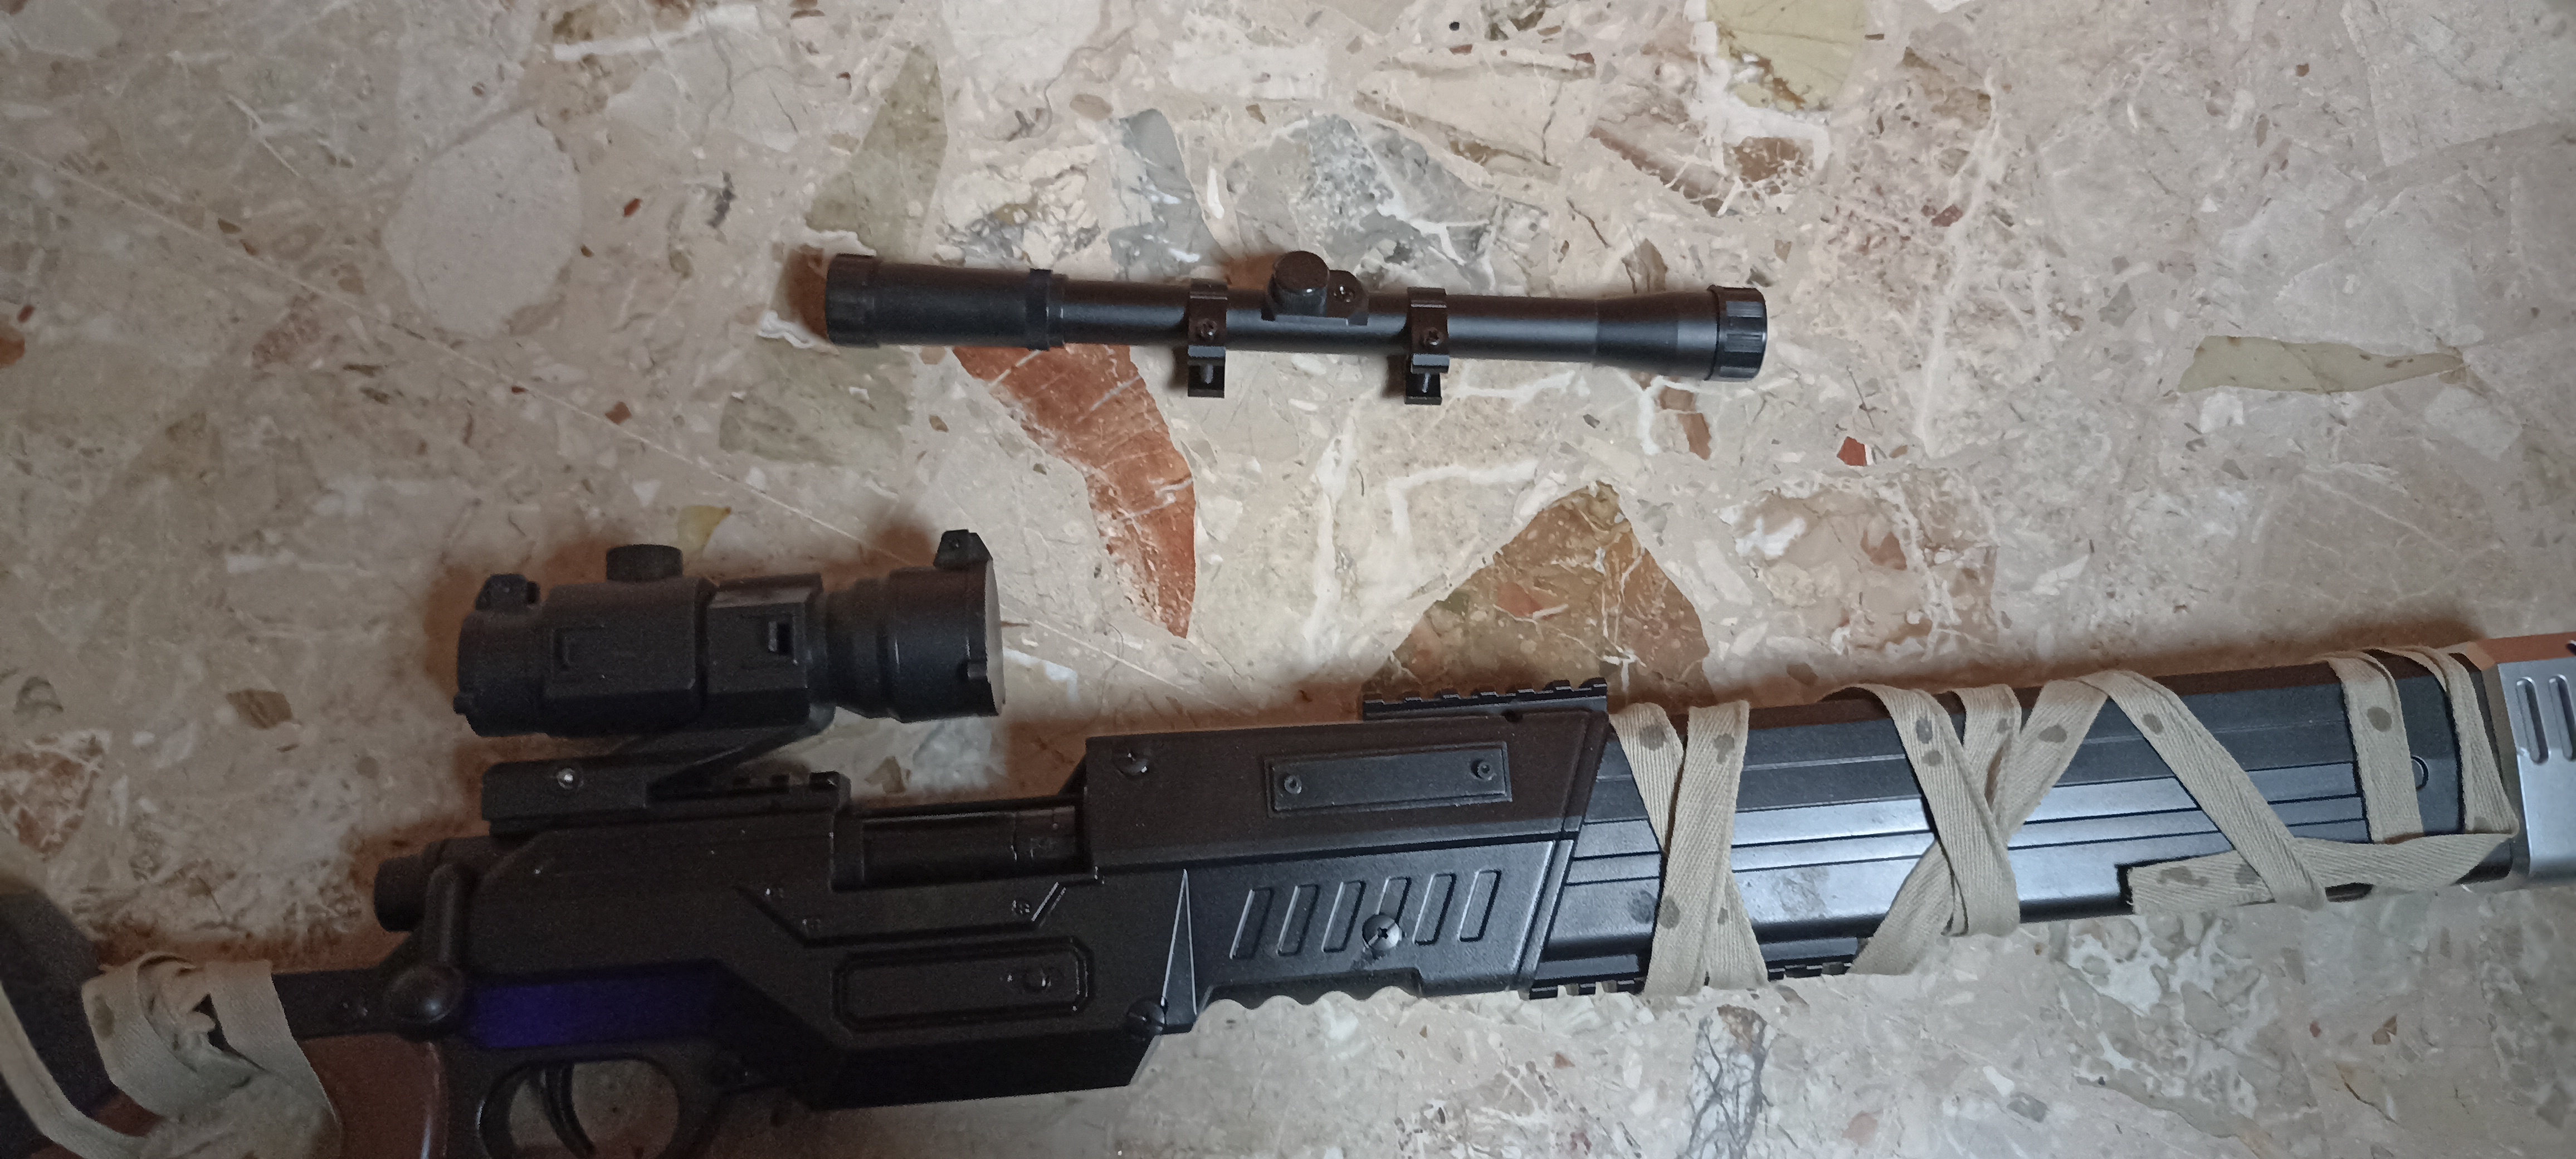 | Mirino telescopico aggiuntivo. |
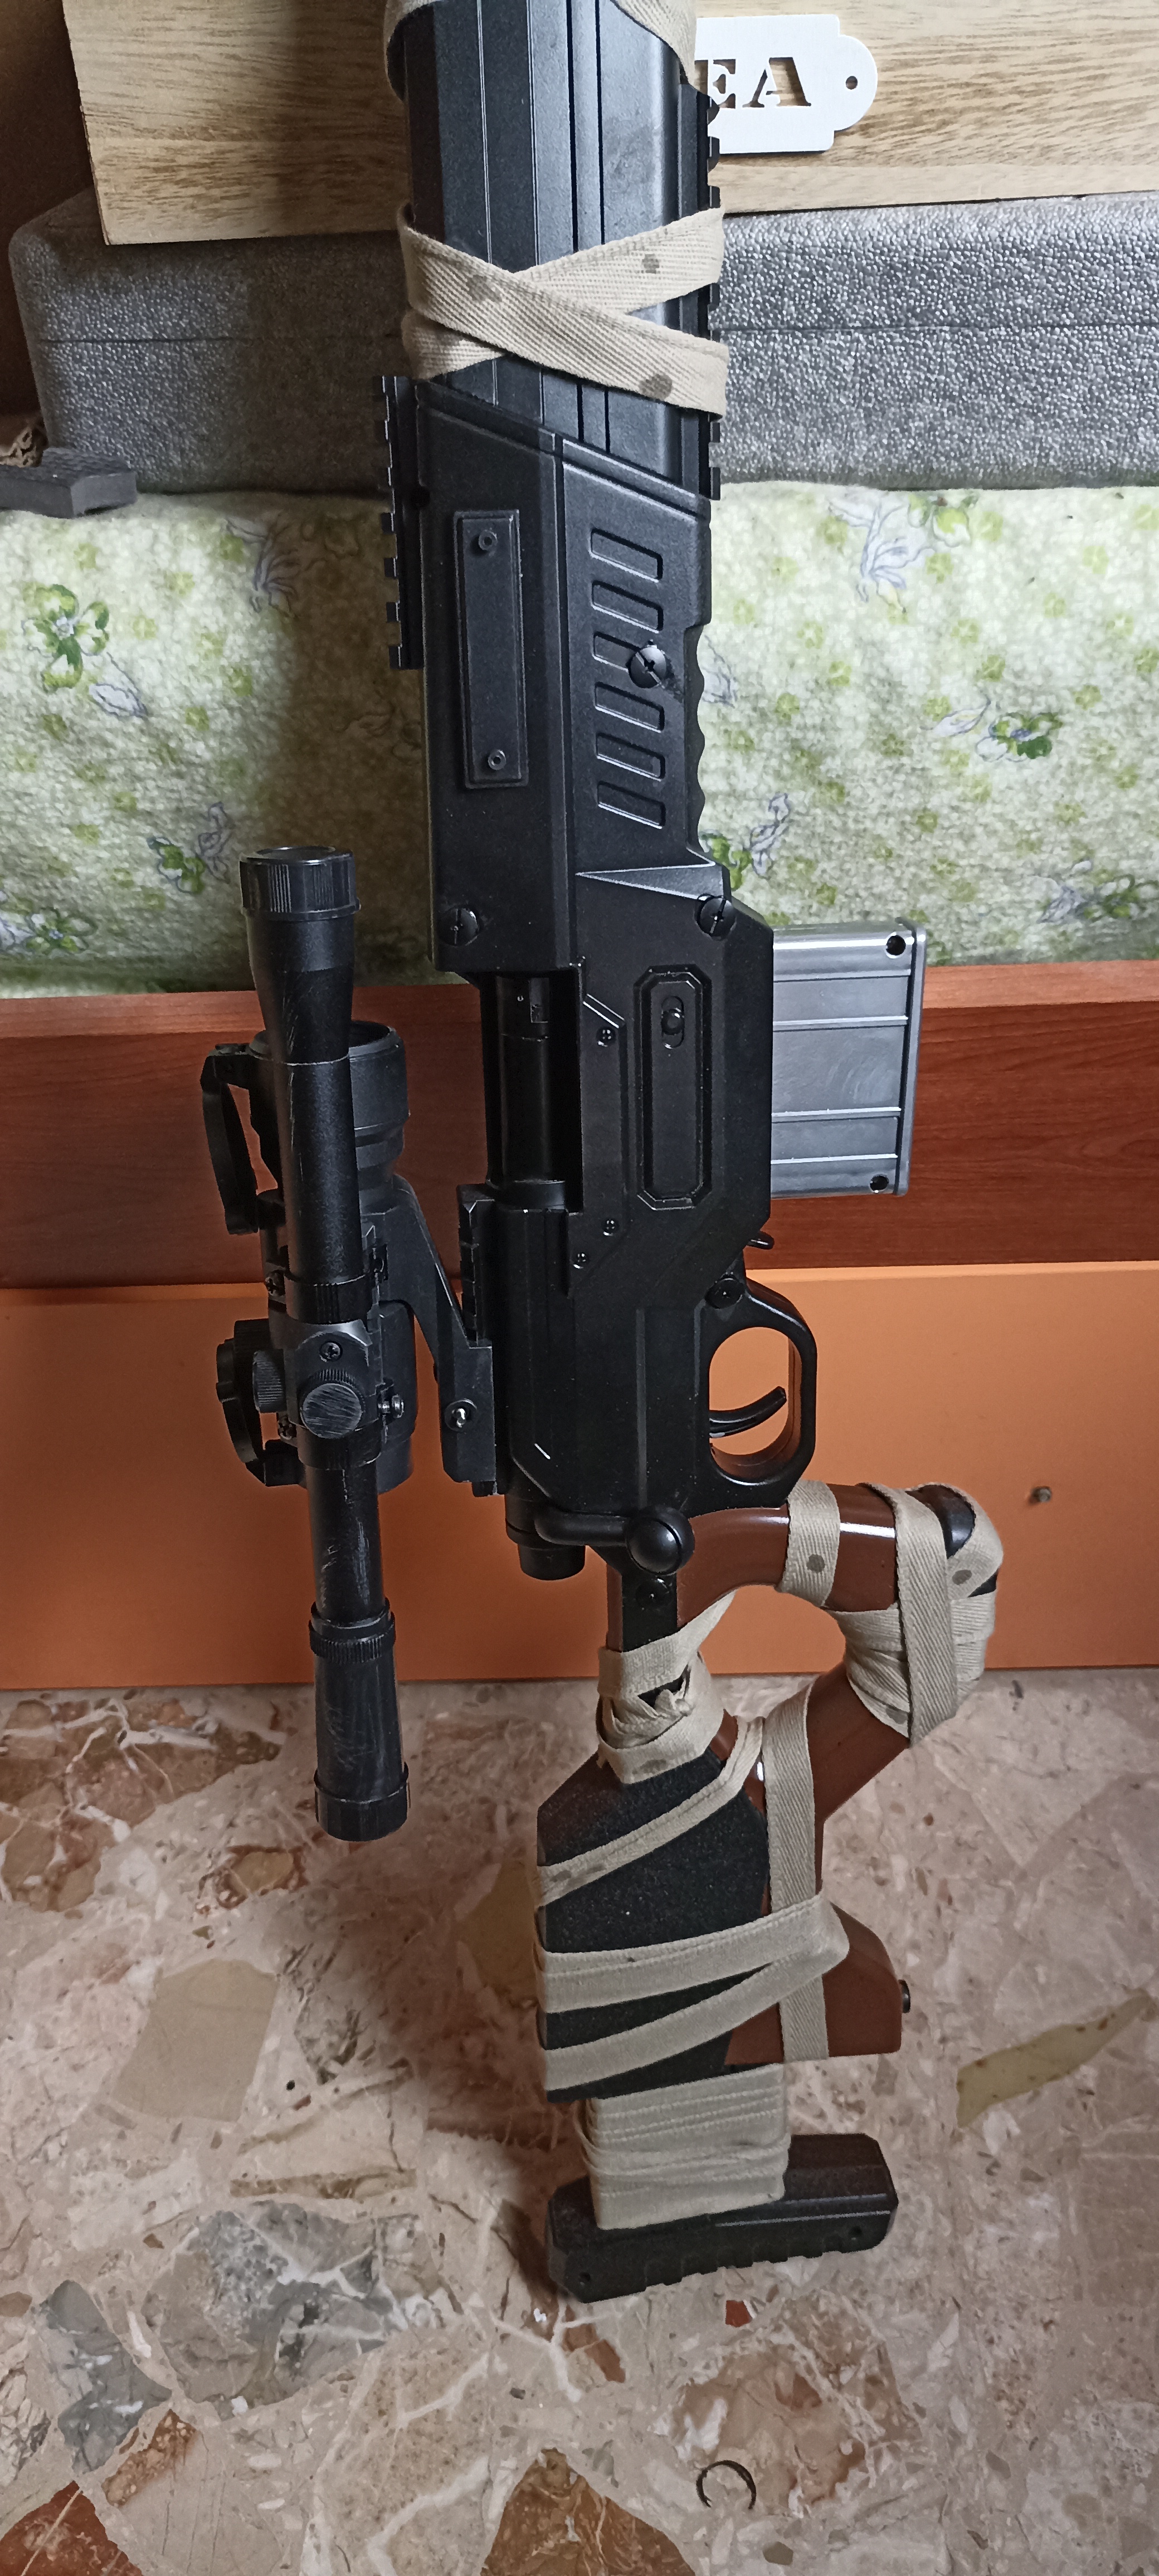
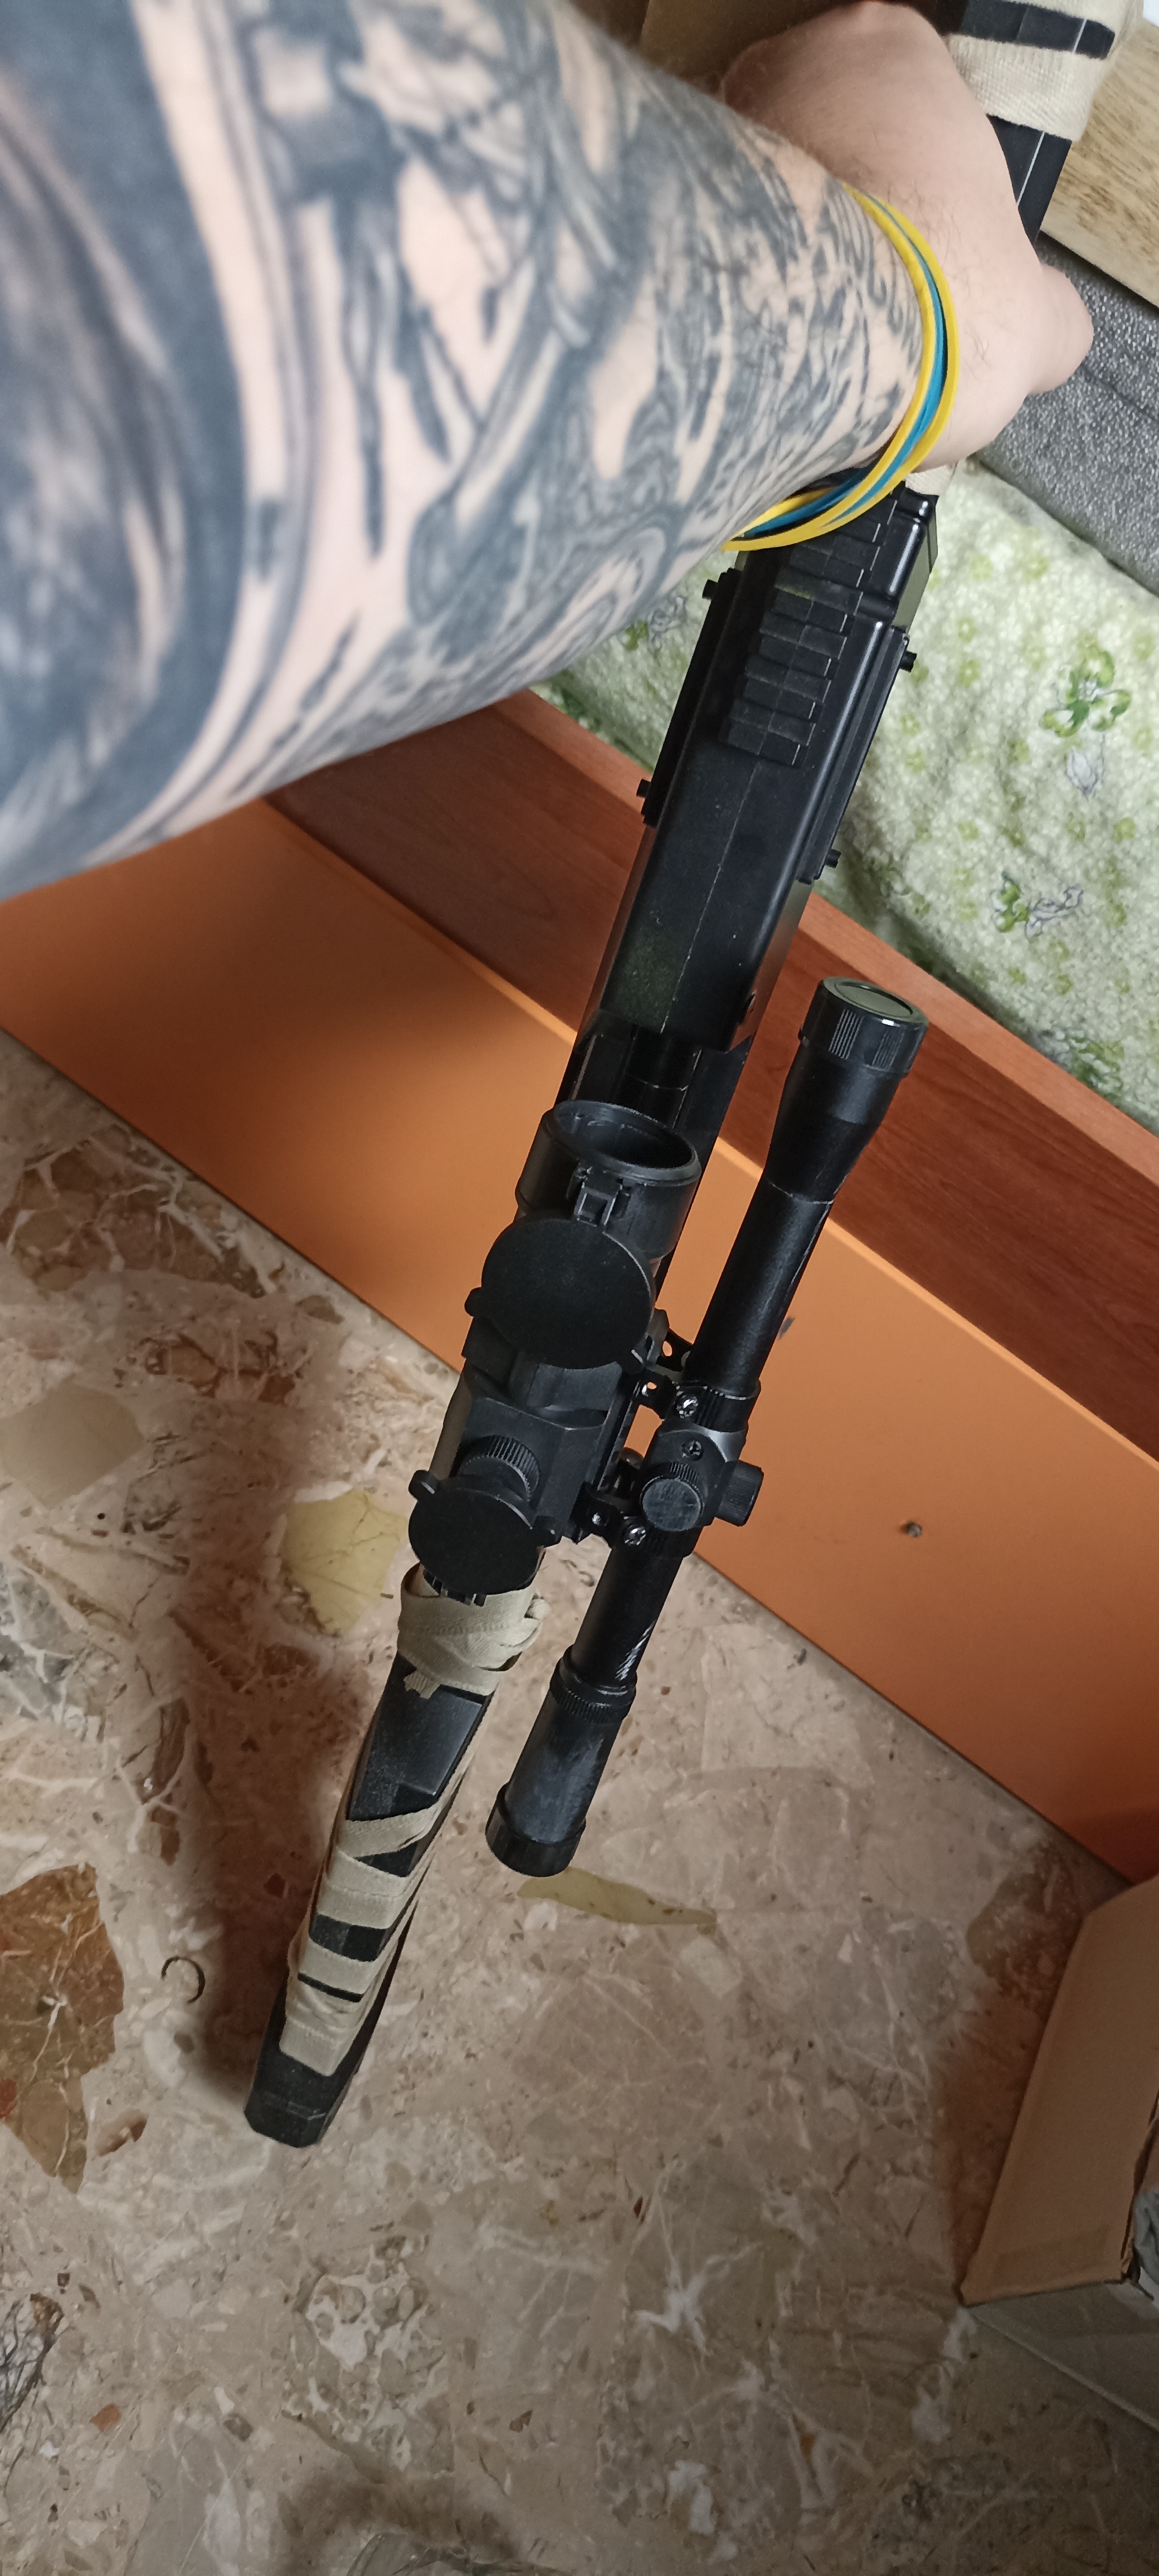 | Dettaglio mirino aggiuntivo |
 | Dettaglio su weathering su imboccatura caricatore. |
 | Dettaglio su weathering mirino. |
 | Dettaglio weathering Lavatura su bocca del fucile. |
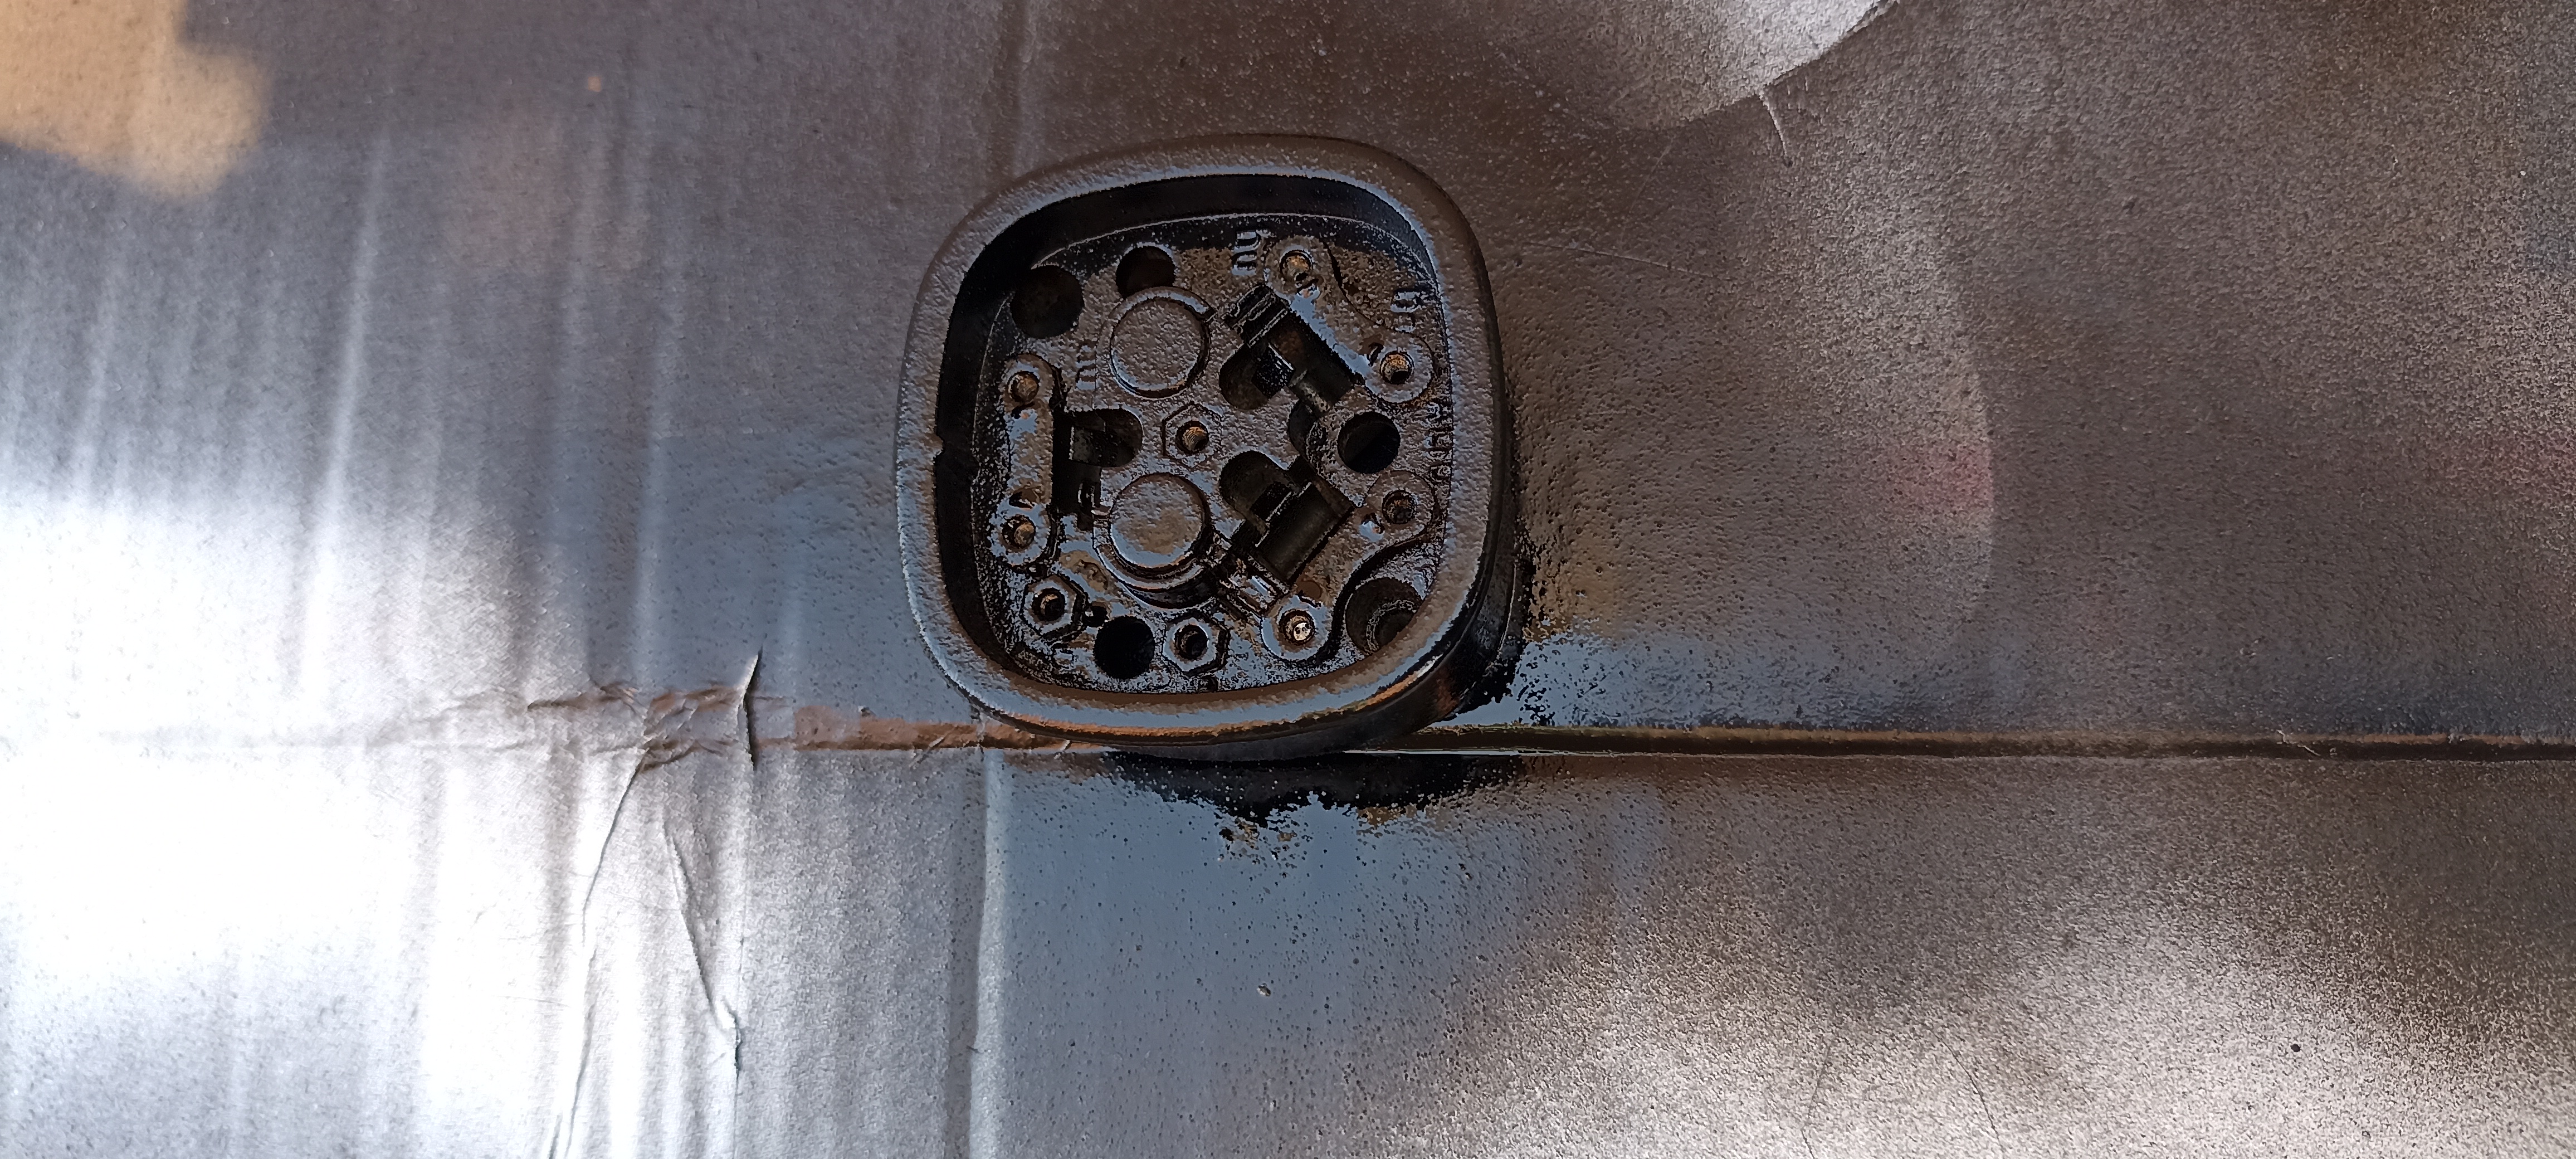 | Spina vecchio telefono riverniciata e con effetto rilievo (dopo aver carteggiato e rimosso scritte SIP). |
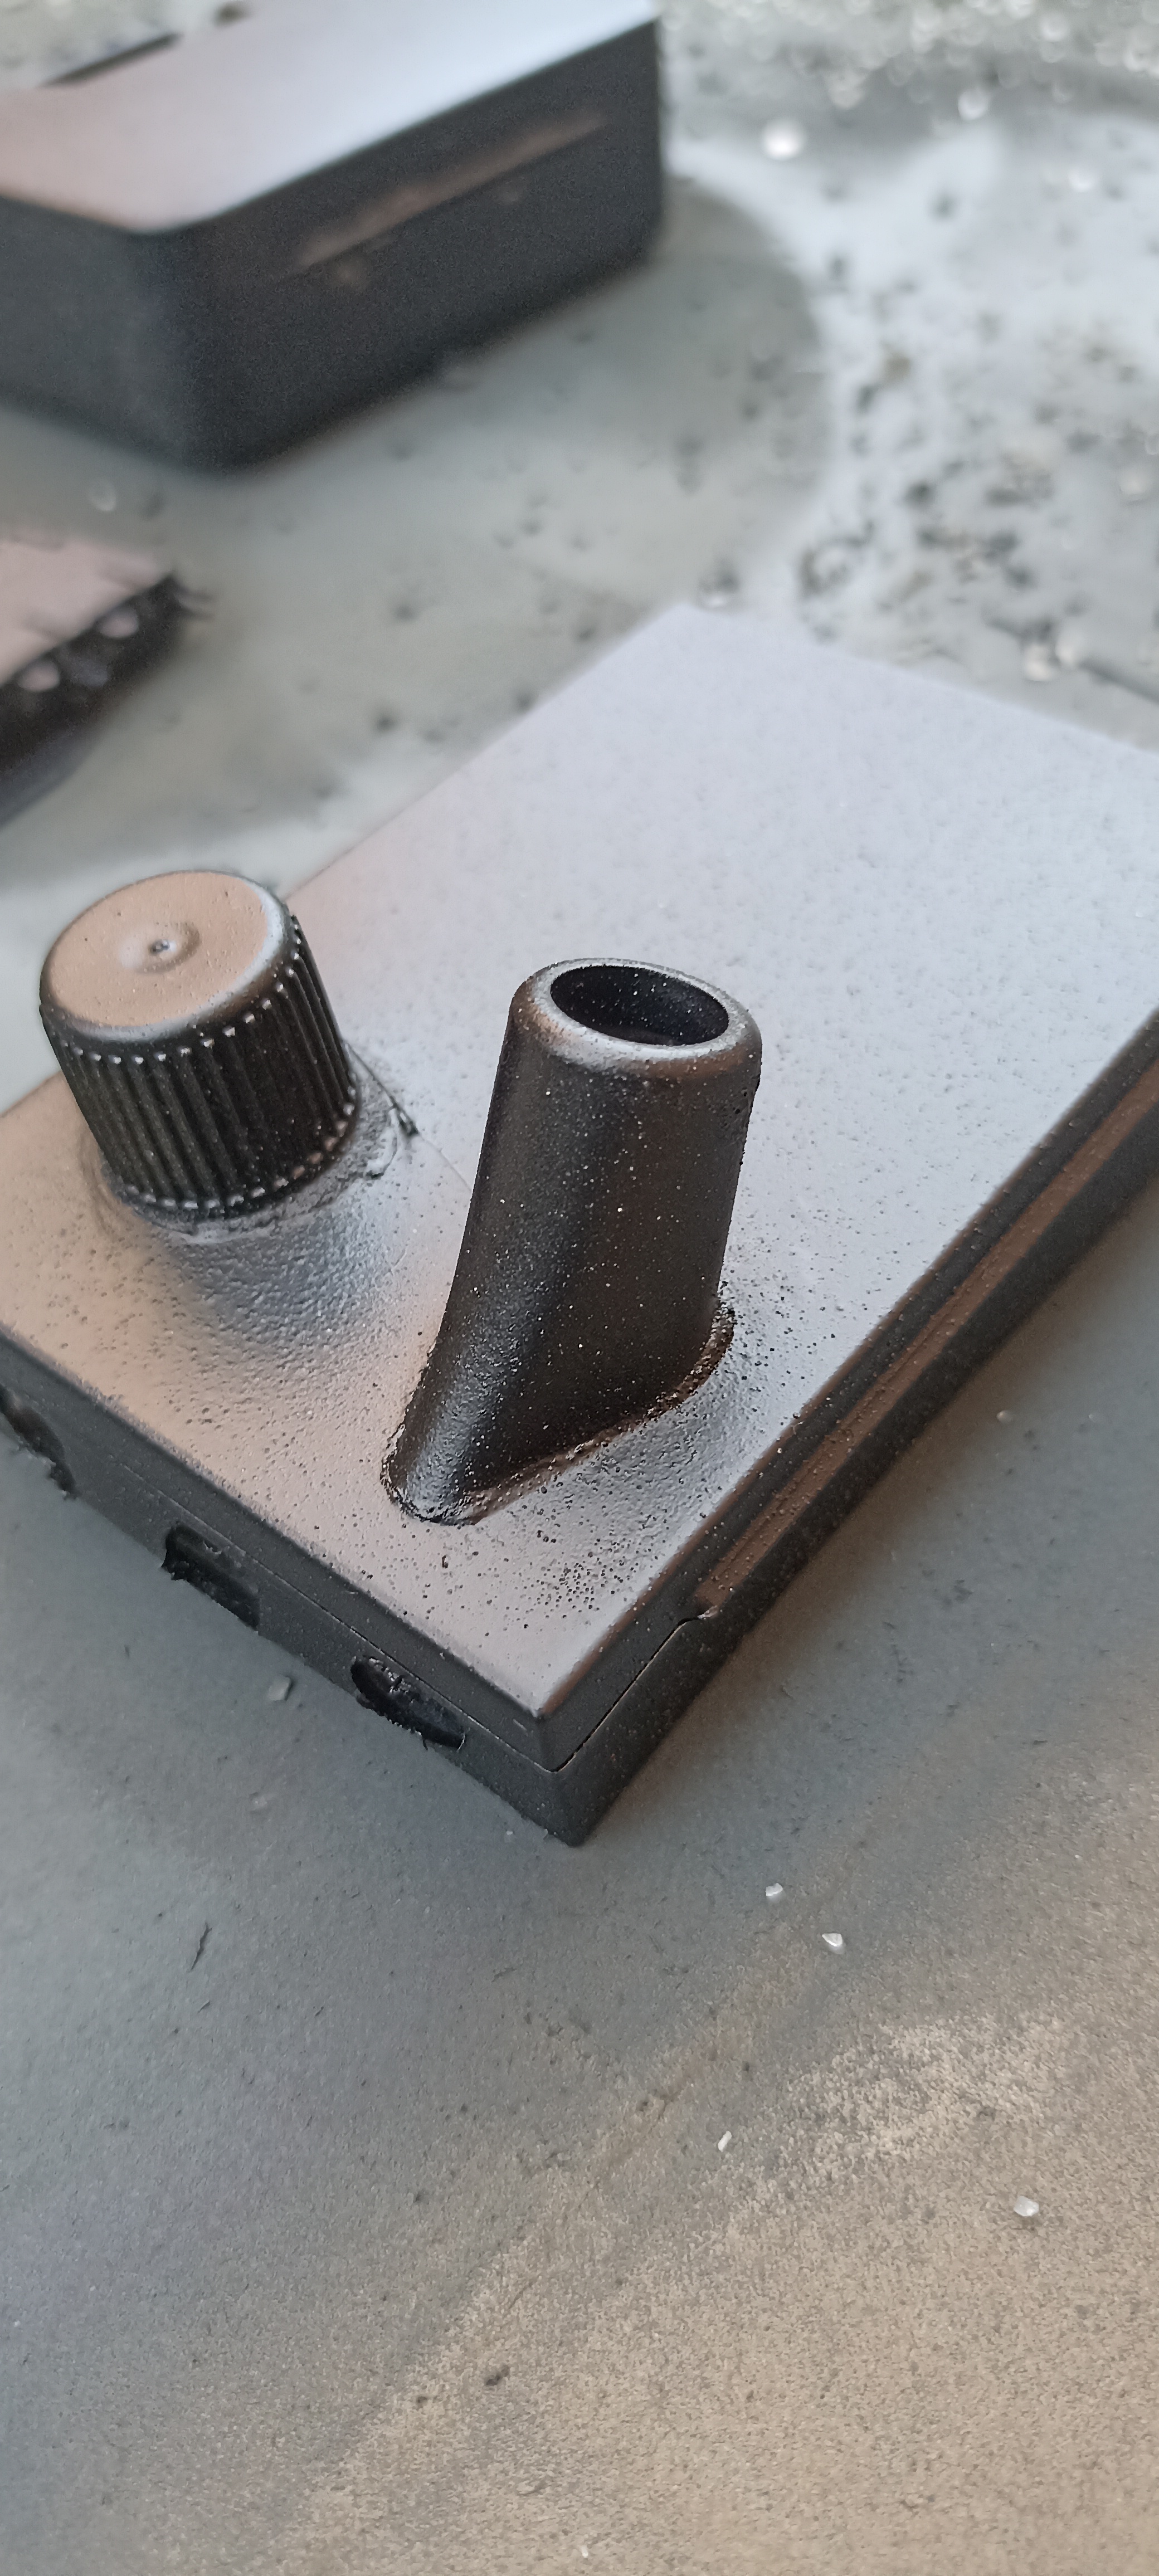
 | Contenitore liquido sigaretta elettronica, con effetto rilievo e verniciatura nero opaca. |
 | Prove di montaggio Grebbles. |
 | Alcuni dettagli aggiunti e weathering. |
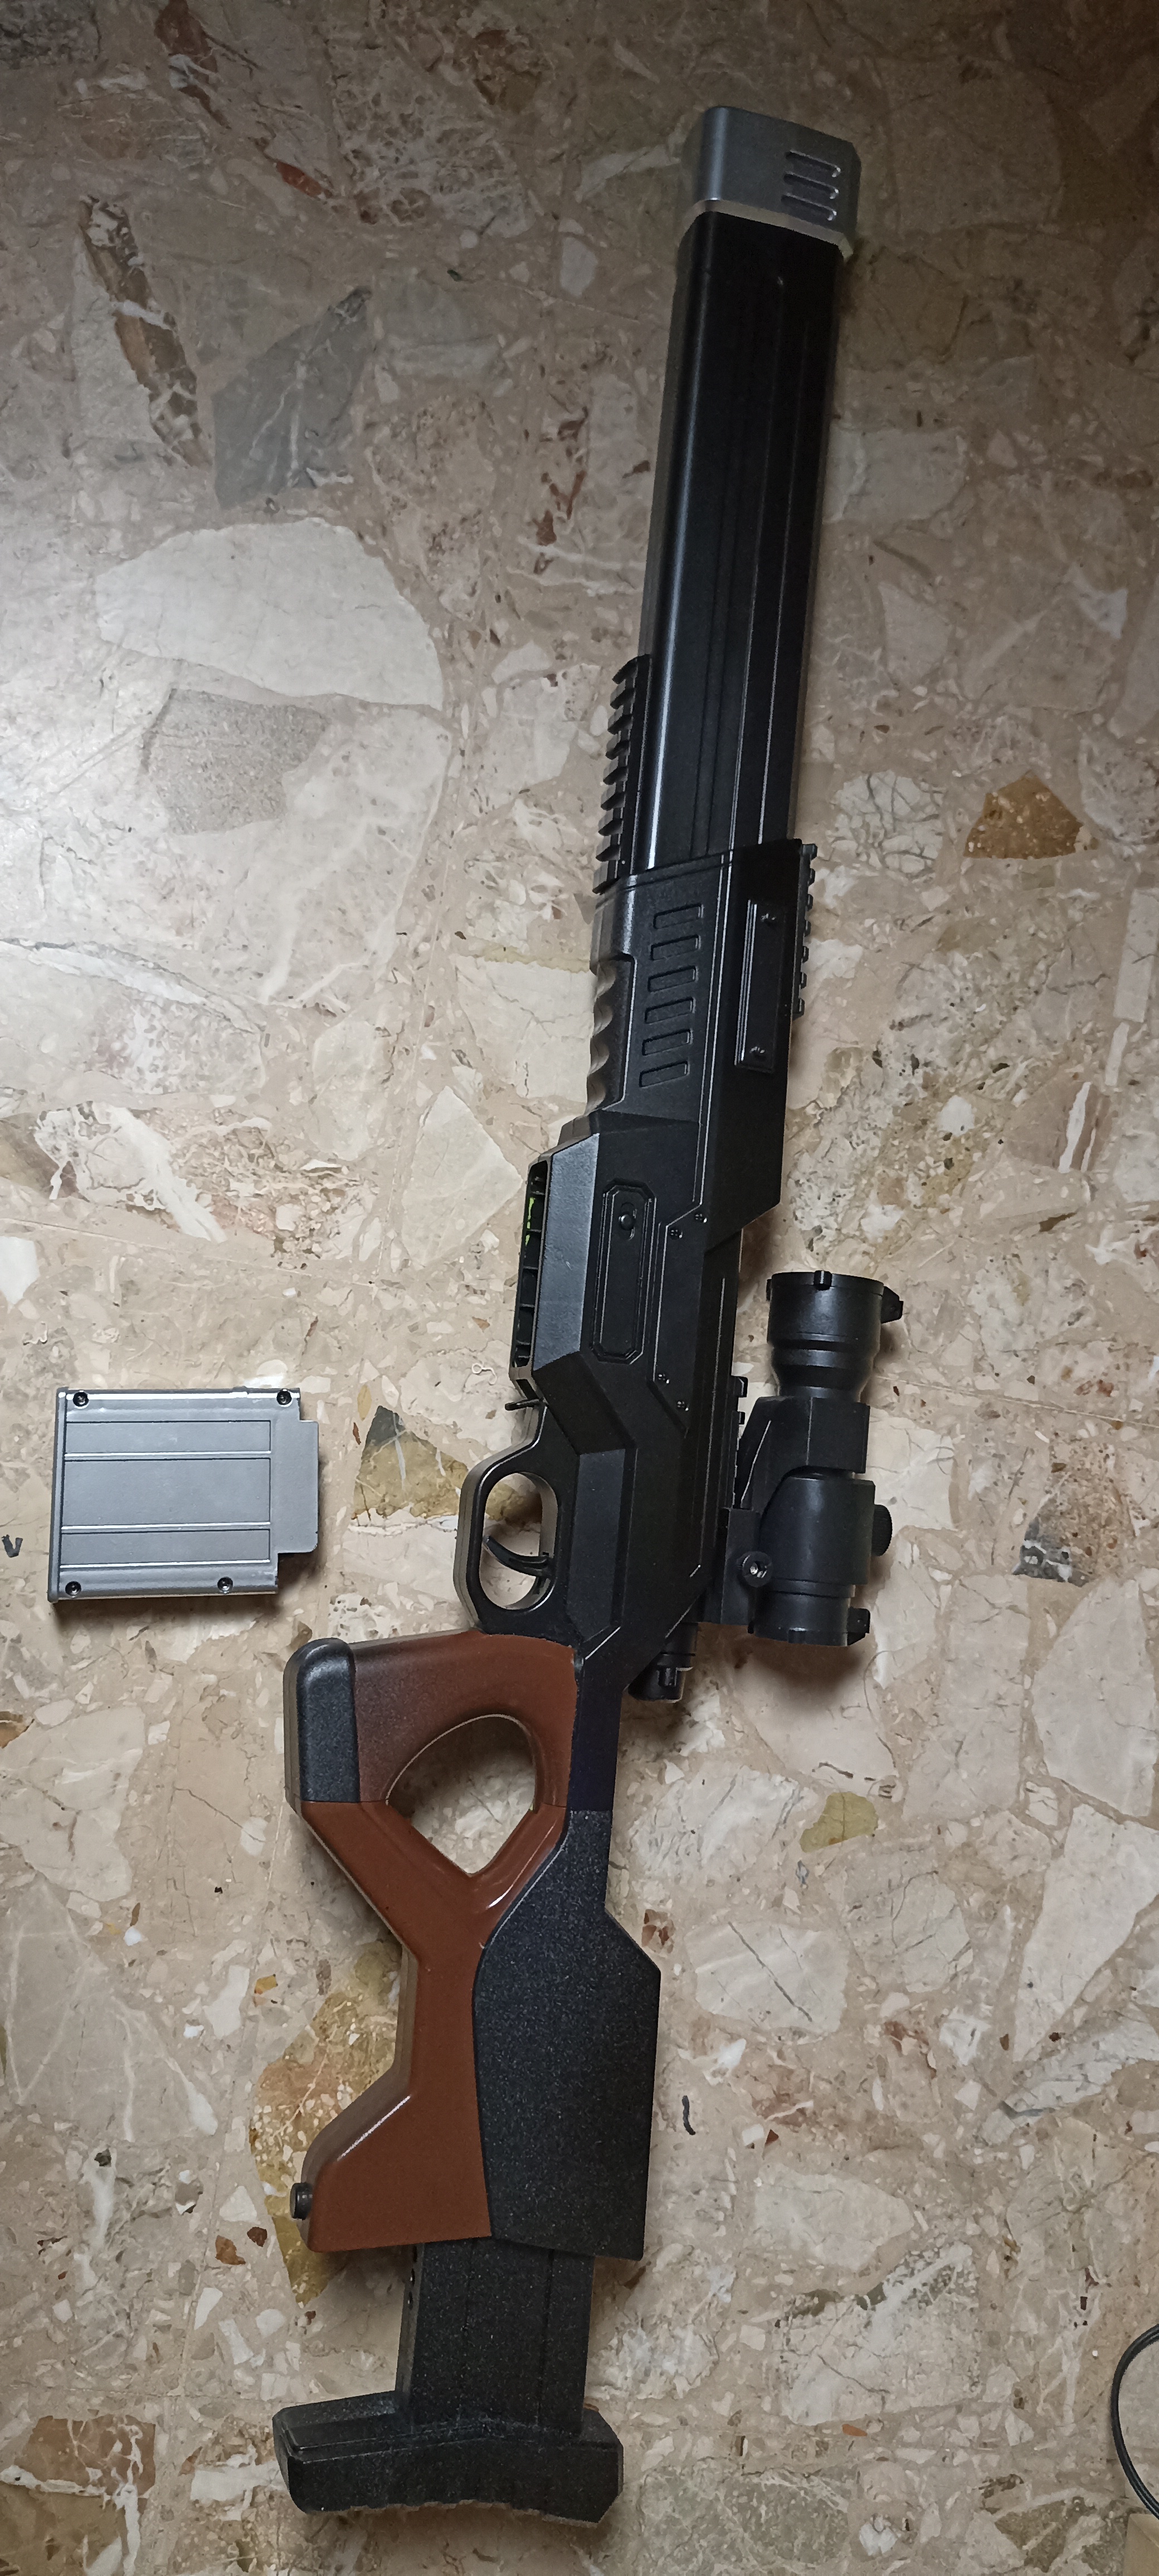
 | Dettagli lato destro quasi ultimato. |
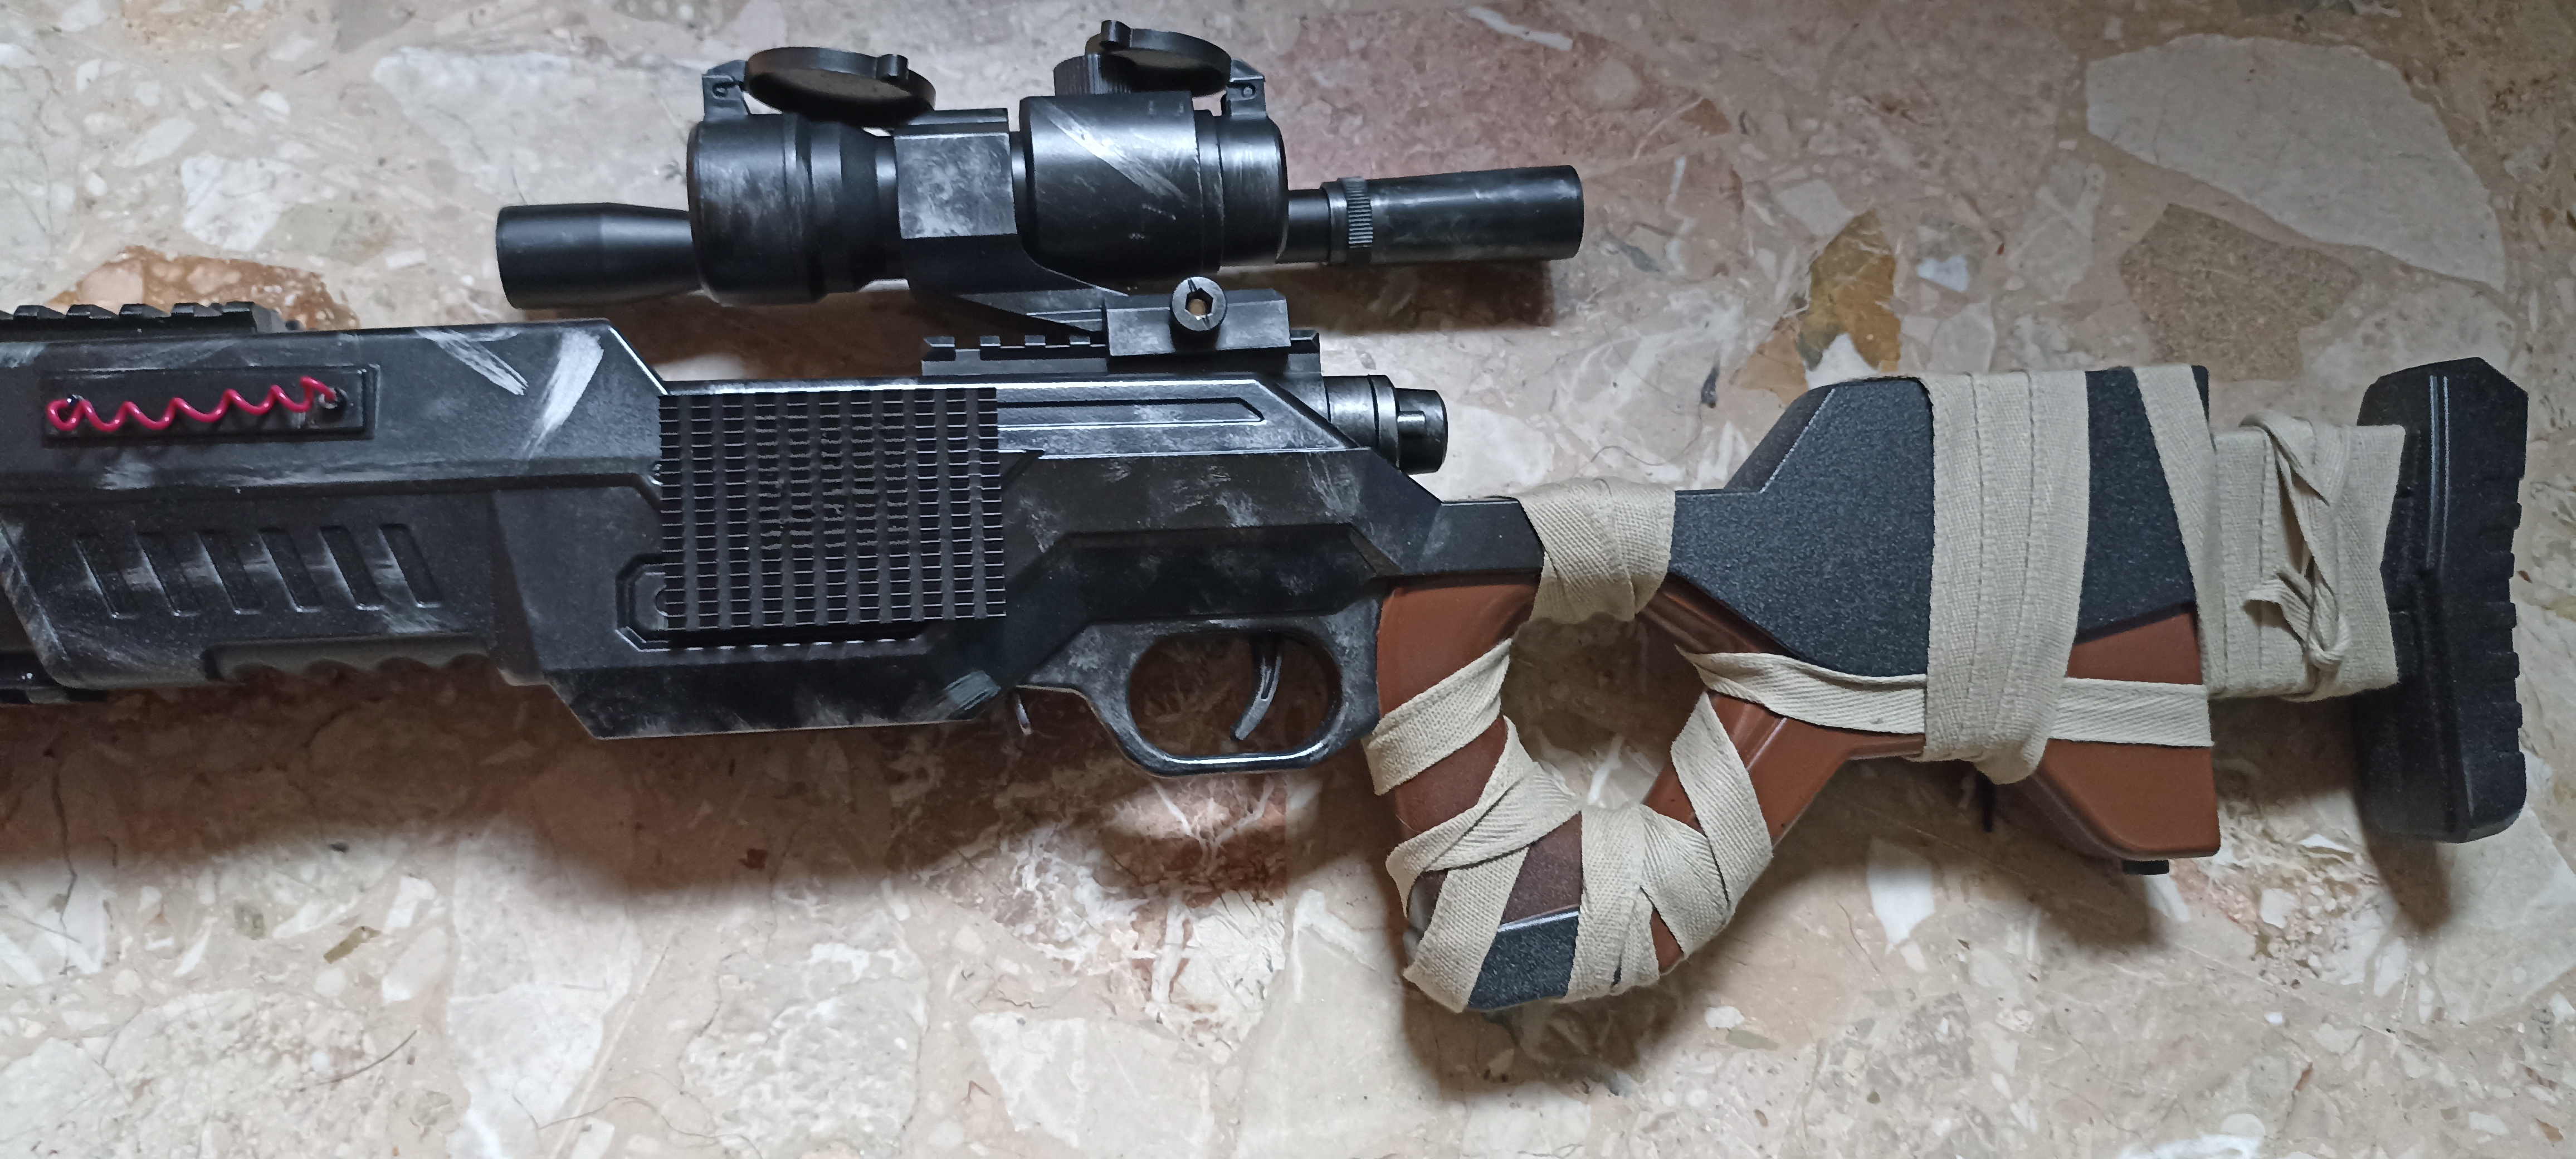 | Dettagli lato Sinistro quasi ultimato. |
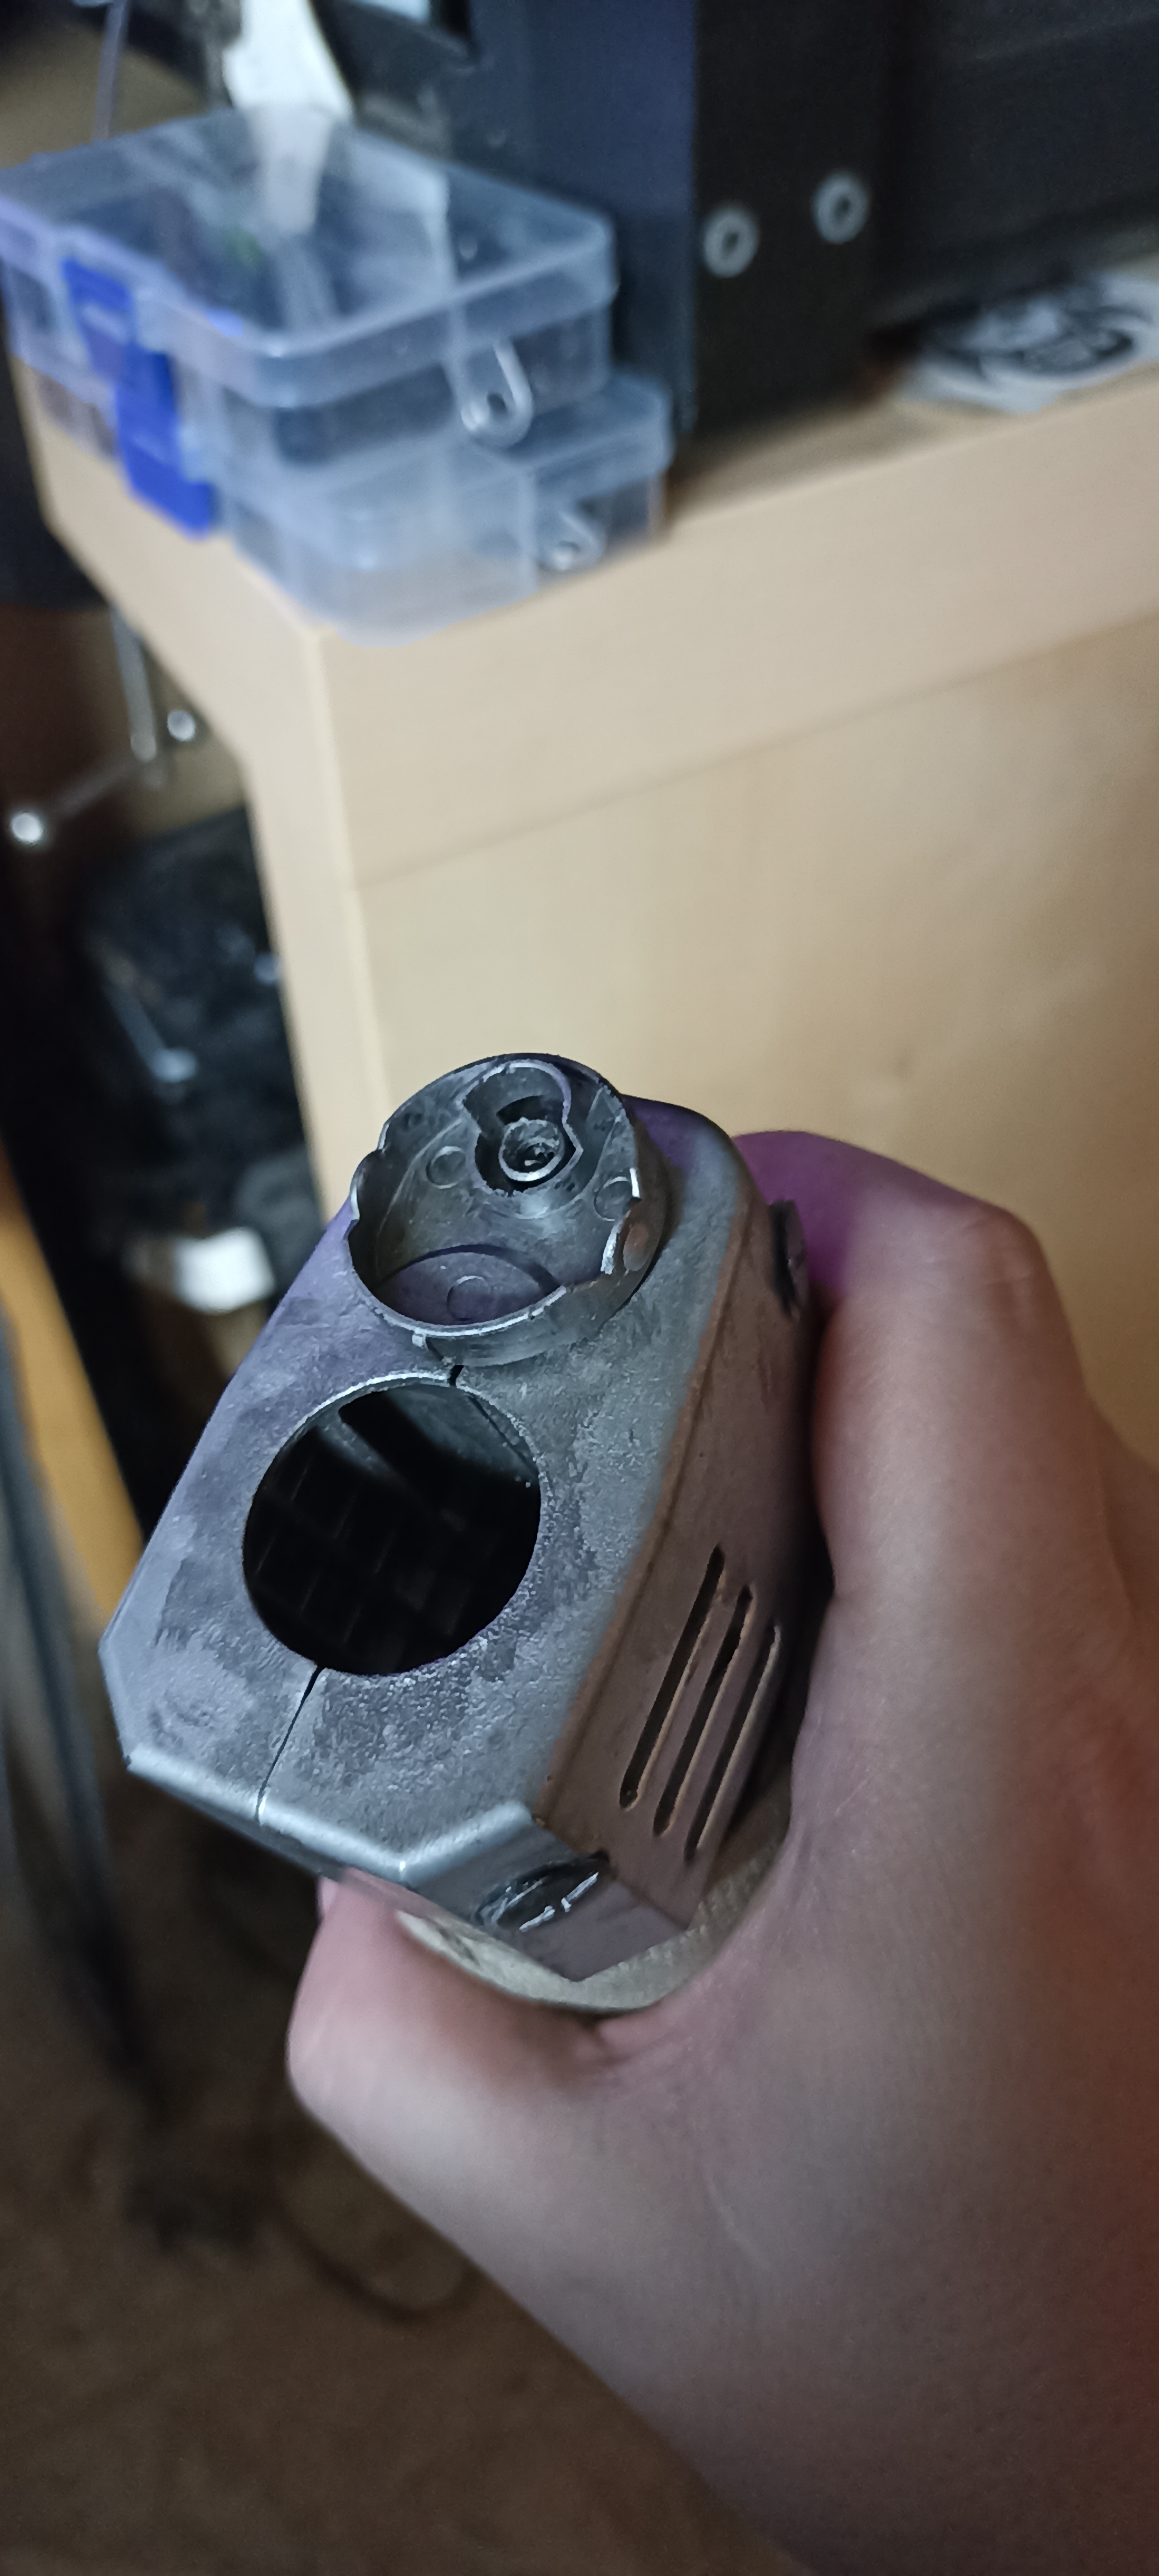 | Dettaglio Bocca di fucile. |
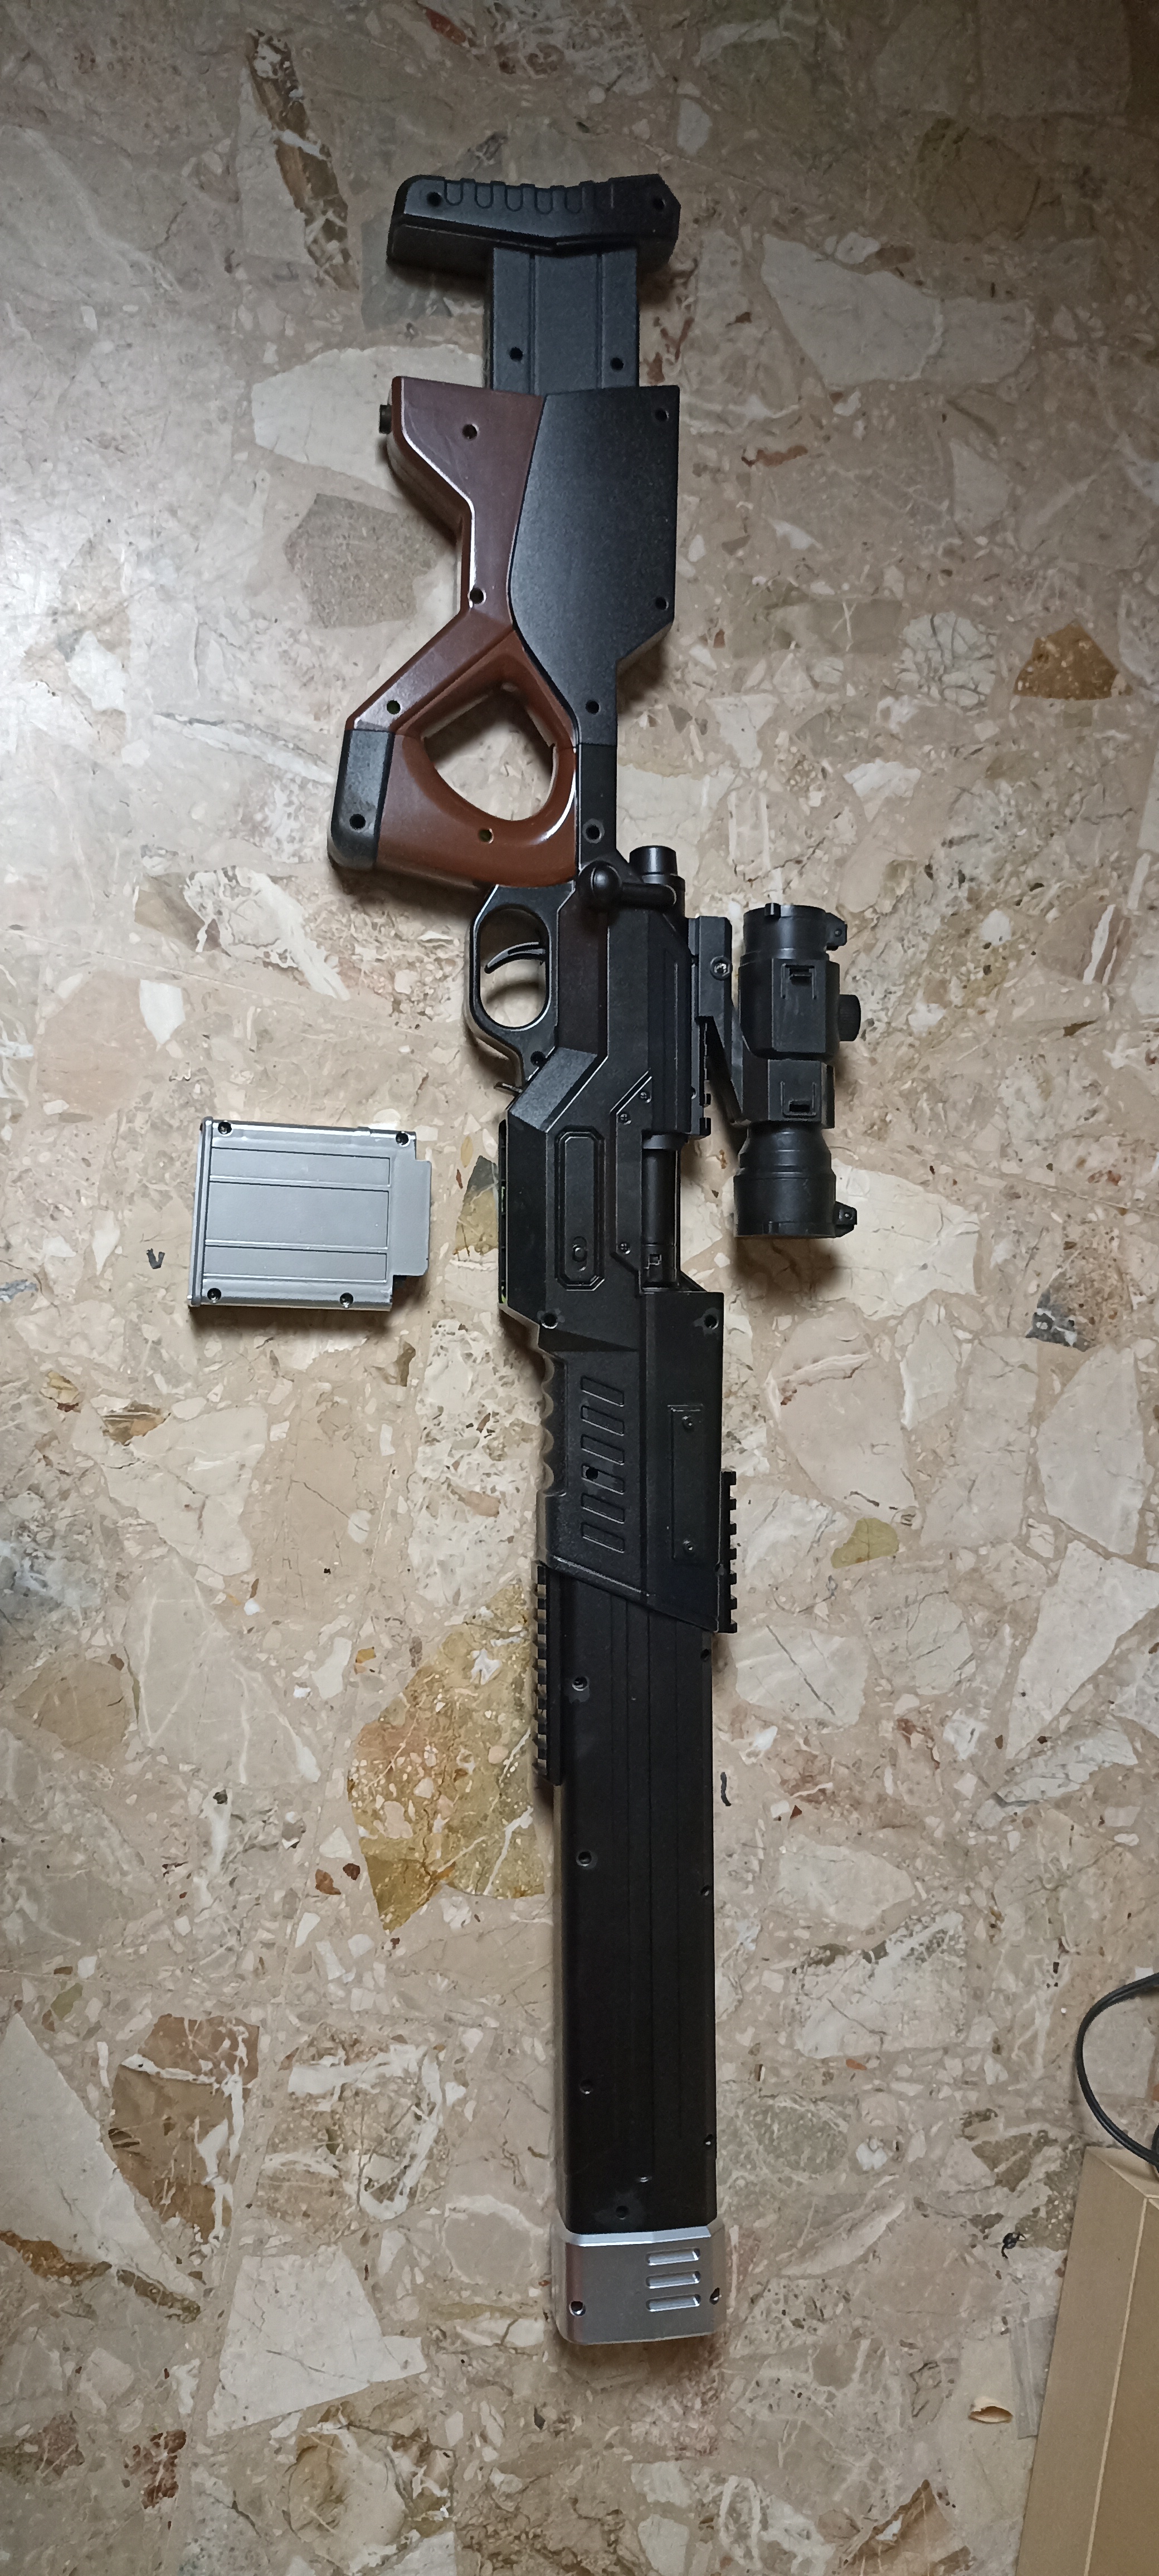
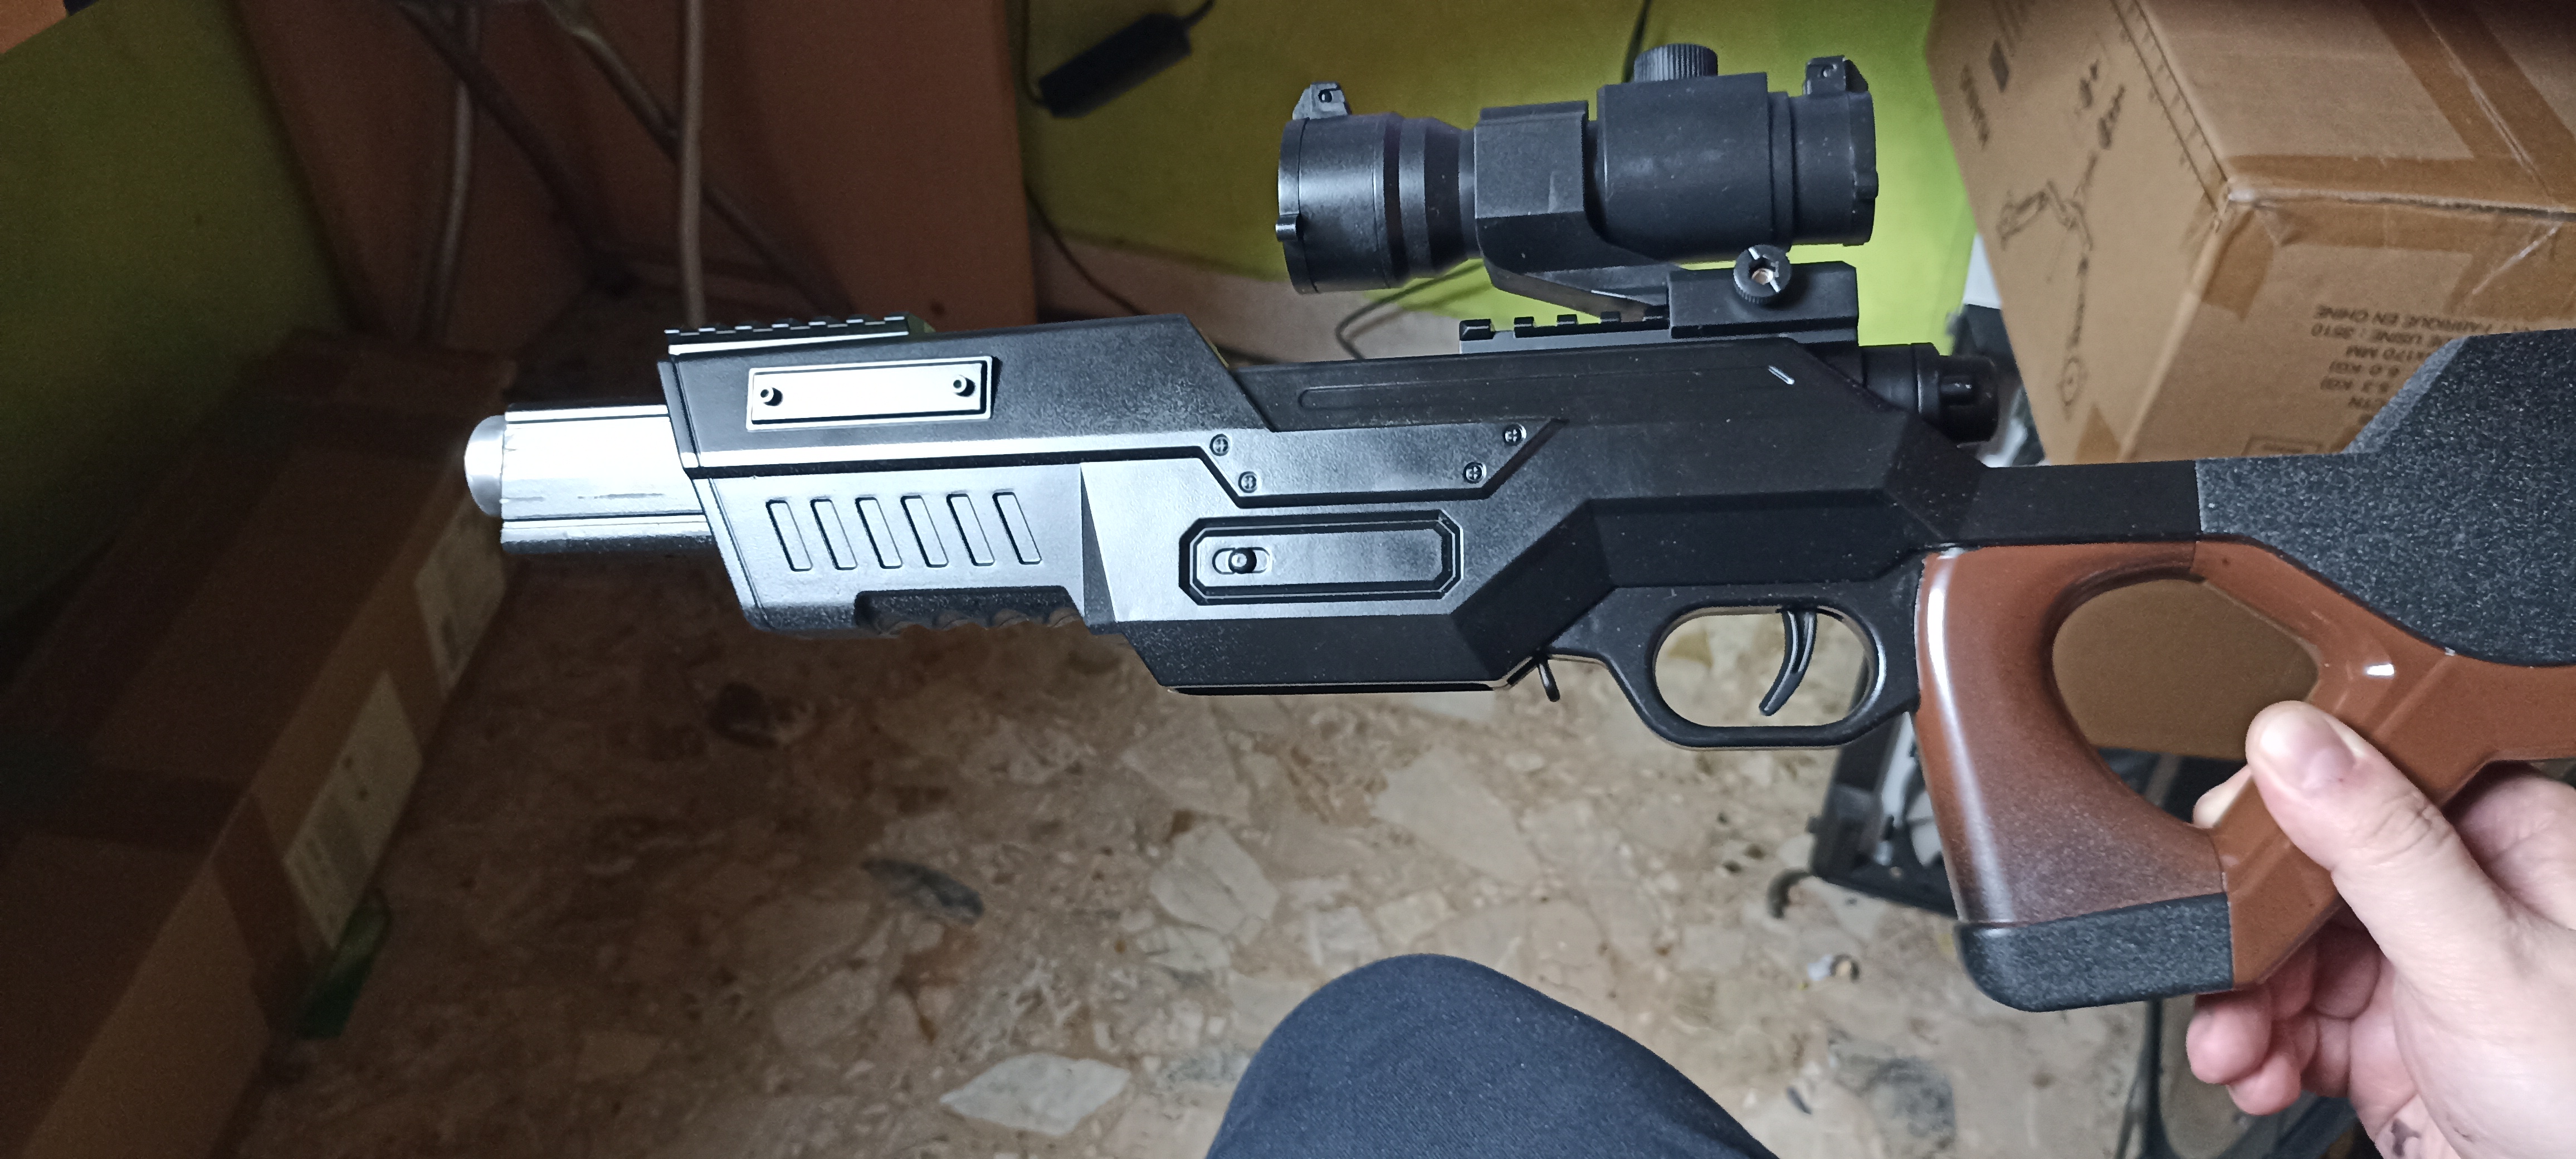
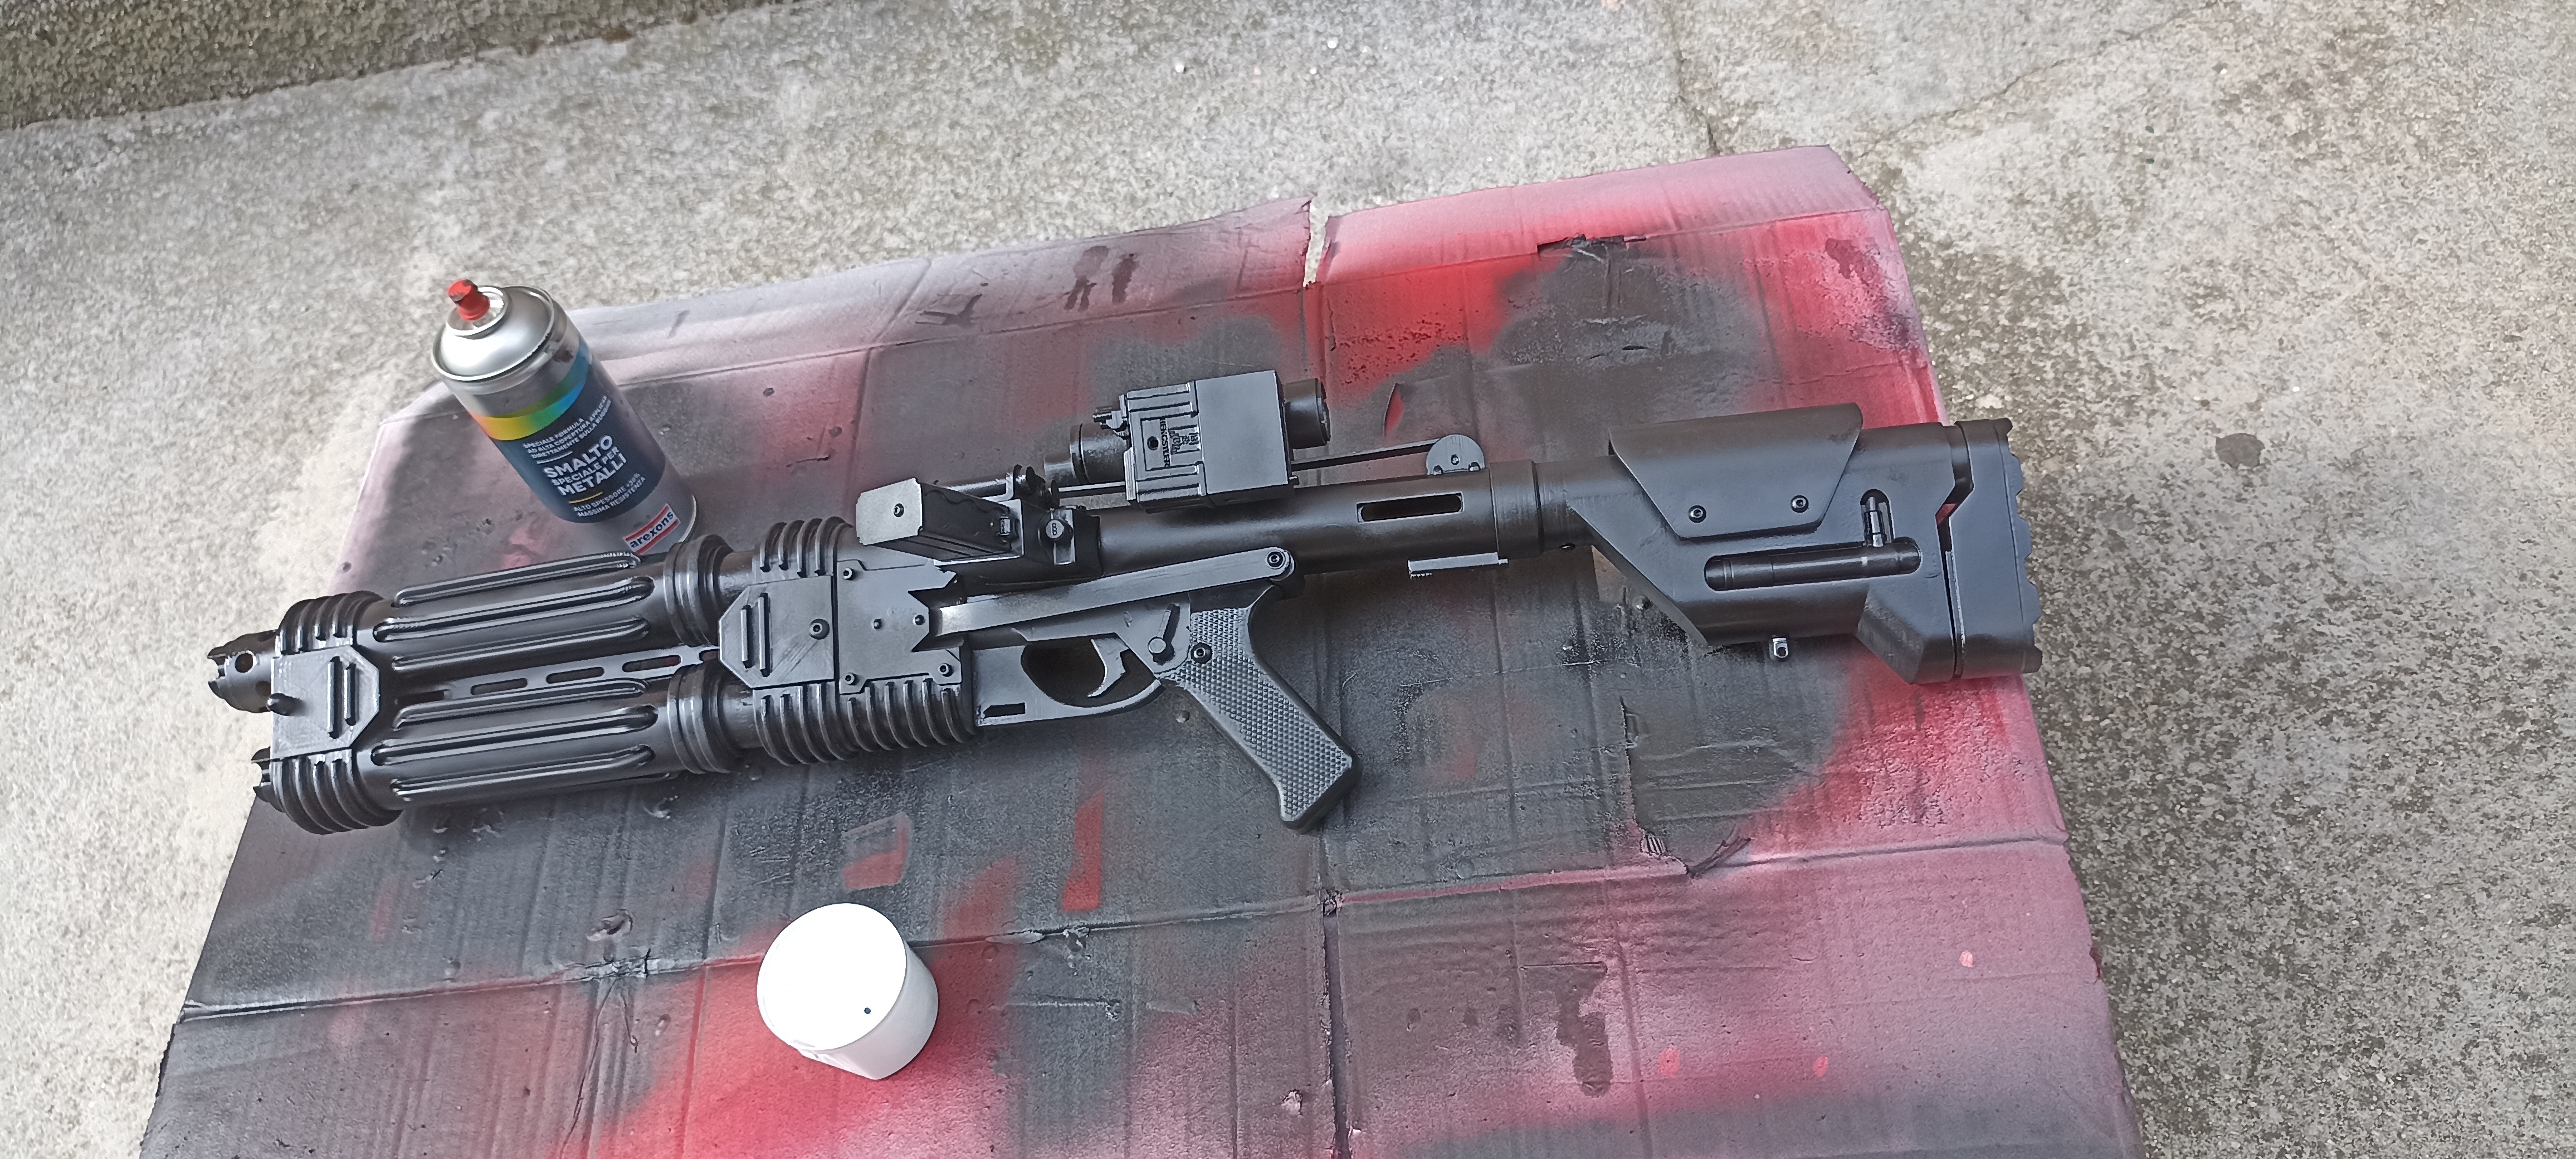
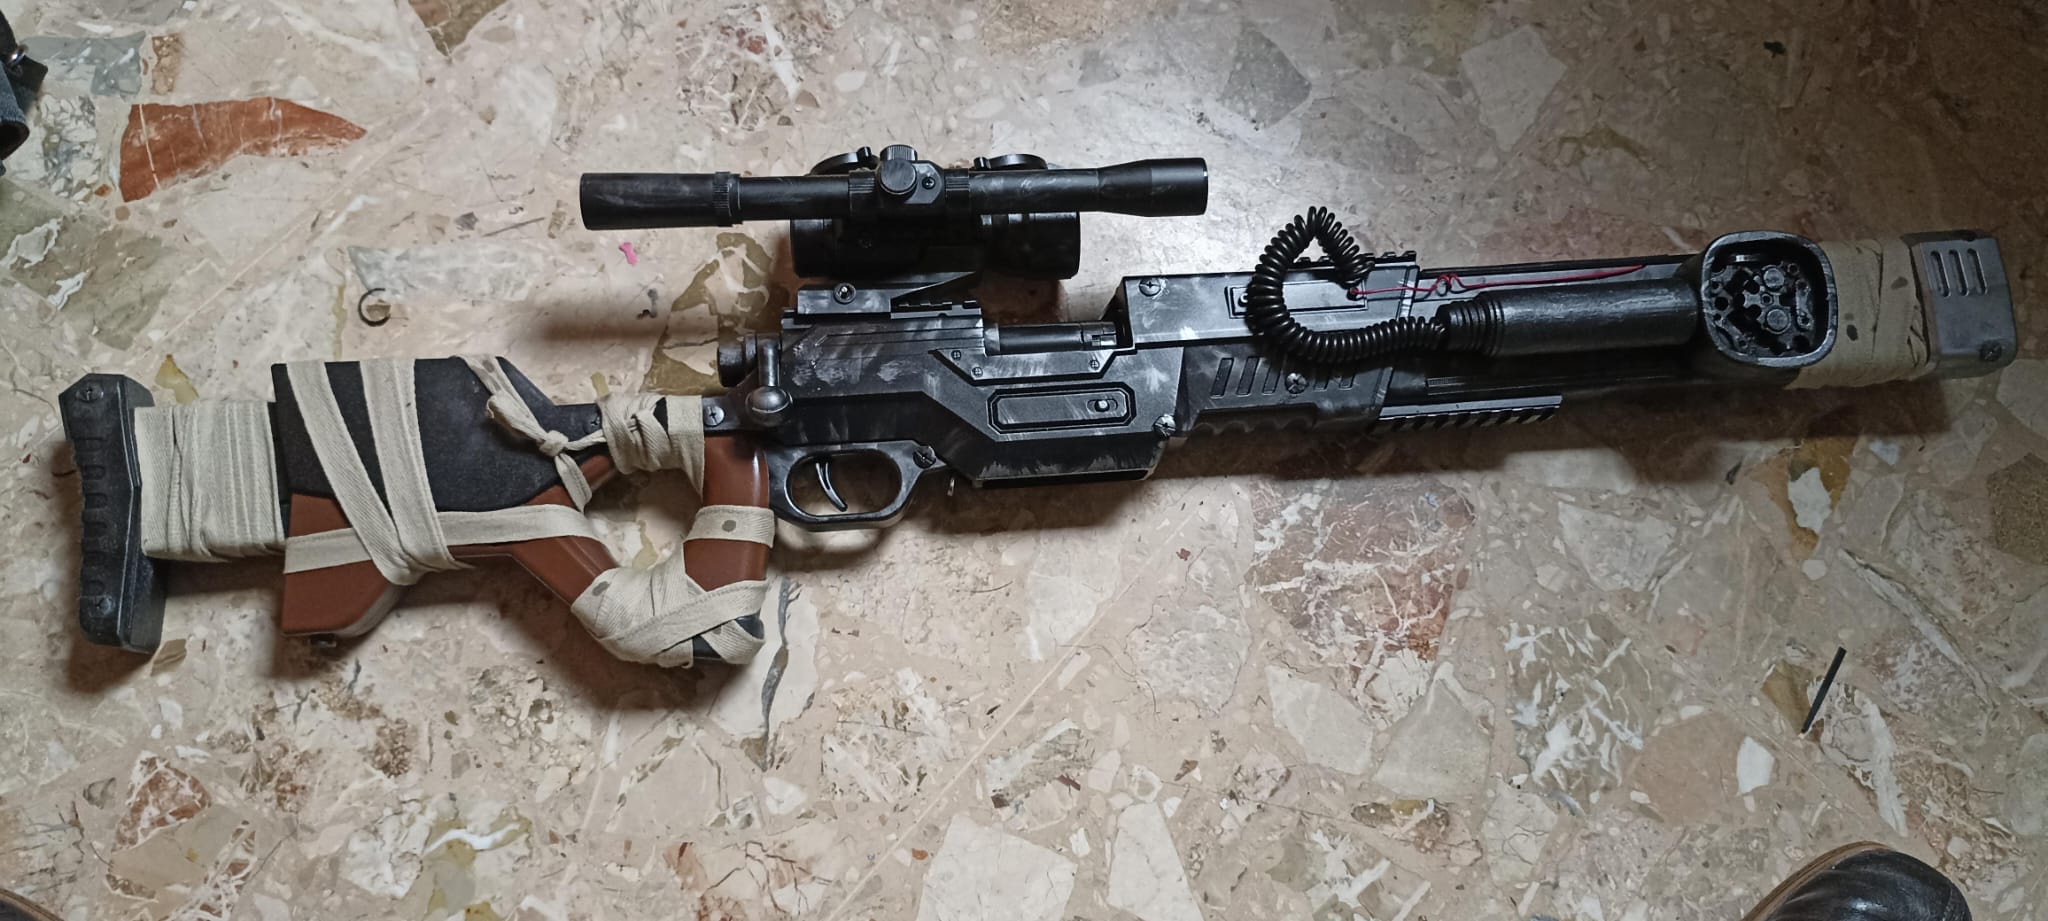 | Visione generale. |
Blaster E-22
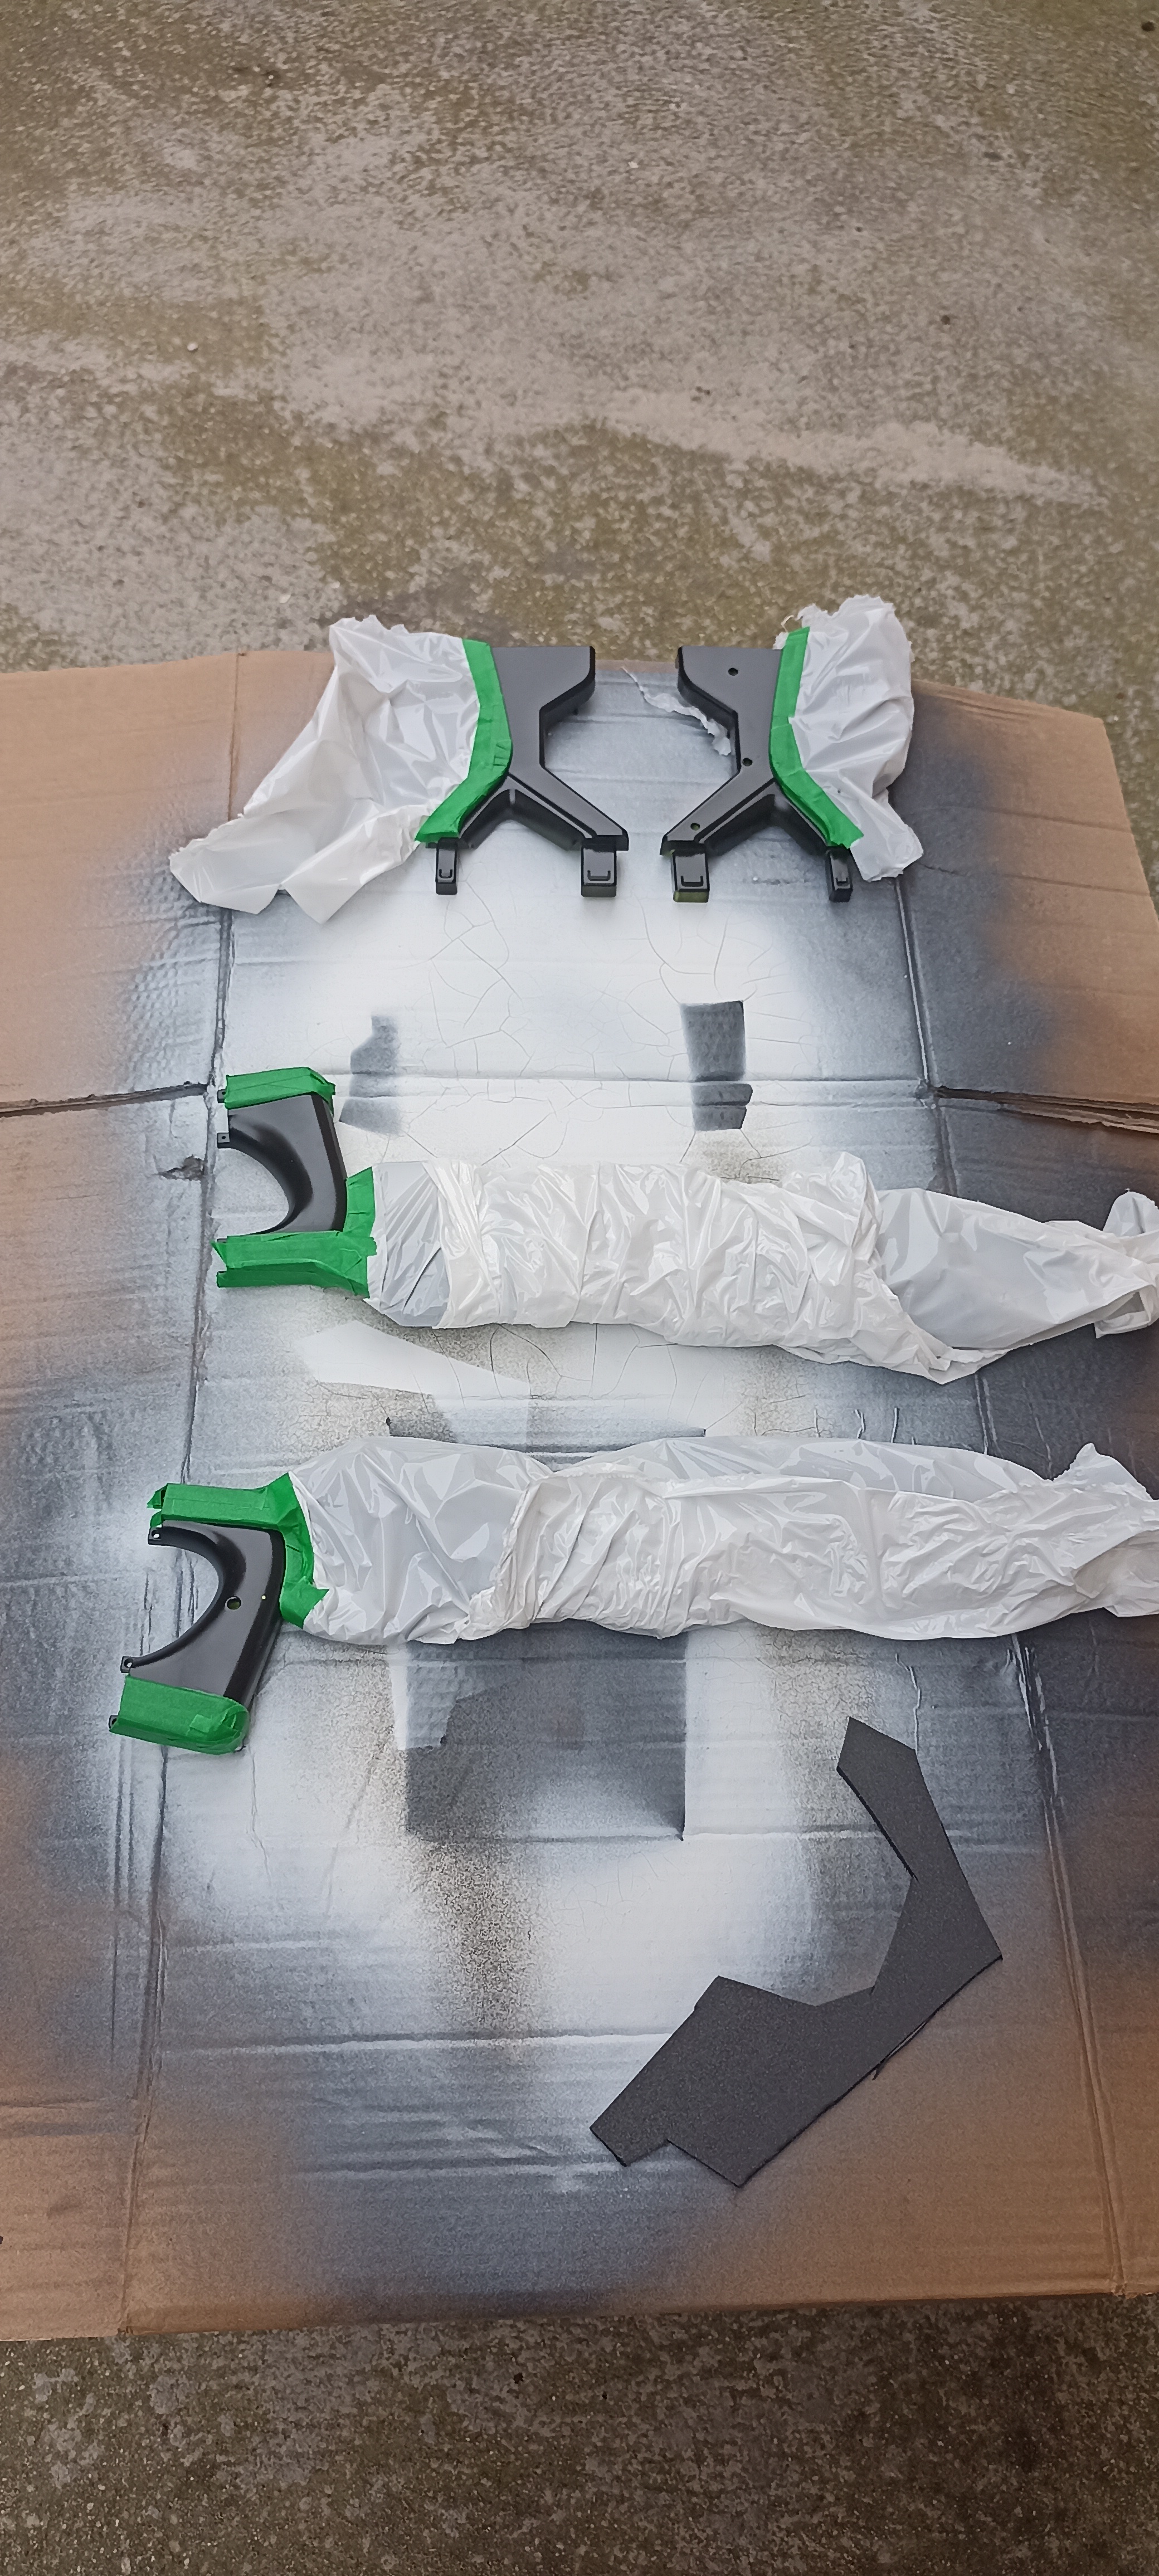
 | Assemblaggio post Sanding. |
 | Modello montato. |
 | Giro di primer trasparente. |
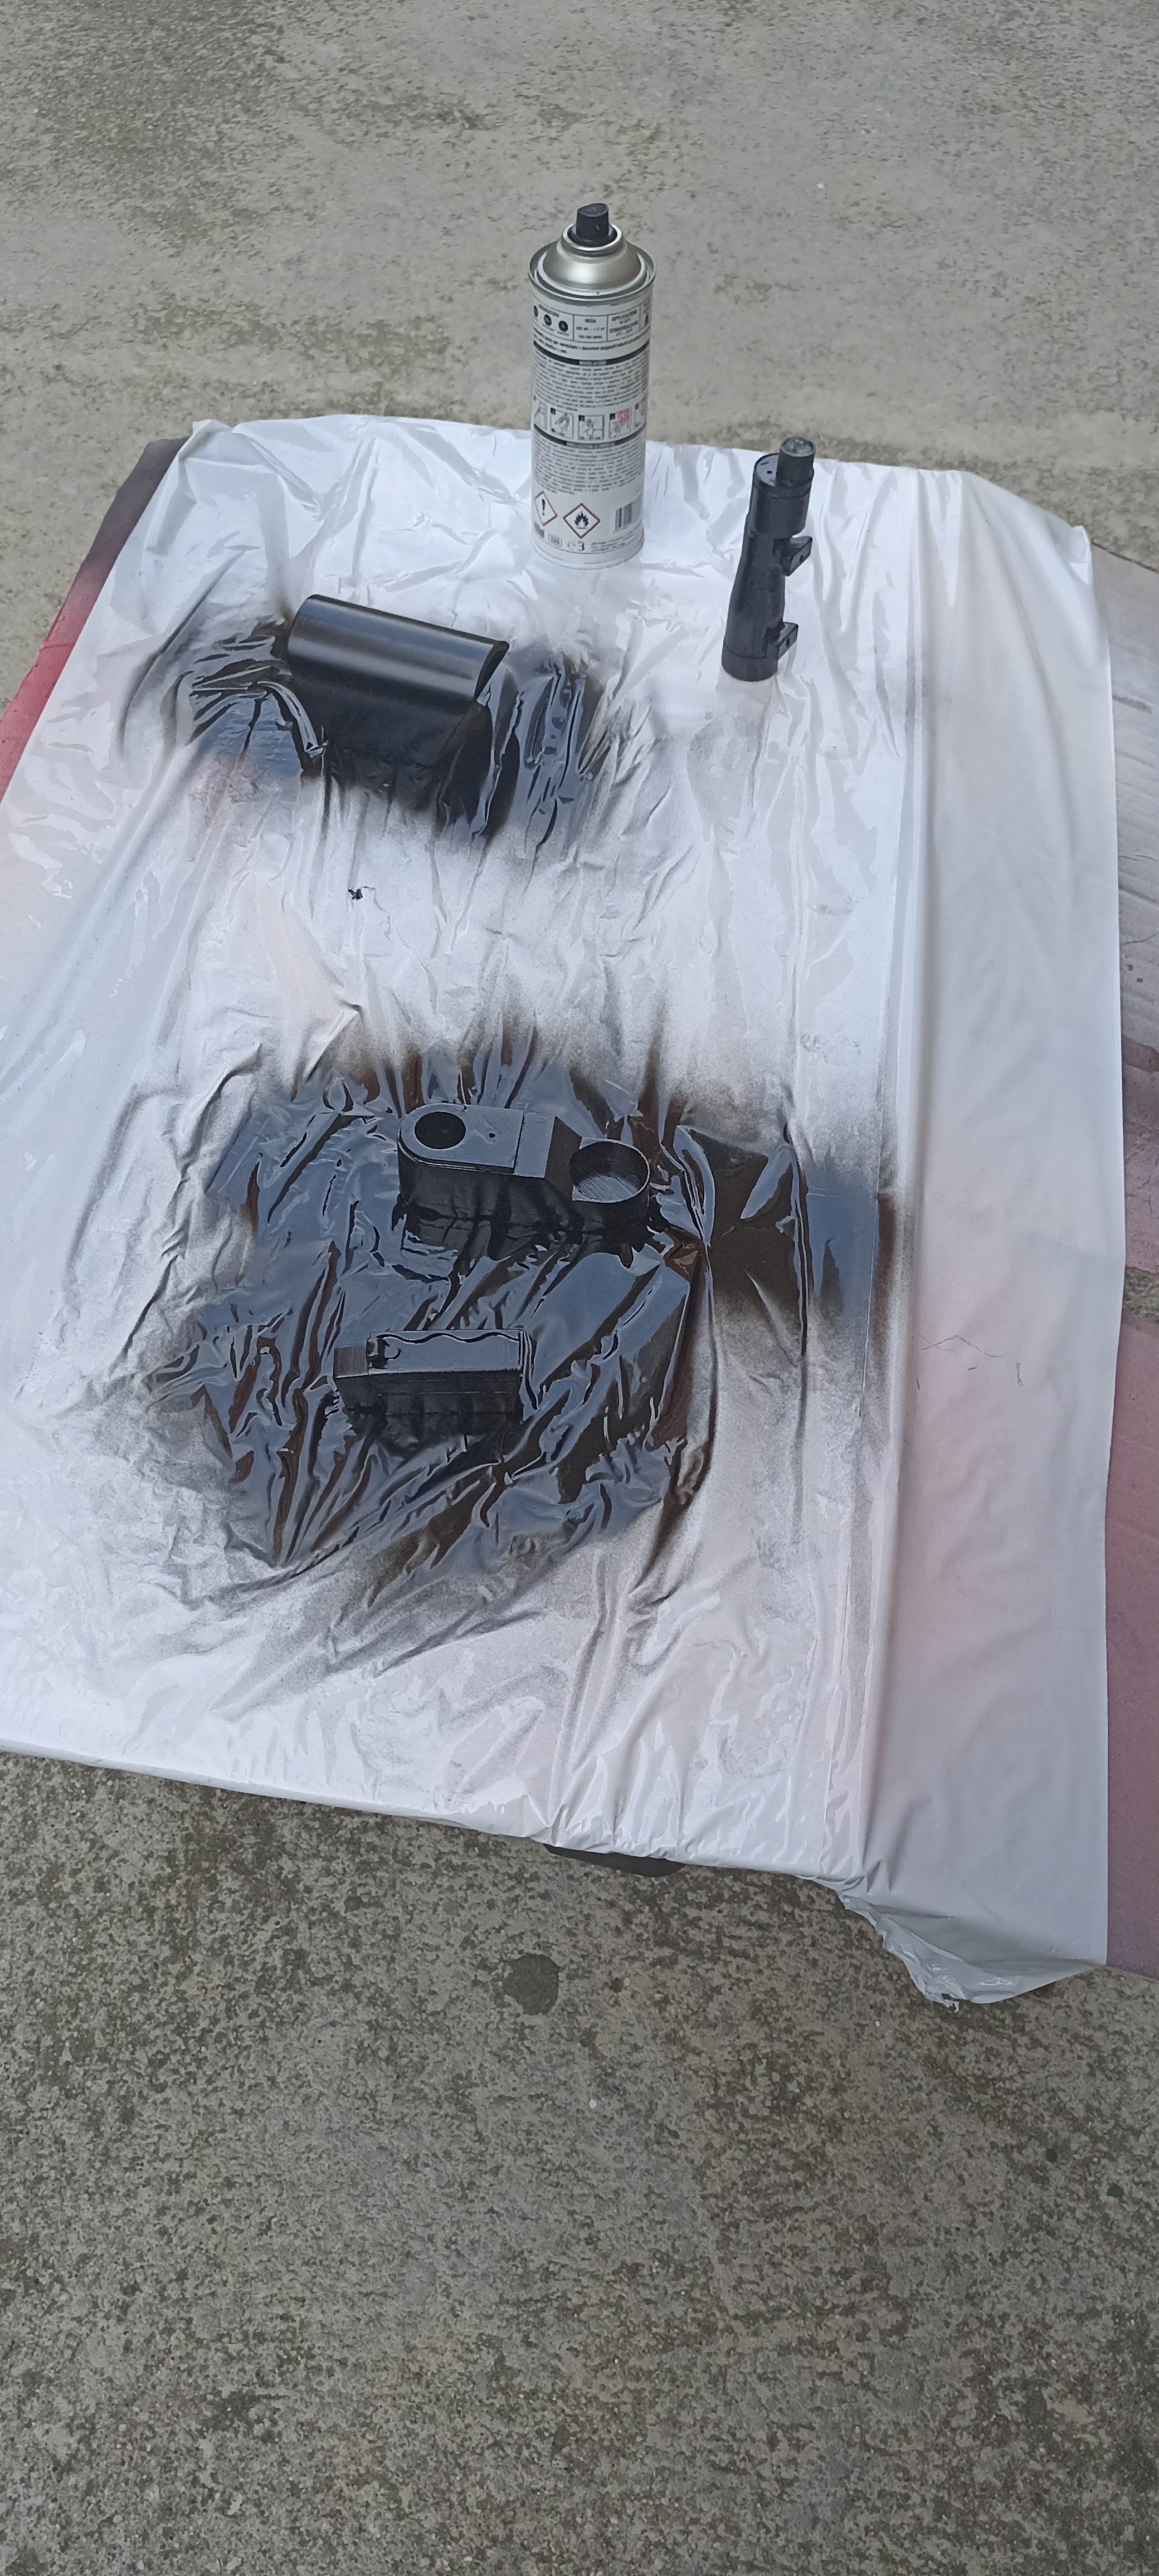
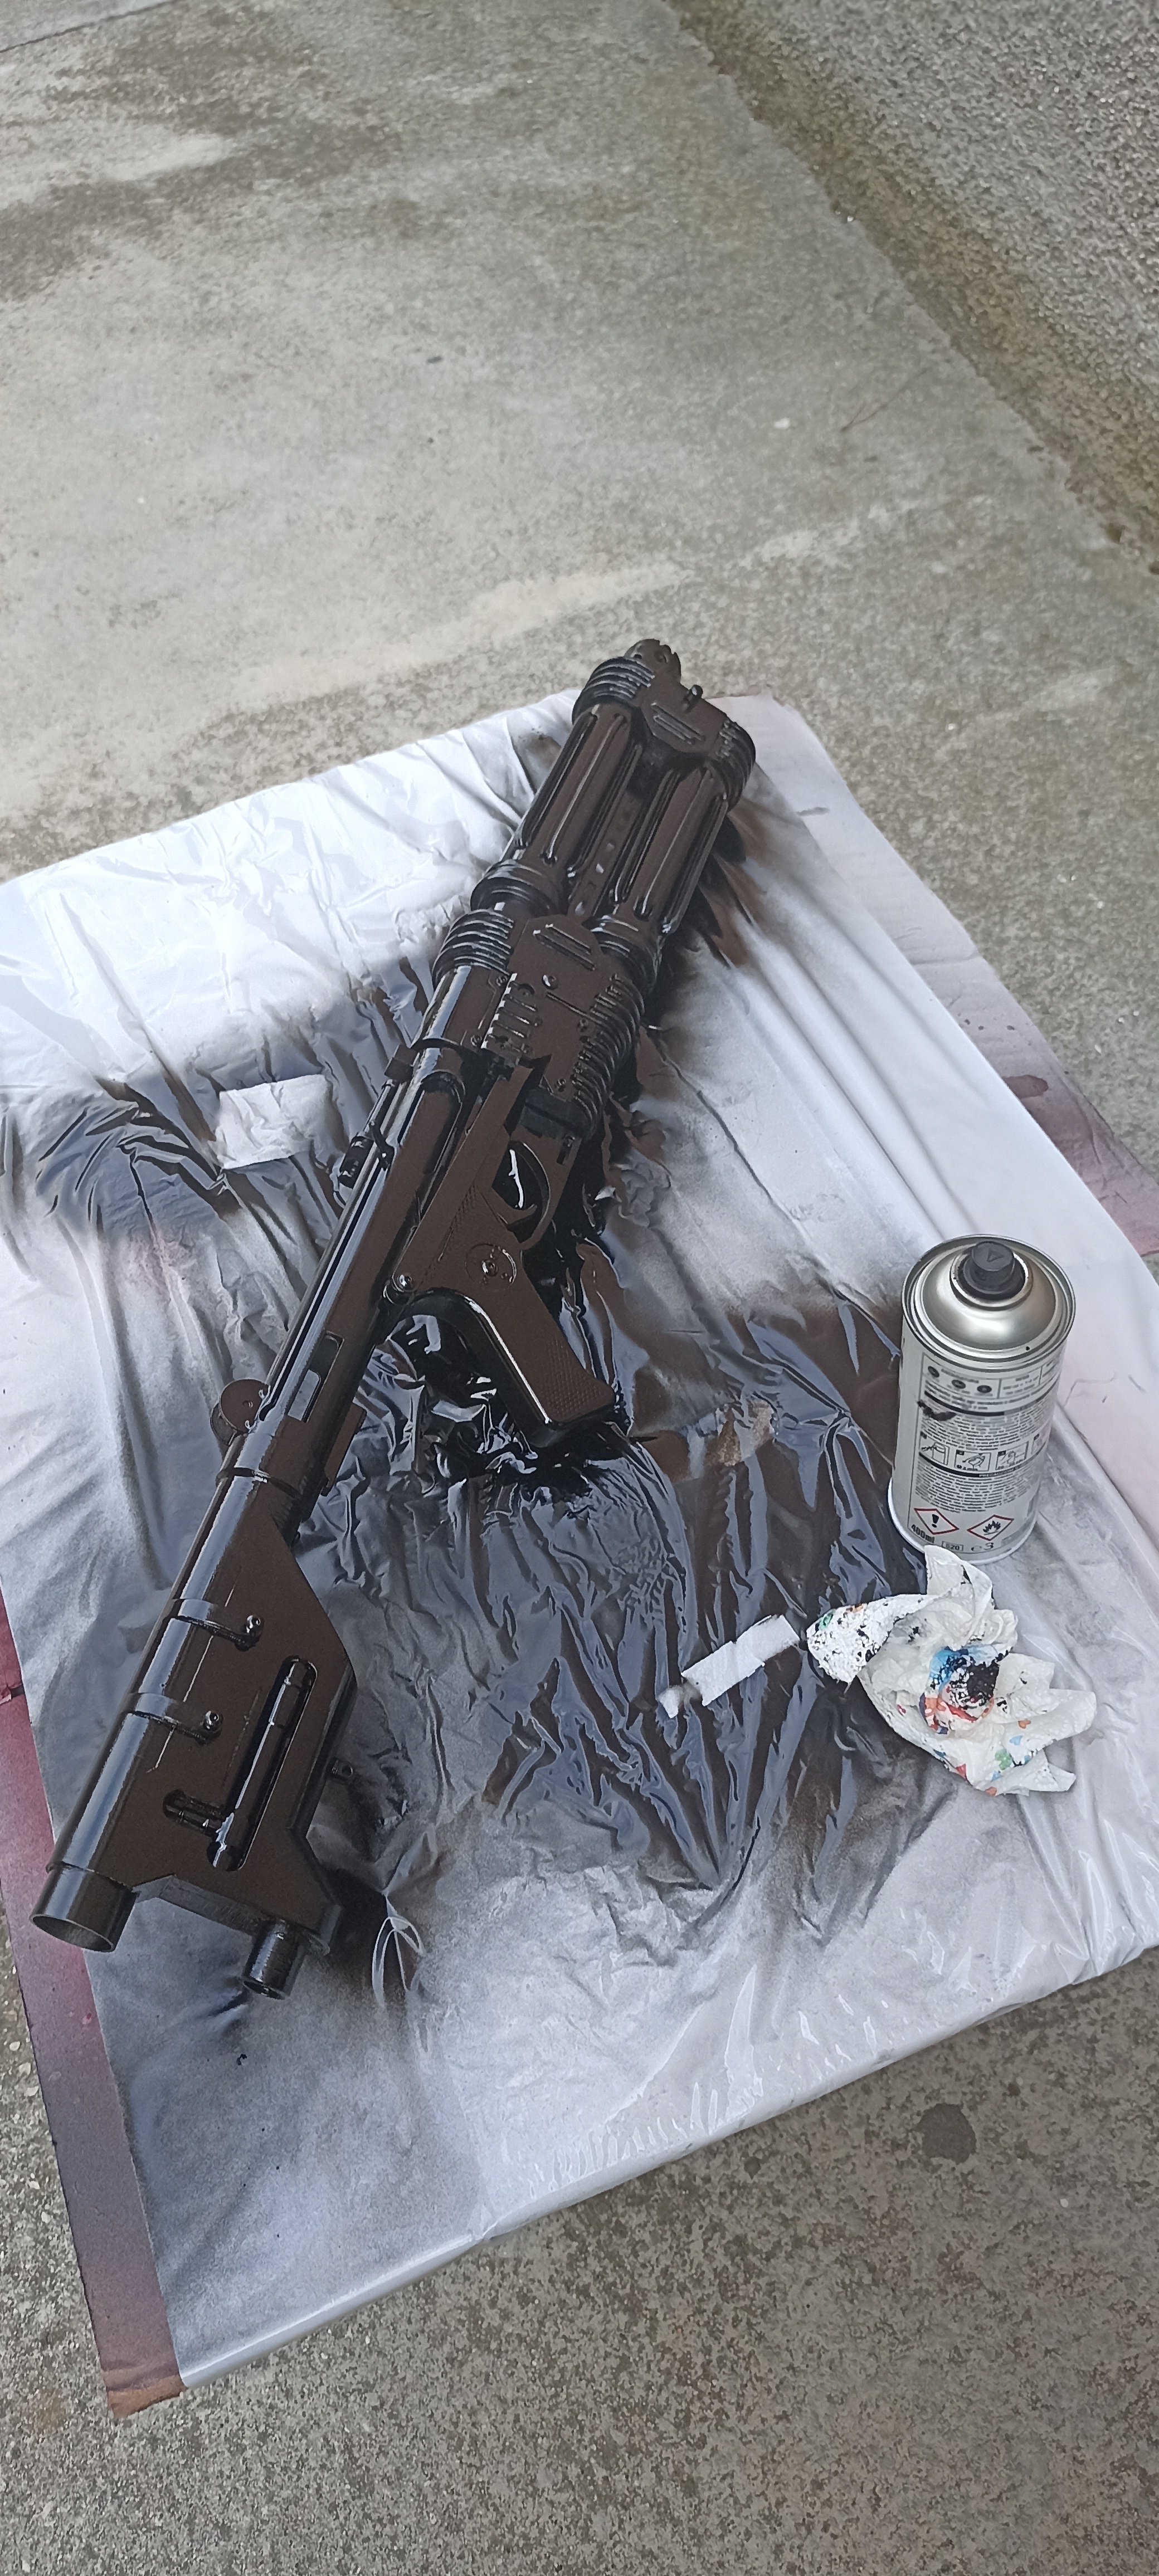 | Giro di Nero Lucido |
 | Effetto lucido asciutto. Notare la differenza con la torcia. |
 | Giro con Nero Opaco solo in alcune parti per dare effetto usura sfruttando il lucido base. |
 | Giro con Satinato trasparente su altri punti per accentuare effetto usura sfruttando il lucido base e il nero opaco precedente. |
 | Dettaglio calcio effetto usura ultimato. |
 | Dettaglio canne effetto usura ultimato. |
 | Dettaglio parte centrale effetto usura ultimato. |
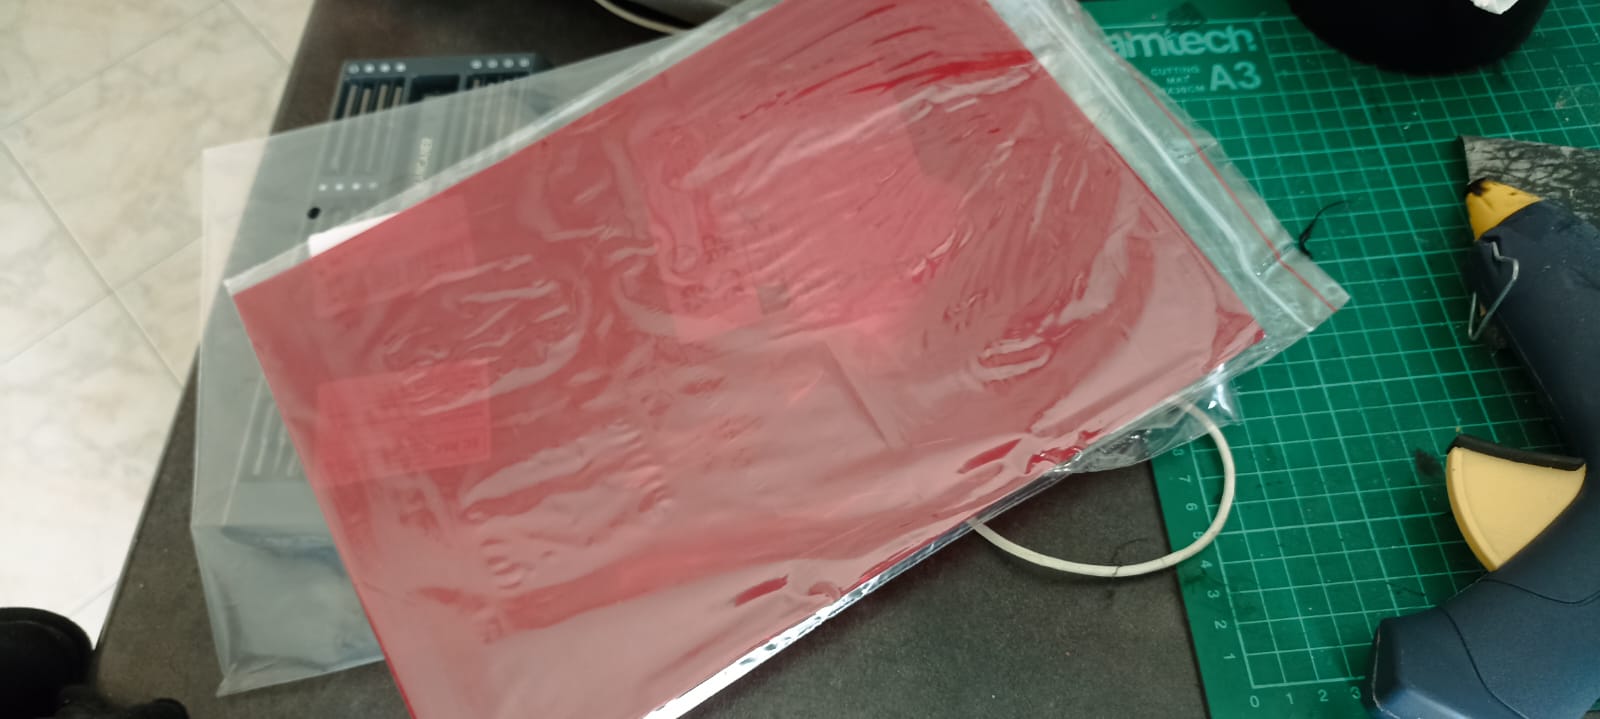 | Recuperato fogli acetato per filtri luci fotografiche rossi per dettagli blaster. |
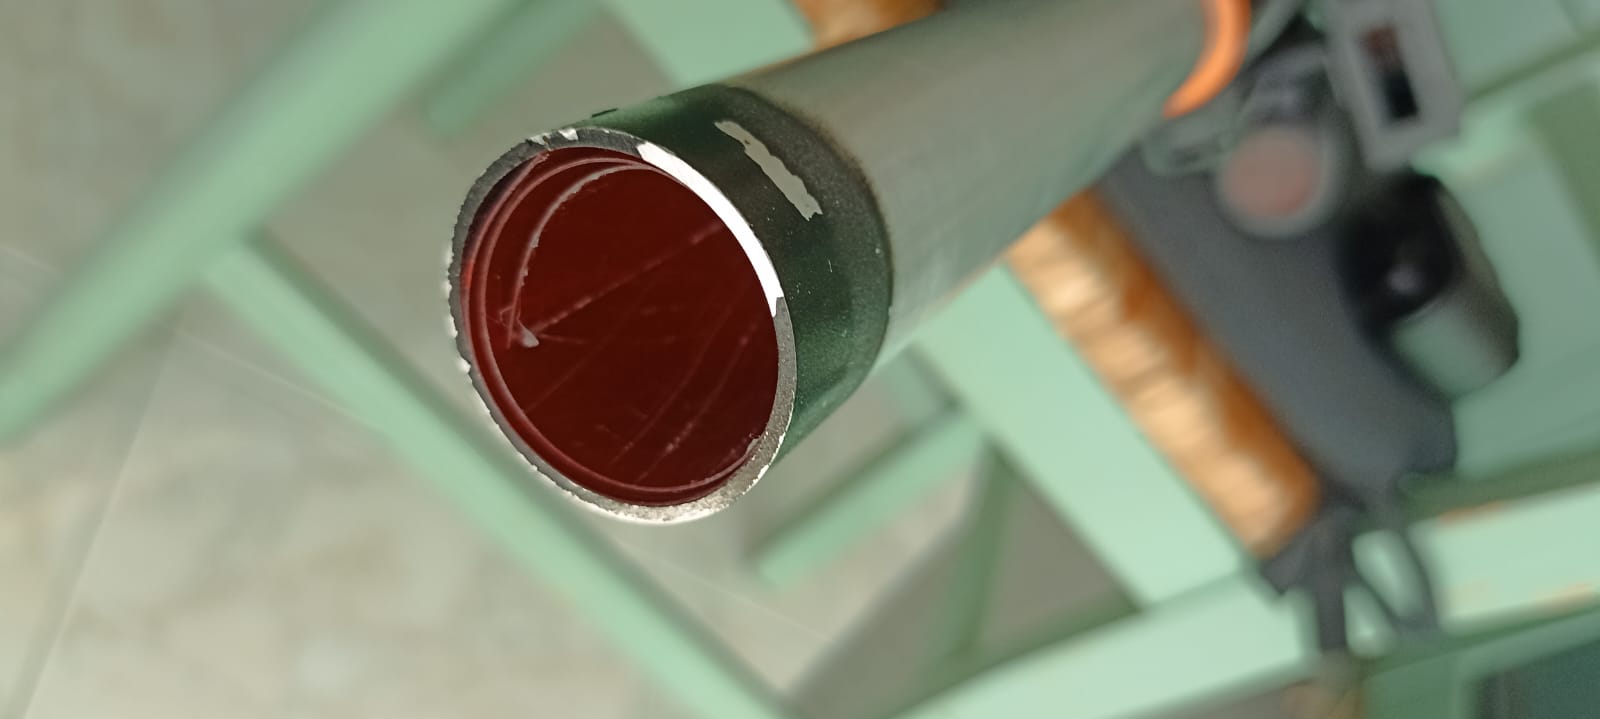 | Arrotolato un foglio filtro e infilato nel calcio. |
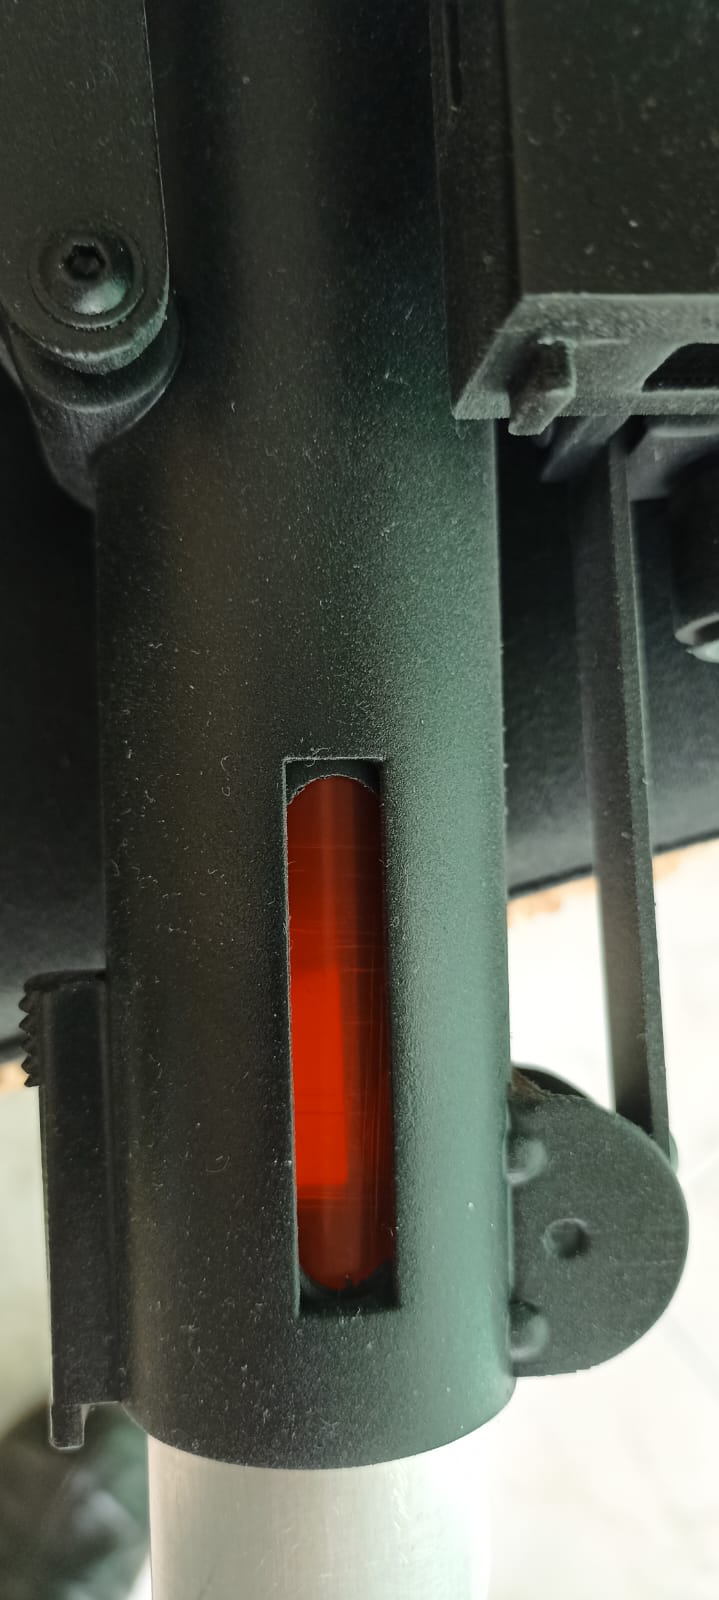 | Effetto finale del dettaglio raggiunto. |
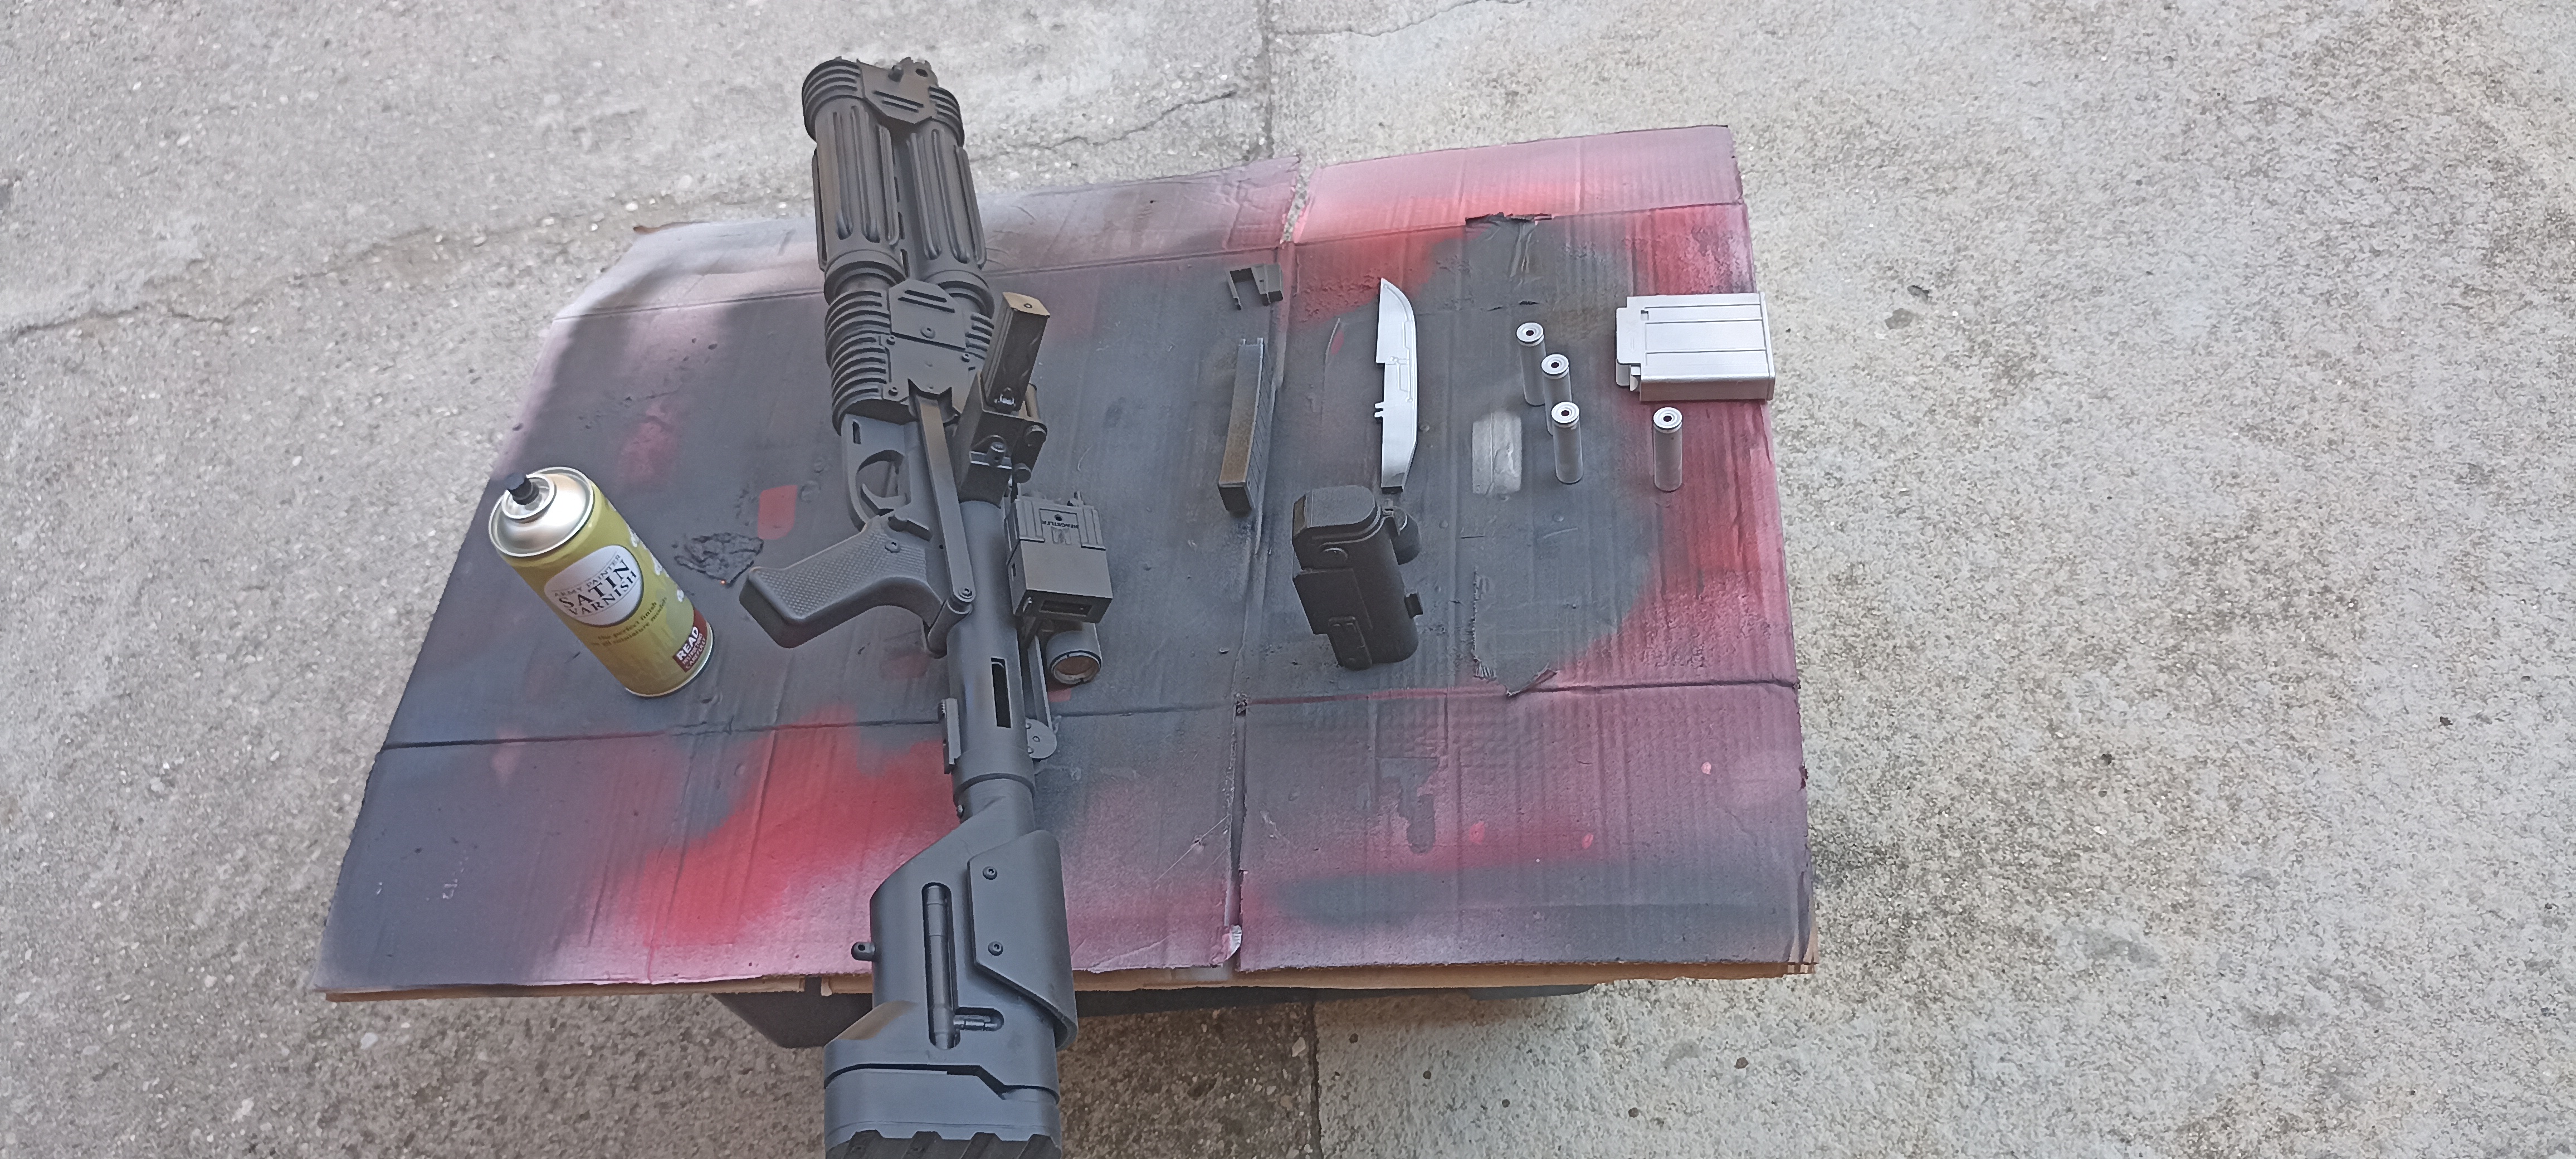
 | Chiusura calcio con magnete. |
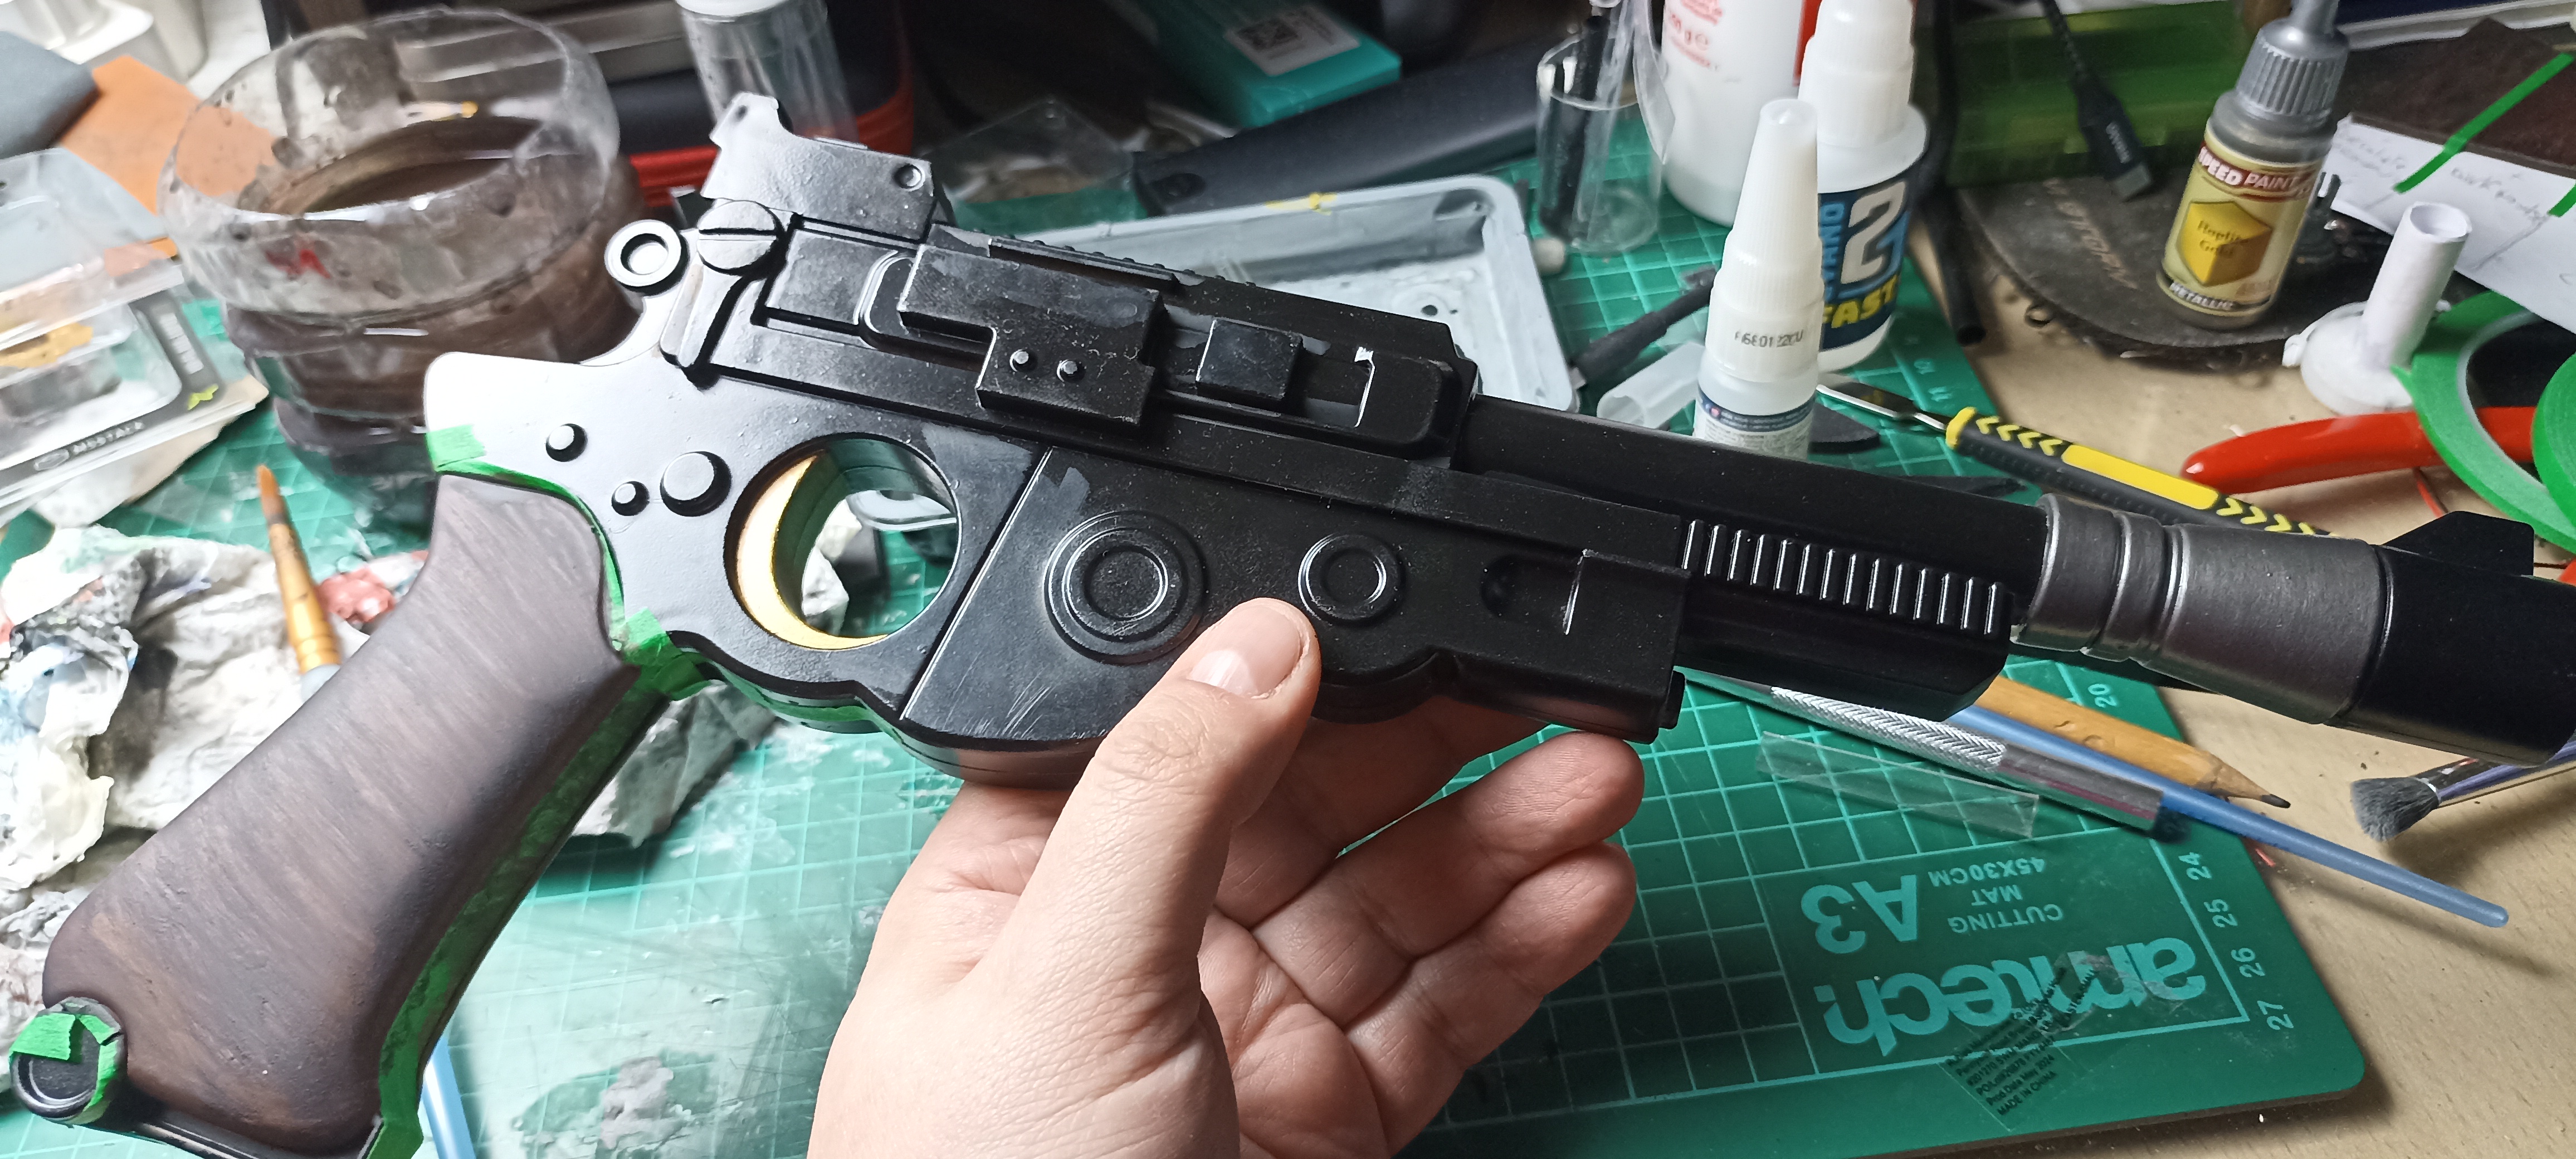
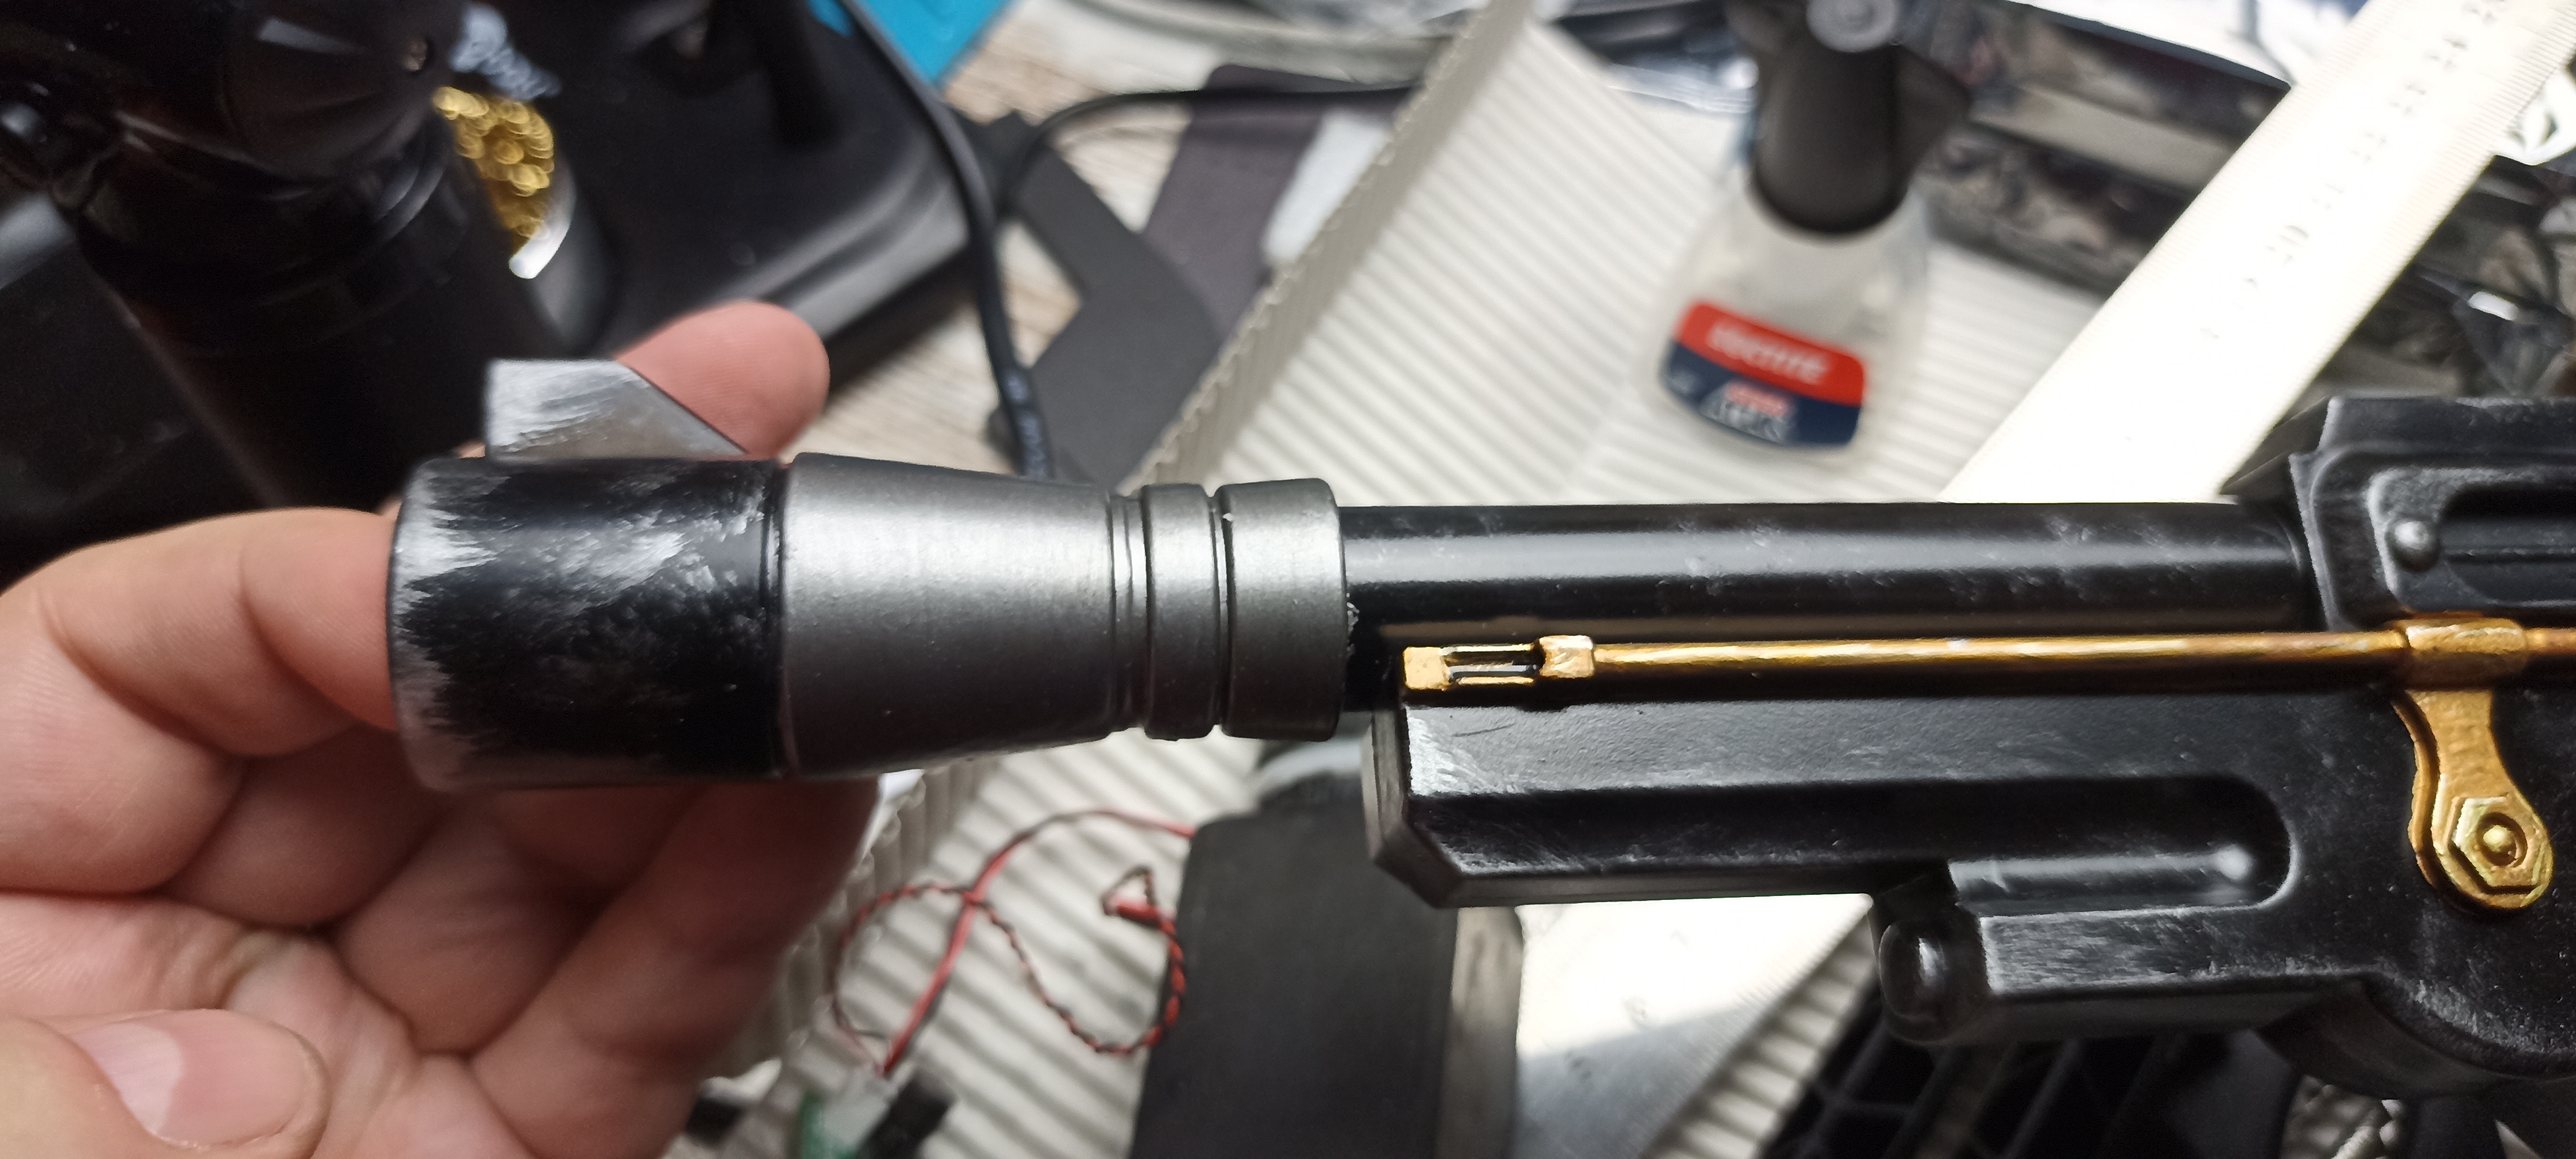
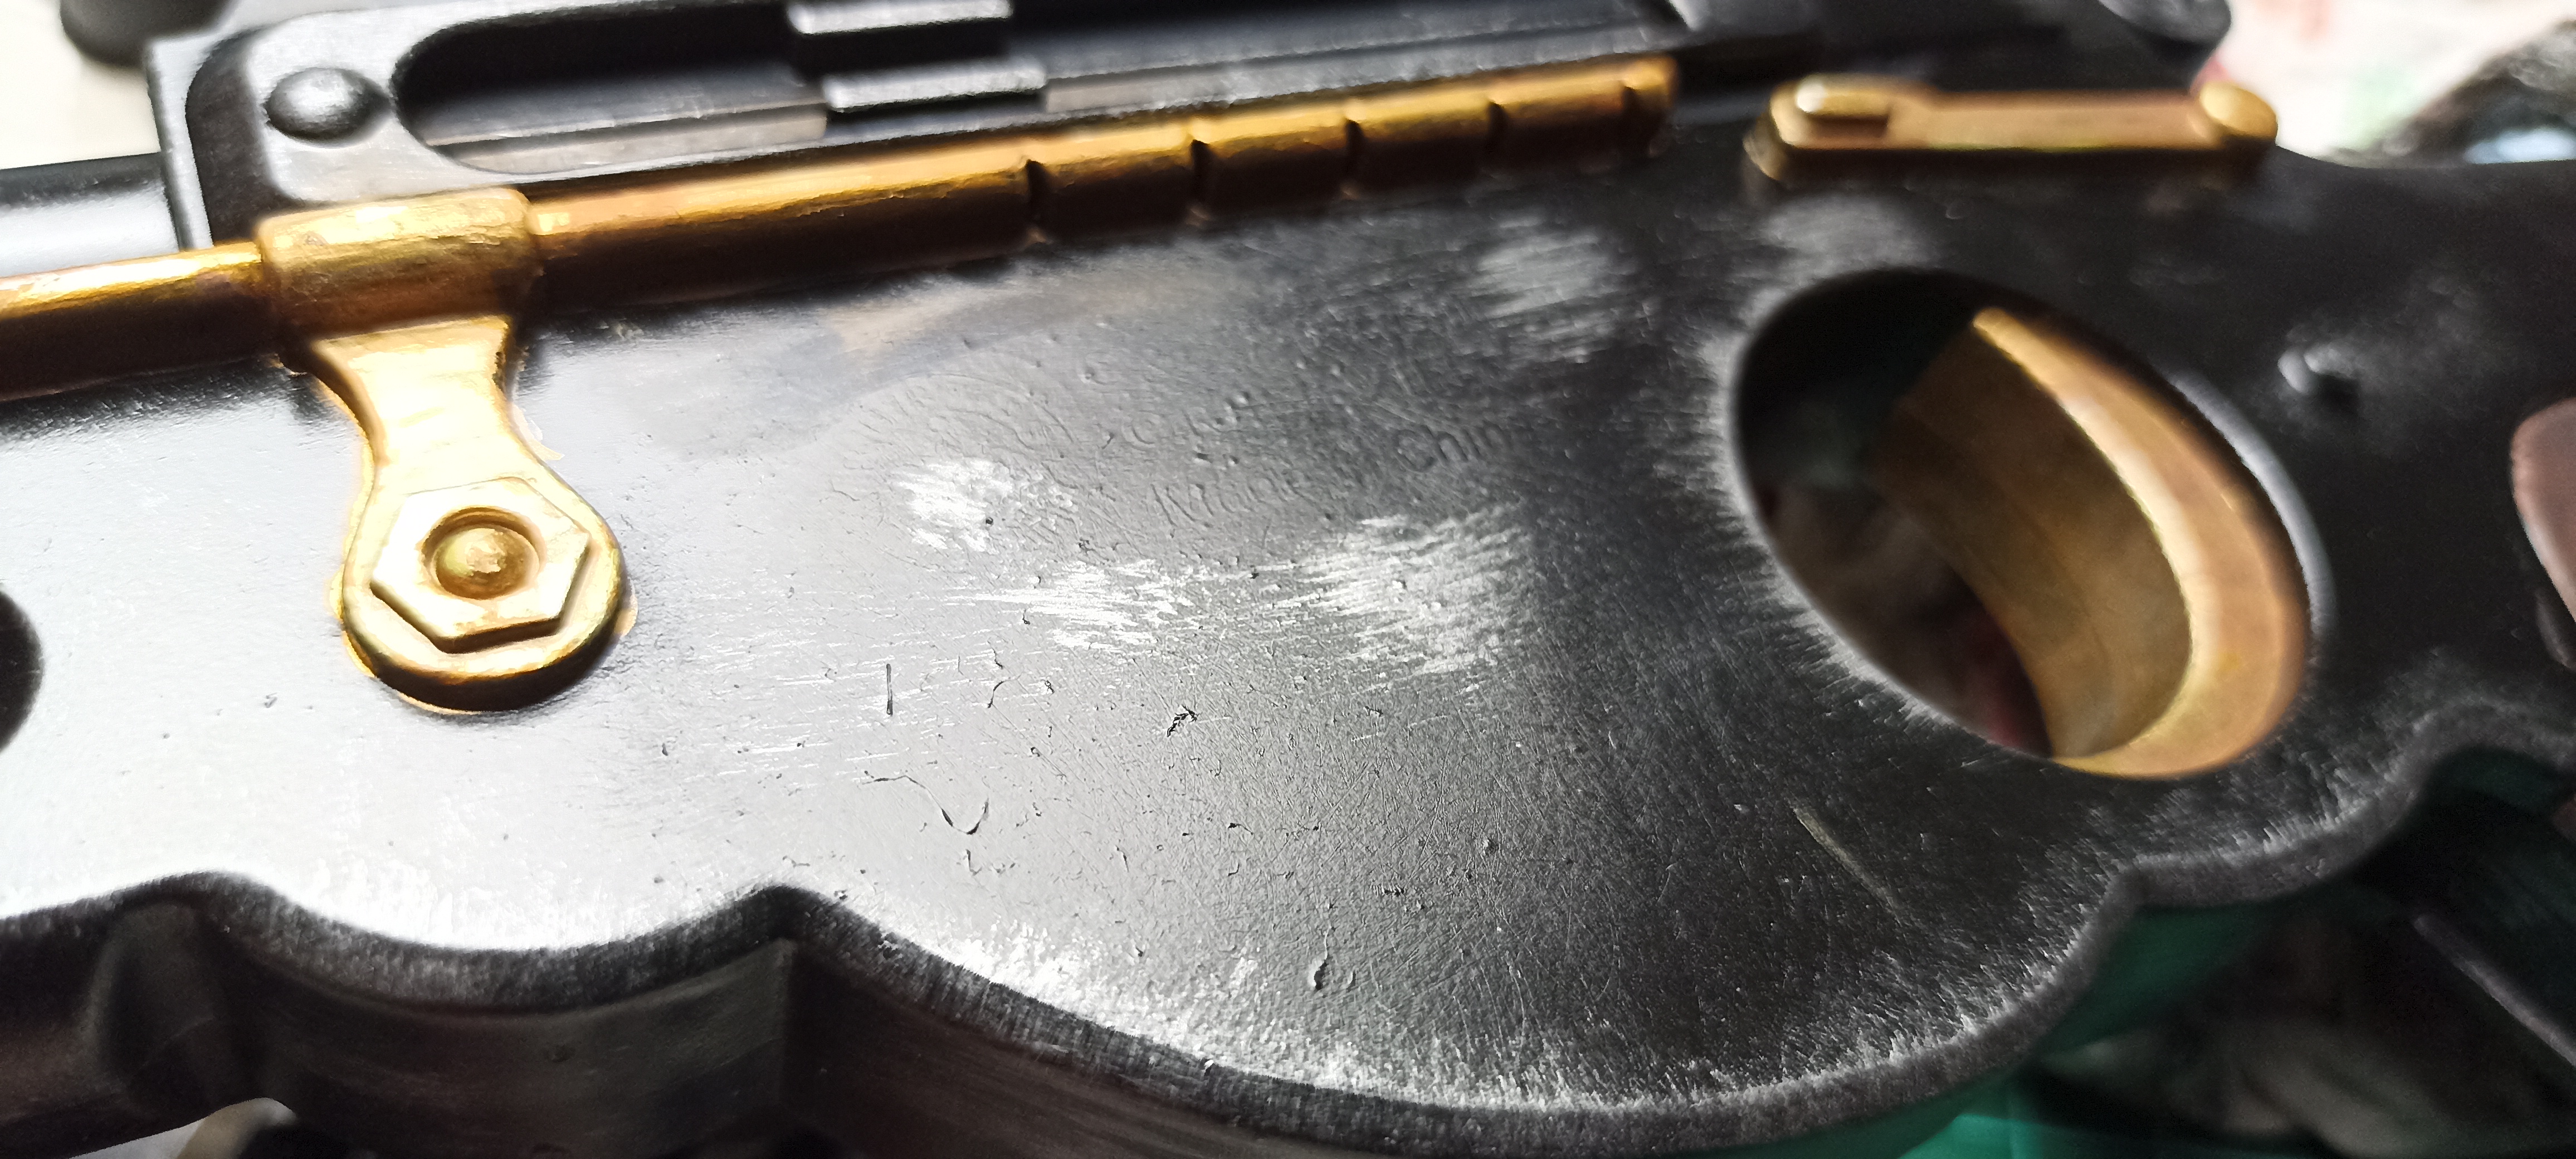
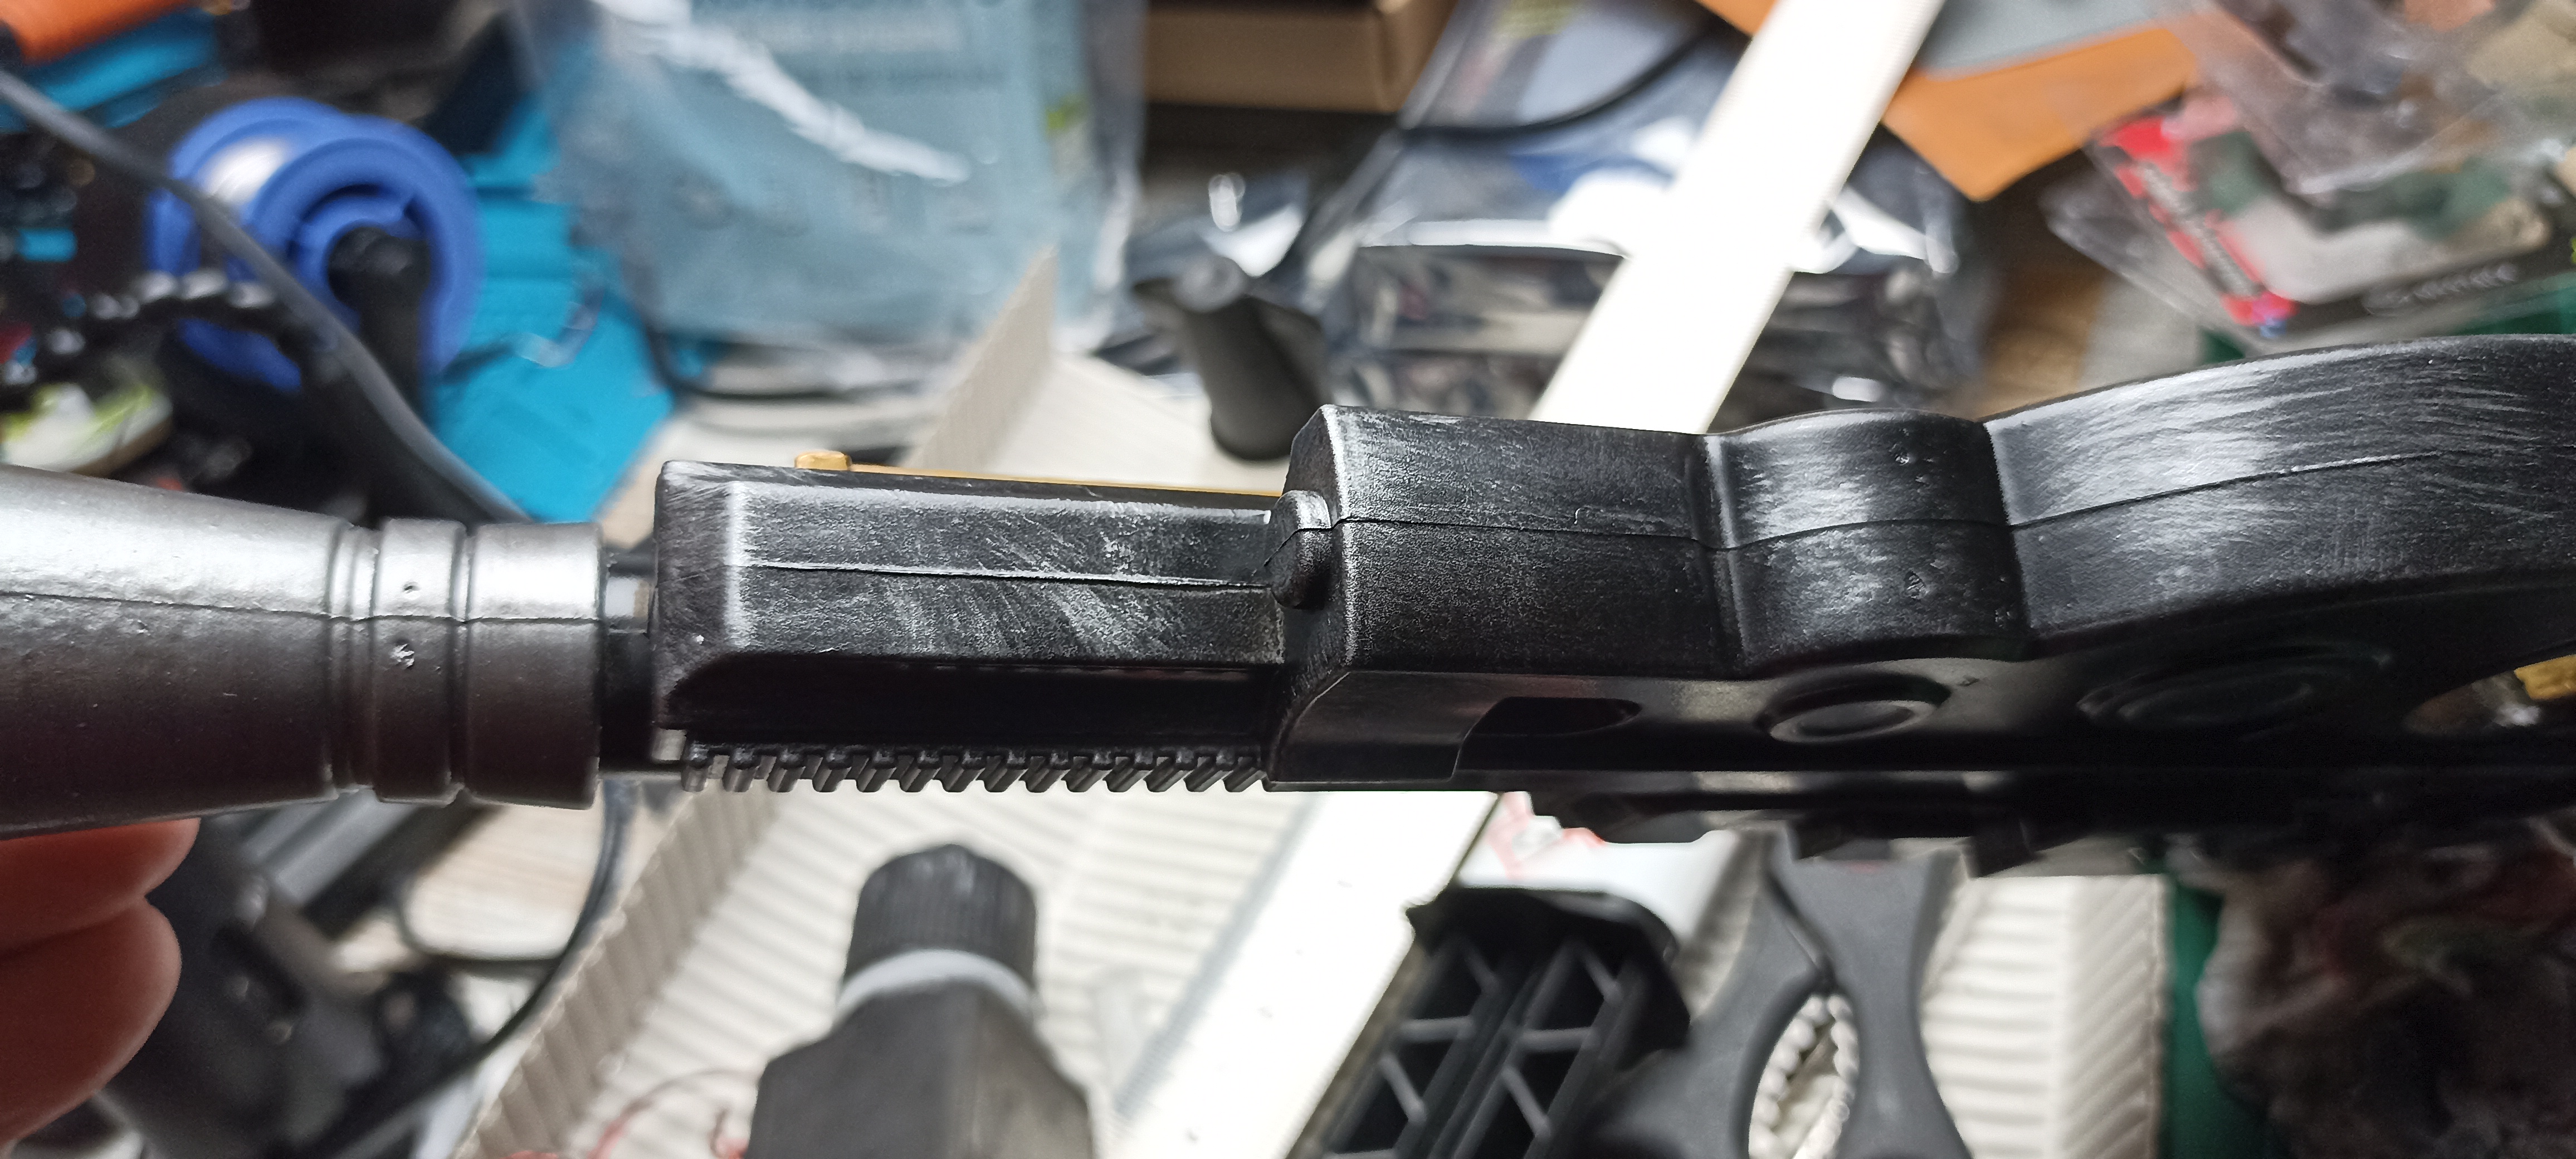
IB-94 Blaster Pistol
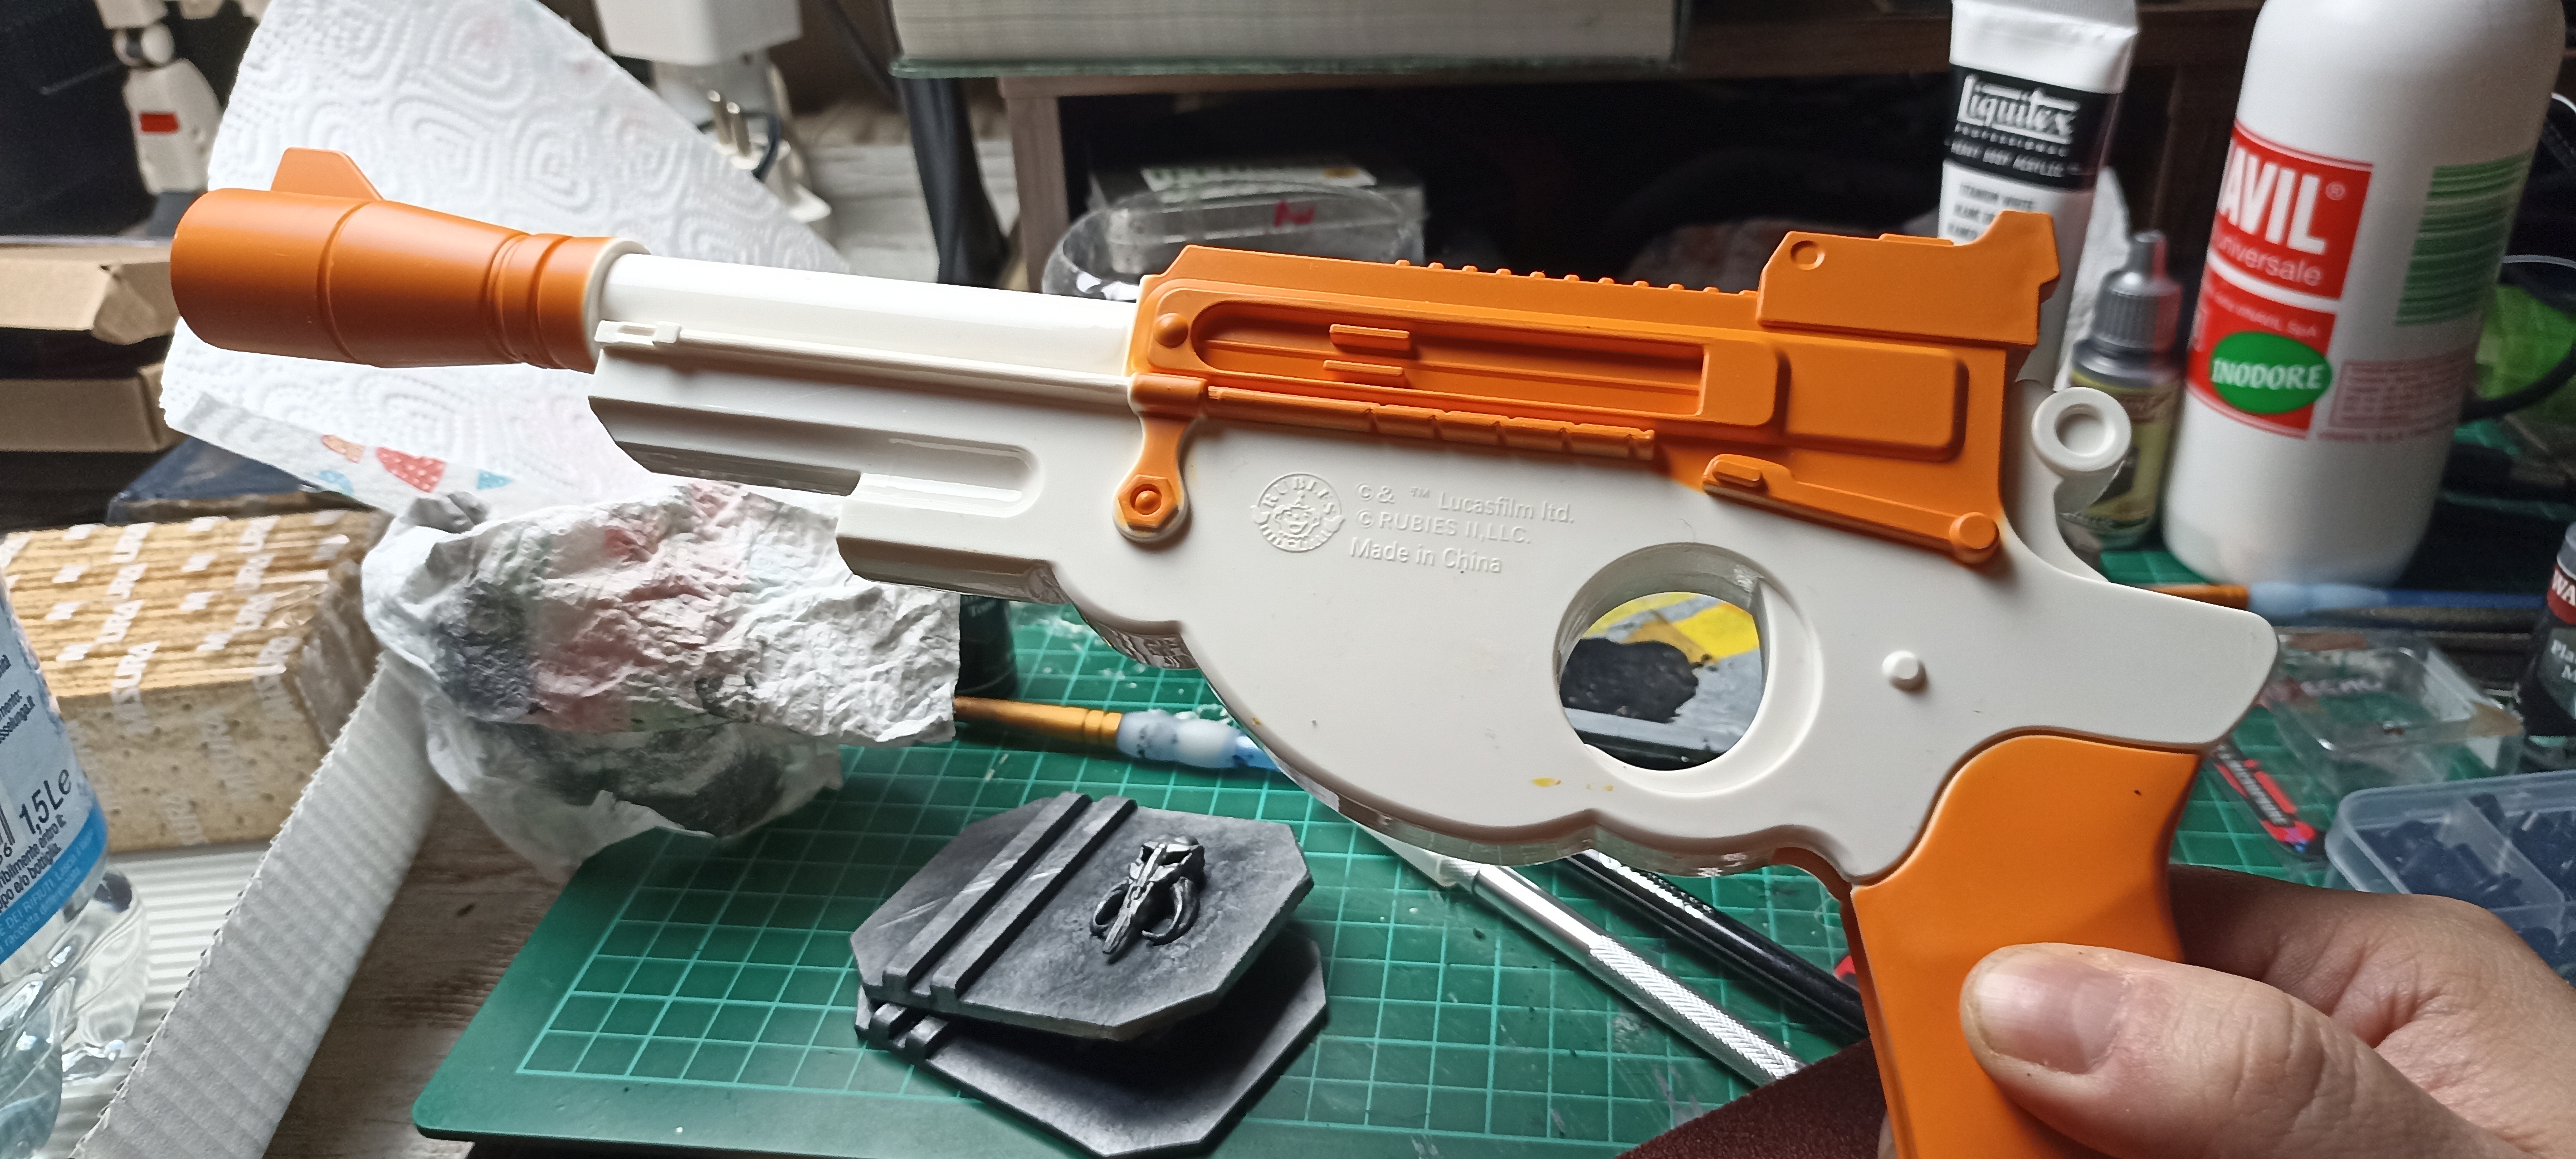 | Modello base di Rubis. |
 | Rimosse scritte in rilievo con carta vetrata. |
 | Primer trasparente. |
 | Nero Lucido. |
 | Dettaglio Gun metal, dipinto a mano. |
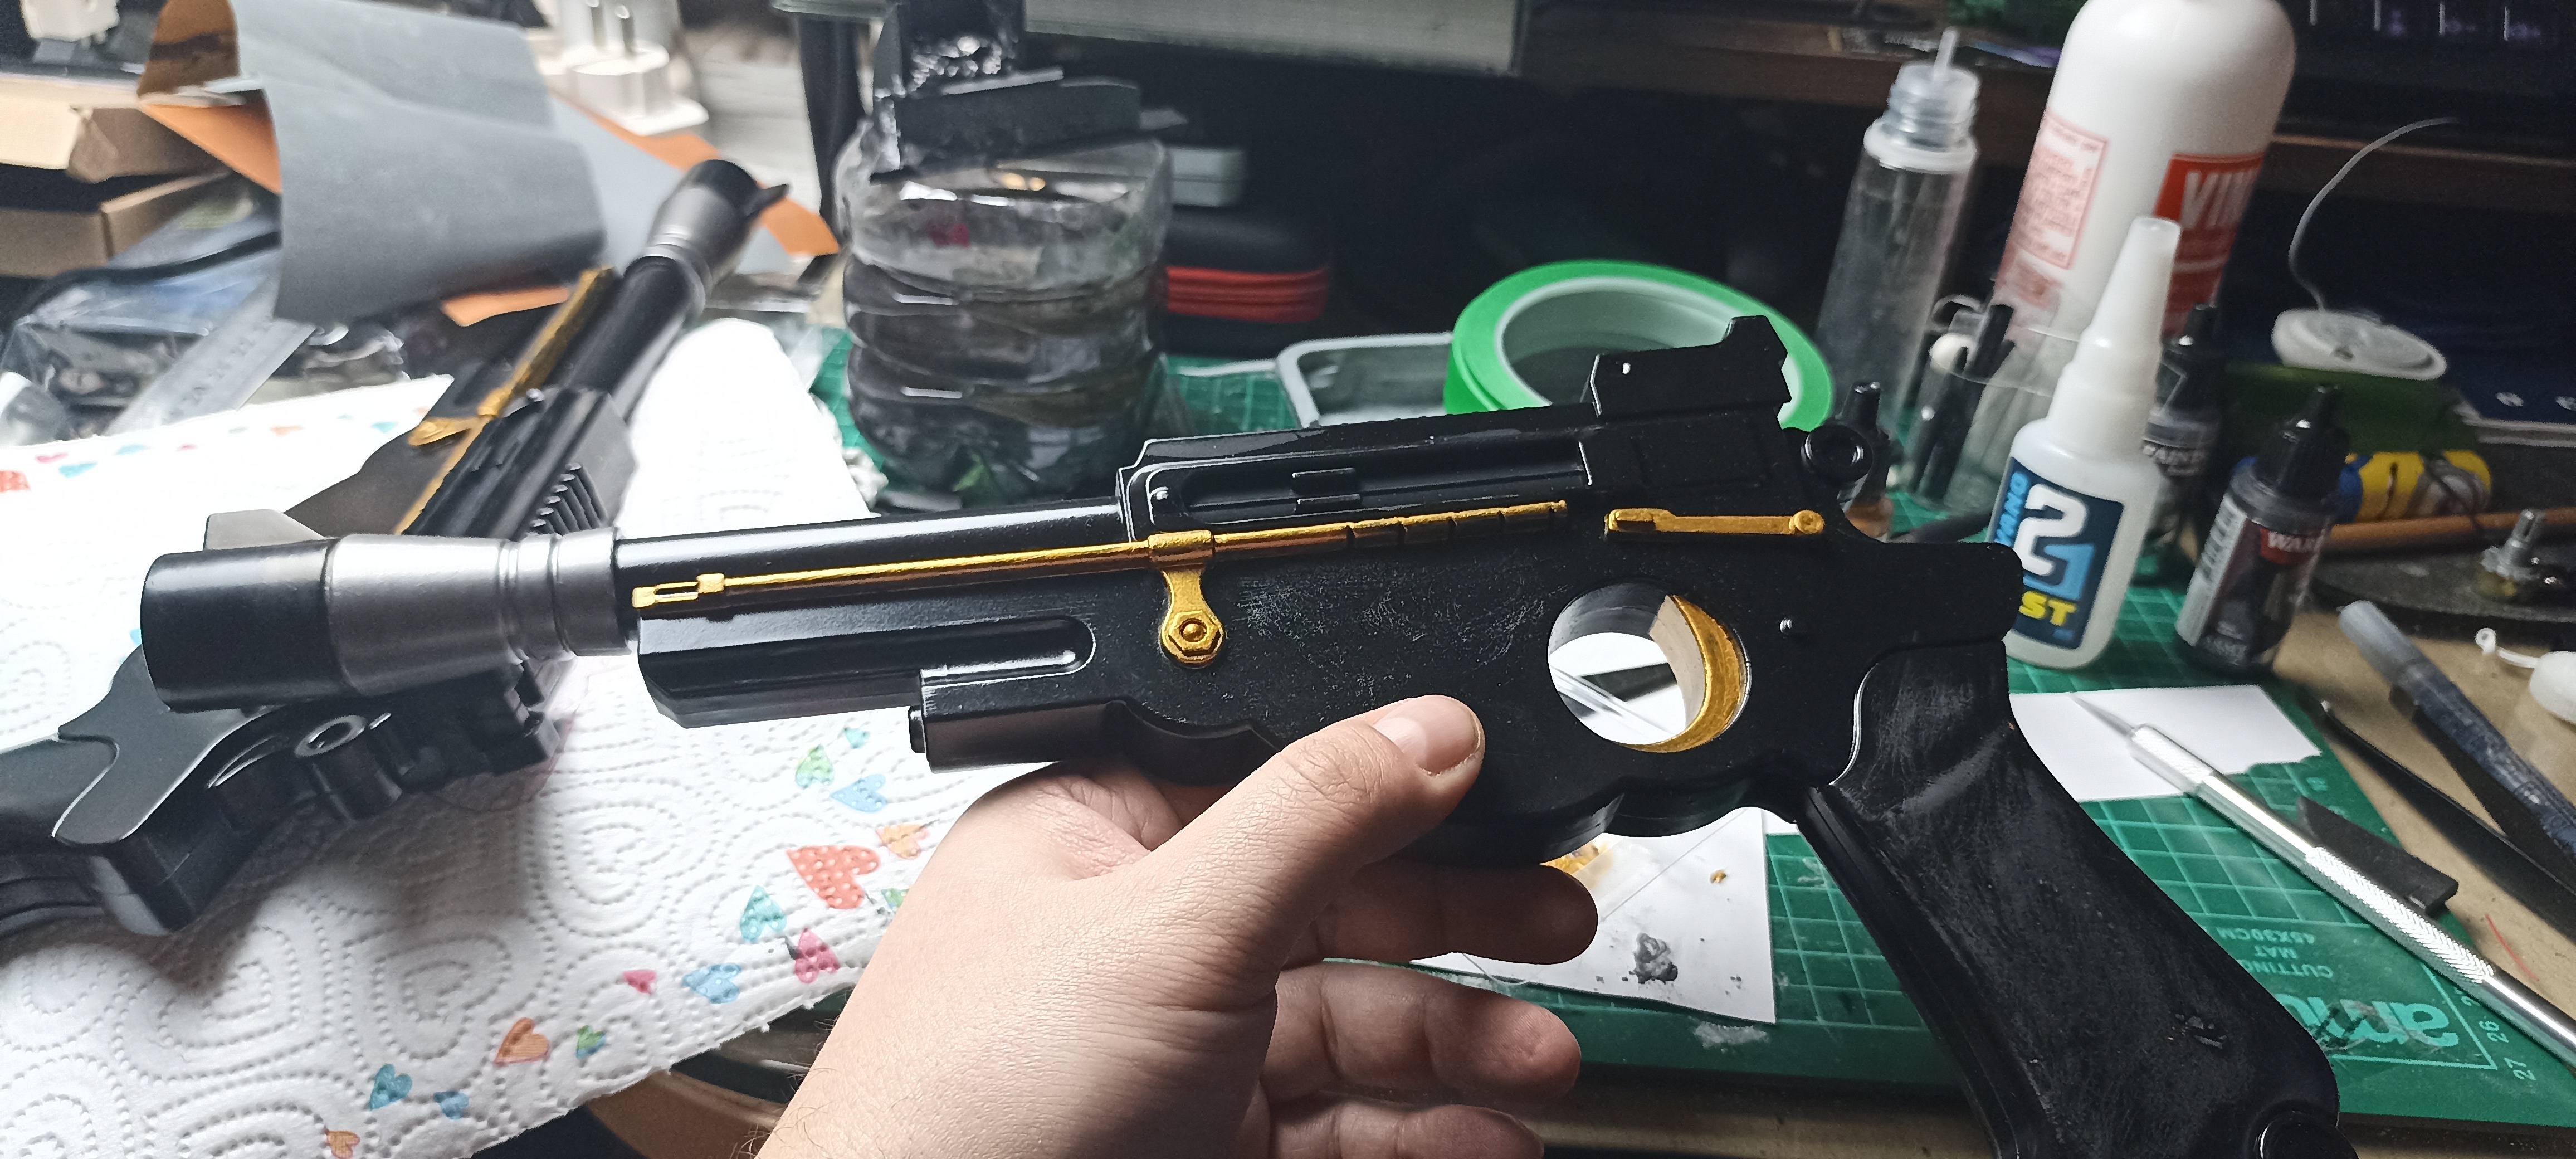 | Dettagli d'orato, dipinto a mano. |
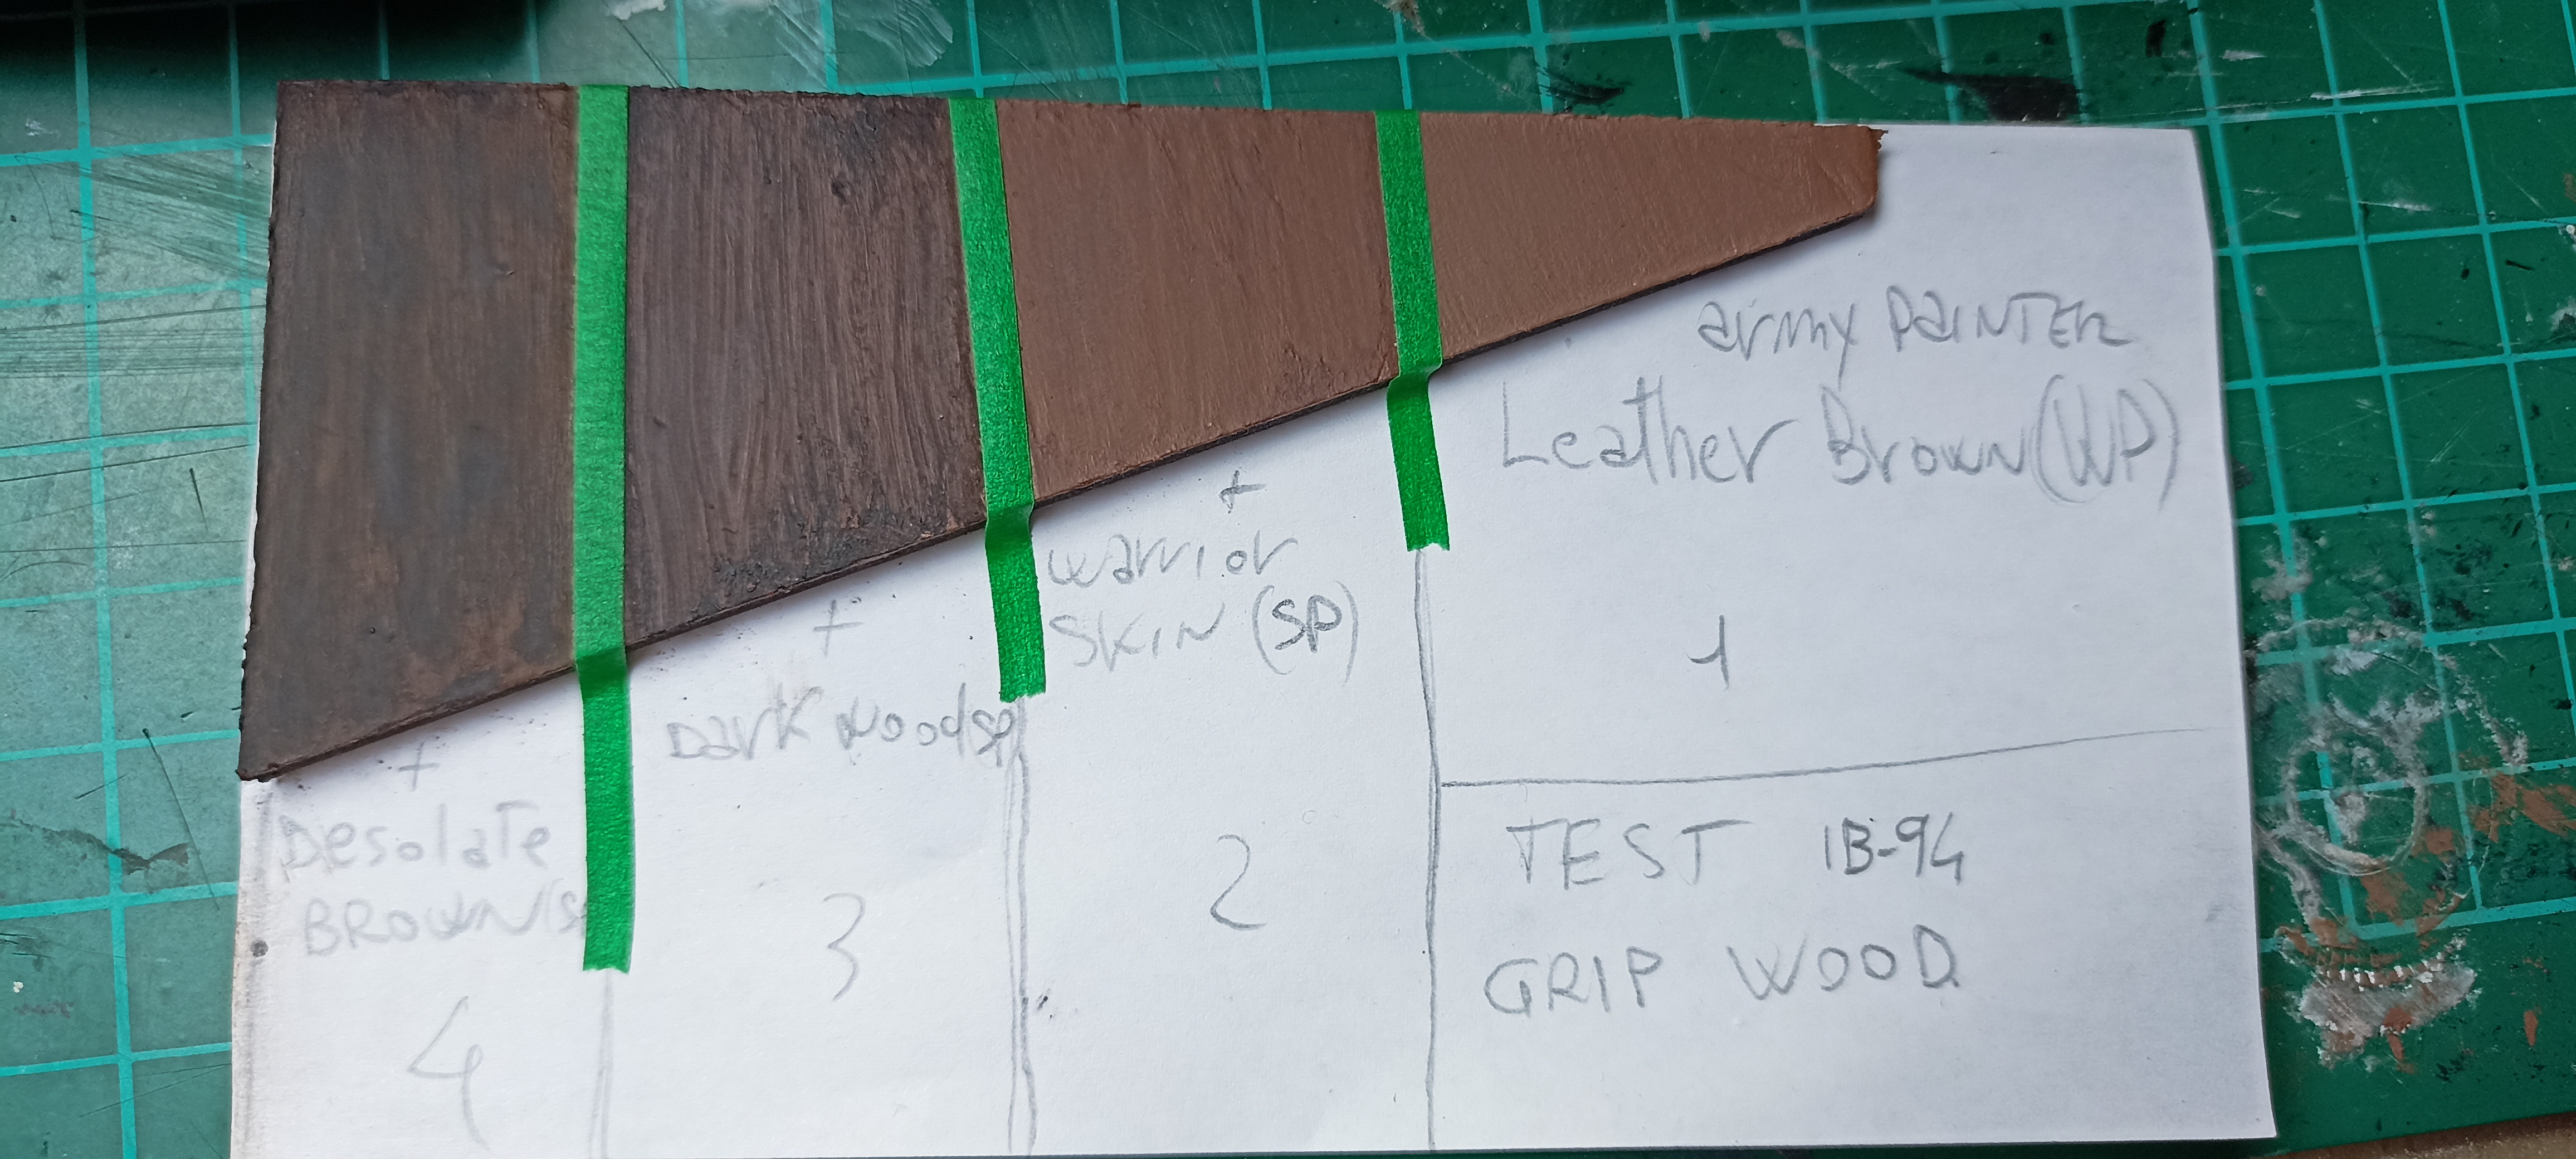 | Test per Base ed effetto legno. |

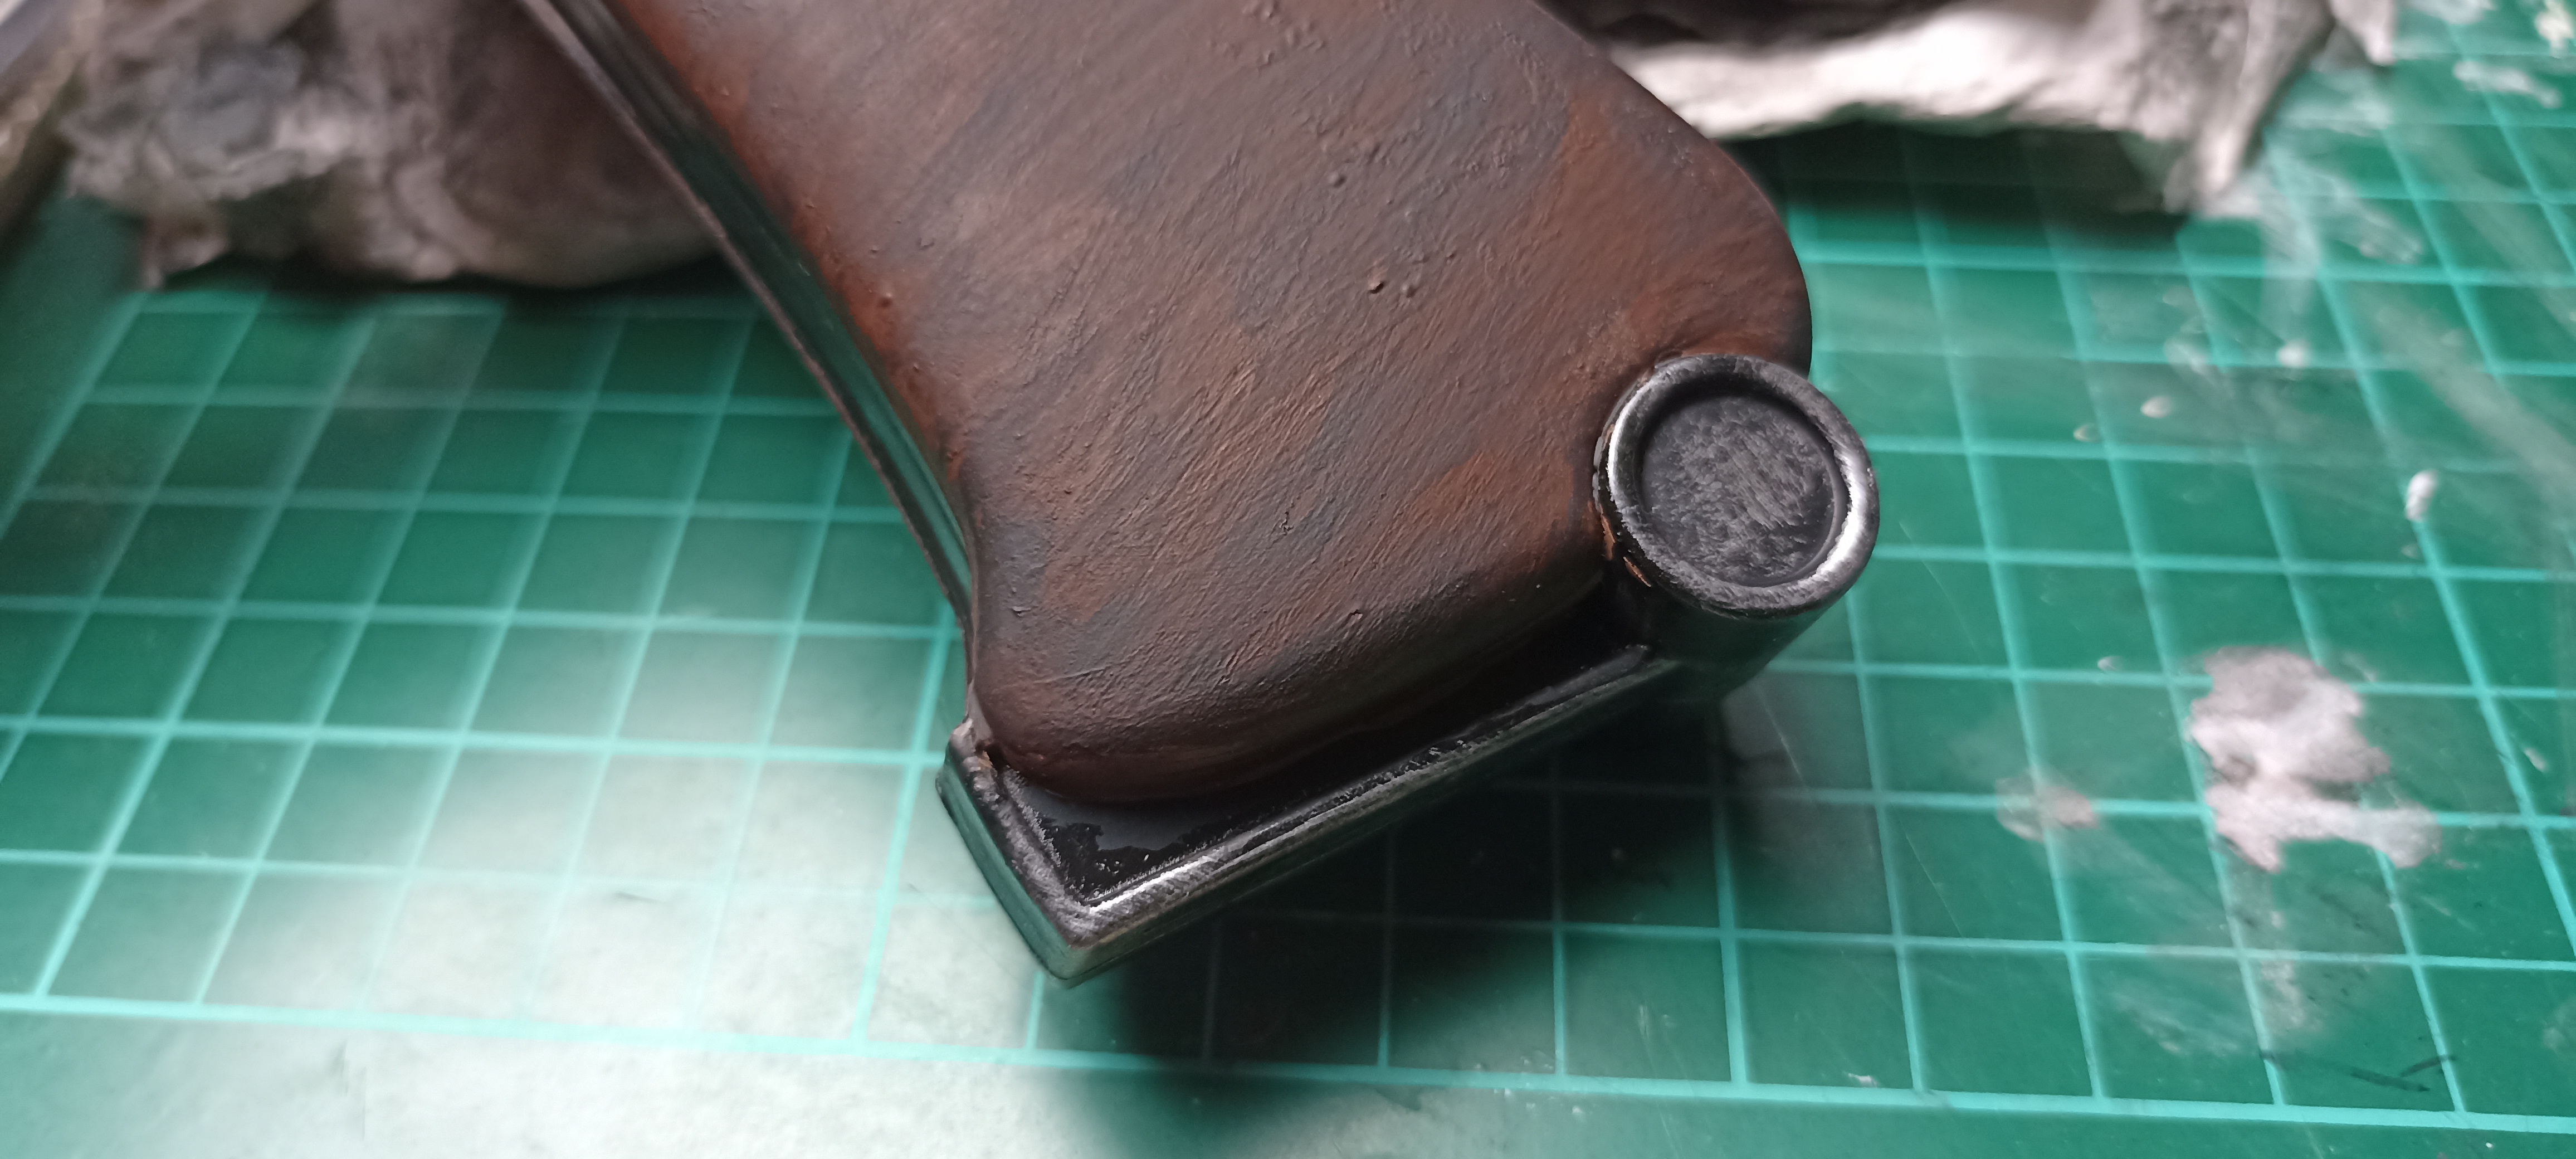
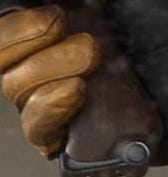 | Foto di Reference originali e dettaglio impugnatura. |
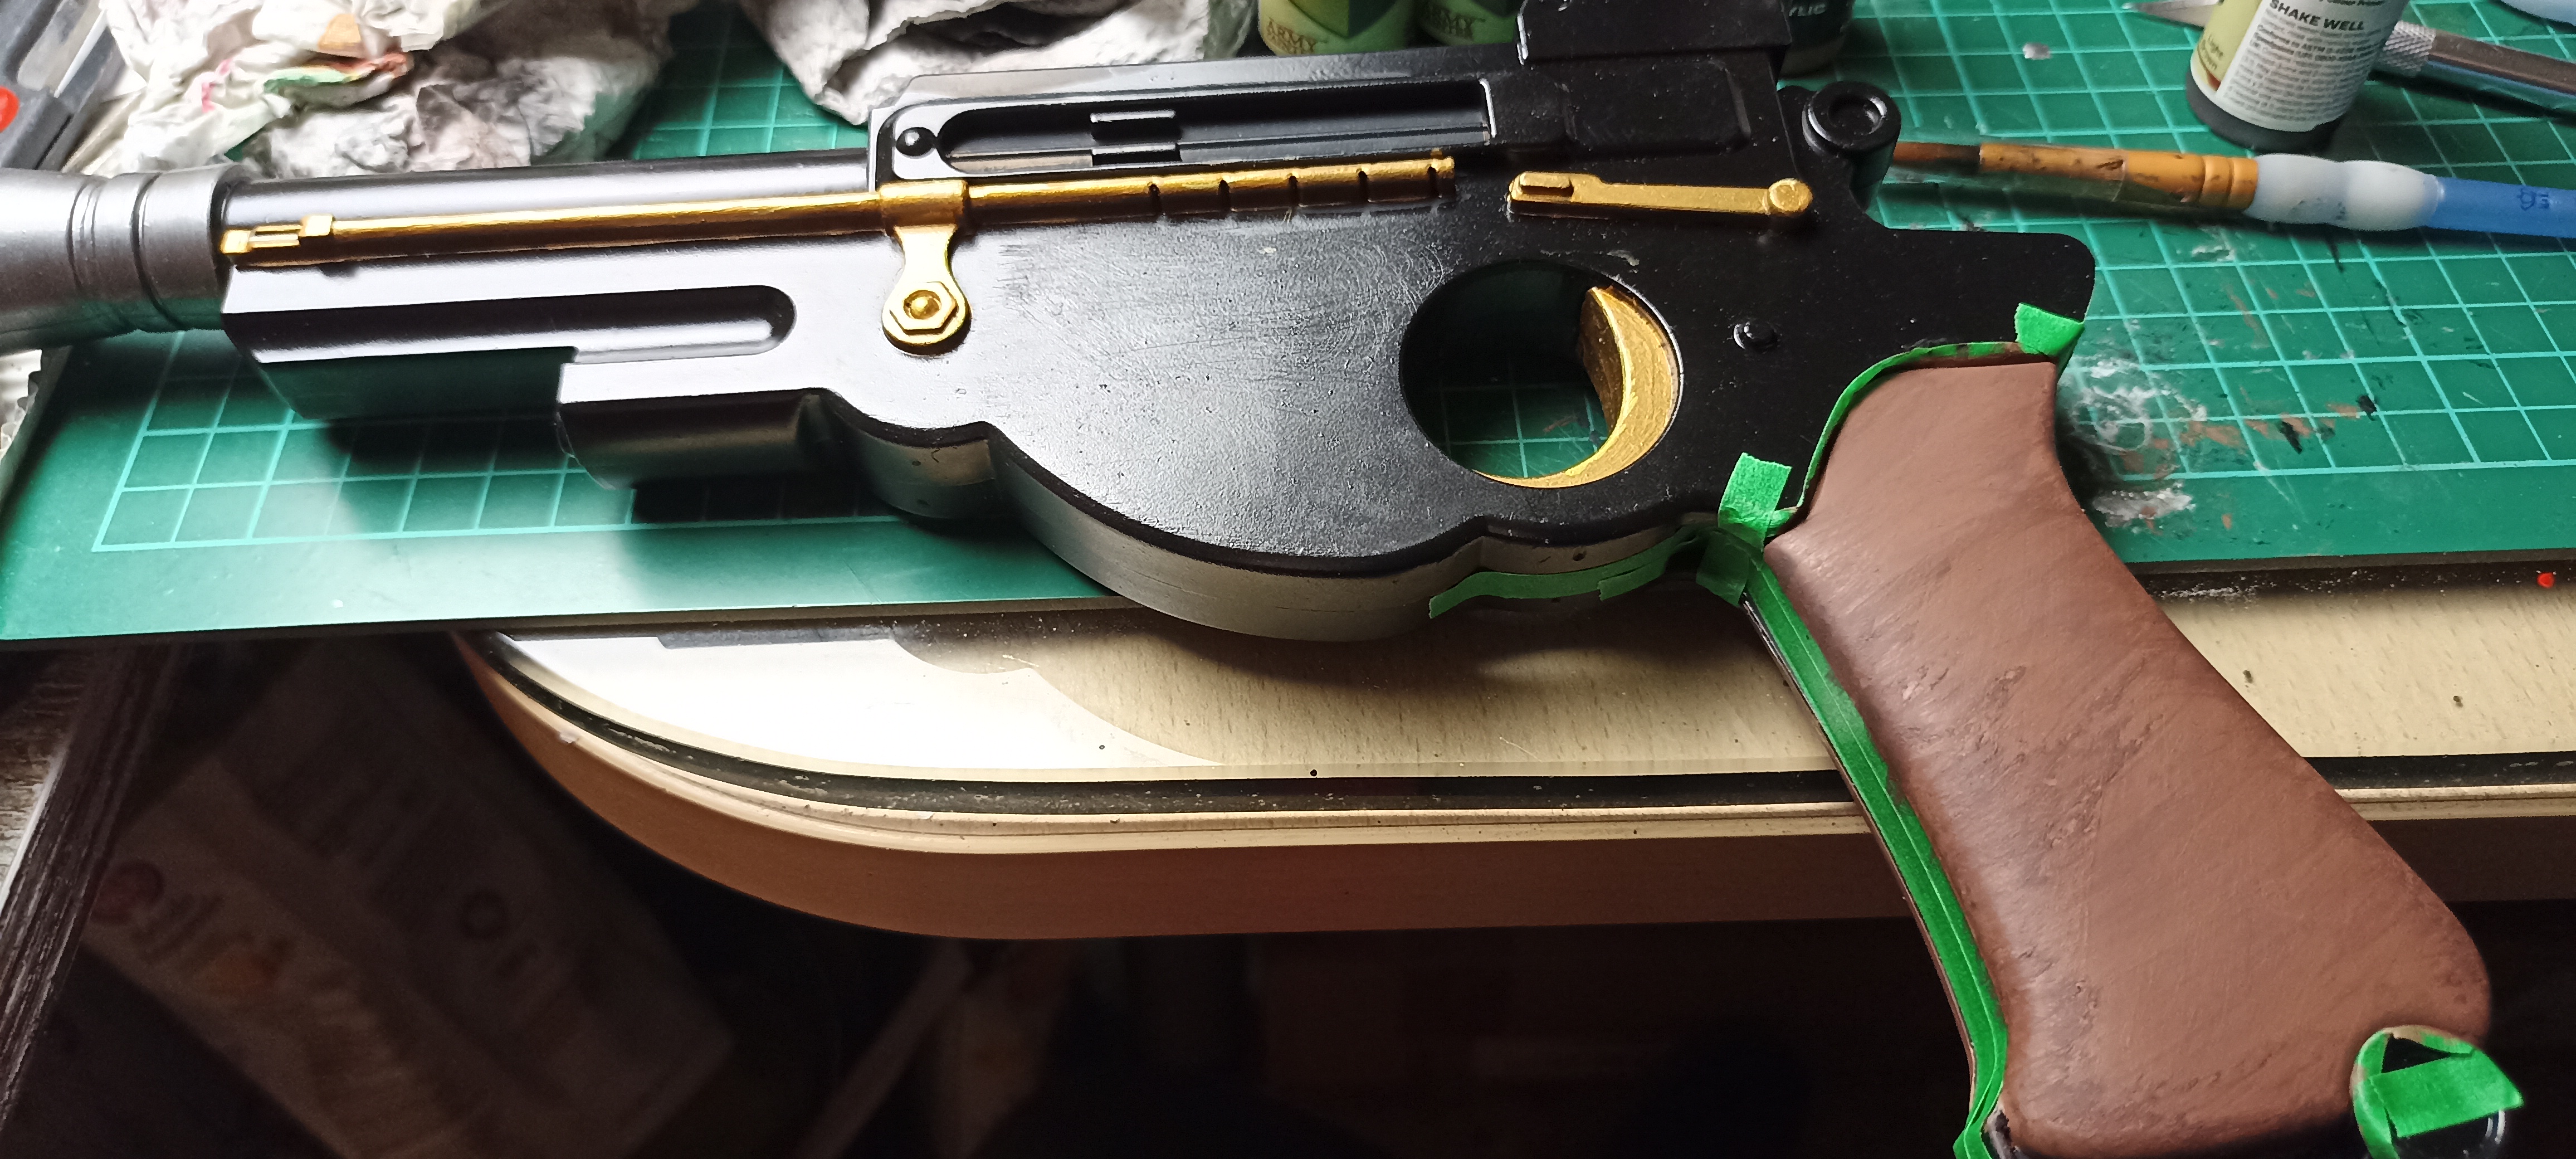 | Base Army Painter Leather Brown (war paint) |
 | Lavatura di Army Painter Dark Wood (speed paint) lato DX. |
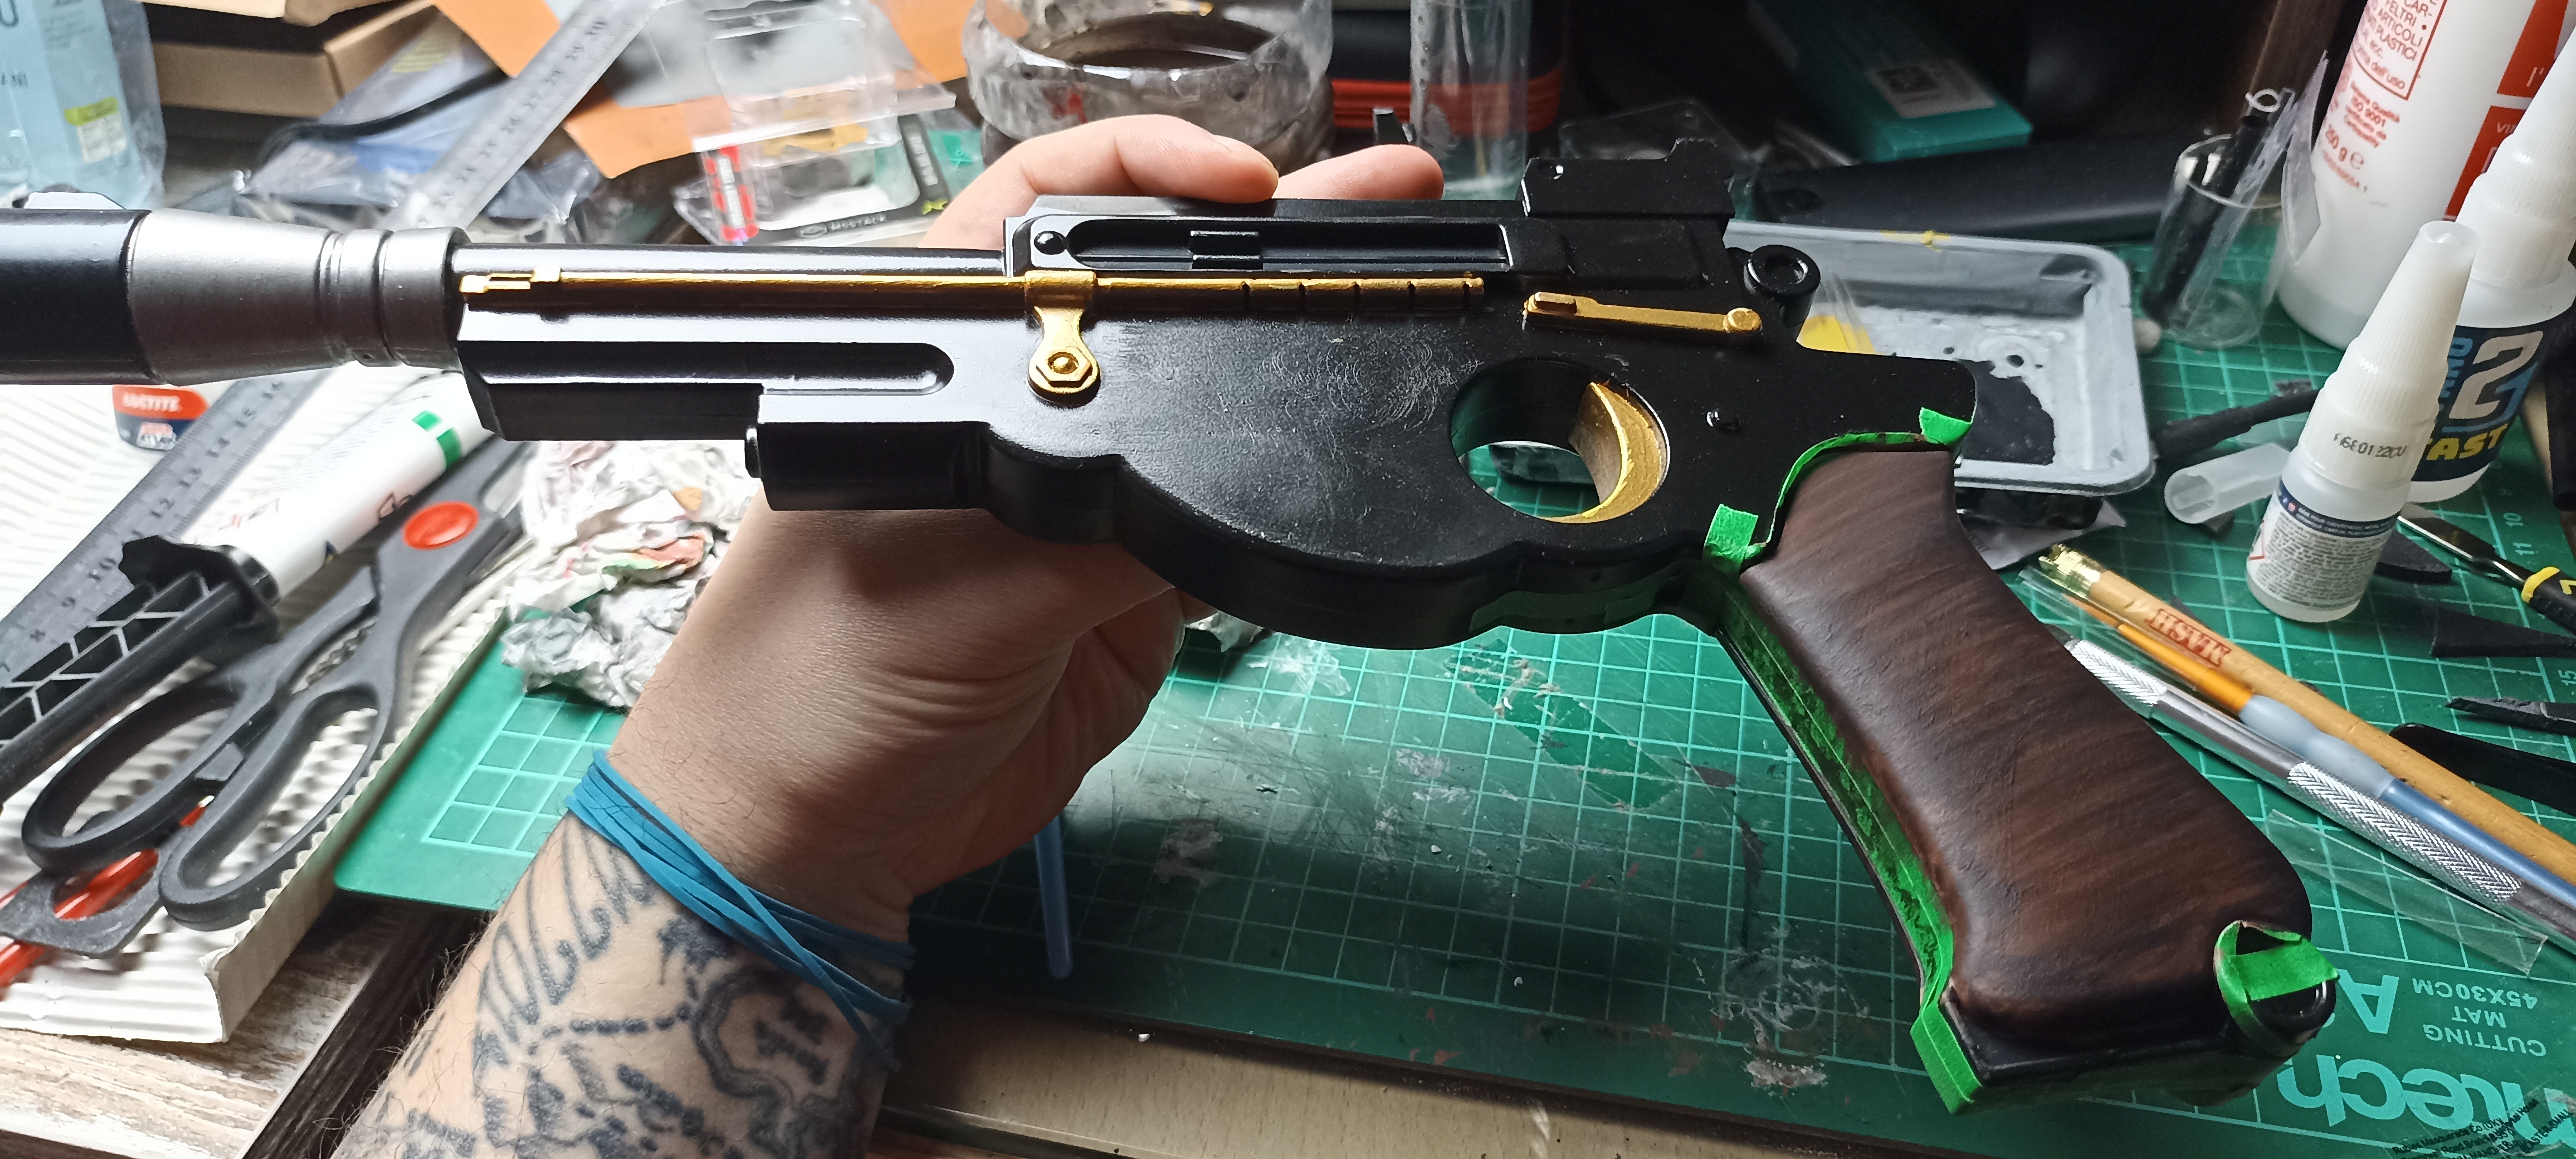 | Lavatura di Army Painter Dark Wood (speed paint) lato SX. |
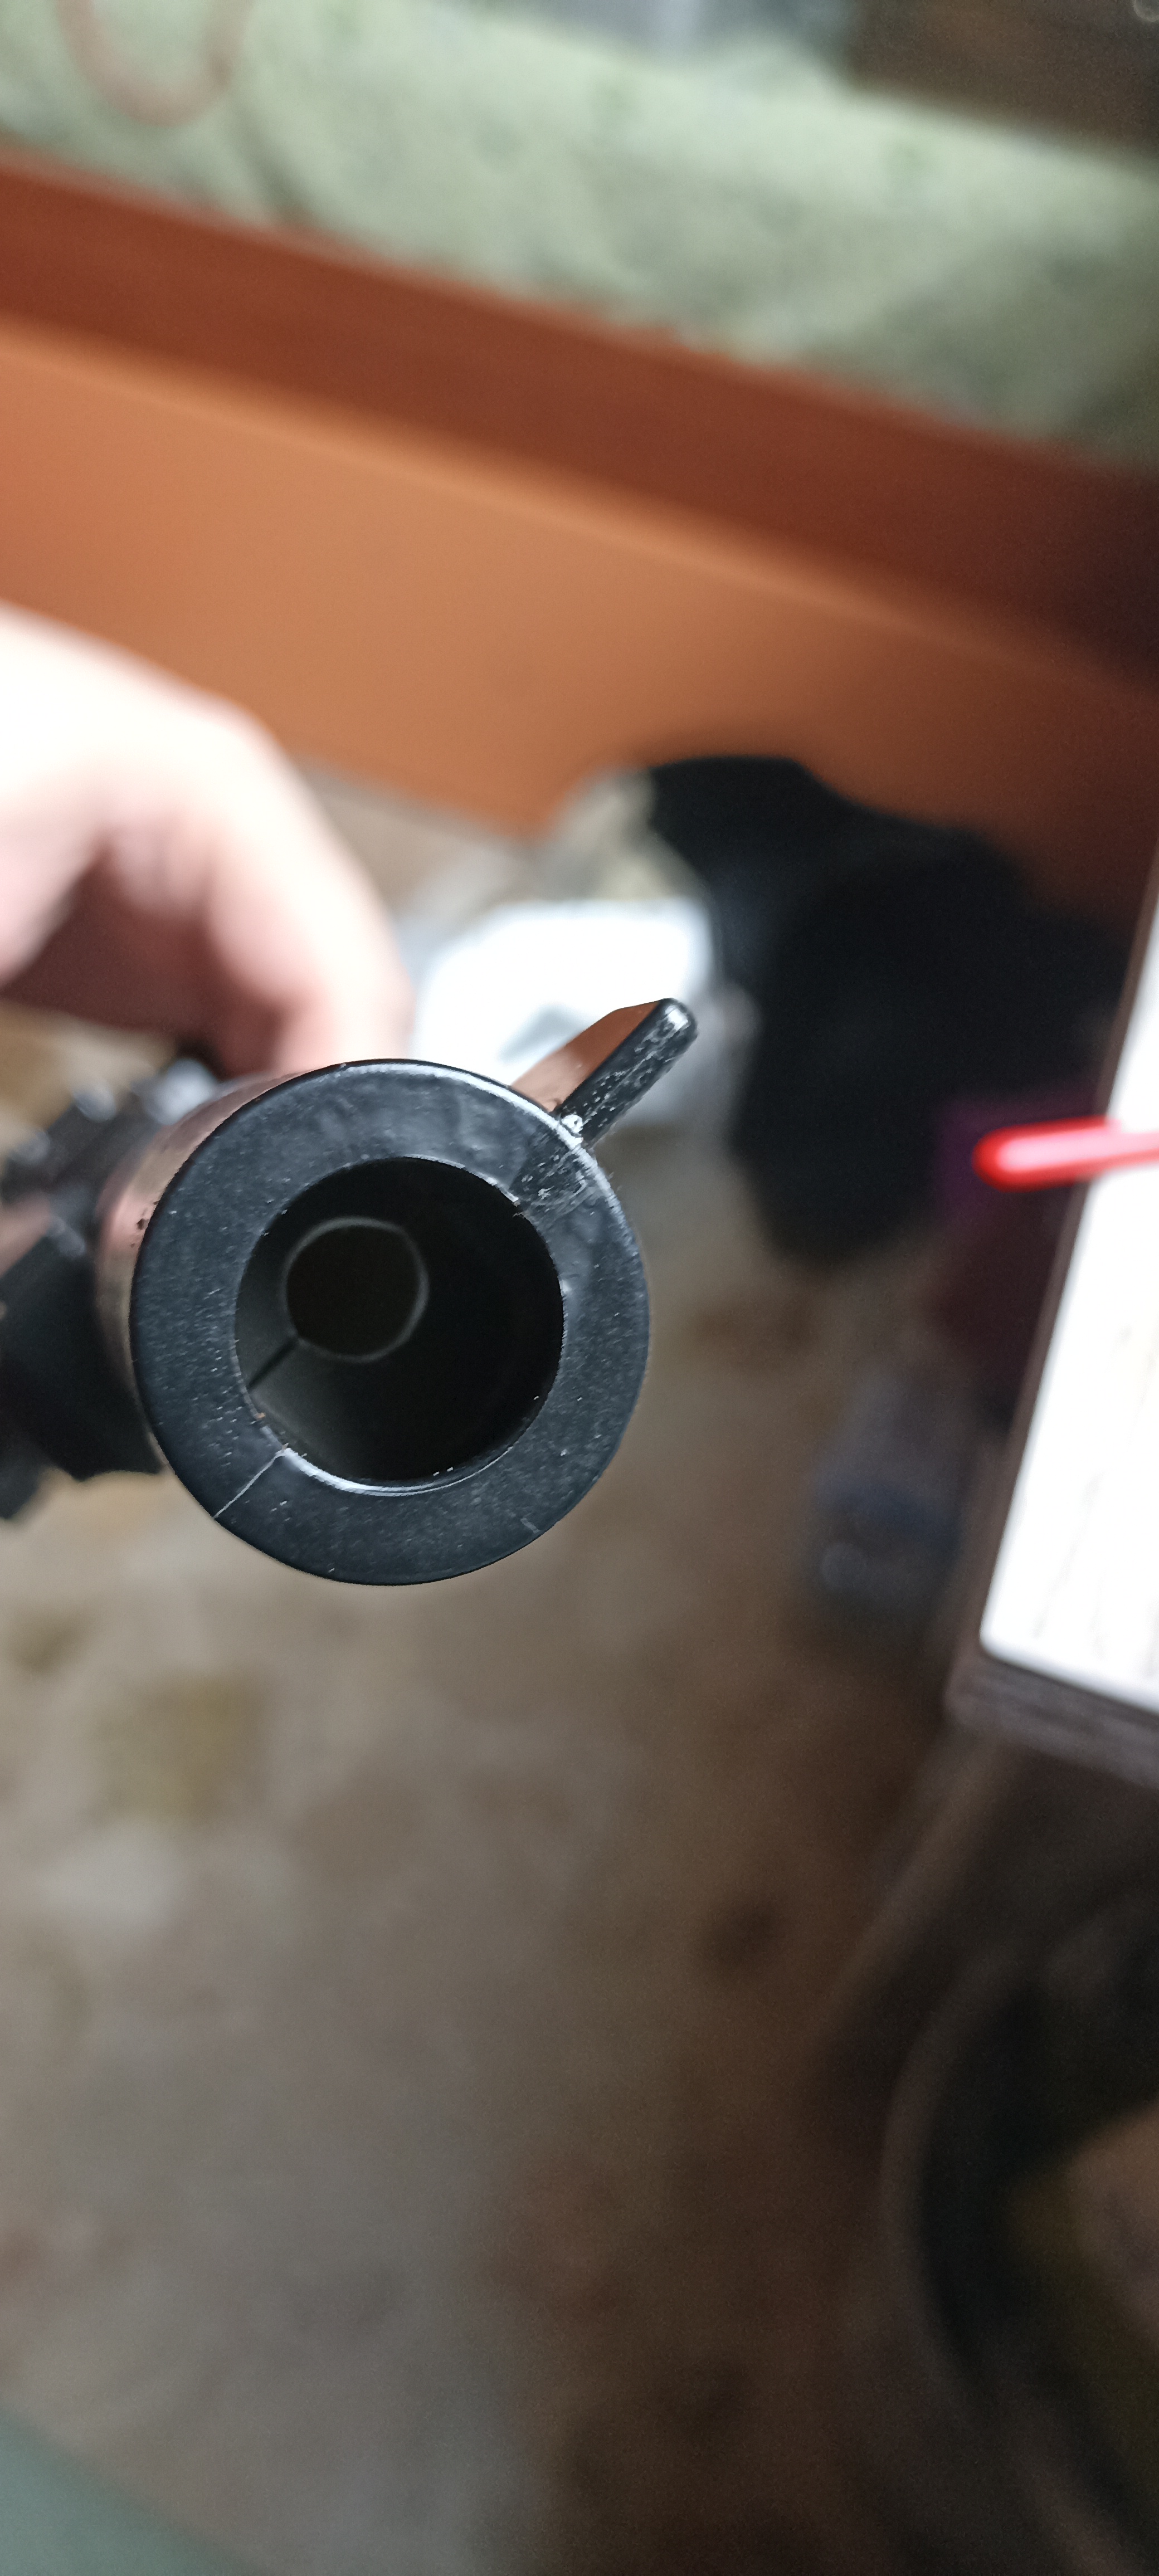 | Dettaglio volata weathering con drybrush silver. |
 | Dettaglio canna weathering con drybrush silver. |
 | Dettaglio cassa weathering con drybrush silver. |
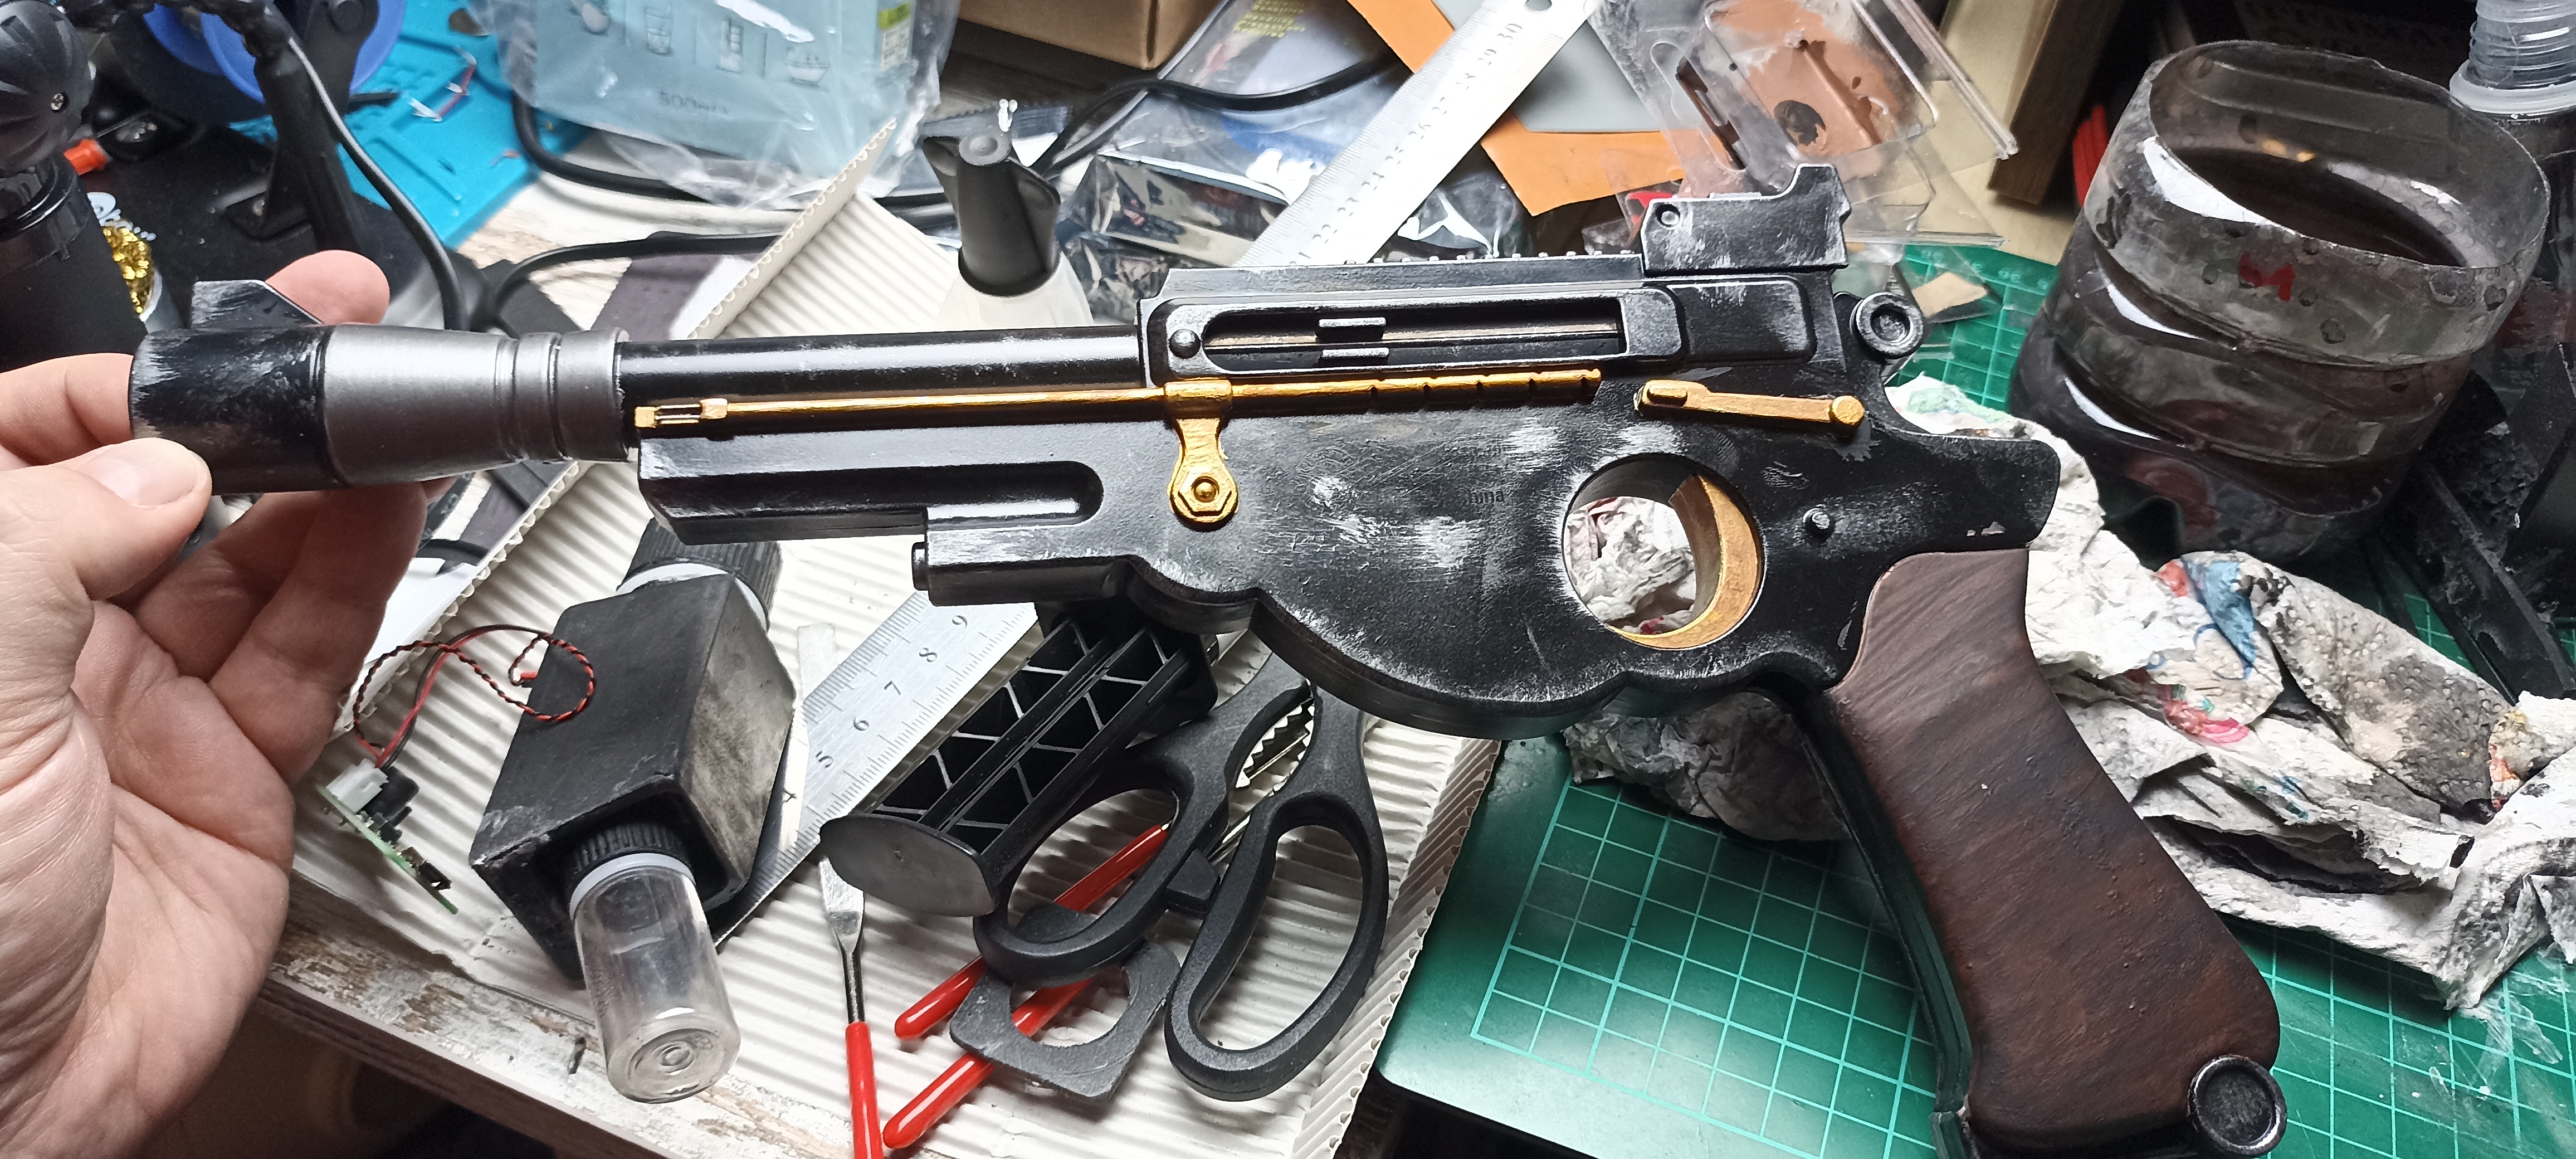 | Visione di insieme weathering con drybrush silver. |
 | Dettaglio fondo impugnatura weathering con drybrush silver. |
 | Dettaglio mirino e cane weathering con drybrush silver. |
 | Dettaglio sotto weathering con drybrush silver. |
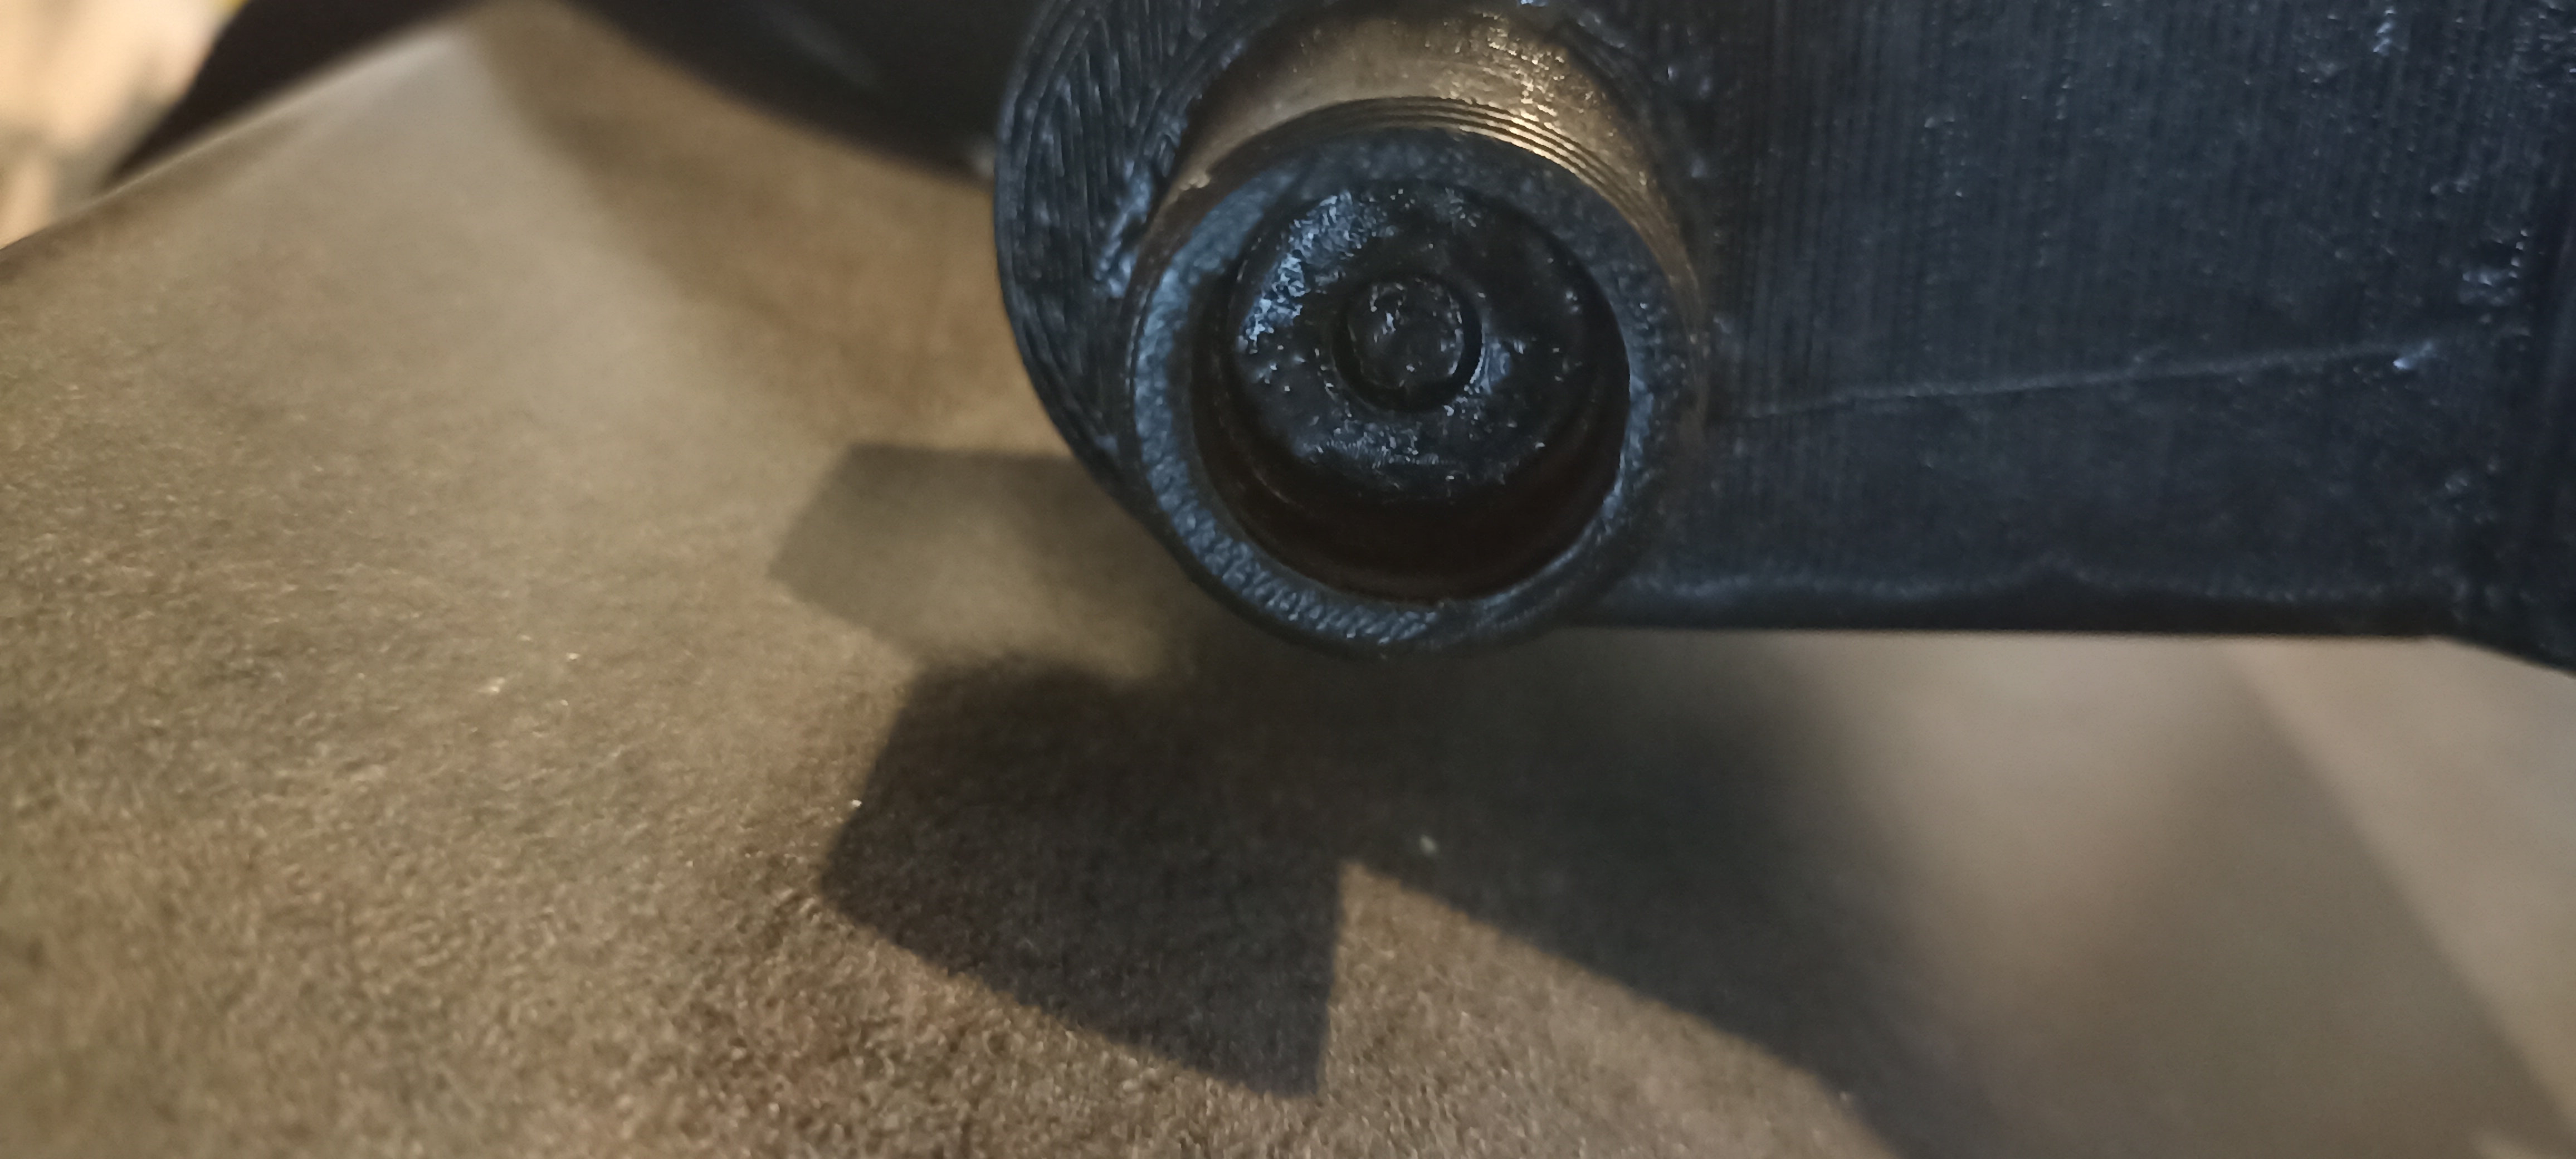
 | Pesa troppo poco. (113g) |
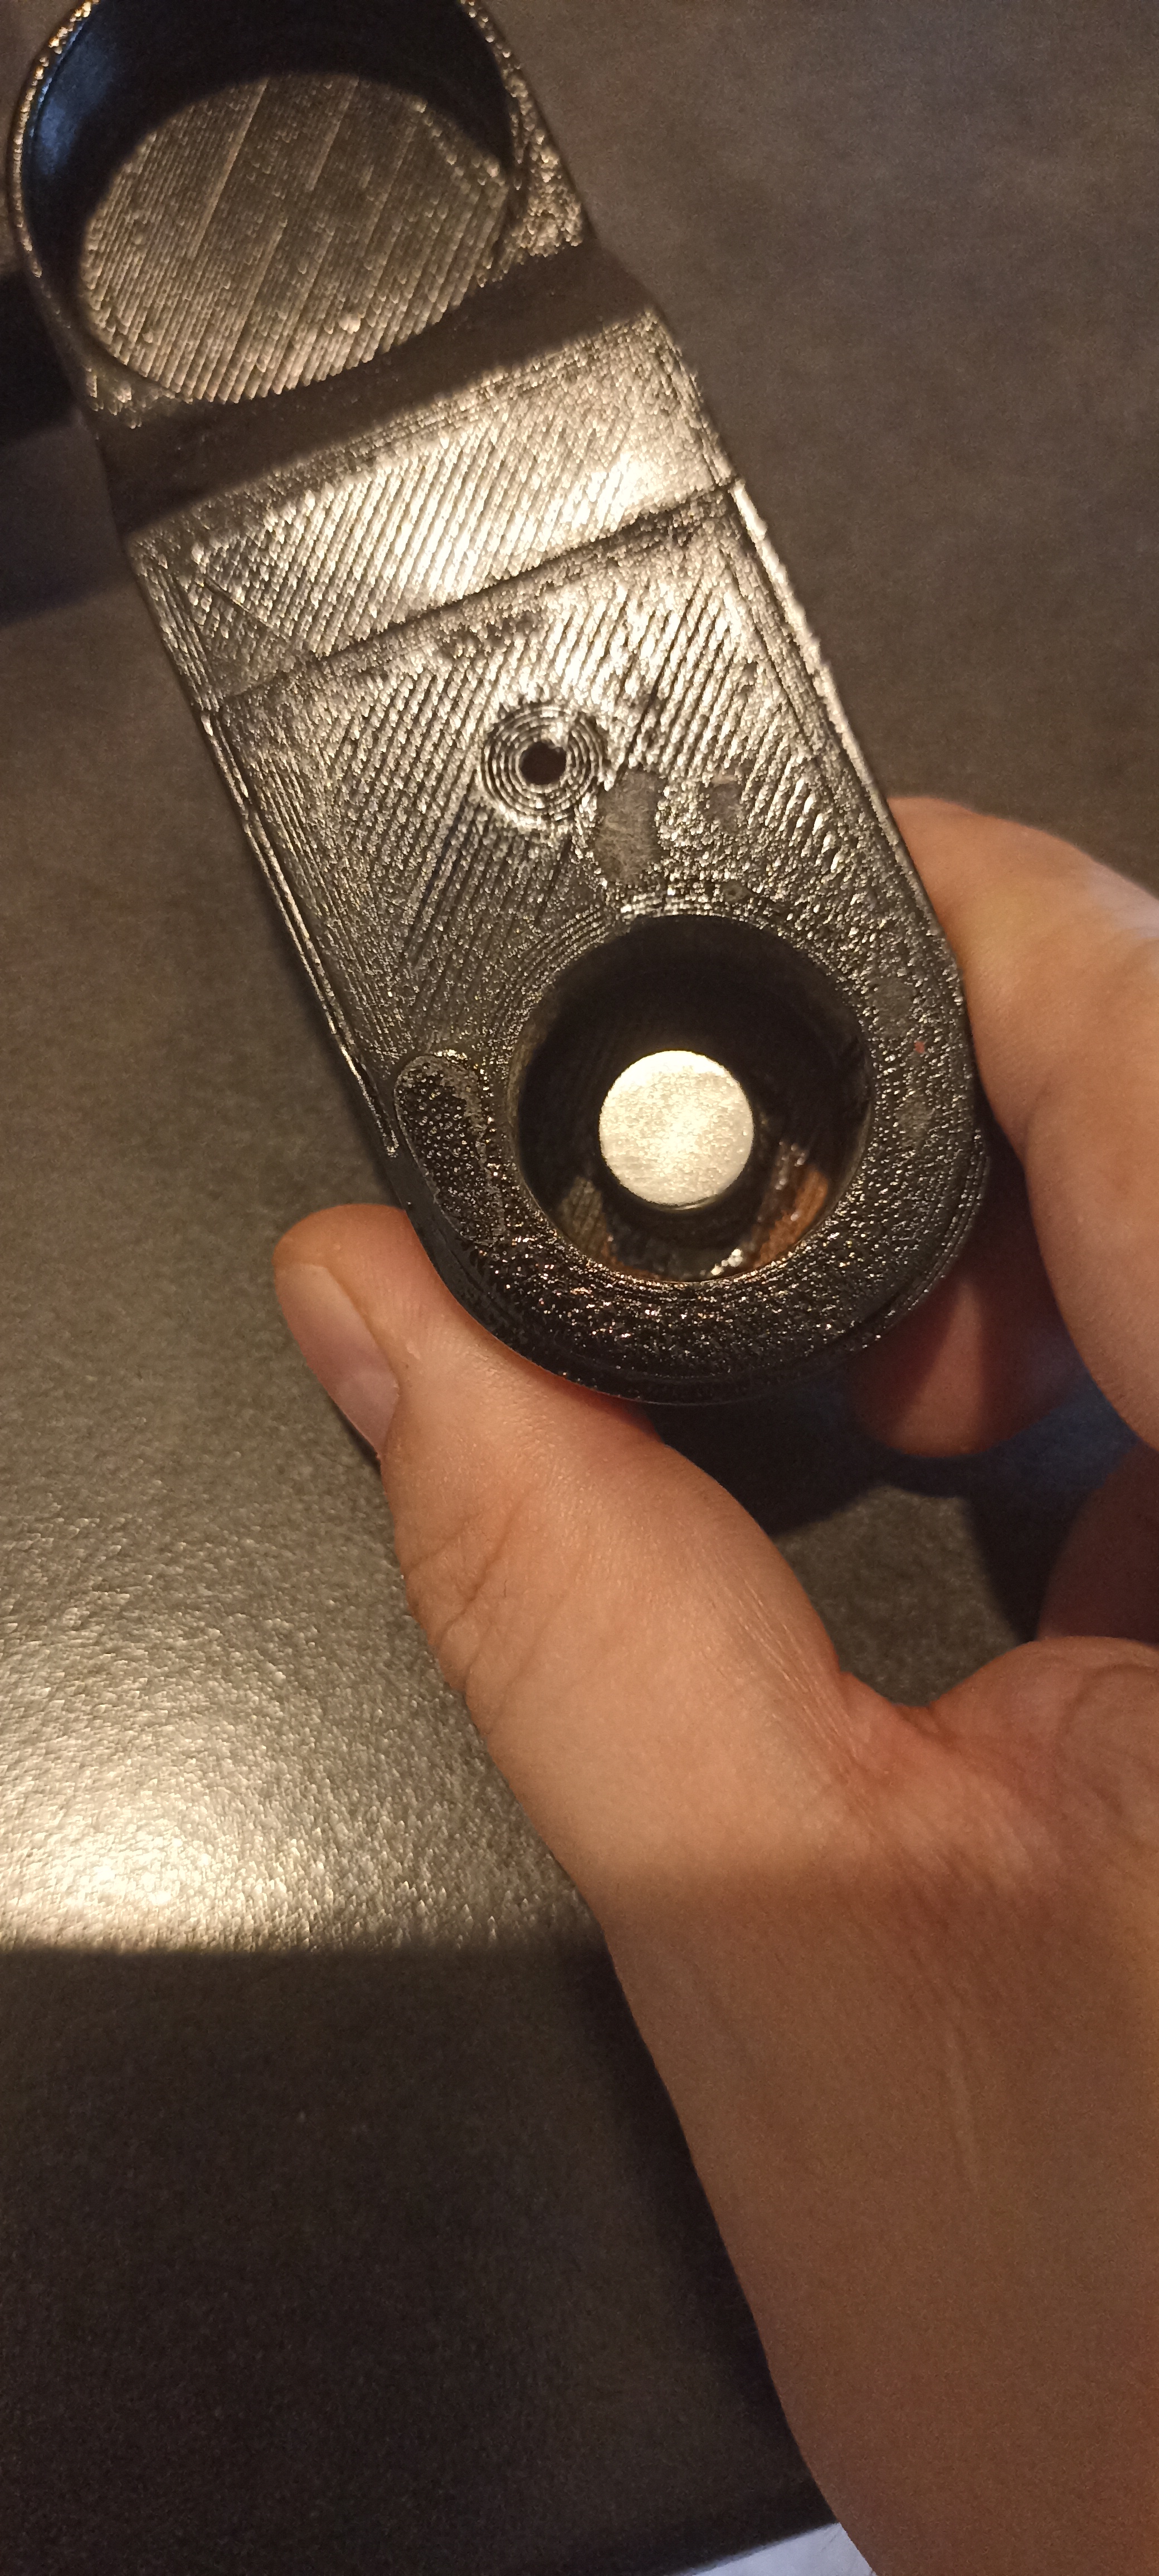
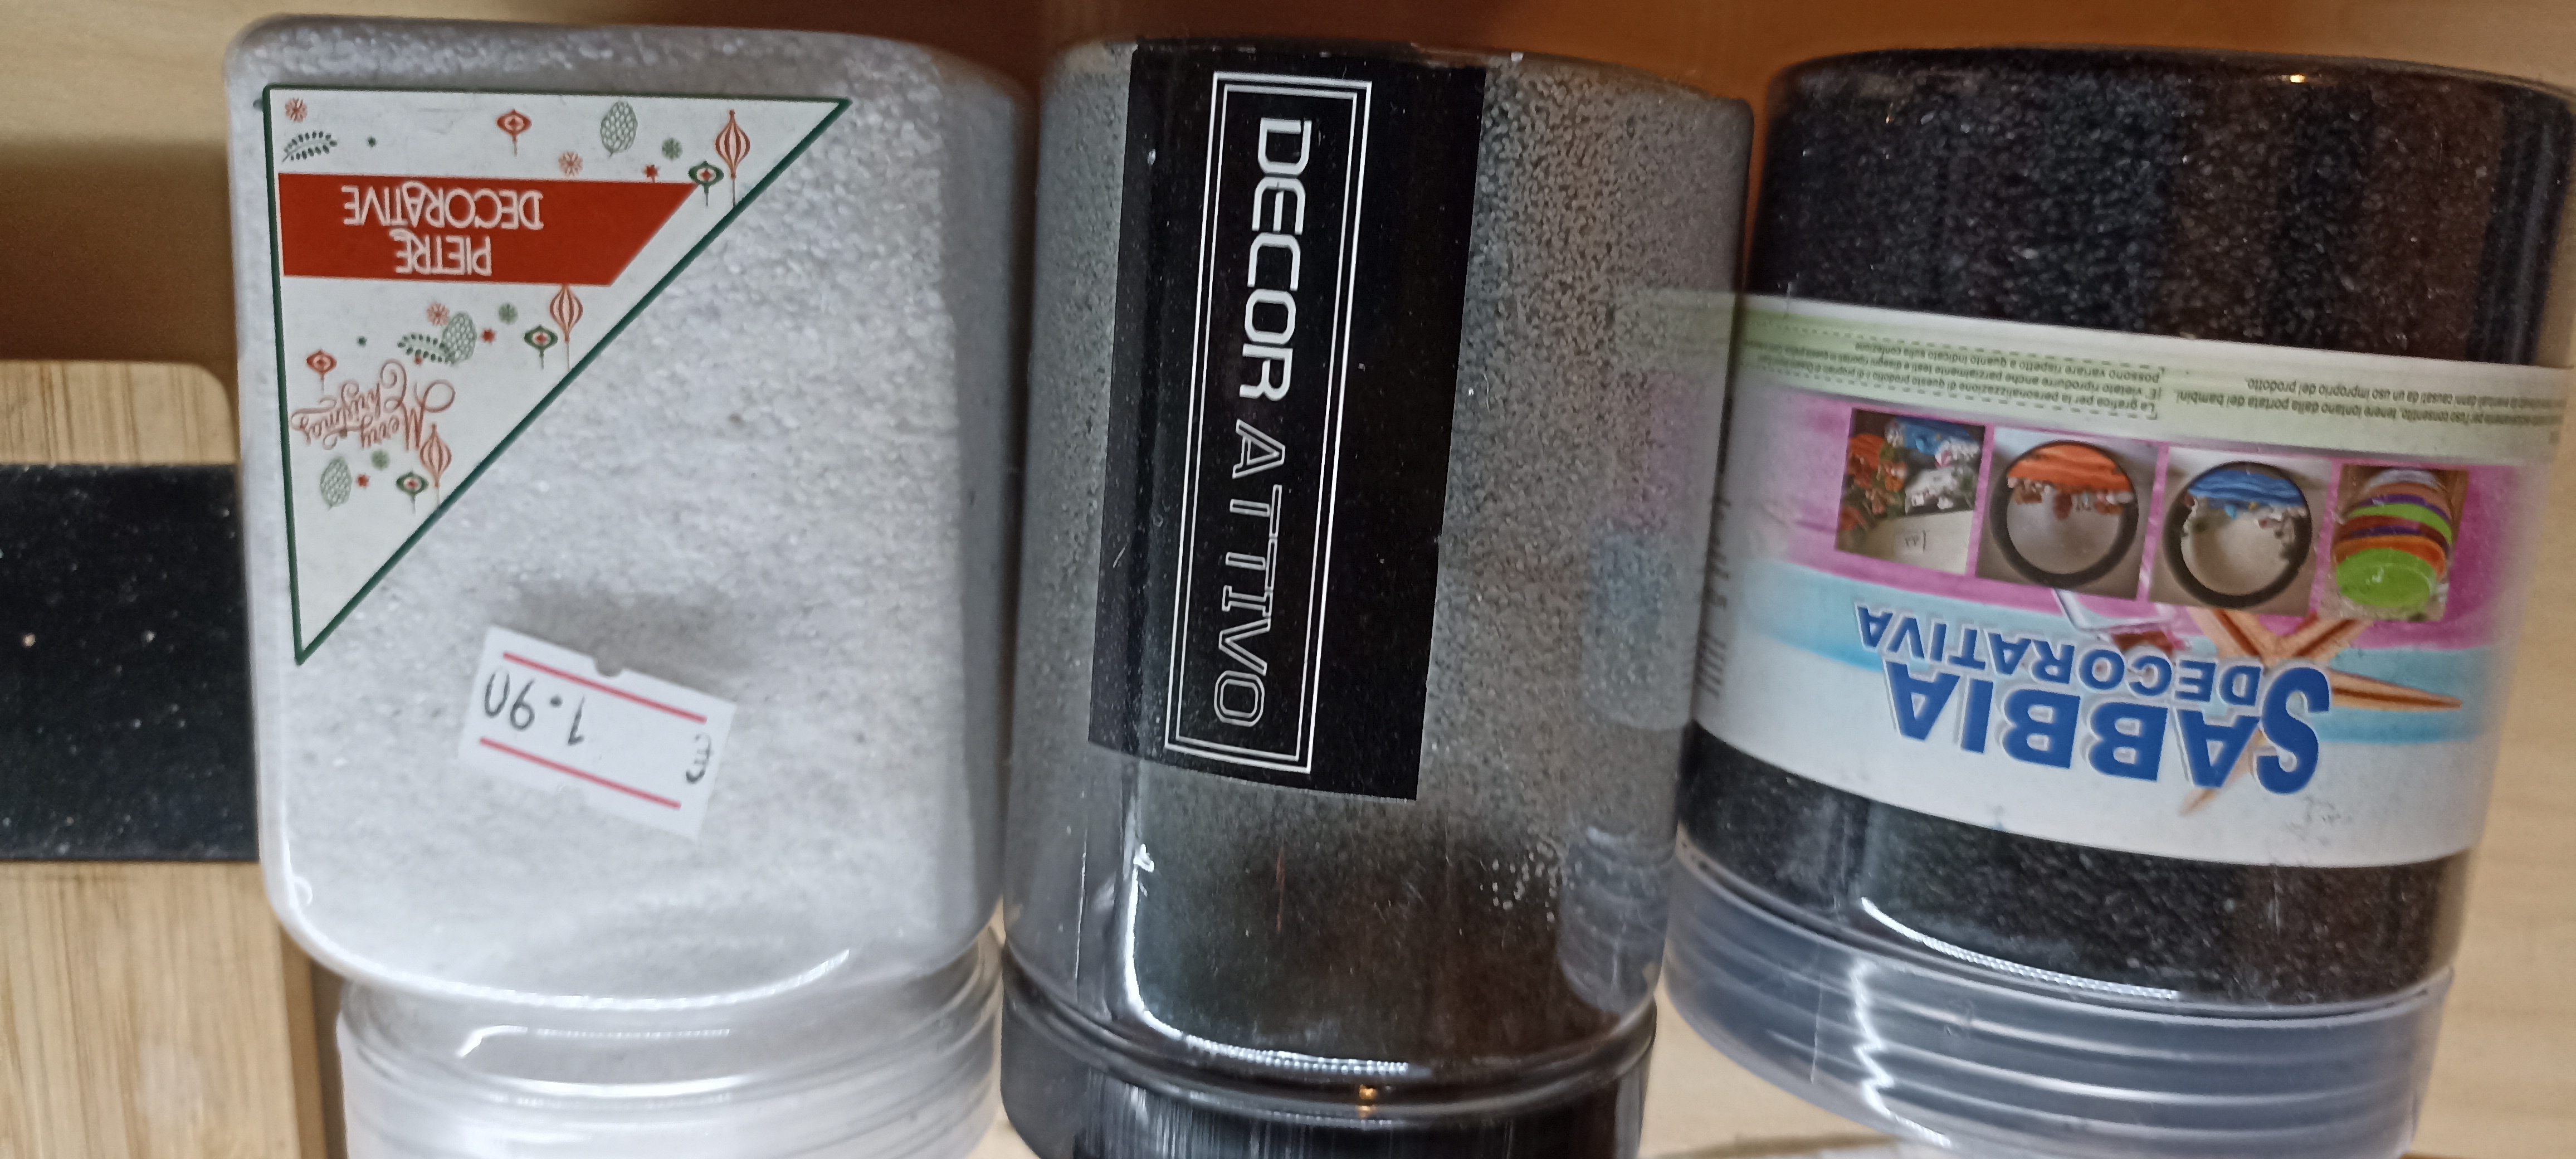 | Recuperato Sabbia. |
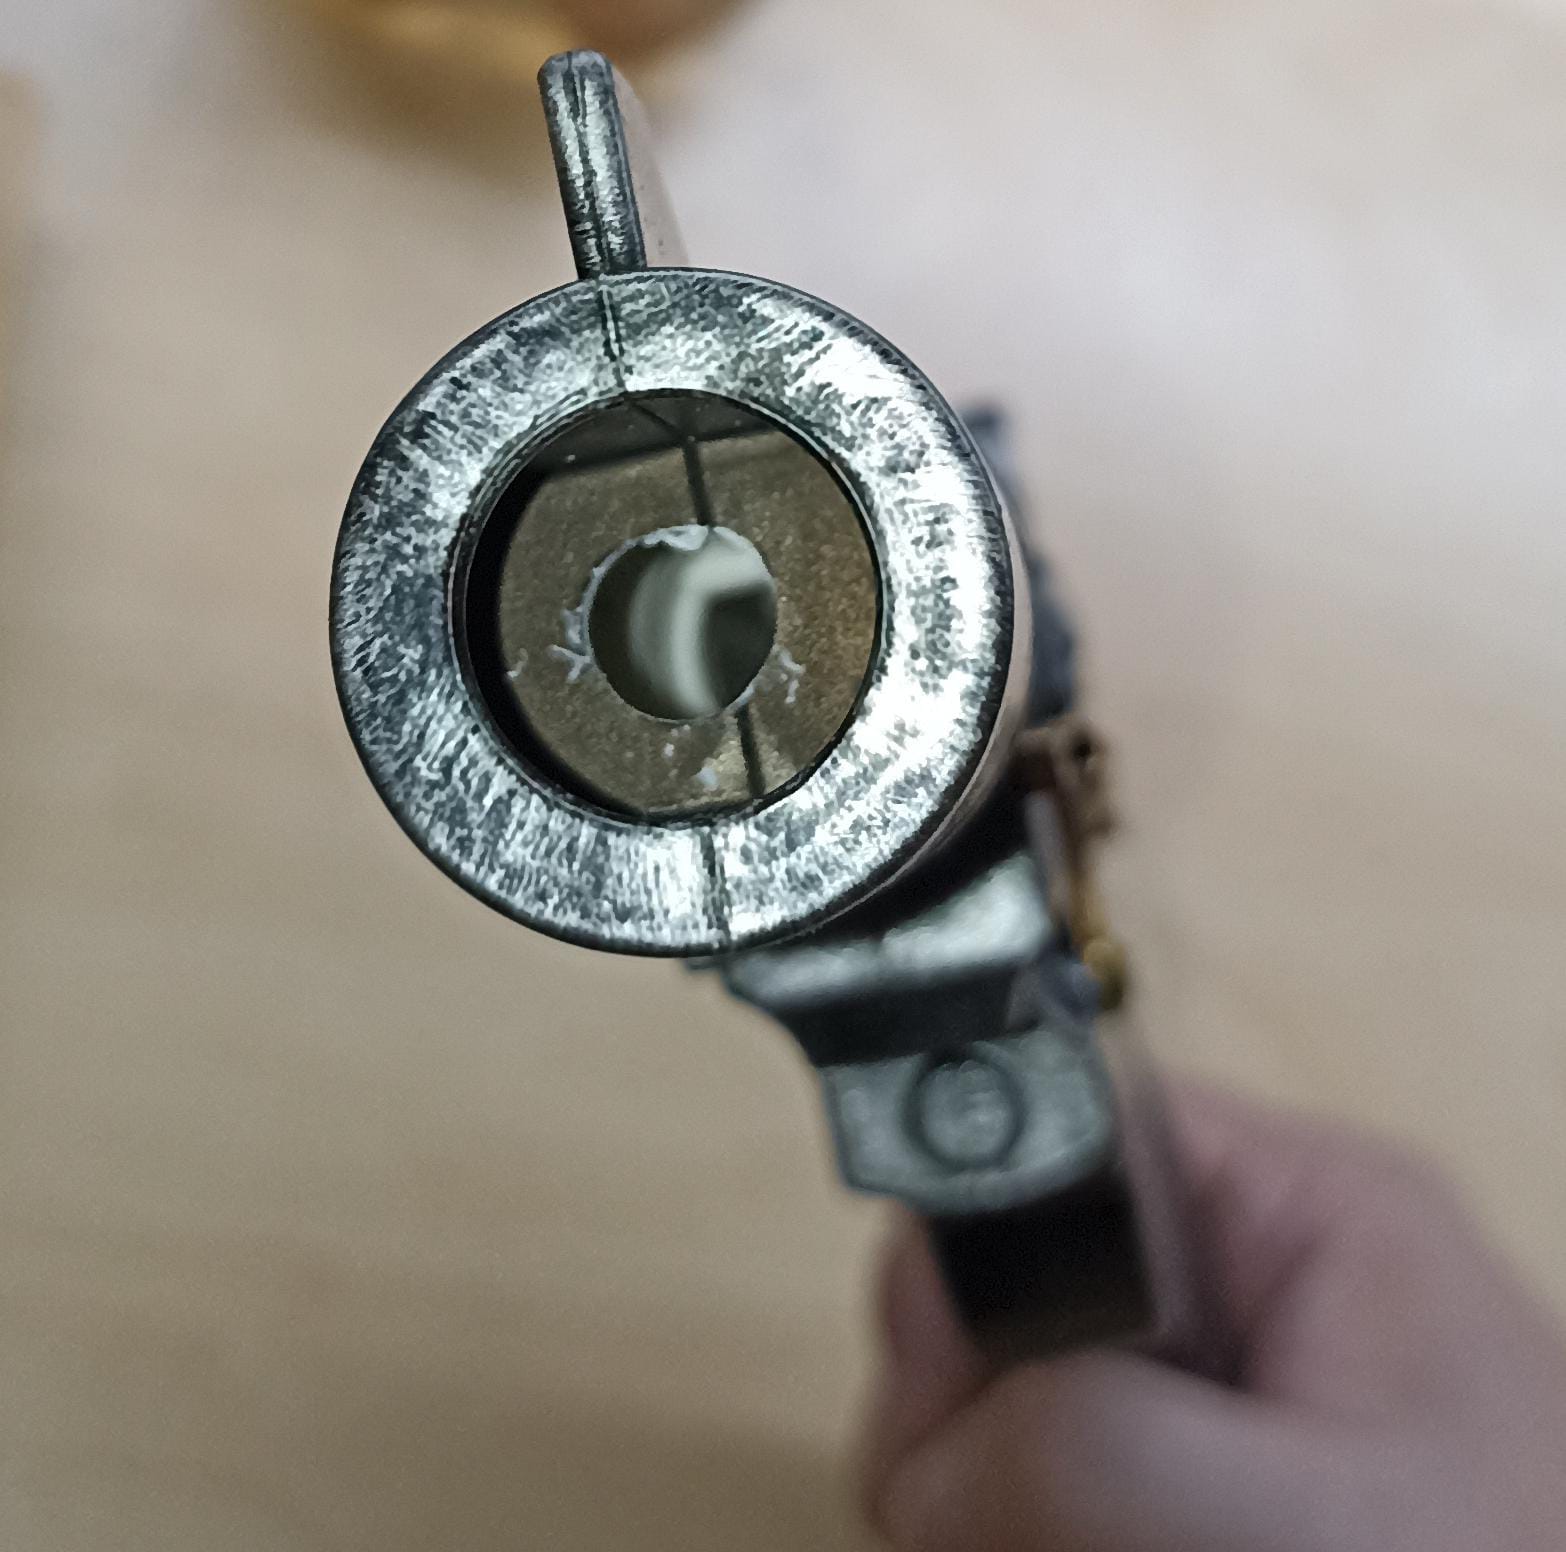 | Buco su pistola per riempire di sabbia. |
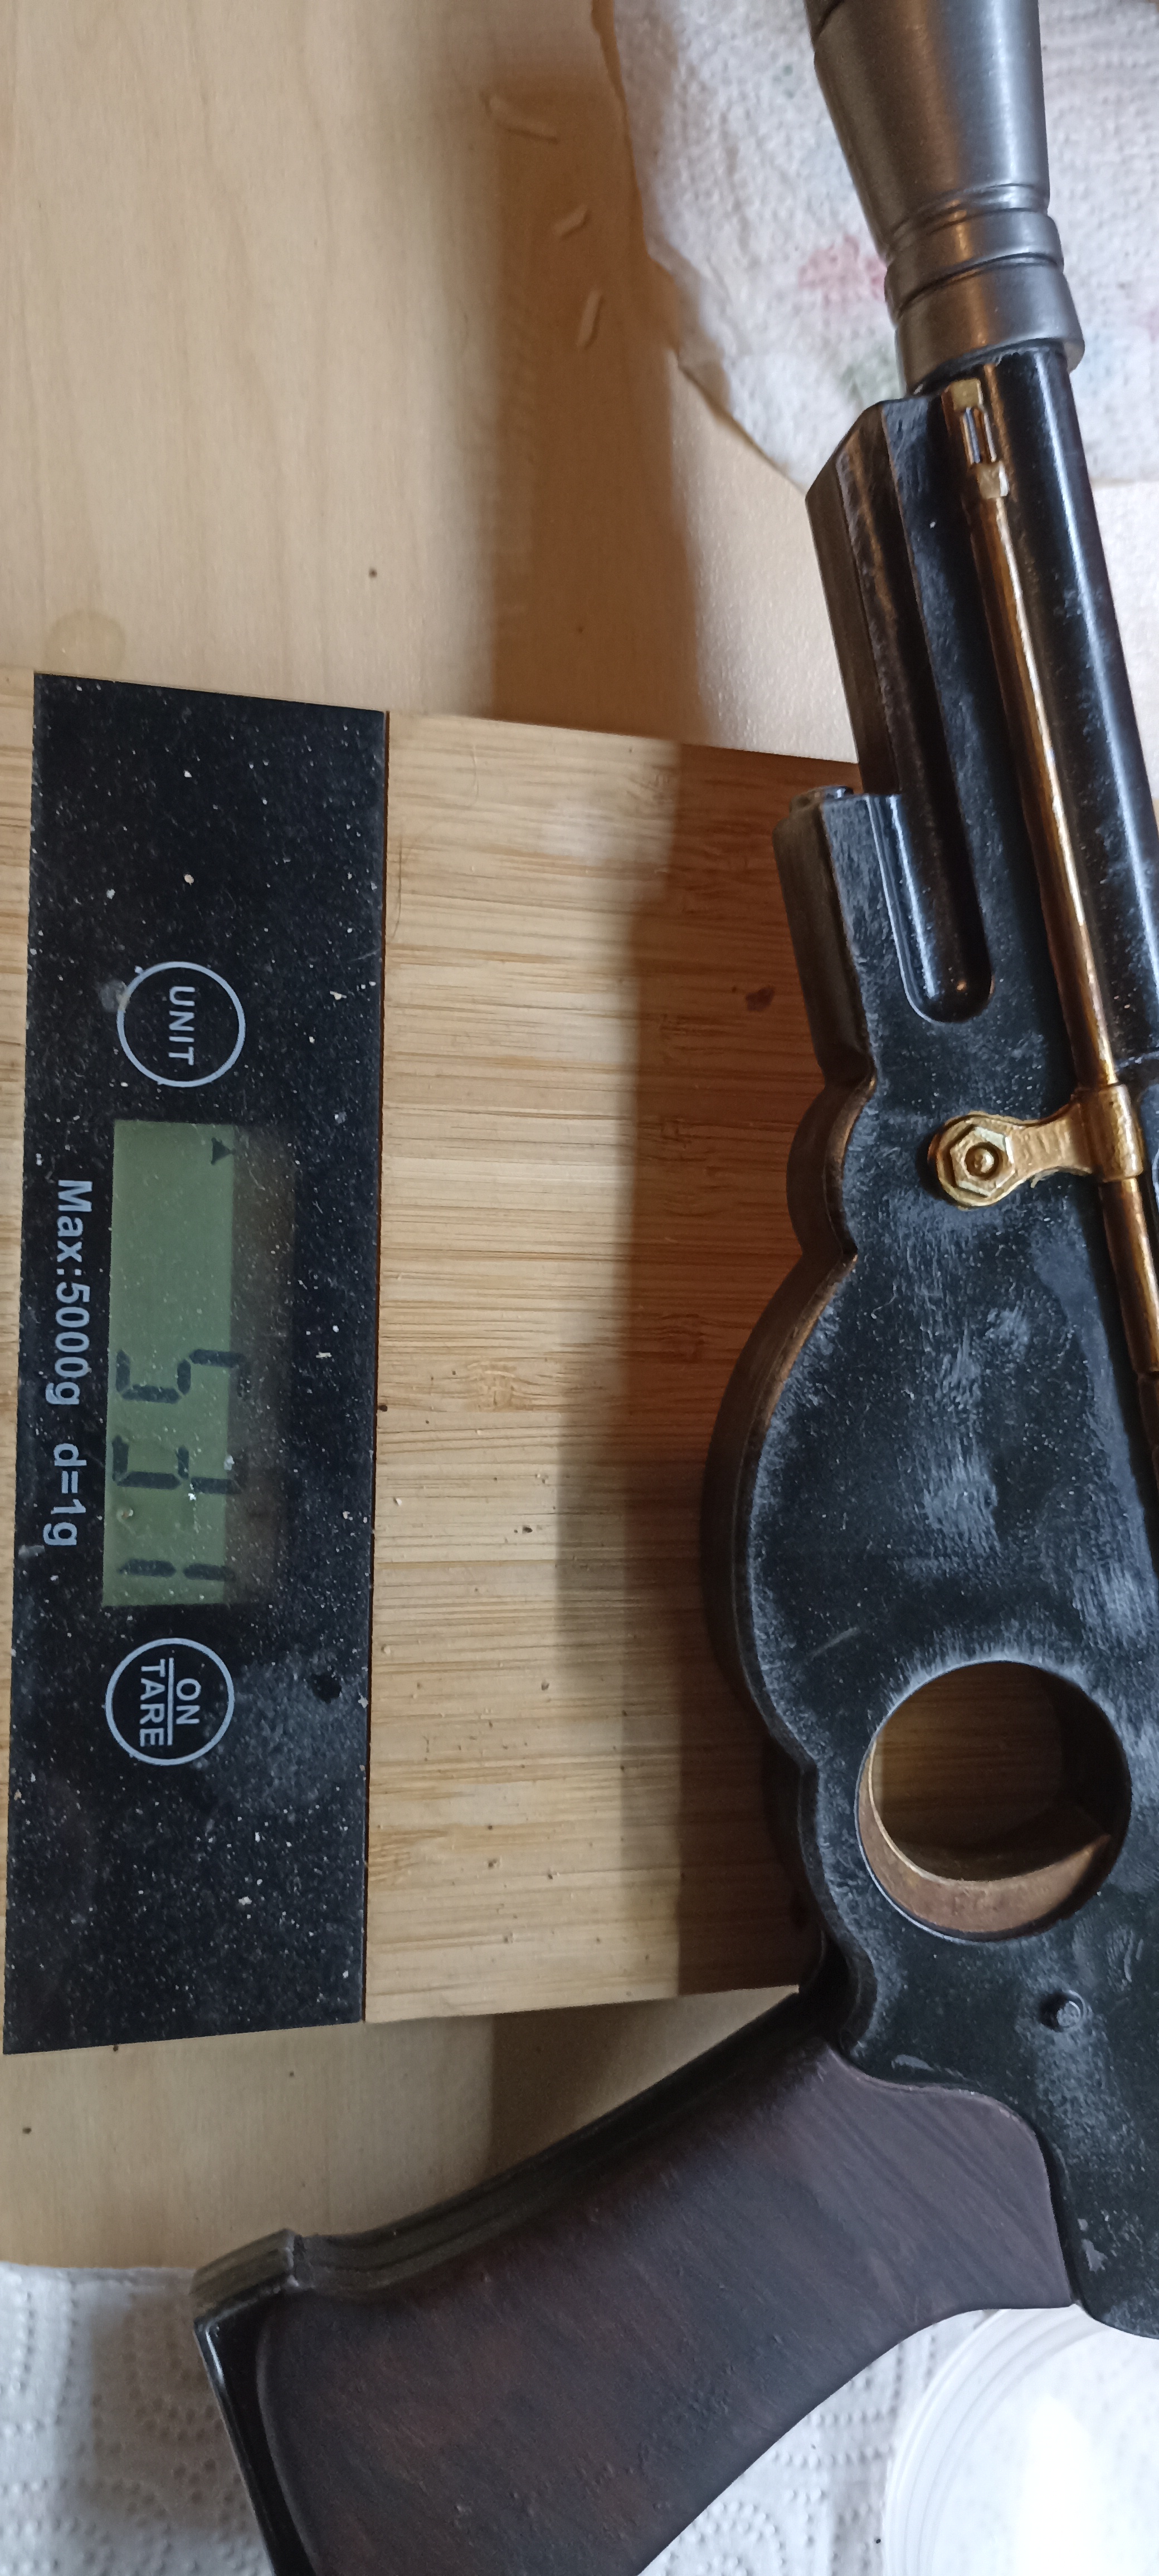 | Ora pesa giusto. (531g) |
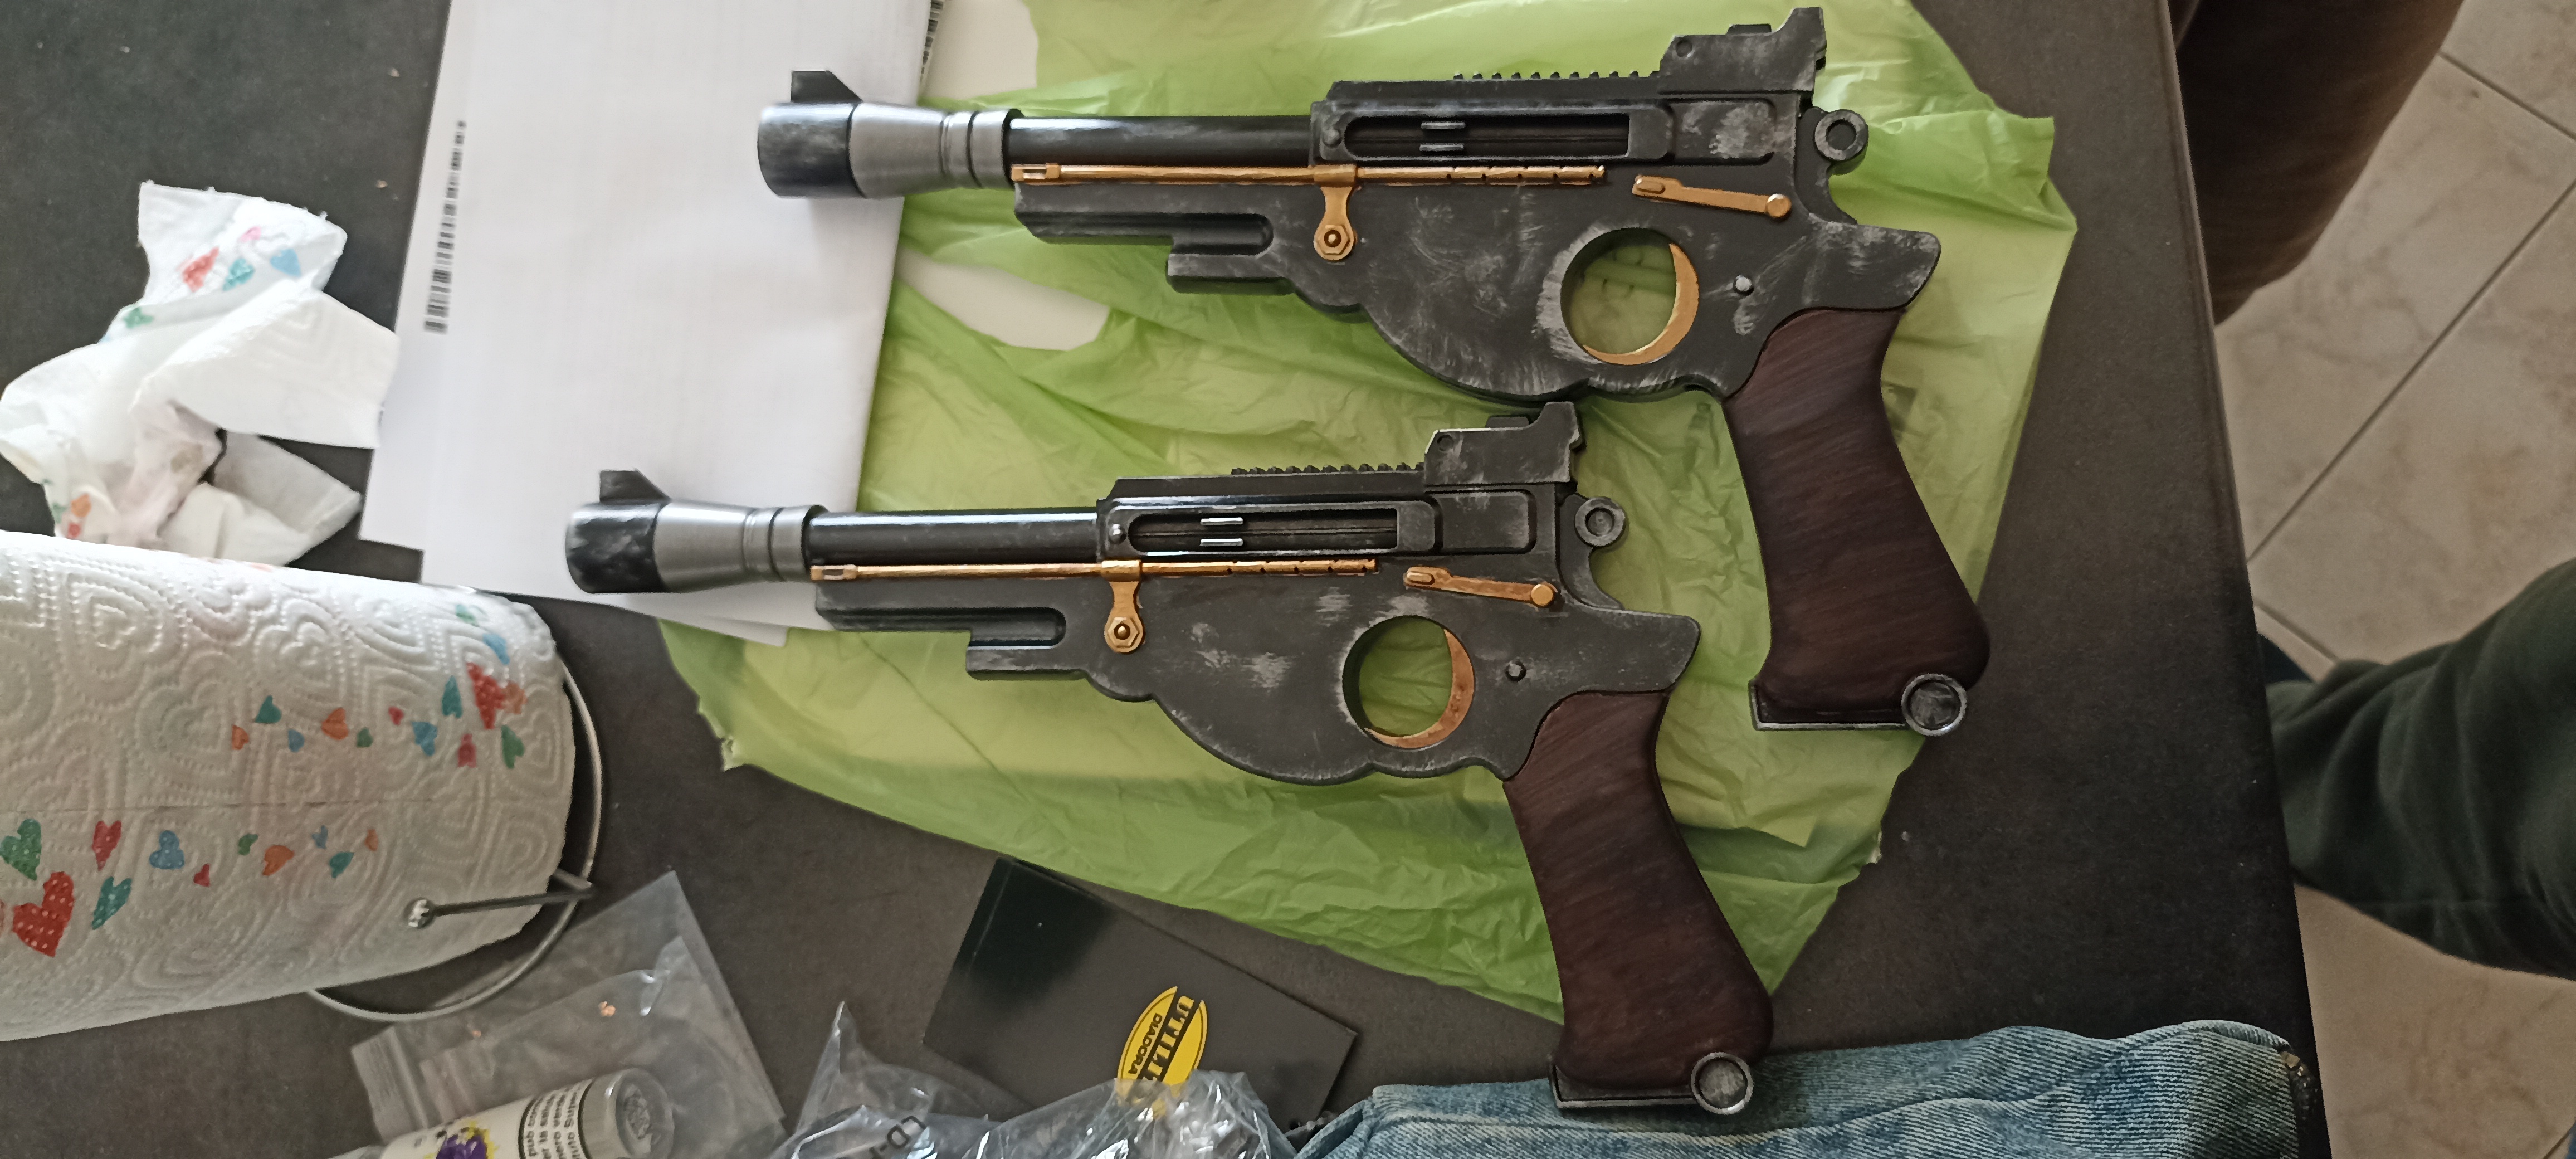 | Replicato per due blaster. |
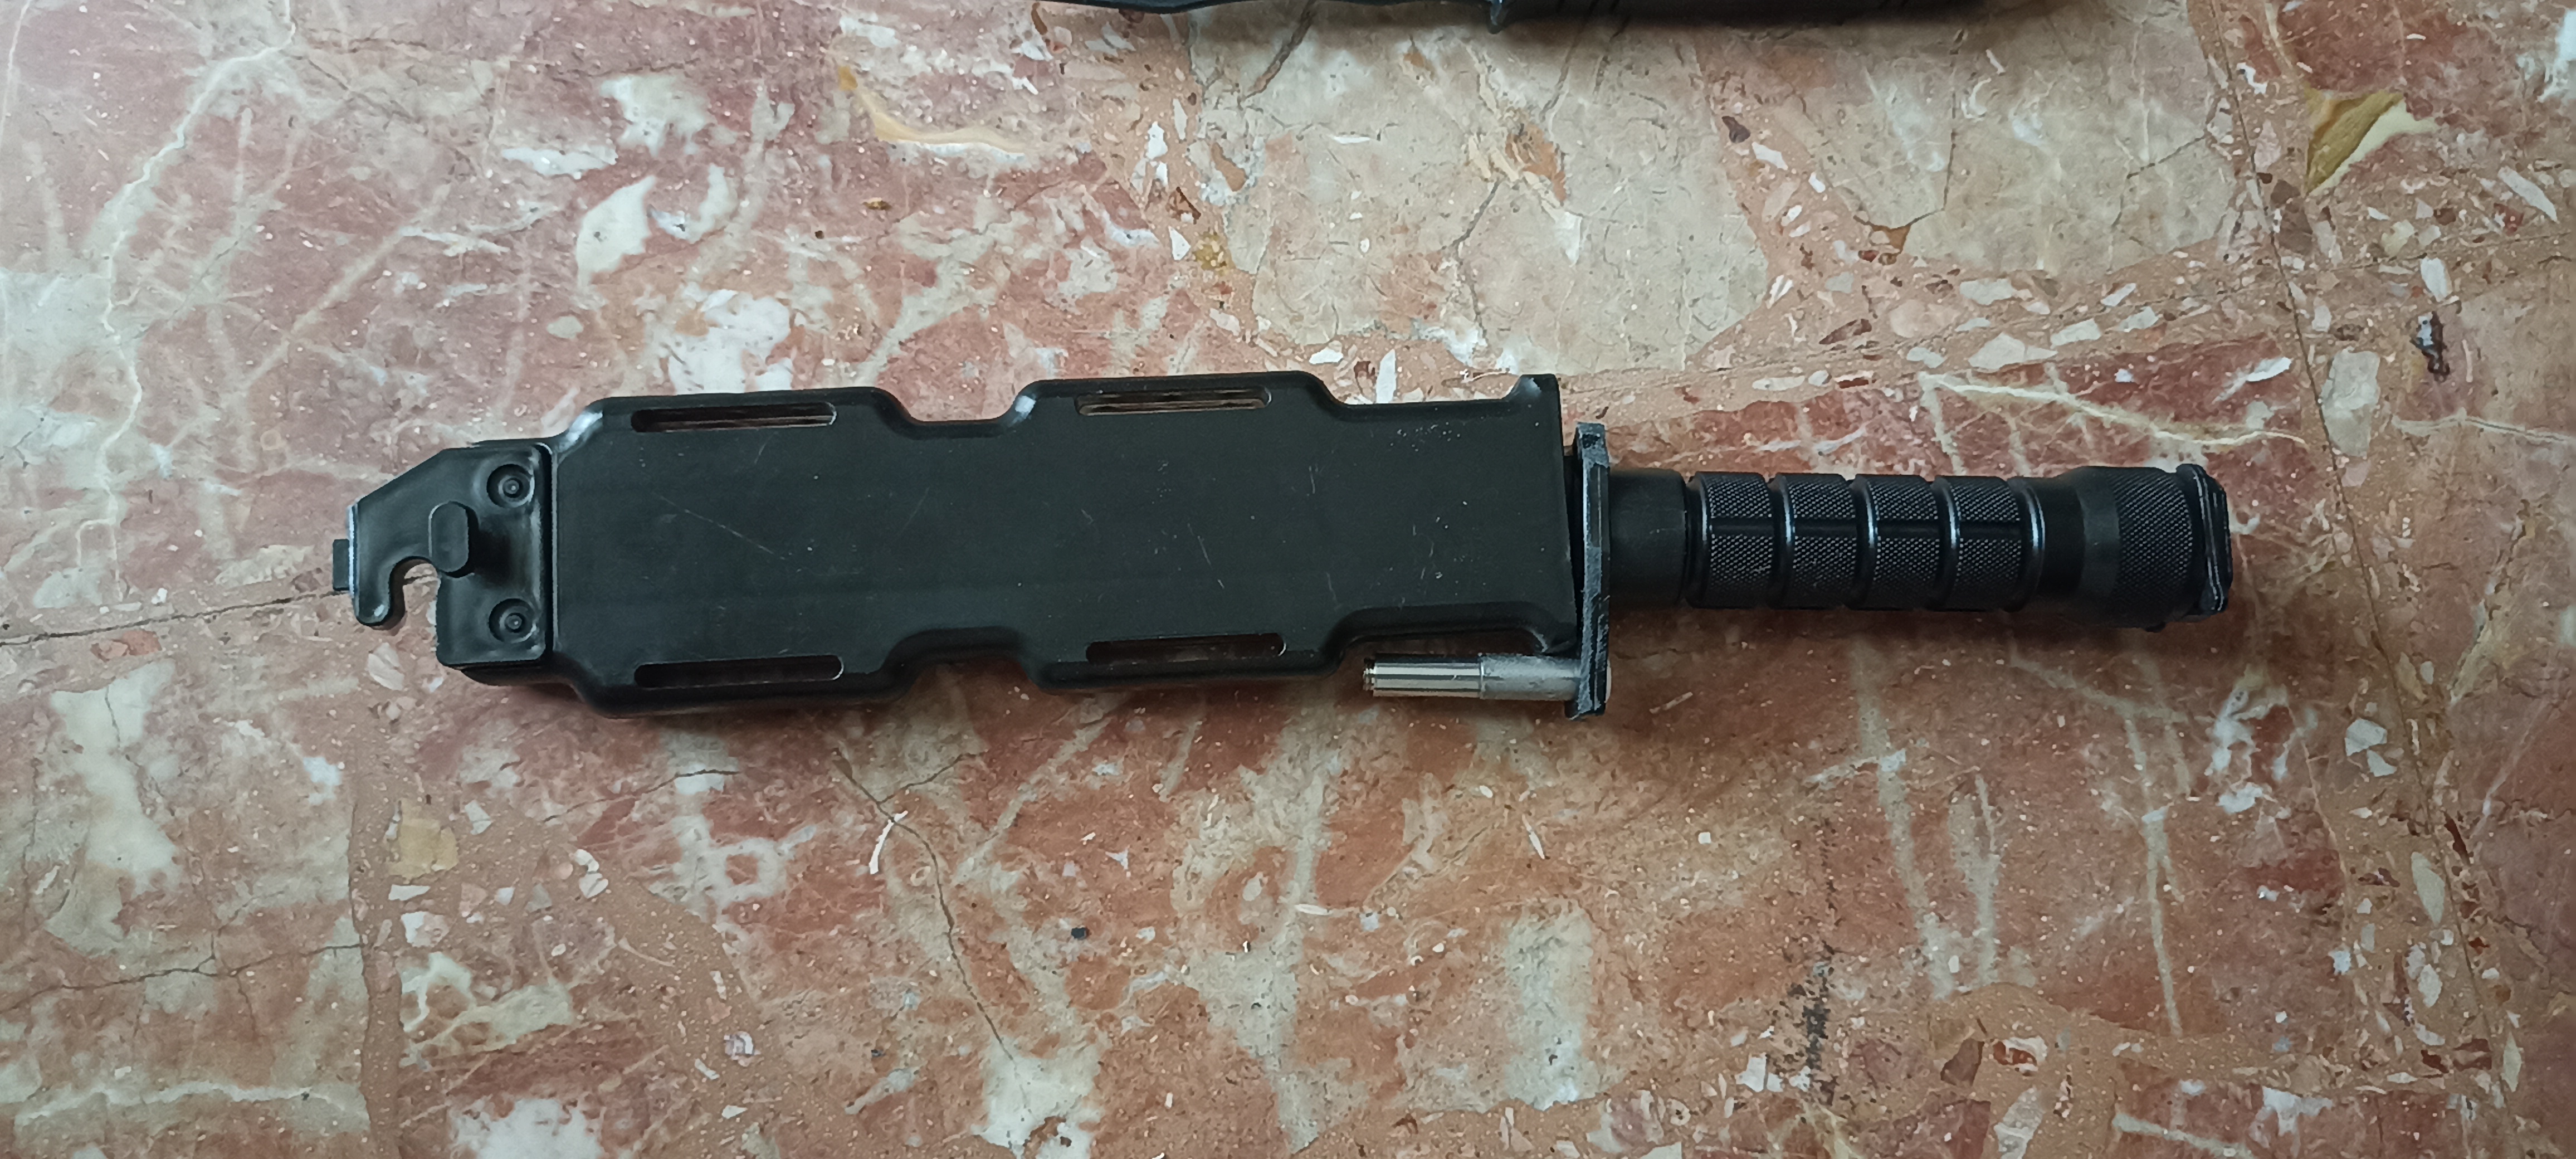
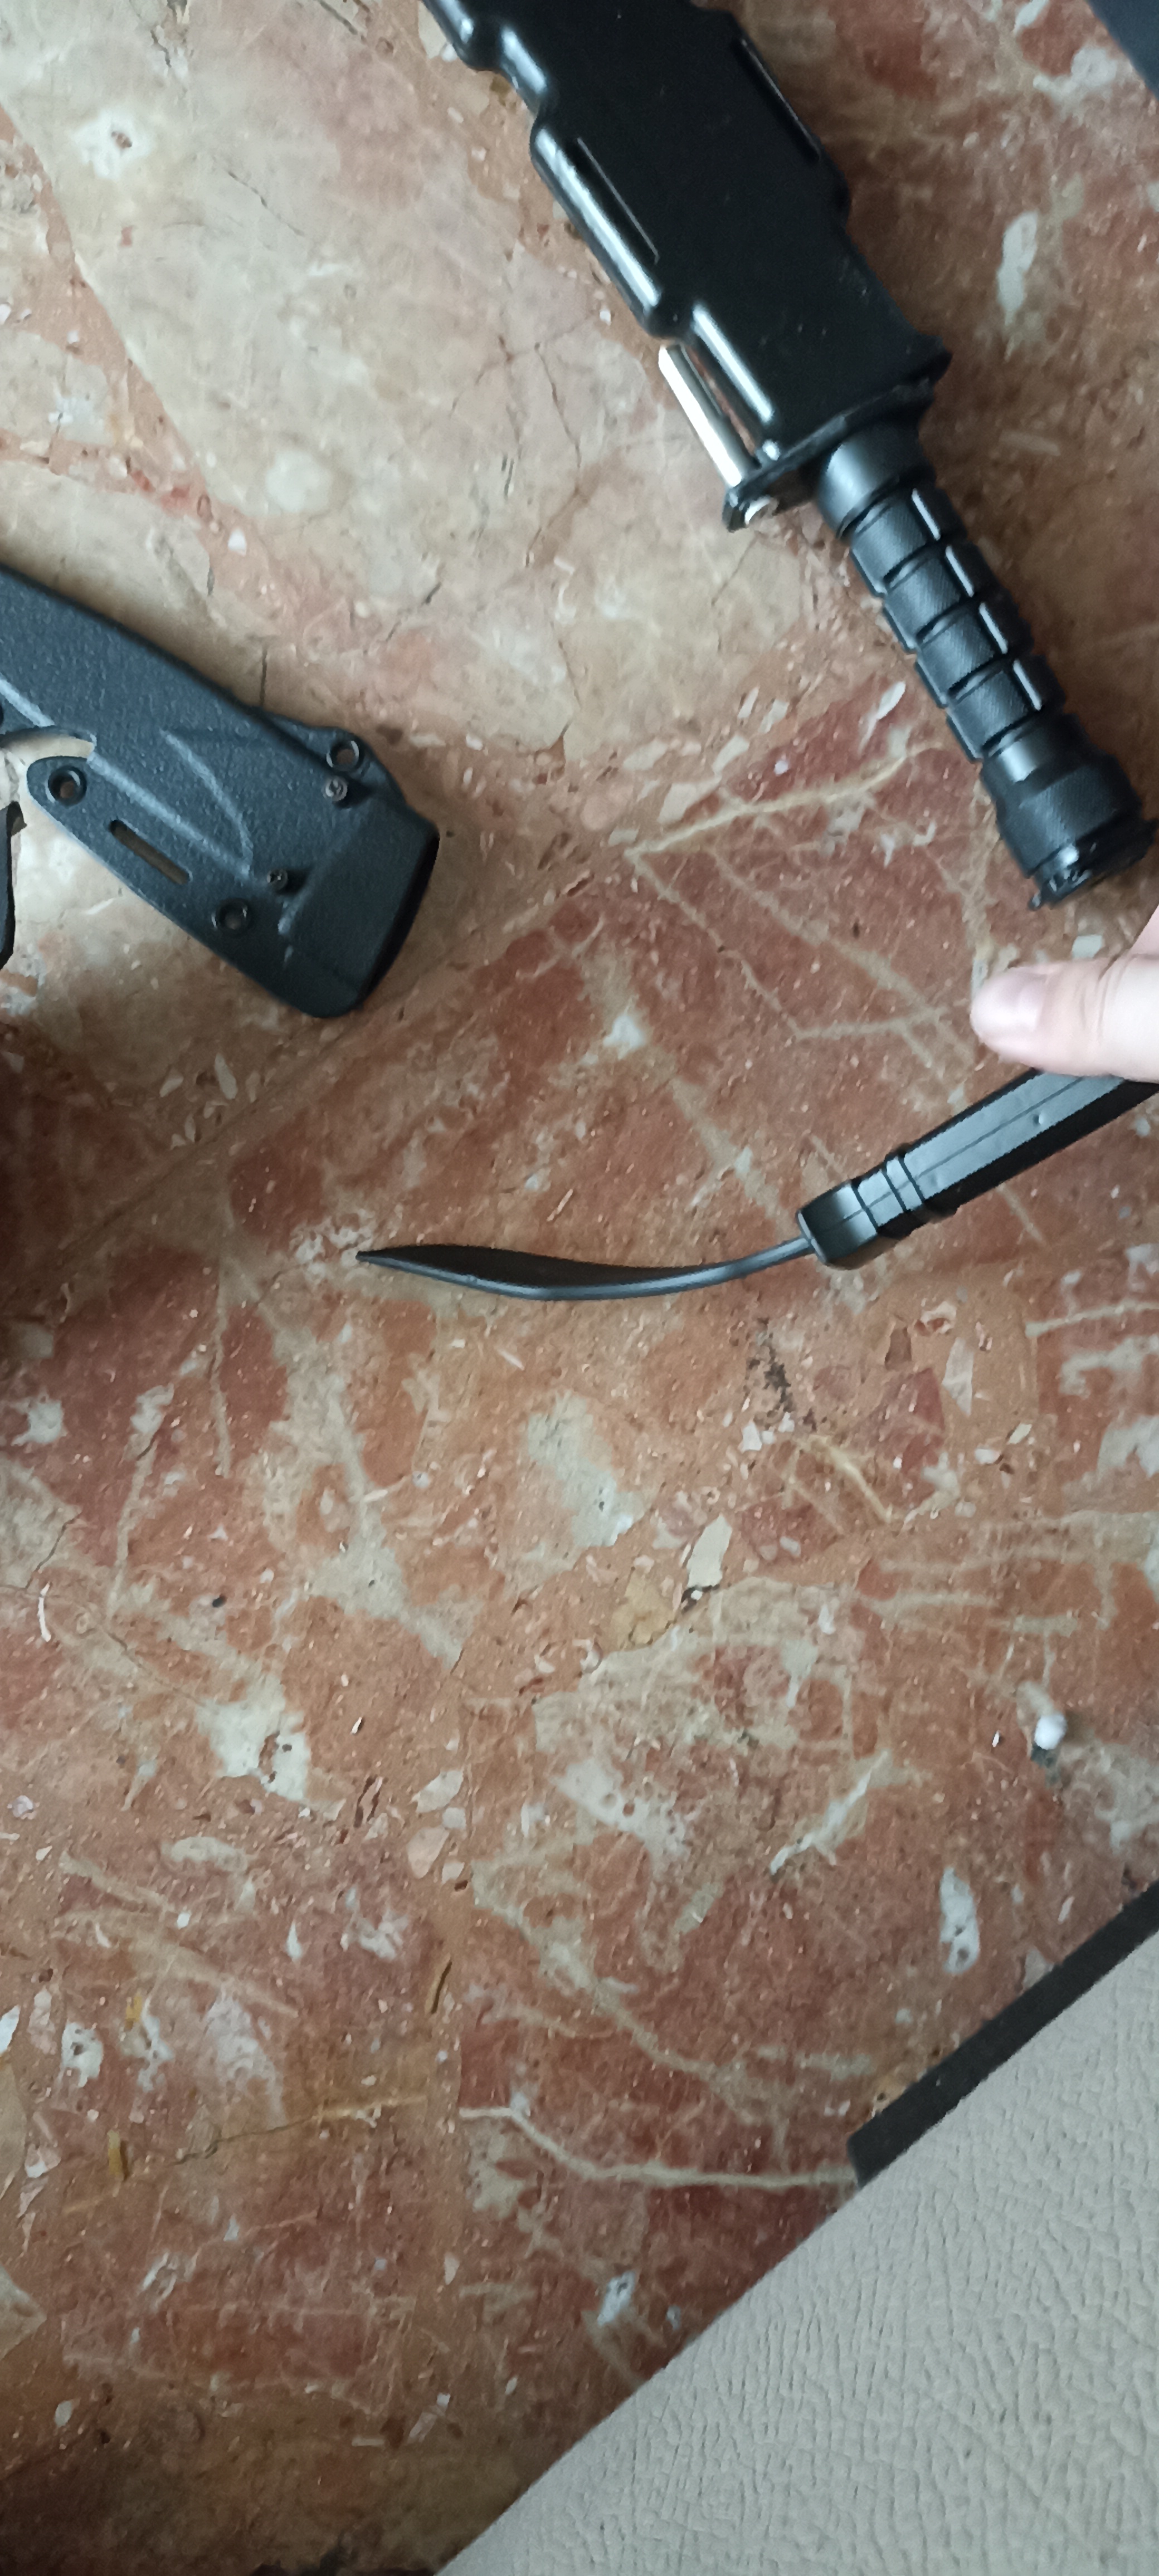
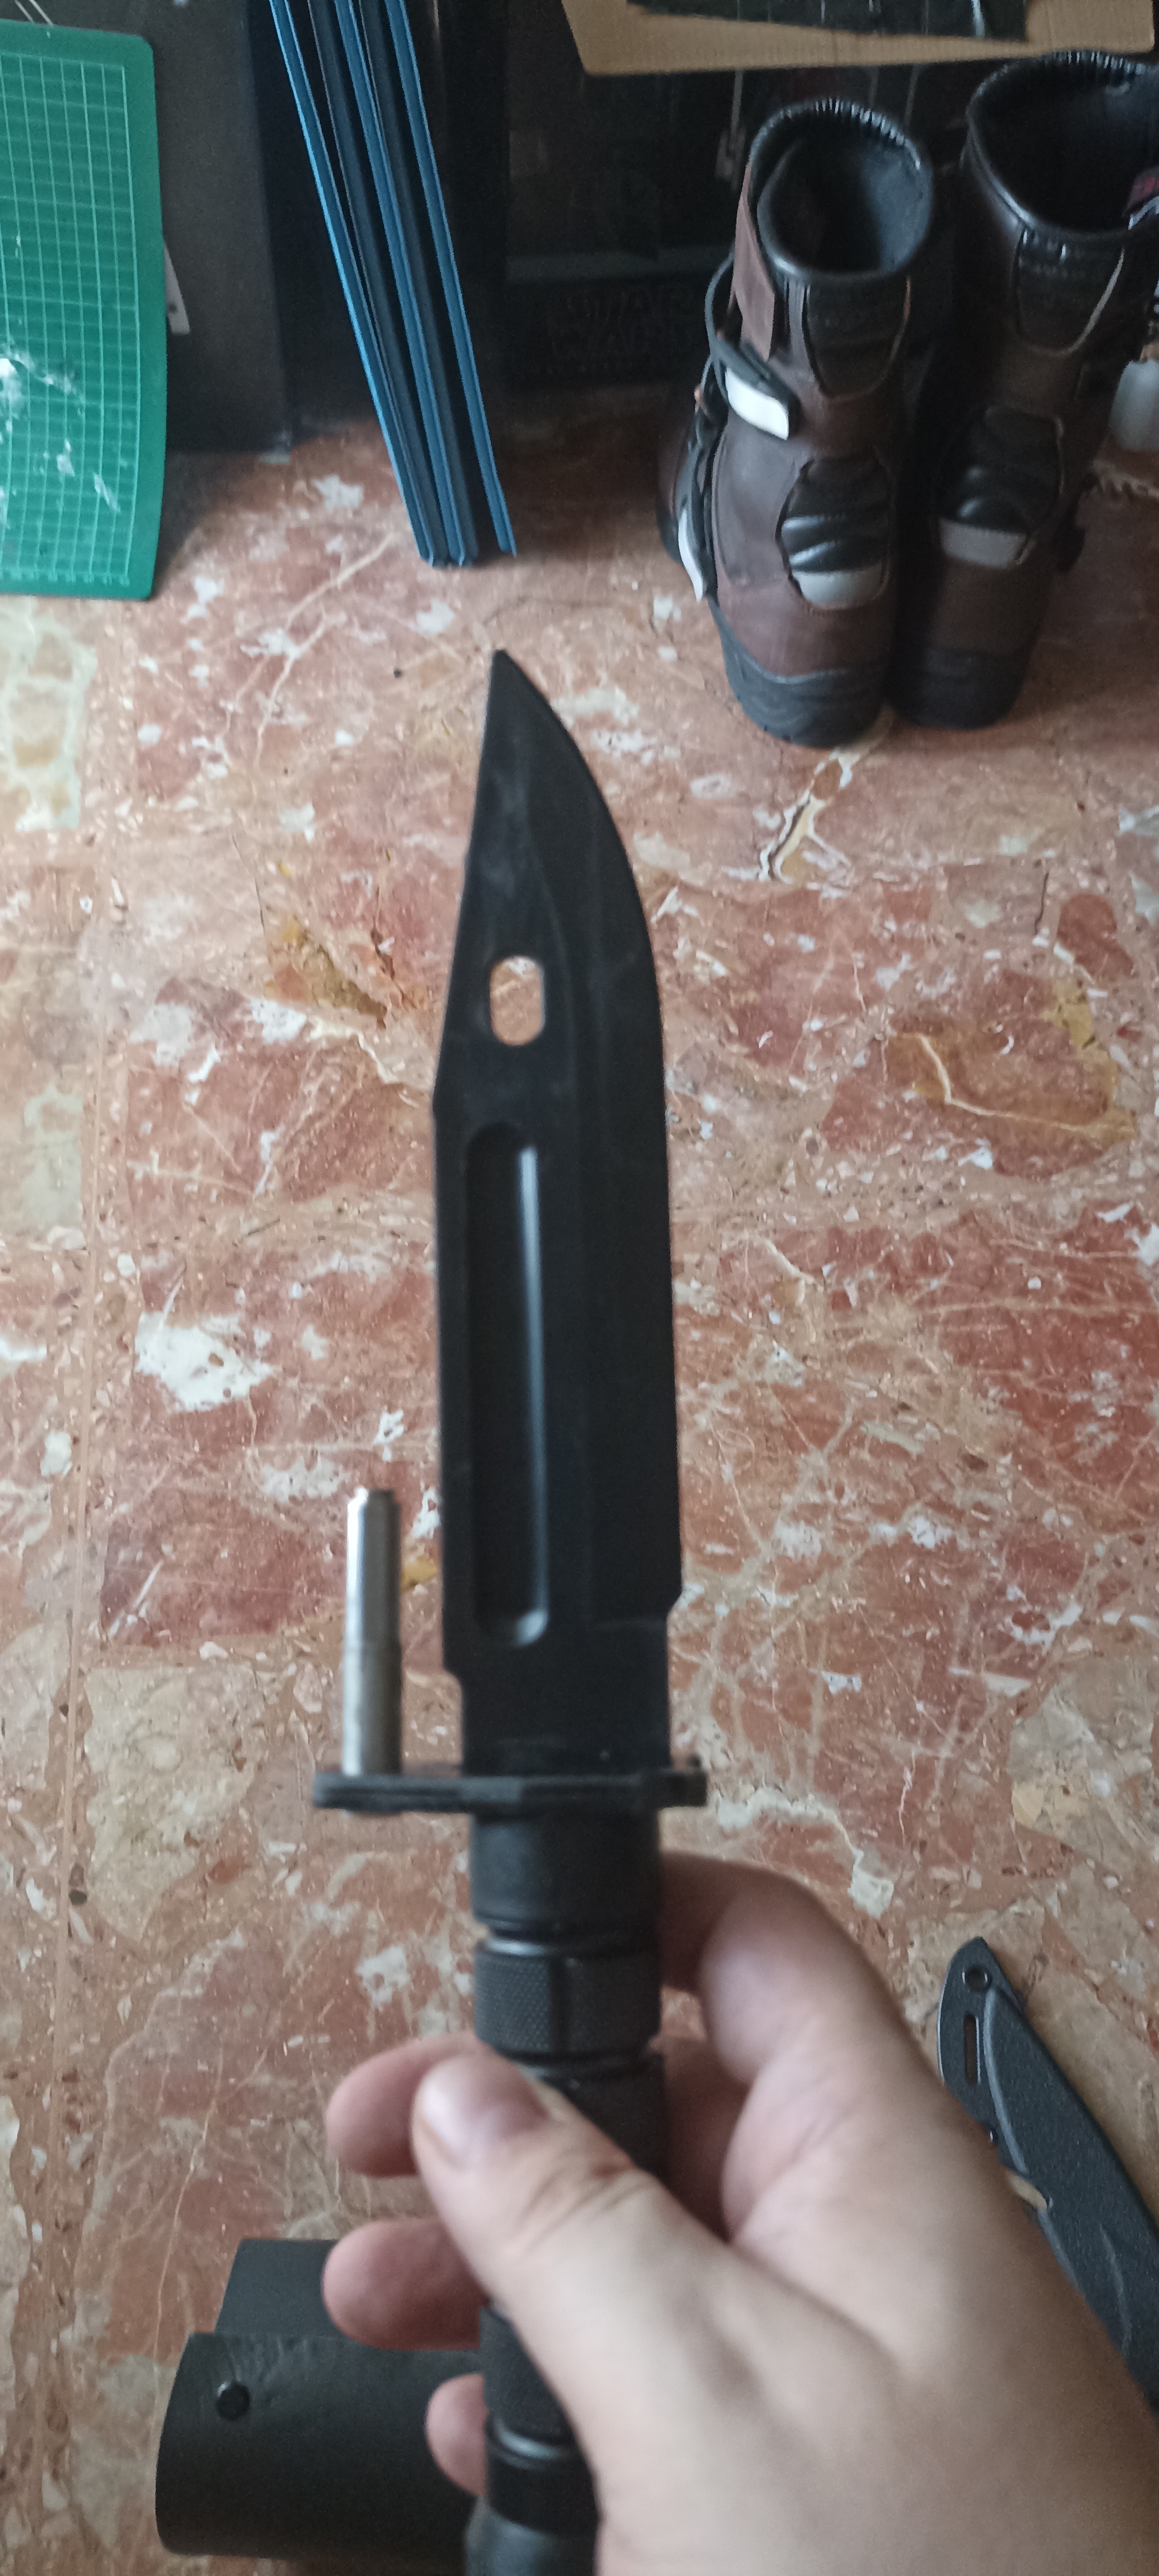
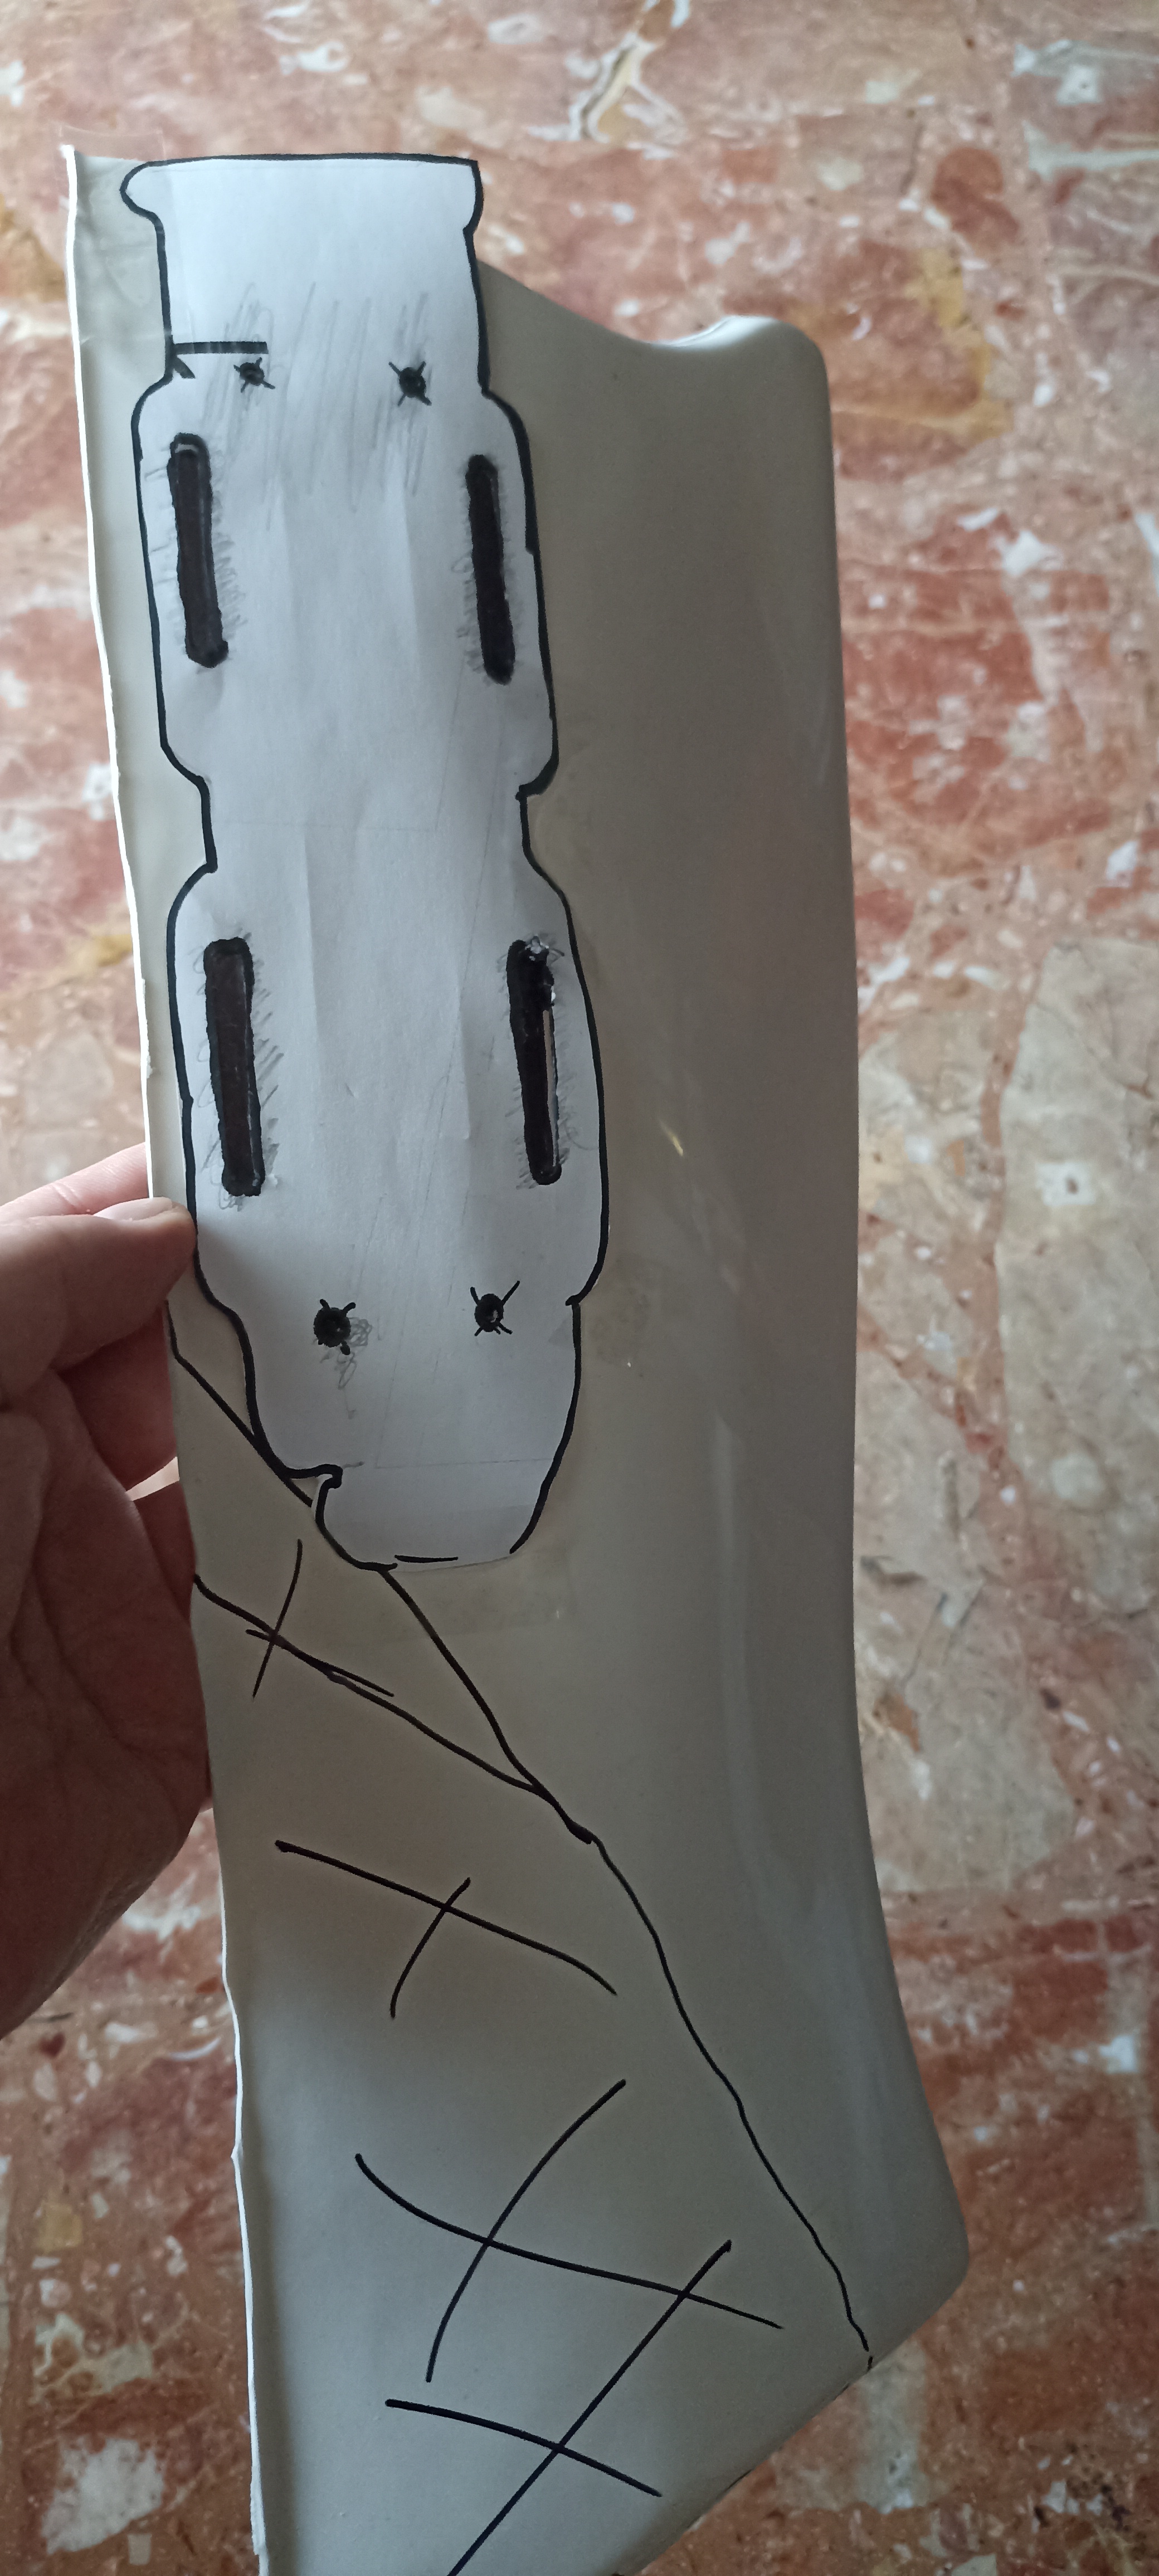
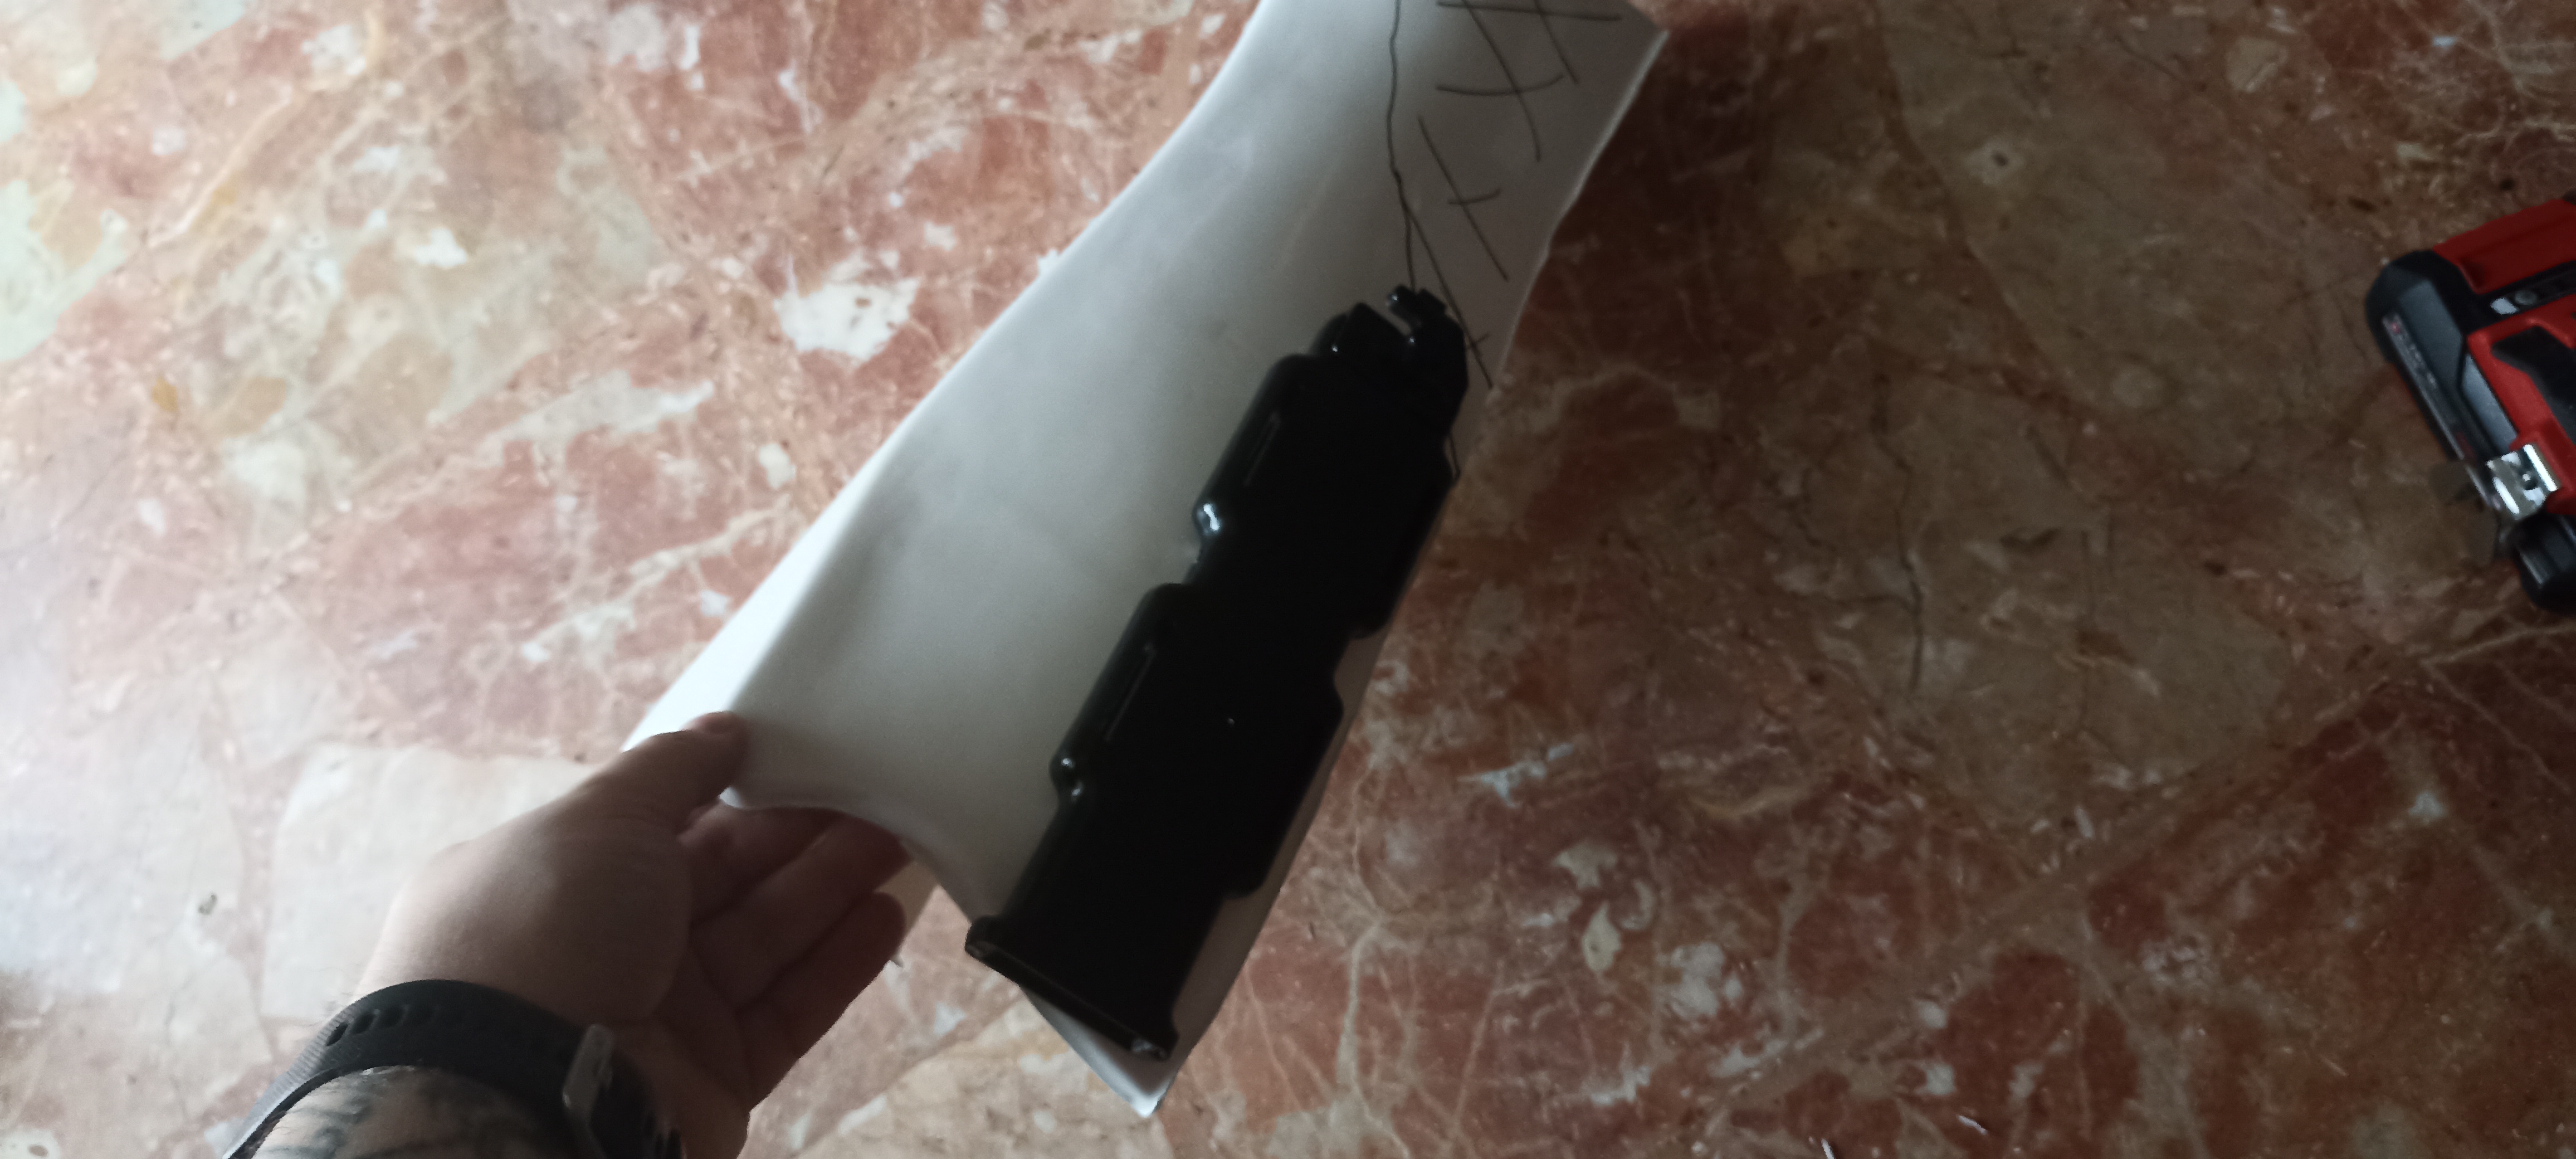
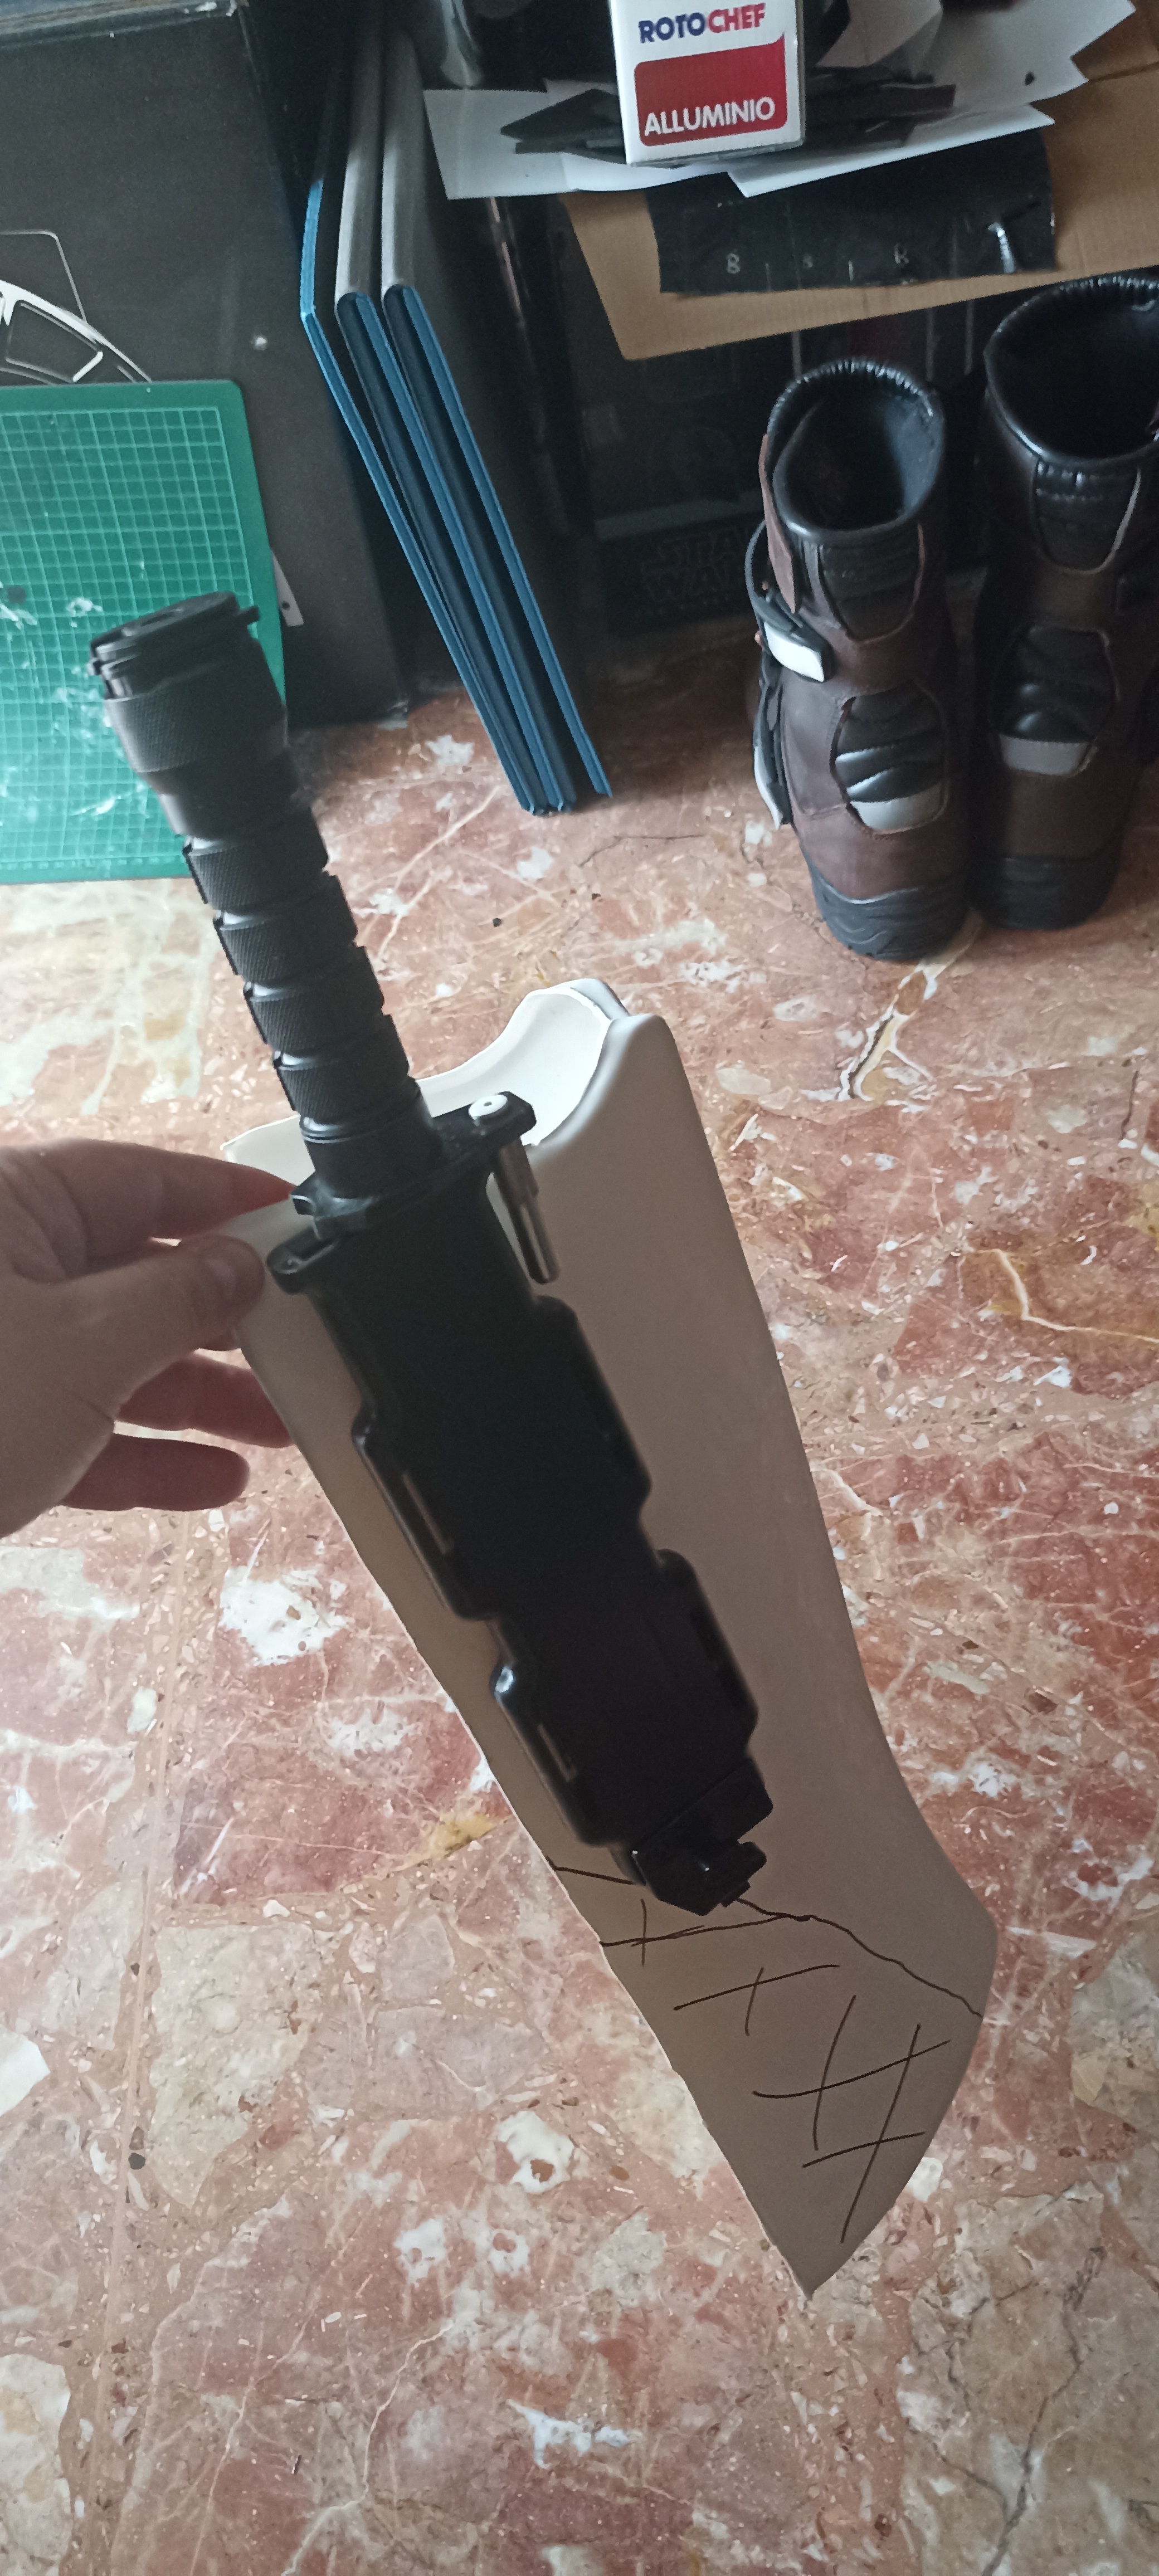
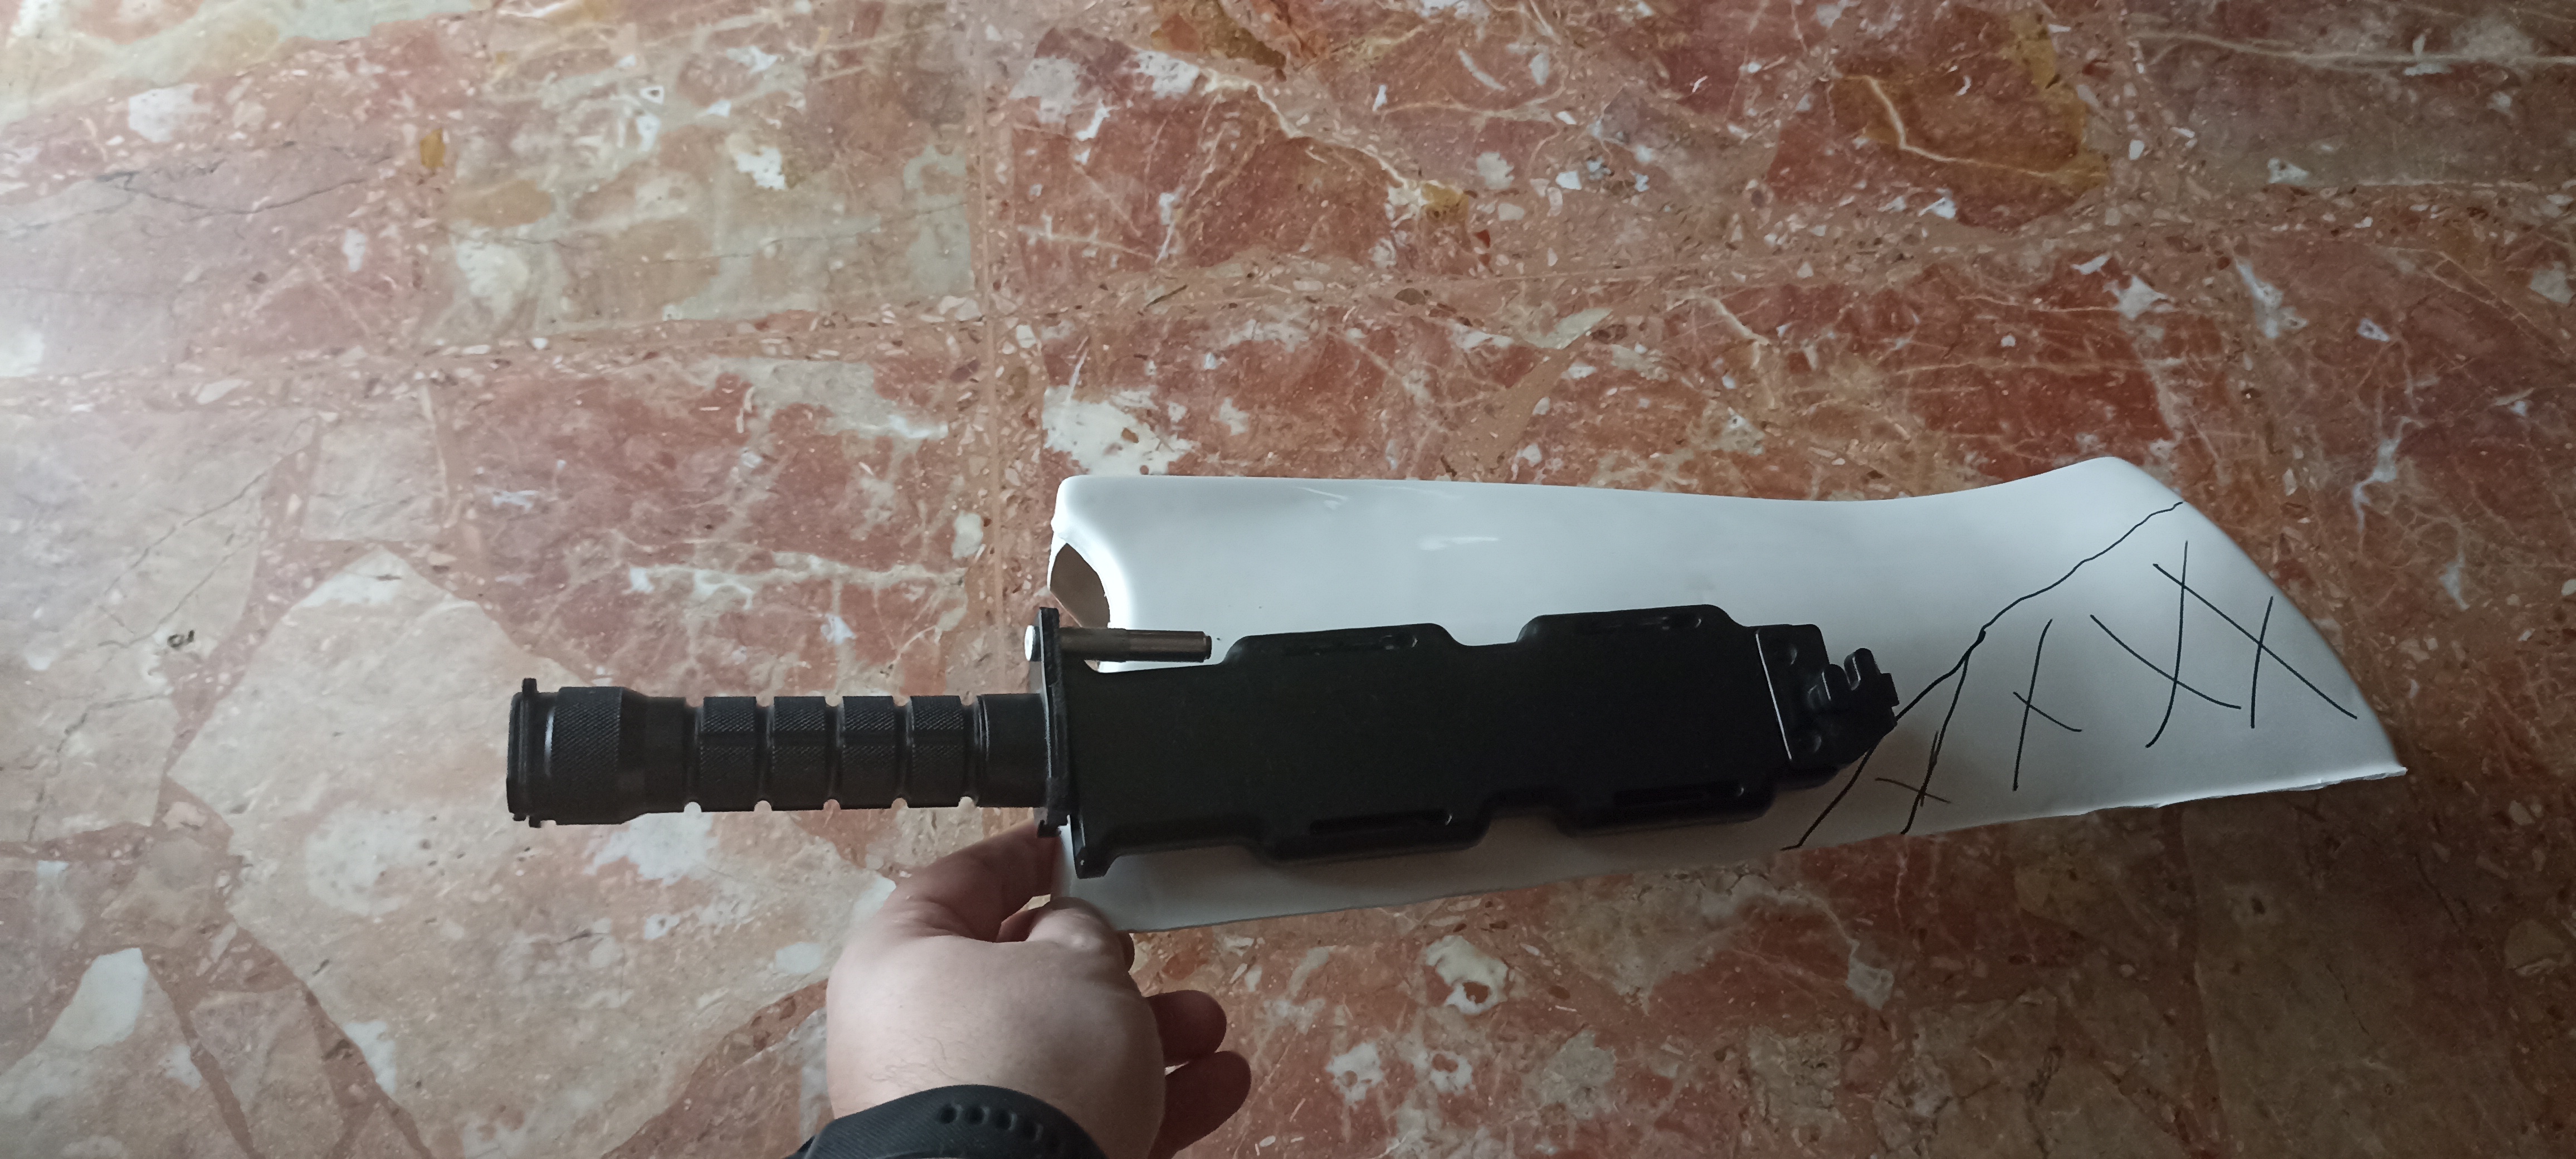
Knife01
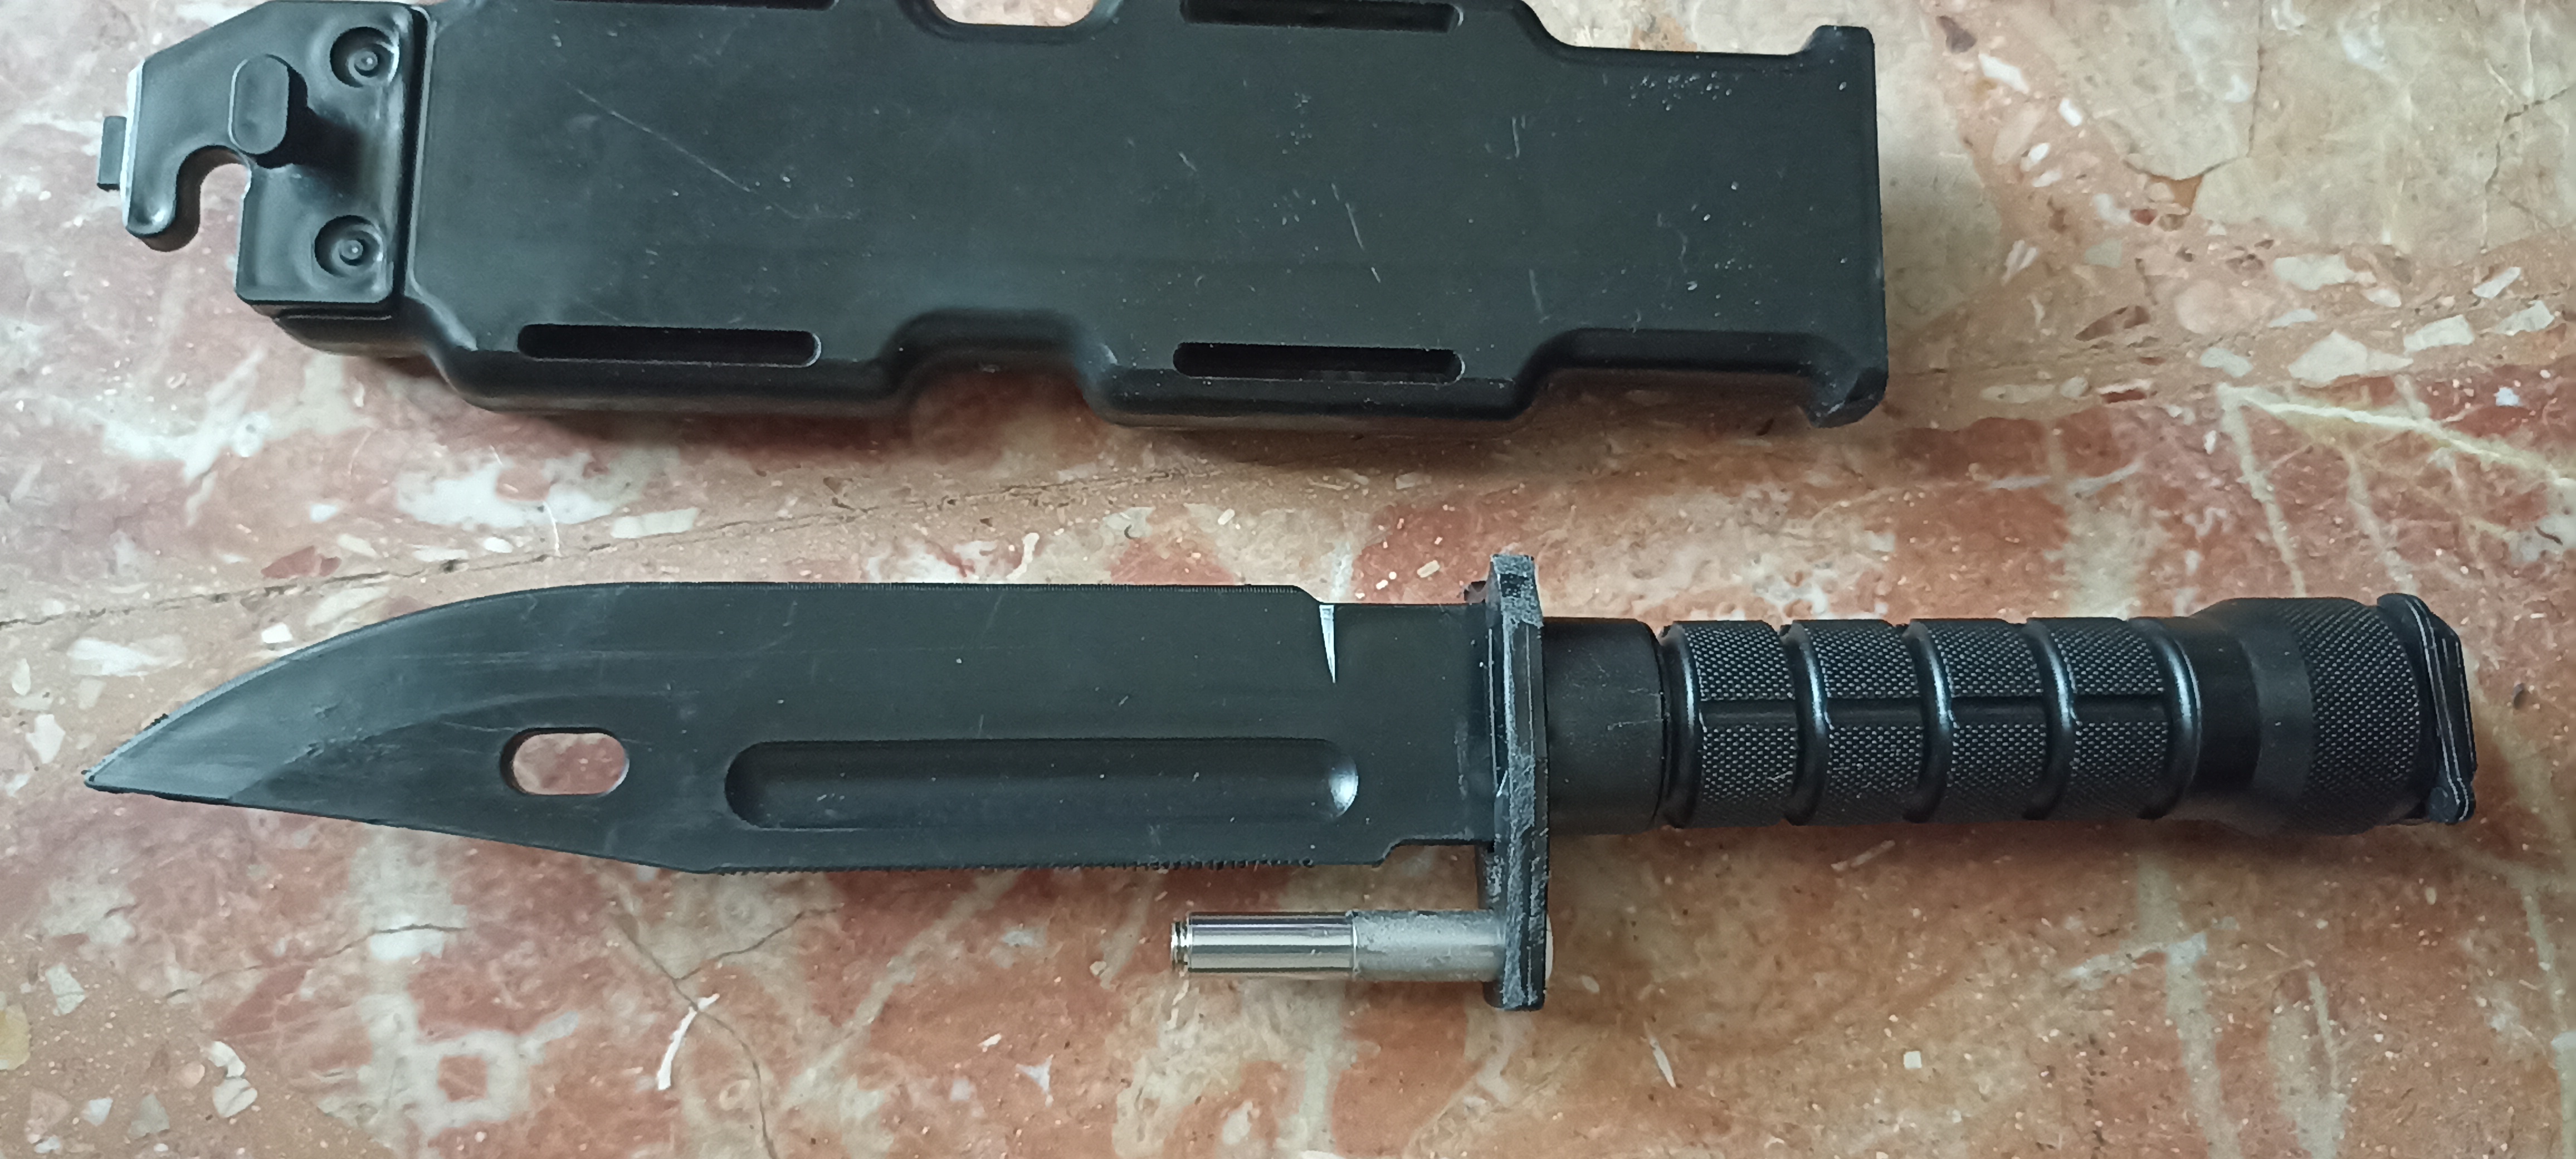 | Coltello giocattolo di partenza. |
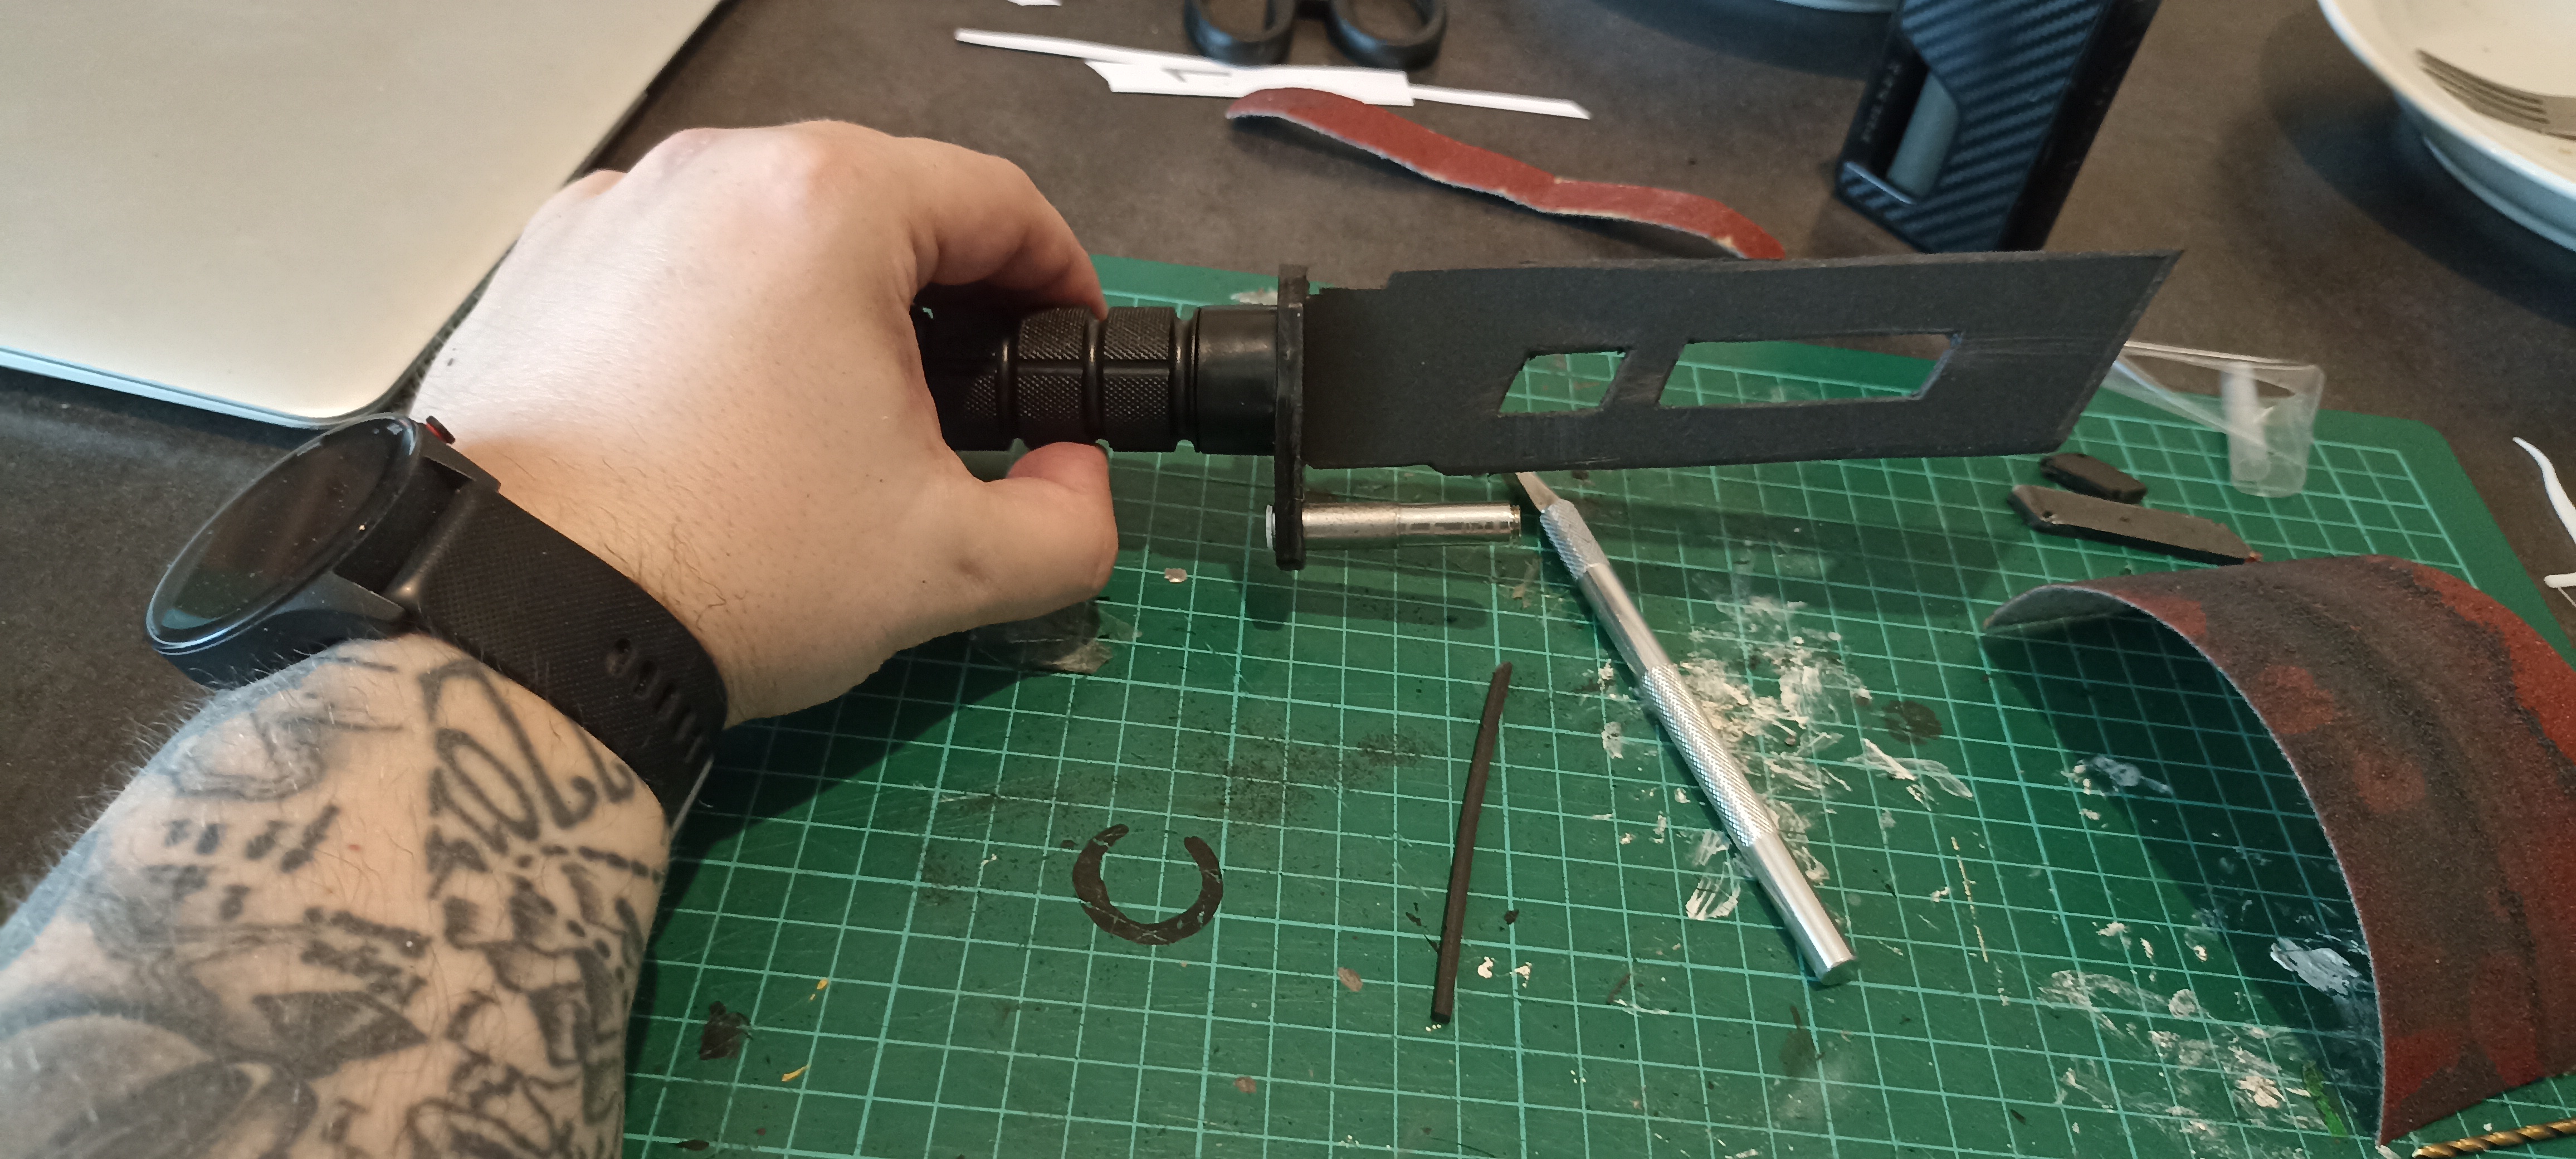
 | Test chiusura con aggiunta grebbles, atomizzatore e-sig. |
 | Lama in gomma flessibile. |
 | Test con grabbles, atomizzatore e-cig. |
 | Dima per custodia su stinco. |
 | Fatto buchi per fissaggio, sia con viti che fettuccia. |
 | Test per vedere se regge con coltello infilato. |
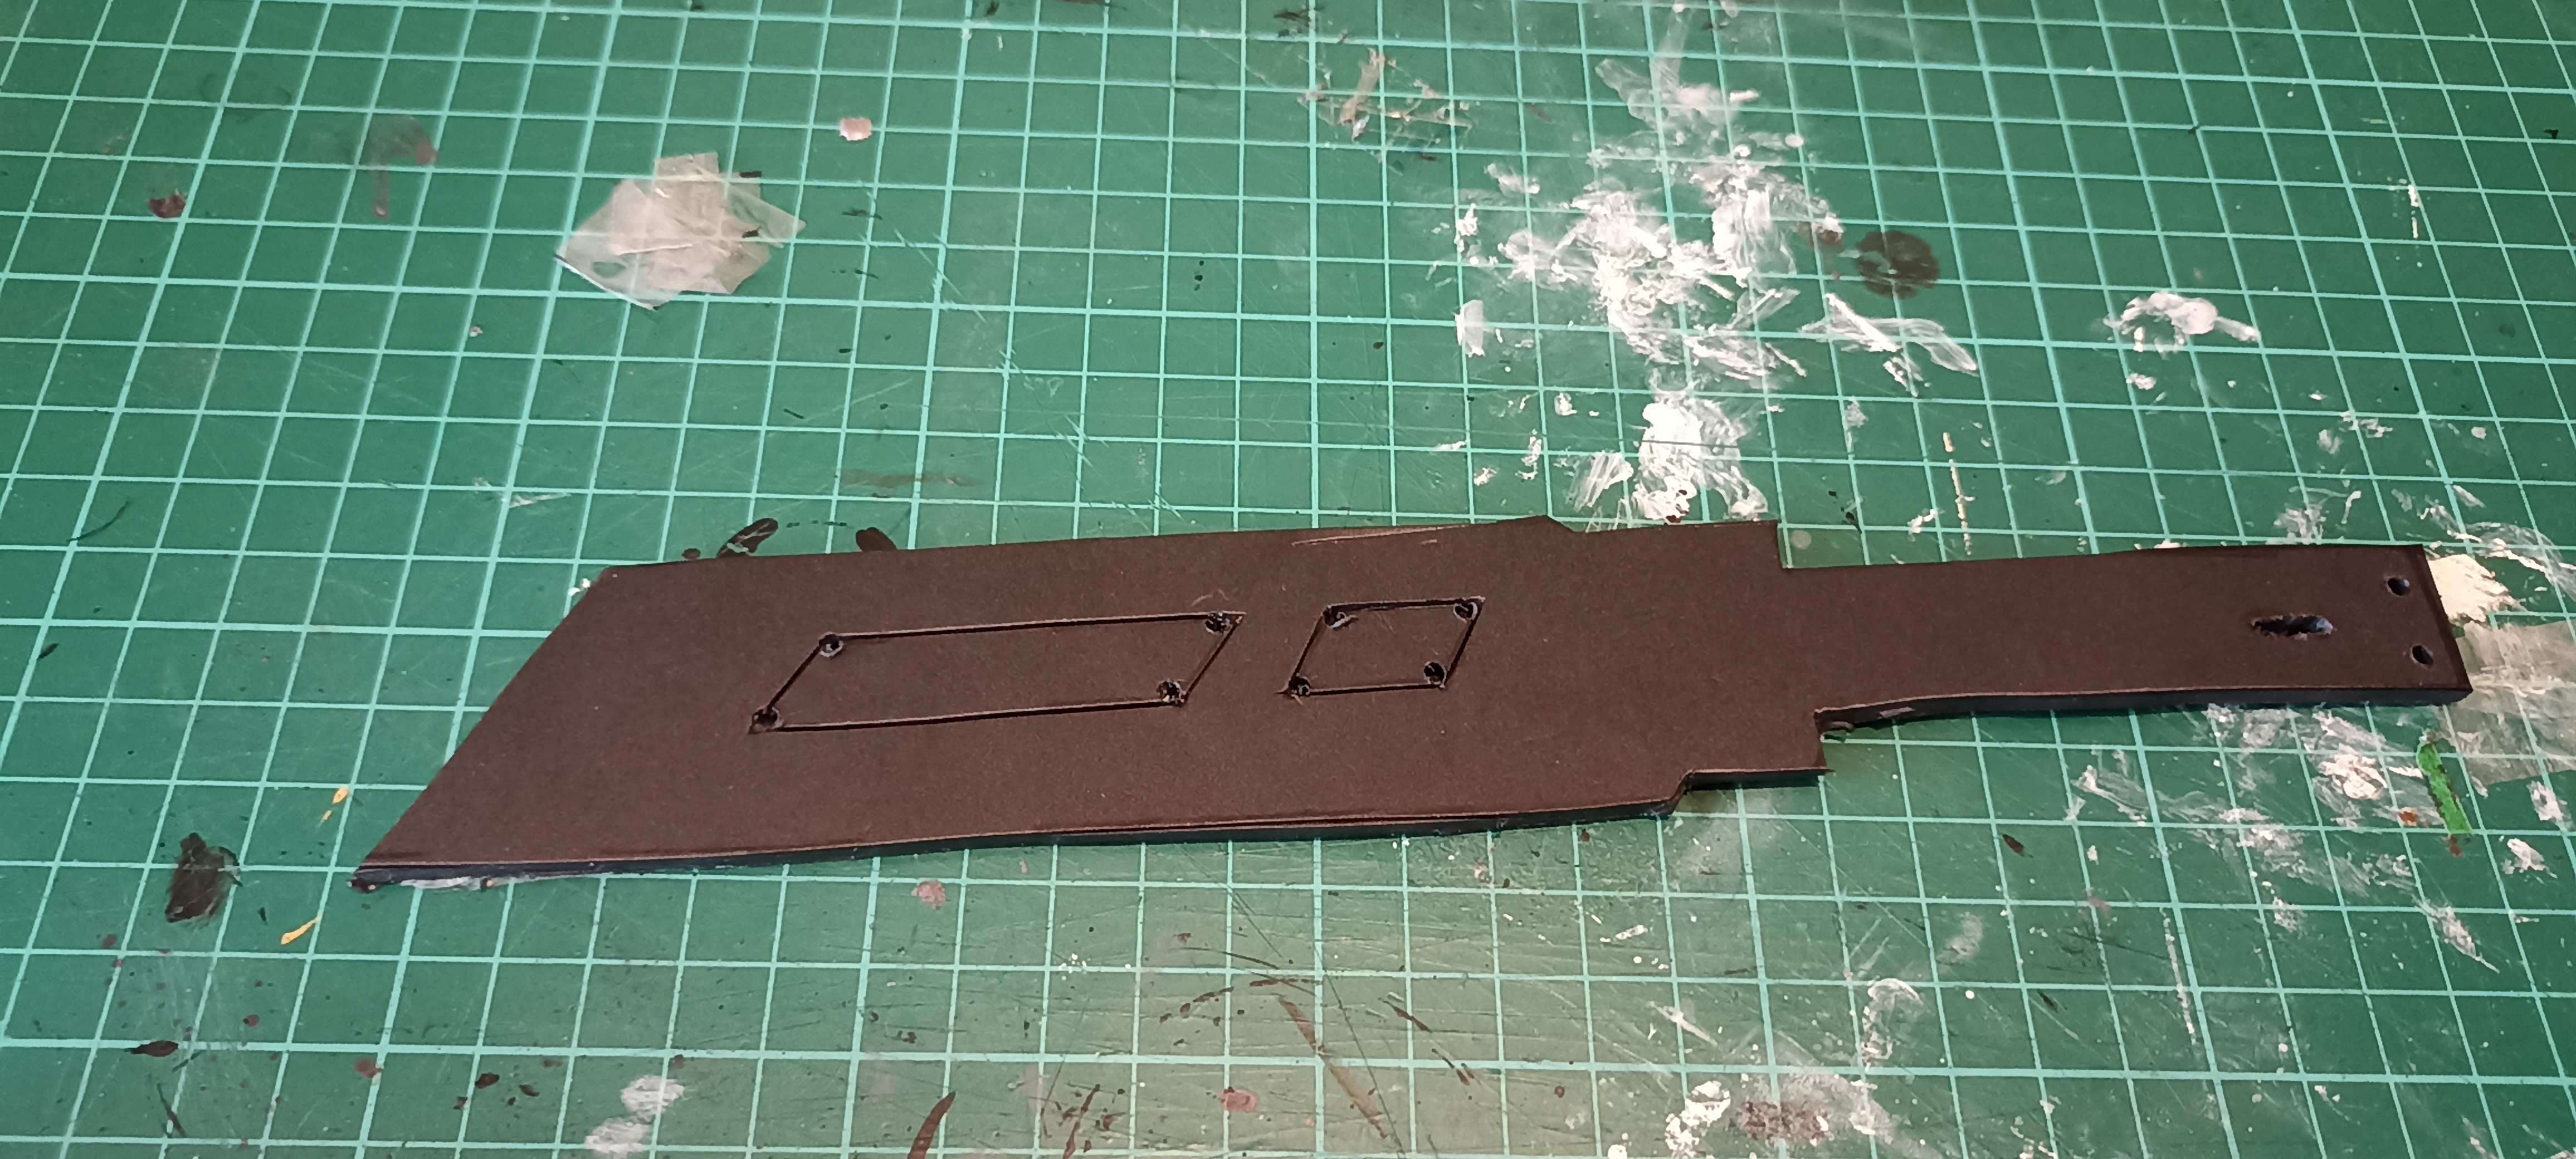 | Lama troppo "earthlike" ricreo una nuova lama da zero e a mano partendo da foglio di polistyrene. |
 | Lama finita e montata su impugnatura. |
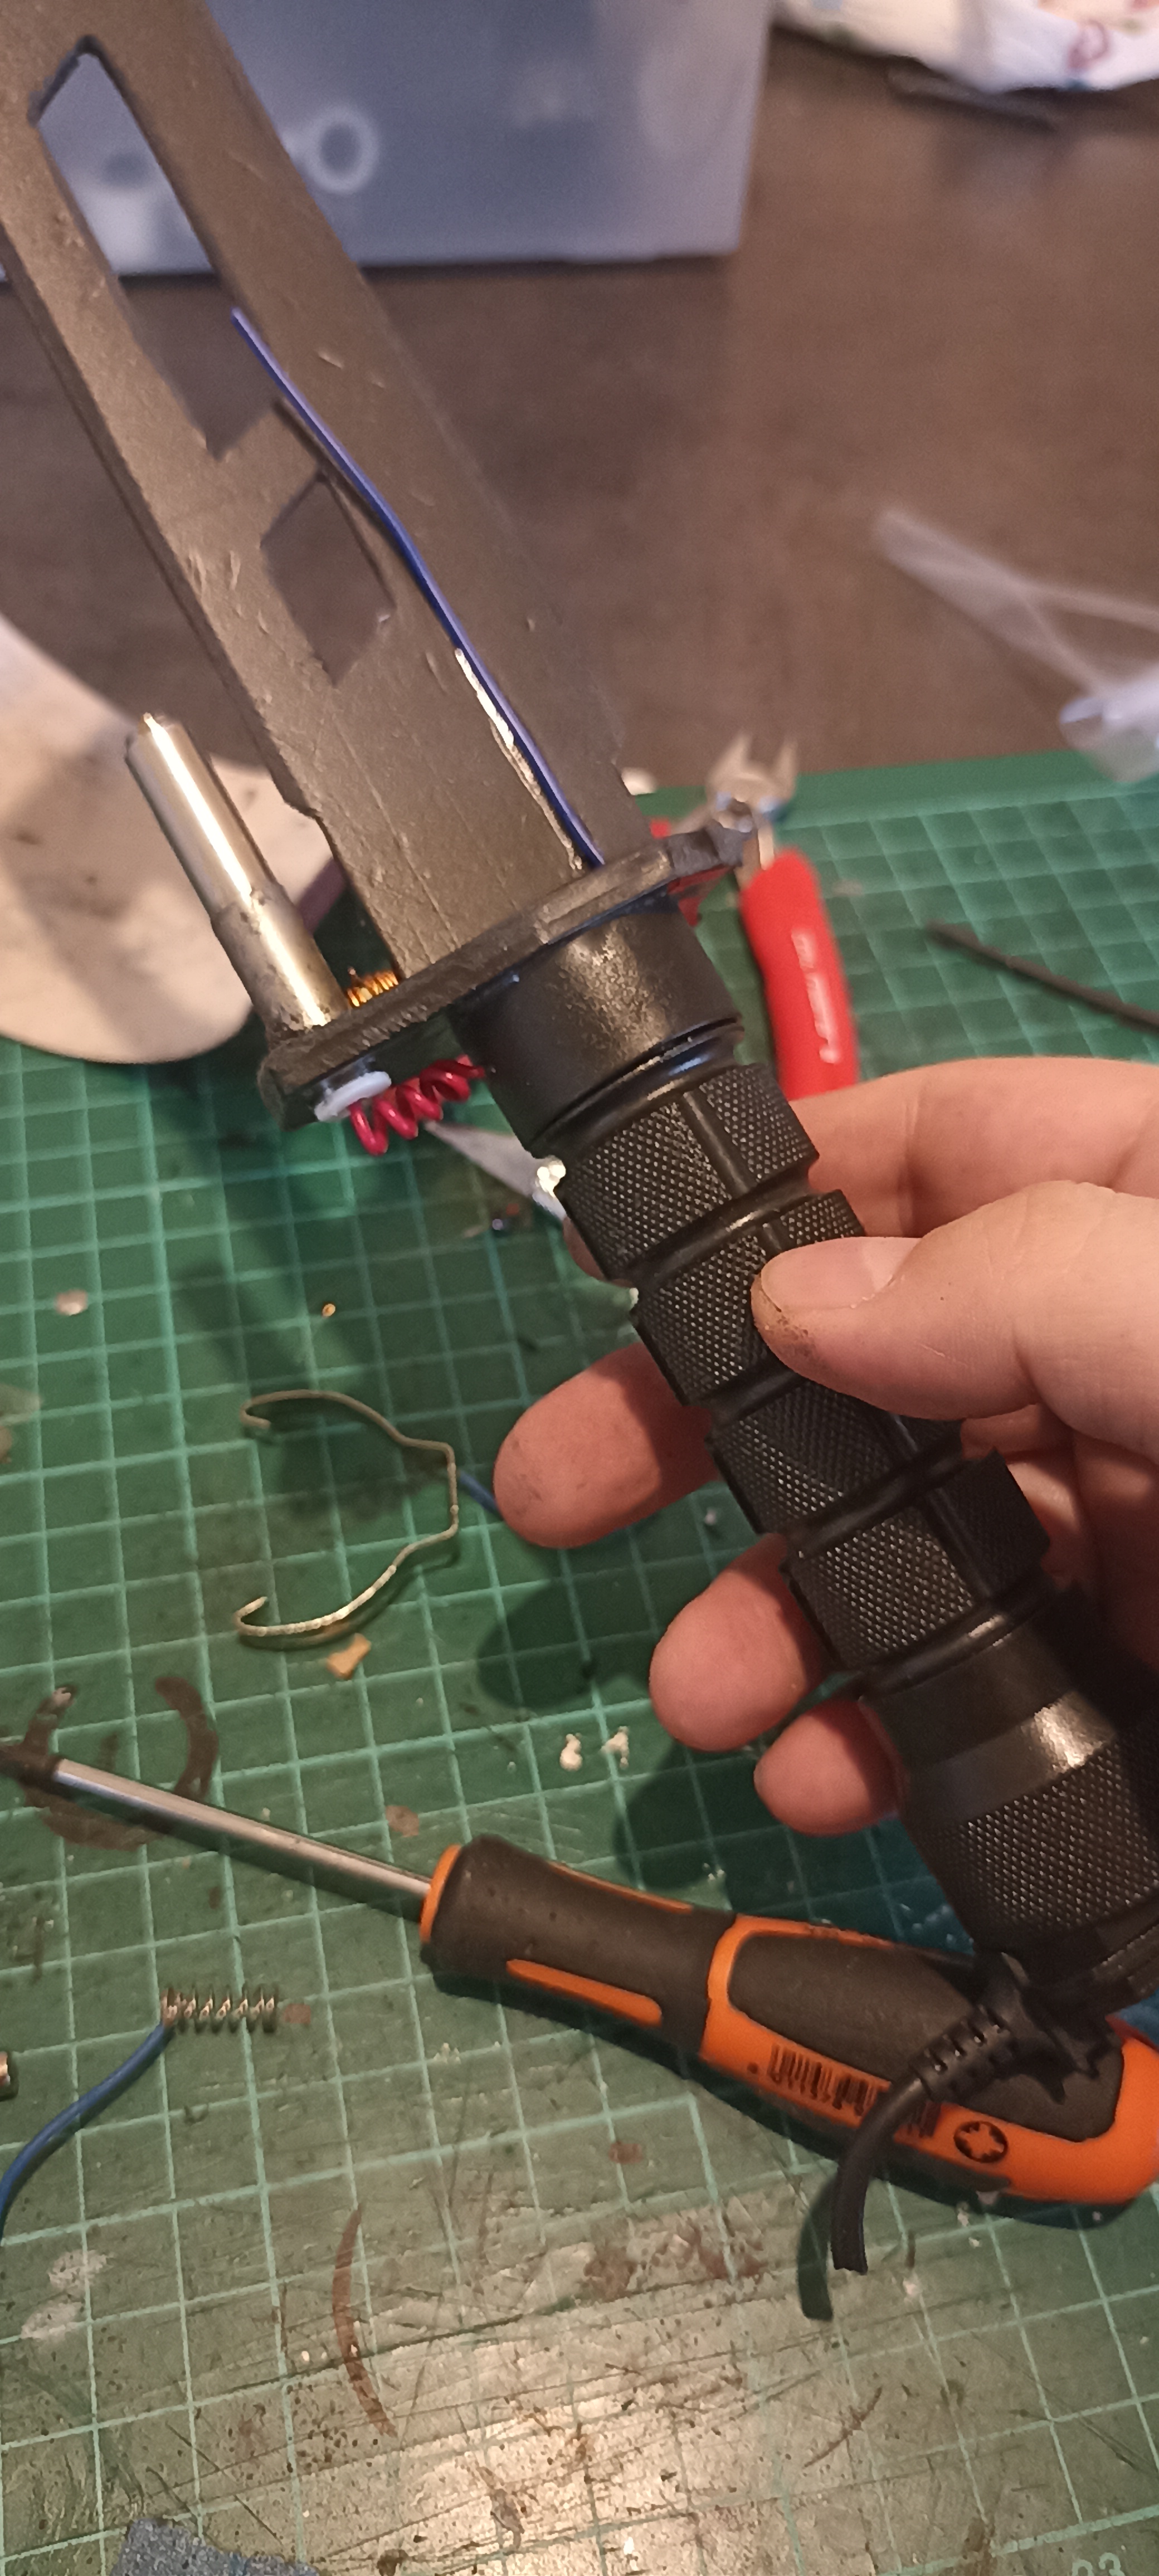 | Inizio ad aggiungere dettagli/grebbles. |
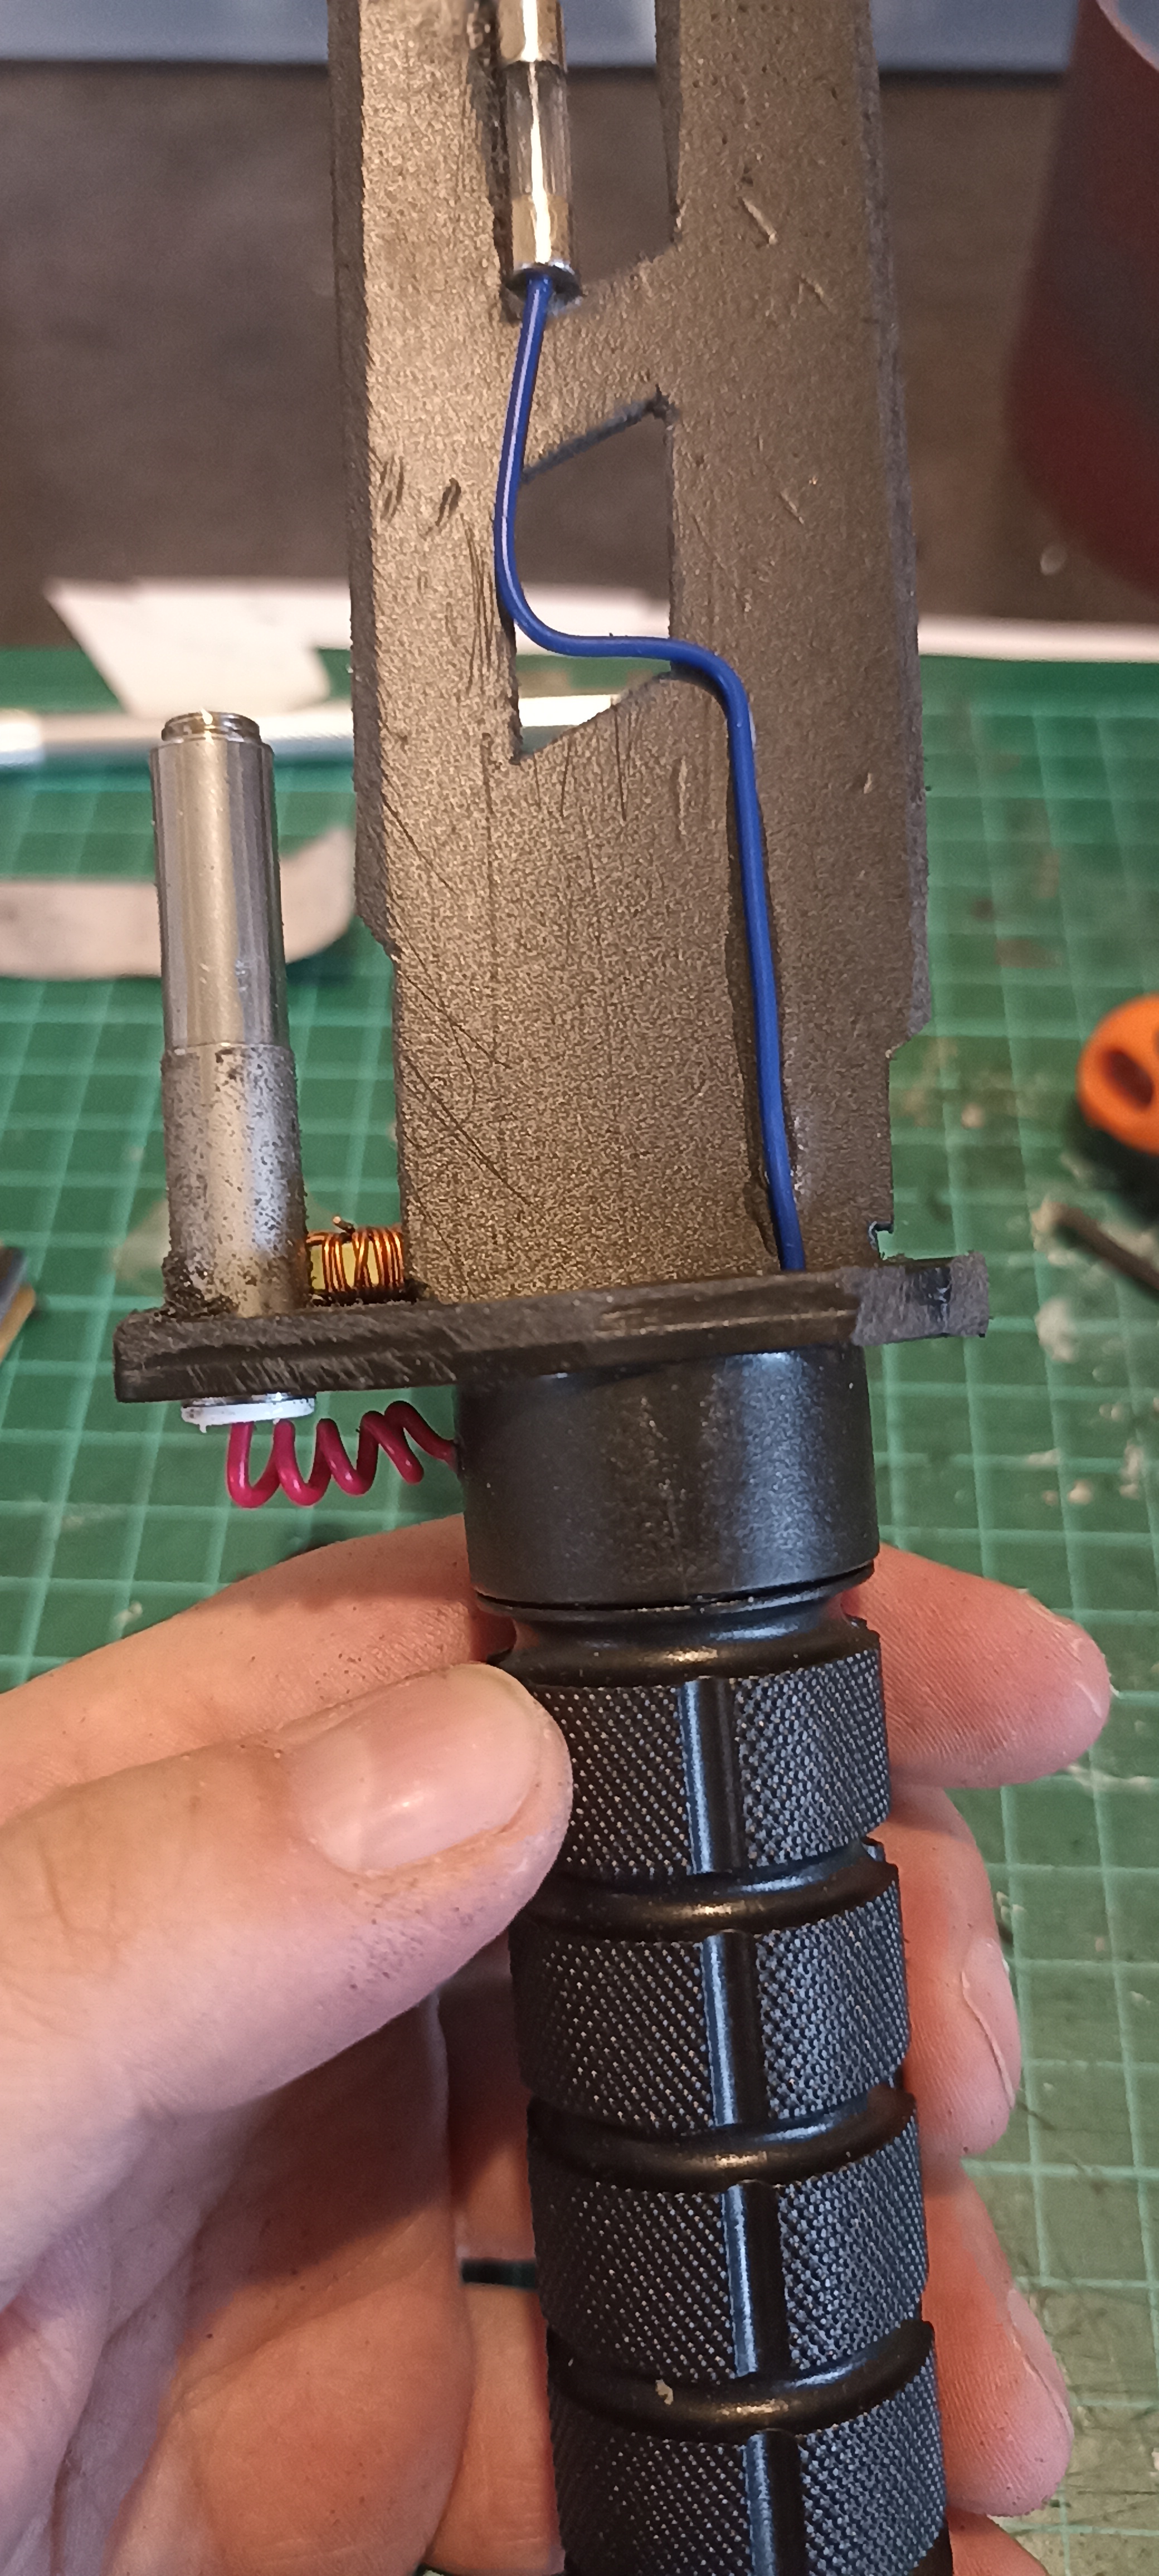 | Aggiungo altri dettagli/grebbles. |
 | Aggiungo altri dettagli/grebbles. |
 | Aggiungo altri dettagli/grebbles. |
 | Aggiungo altri dettagli/grebbles. |
 | Aggiungo altri dettagli/grebbles. |
  | Visione di insieme con stinco e custodia. |
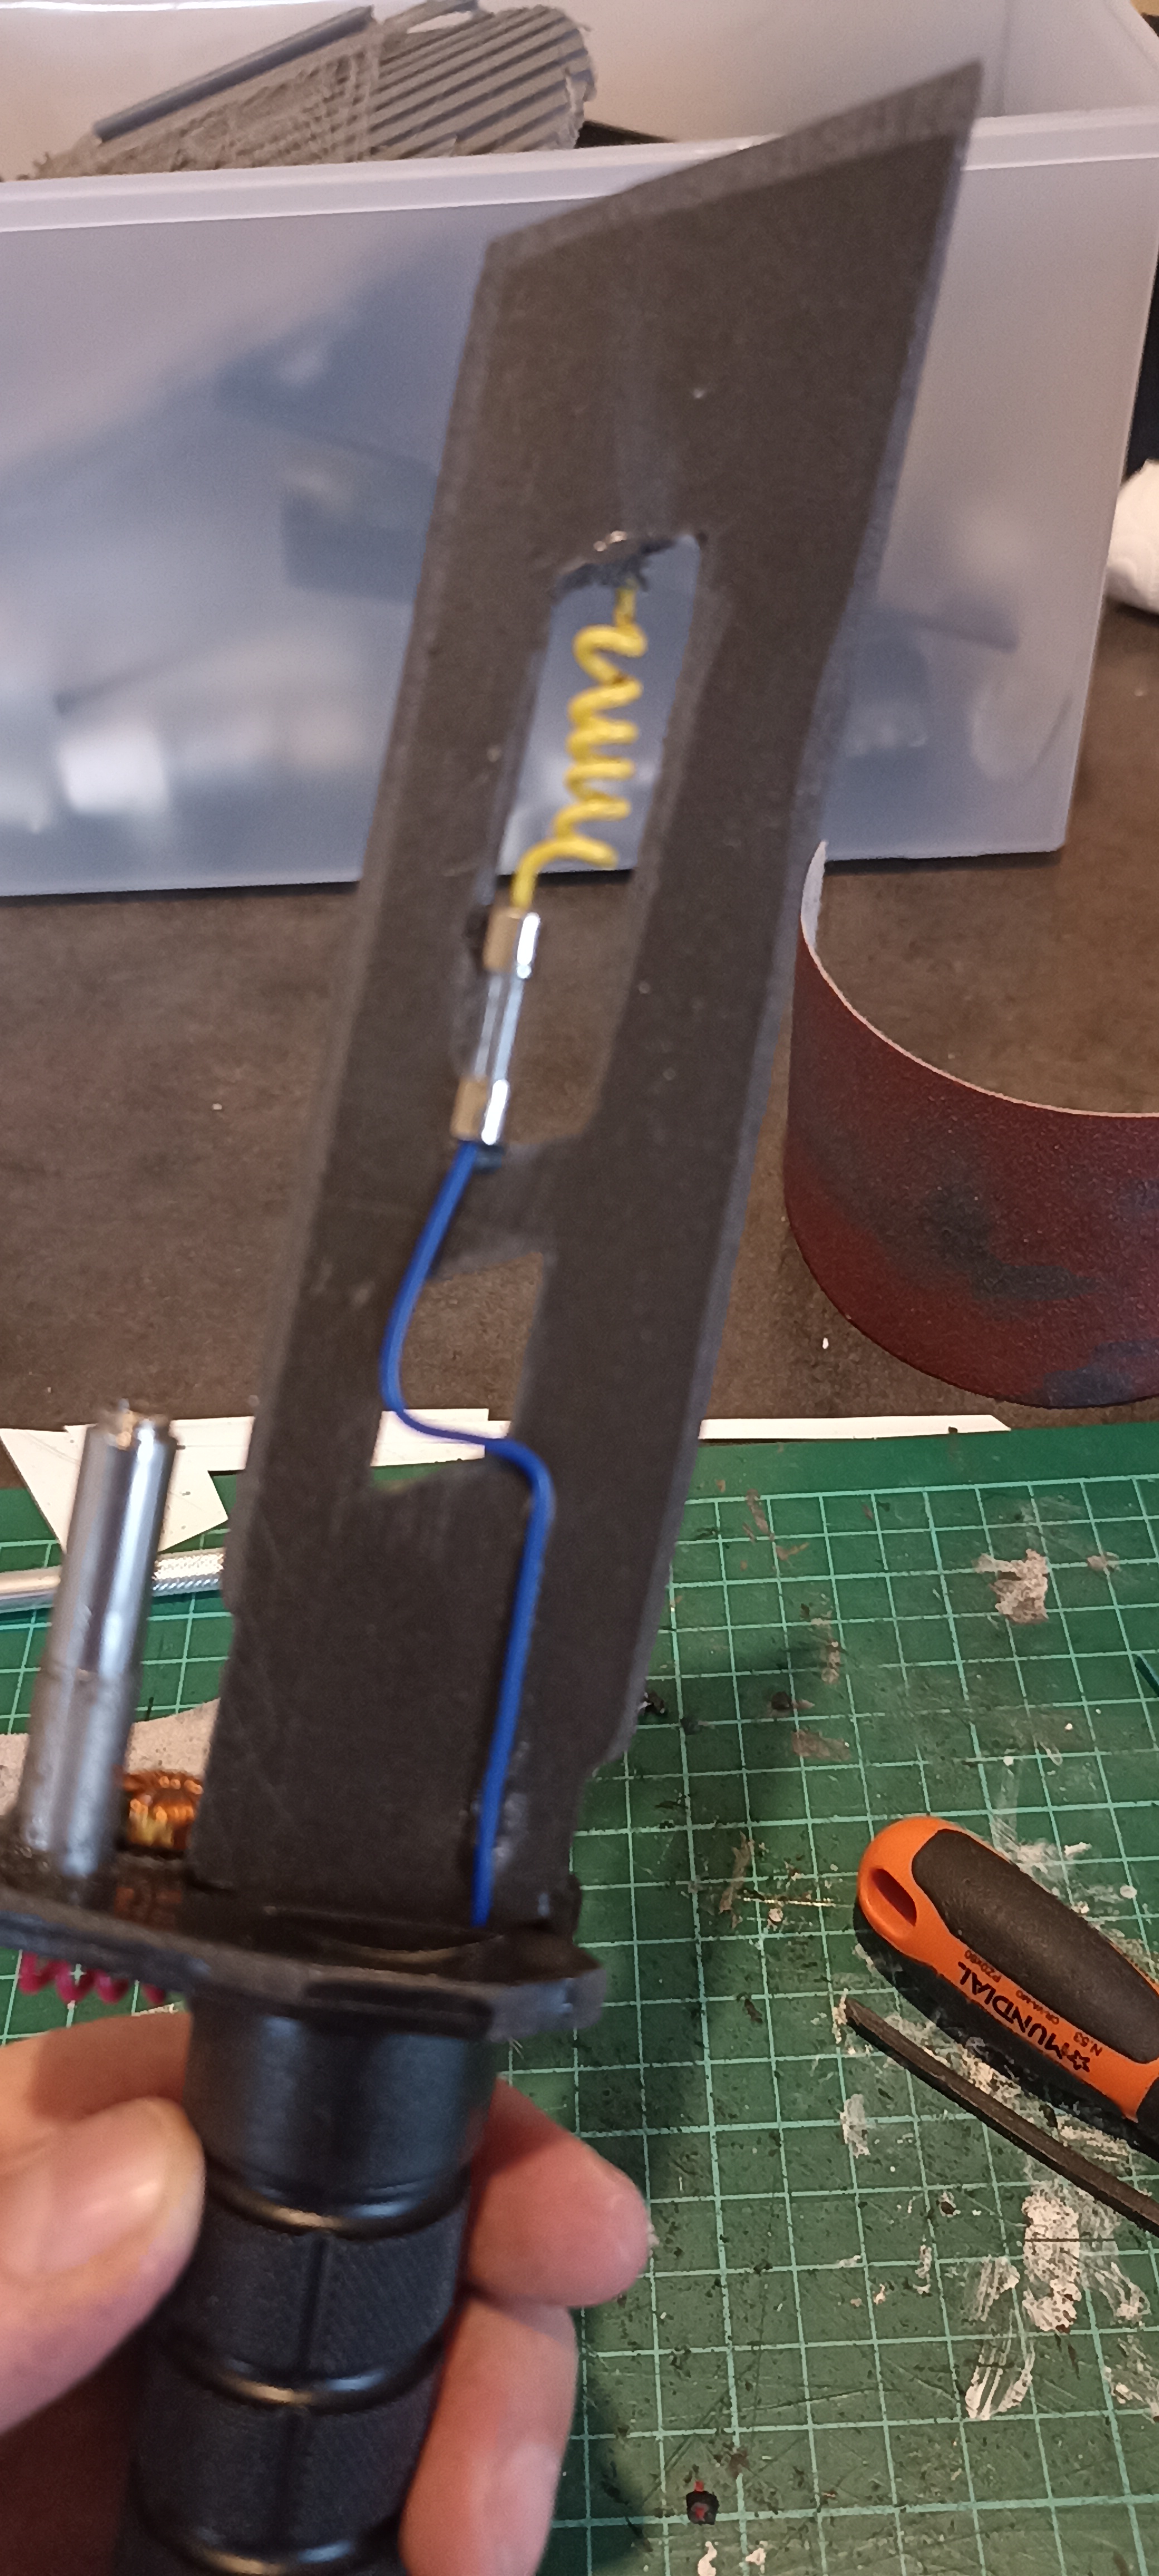
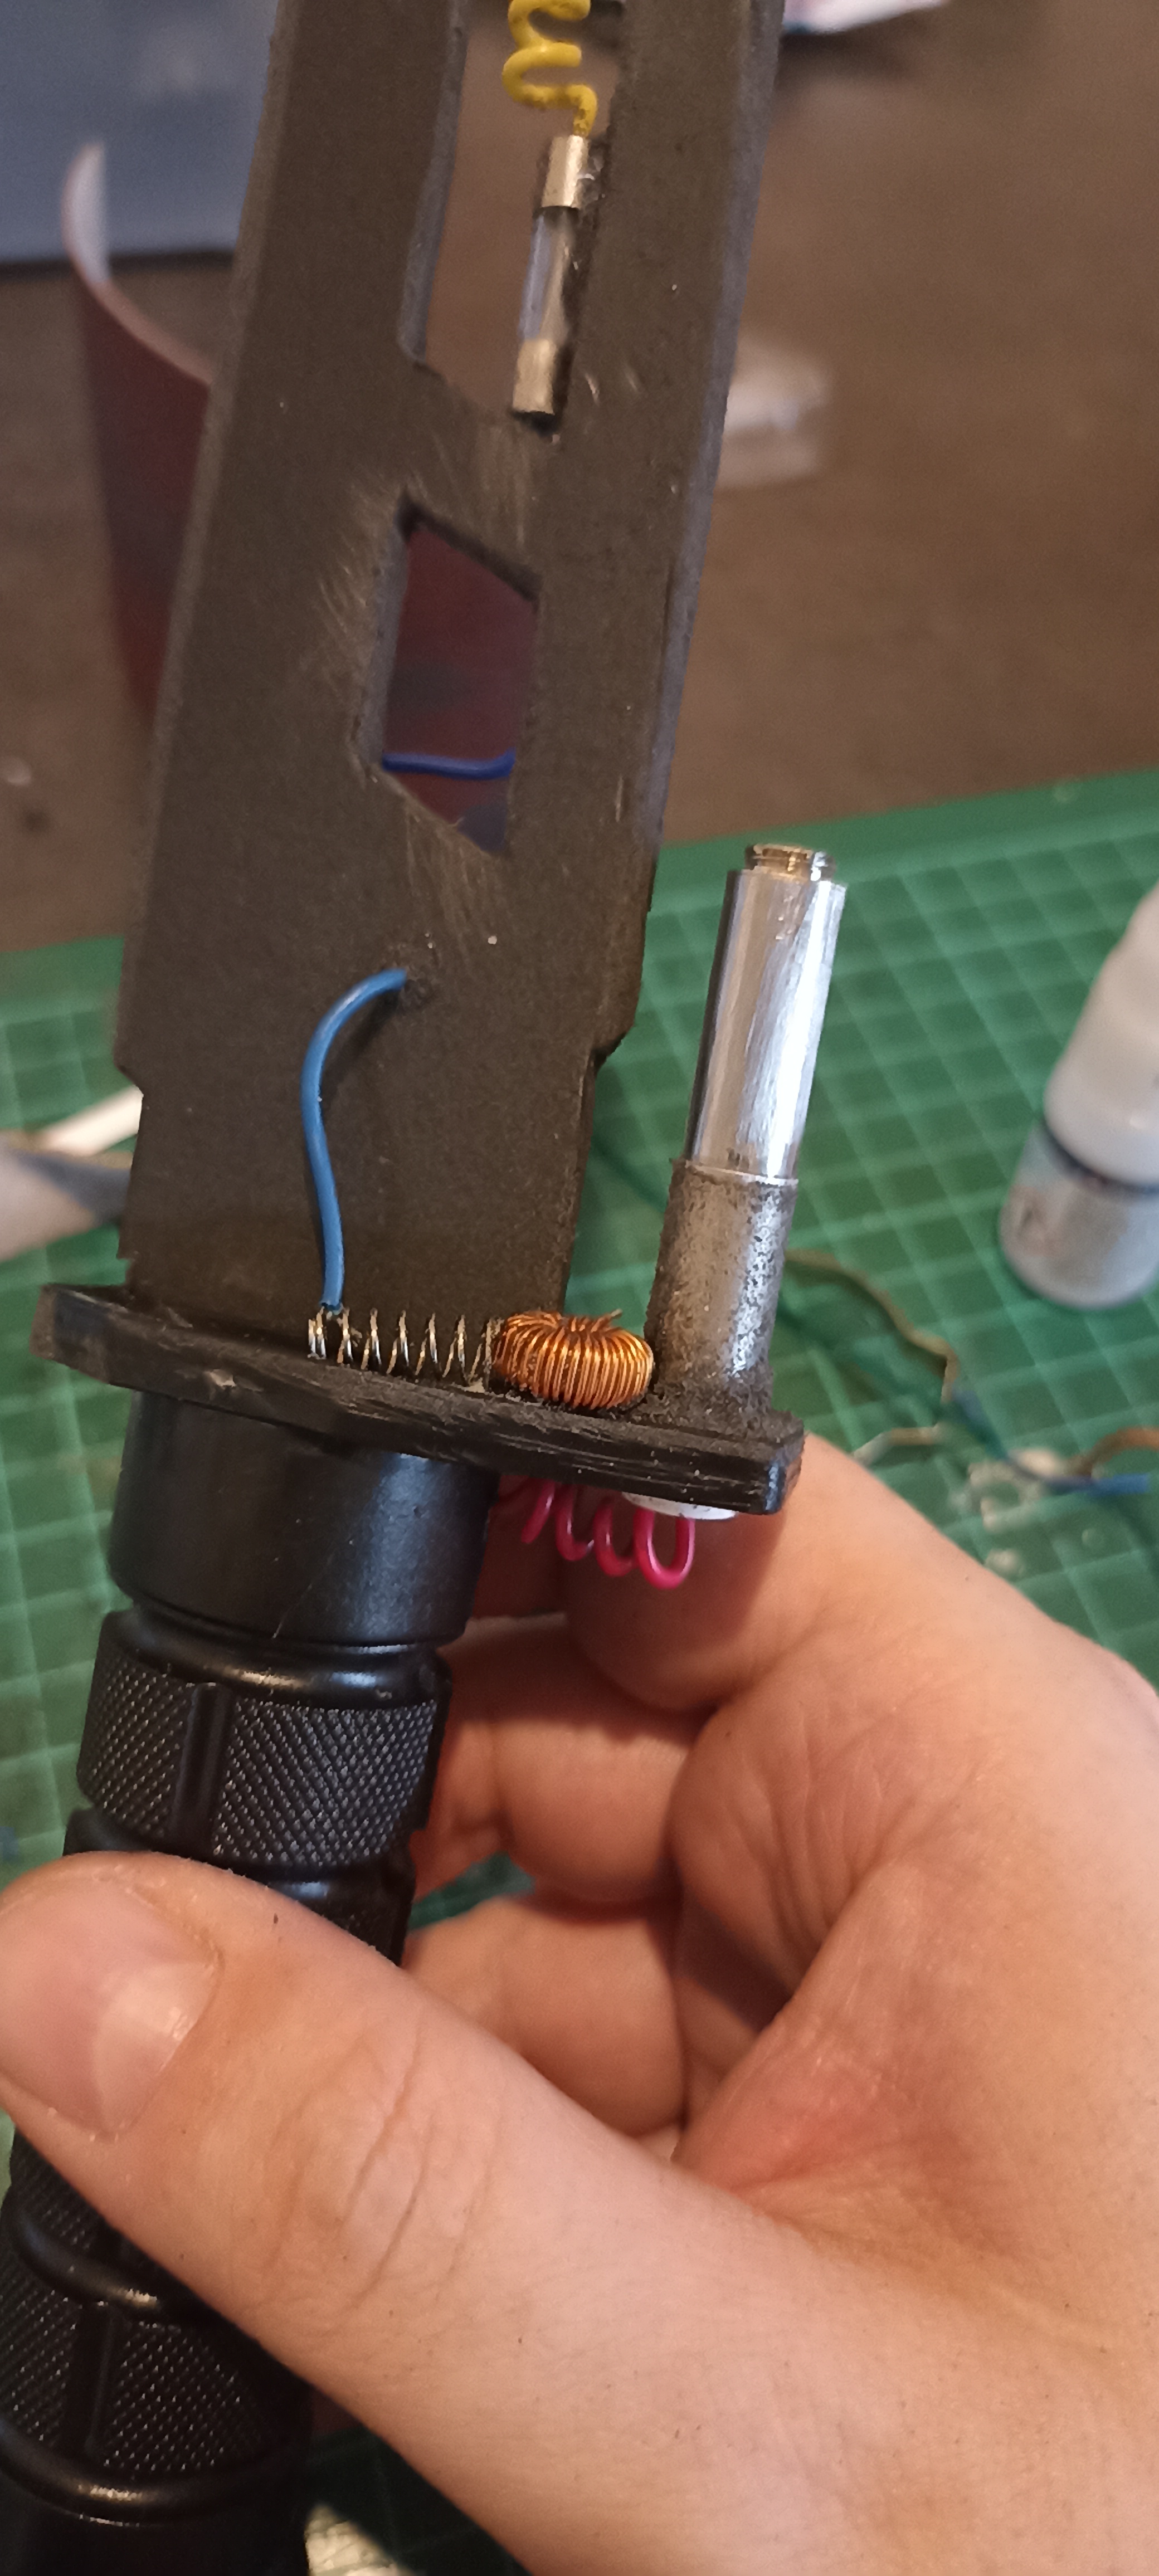
Here you can see the full process for Gabro's left arm
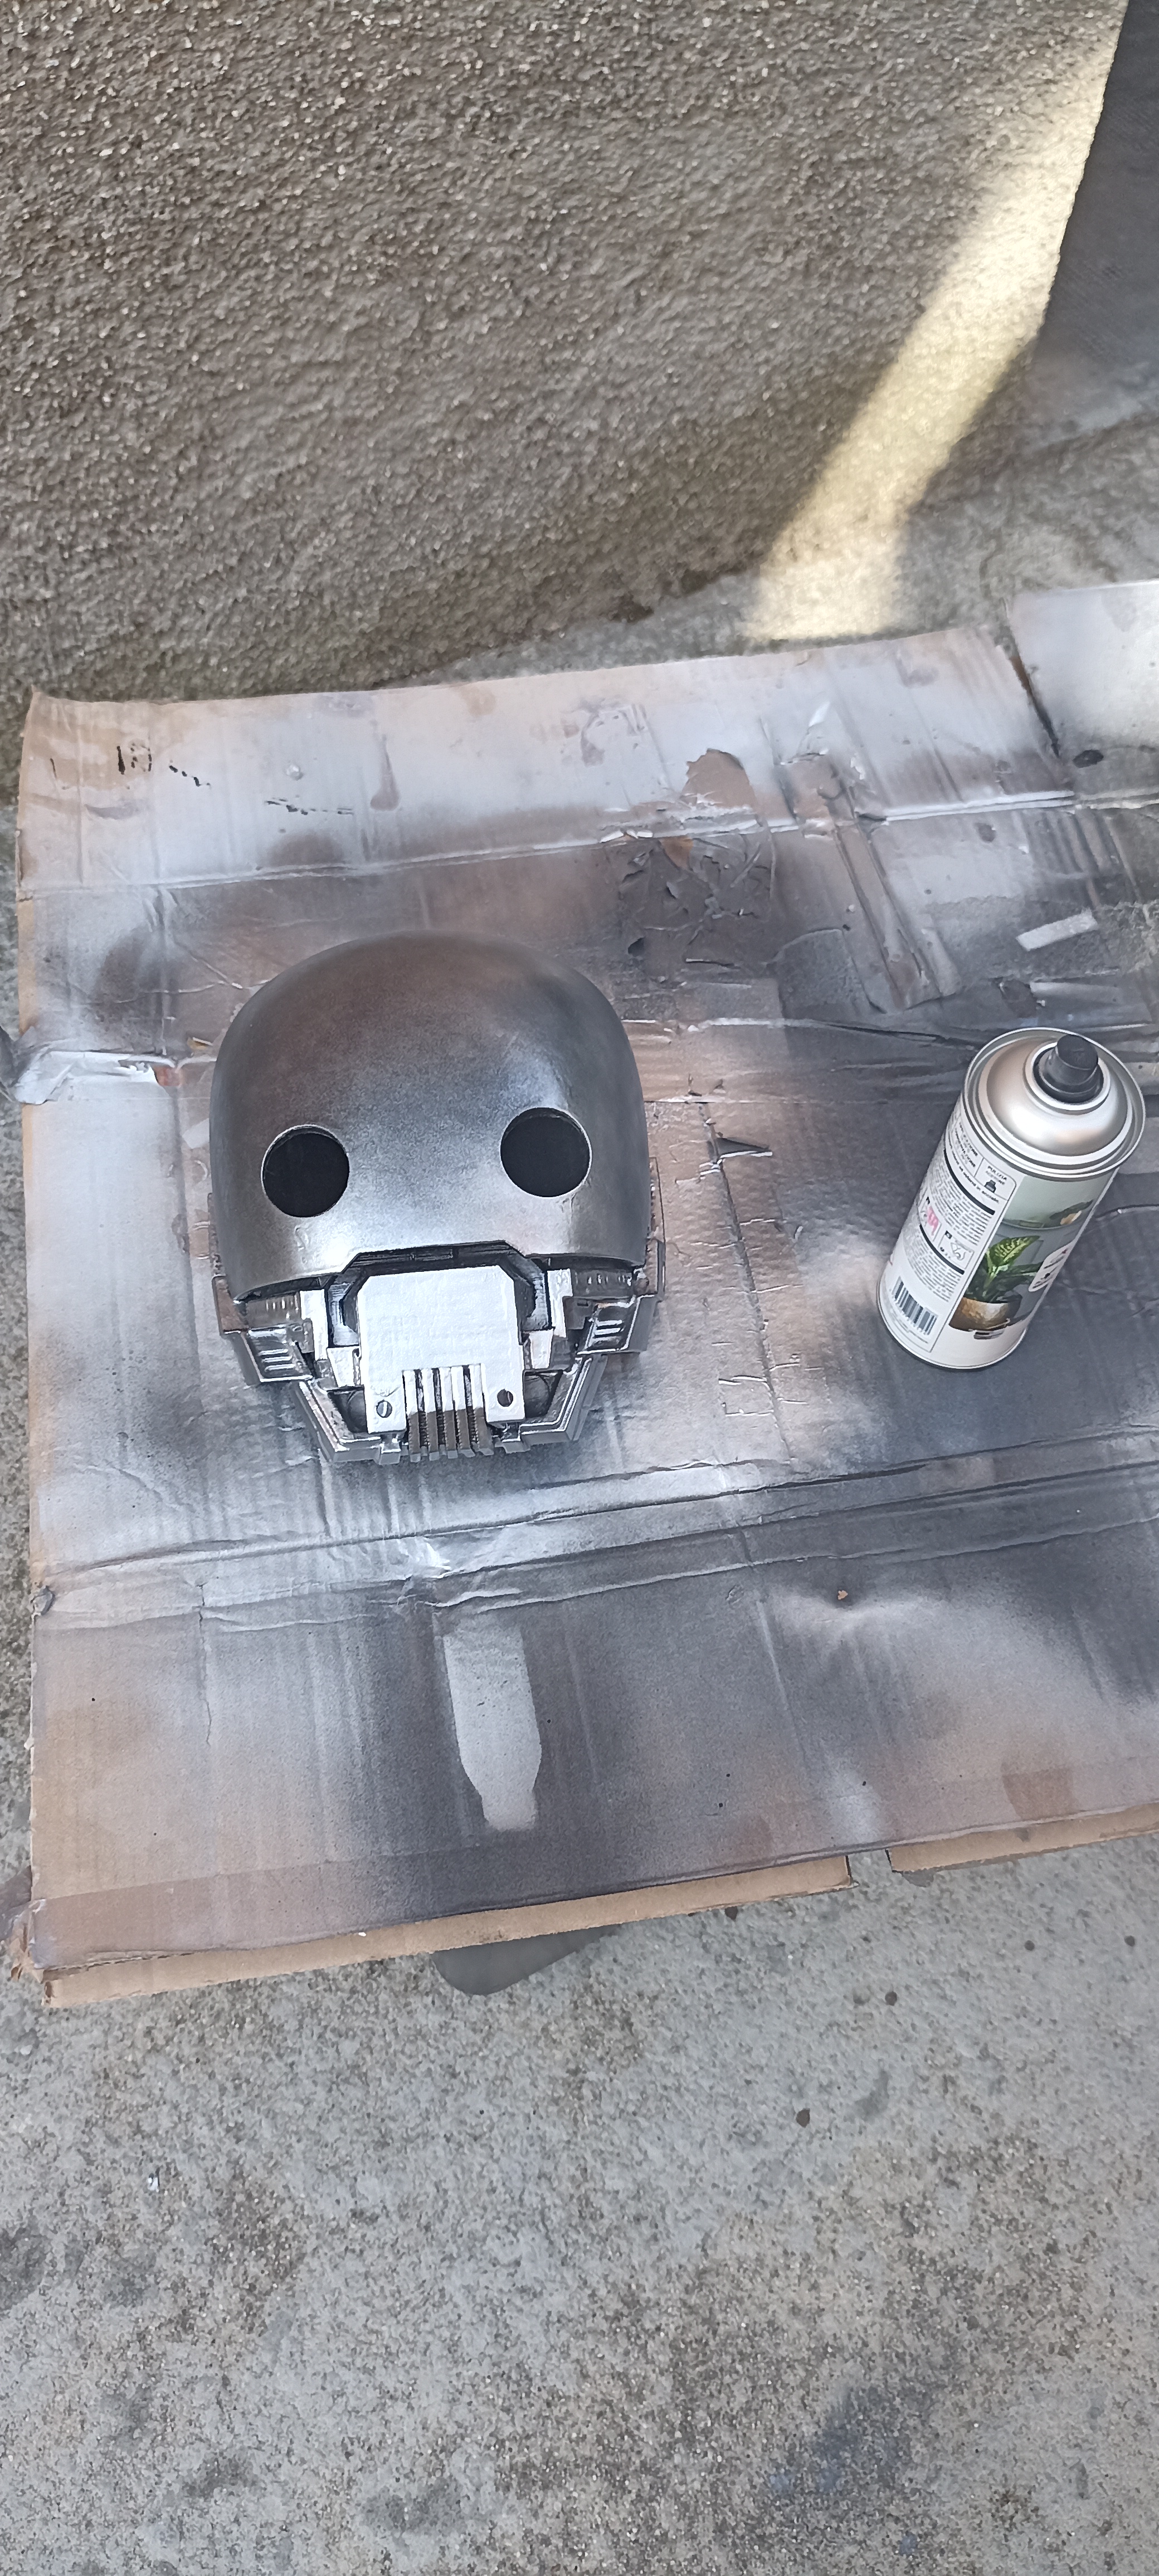
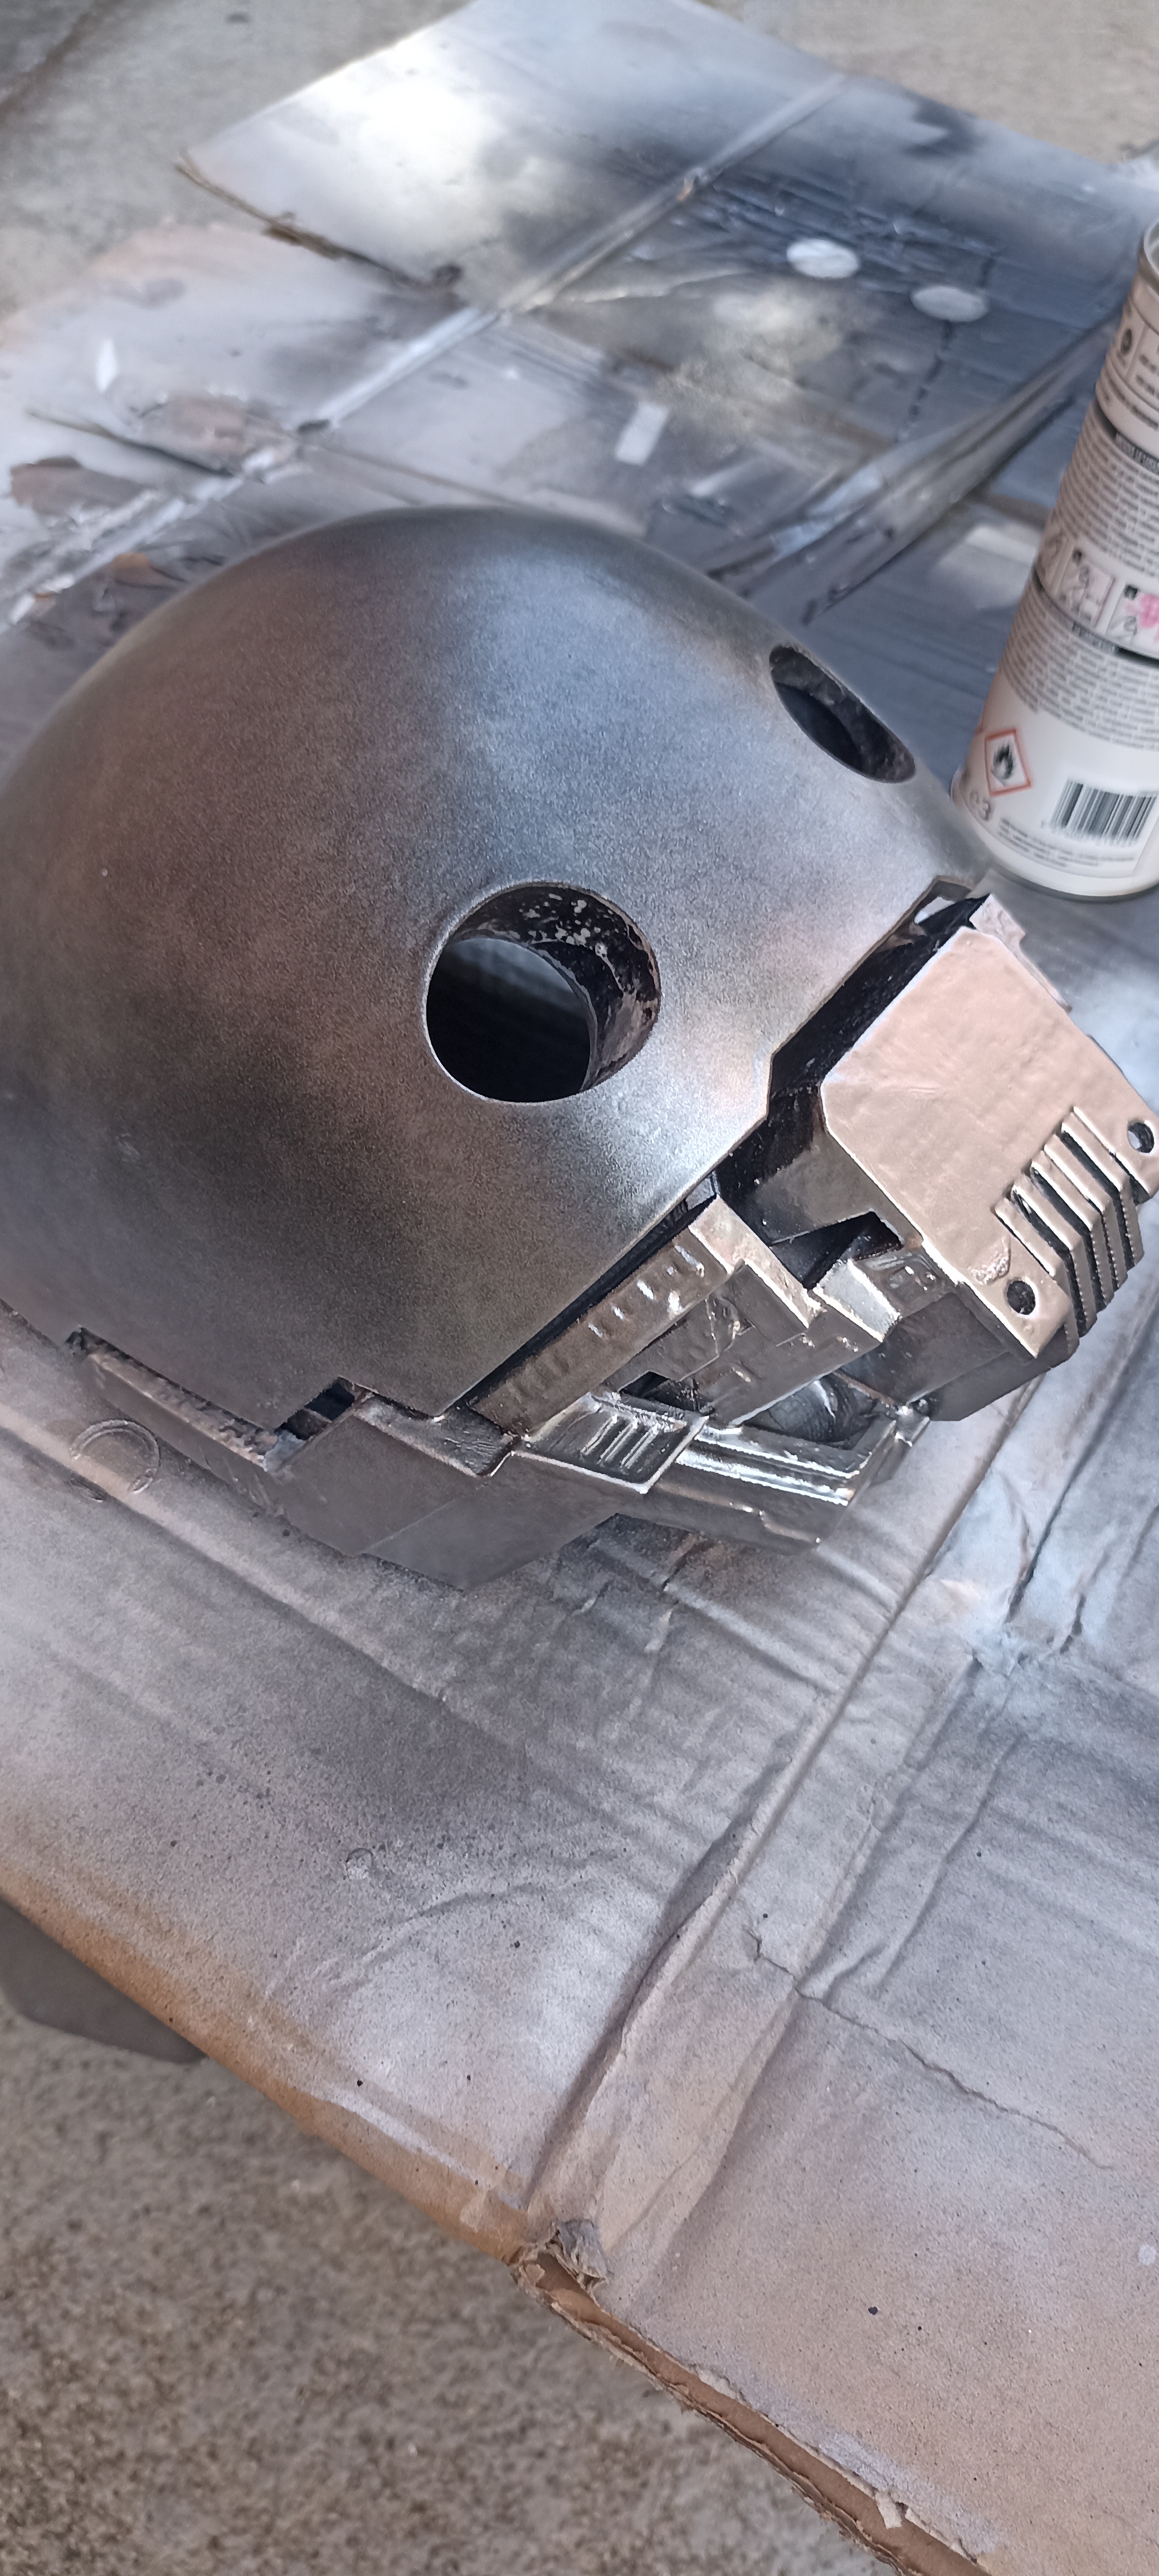
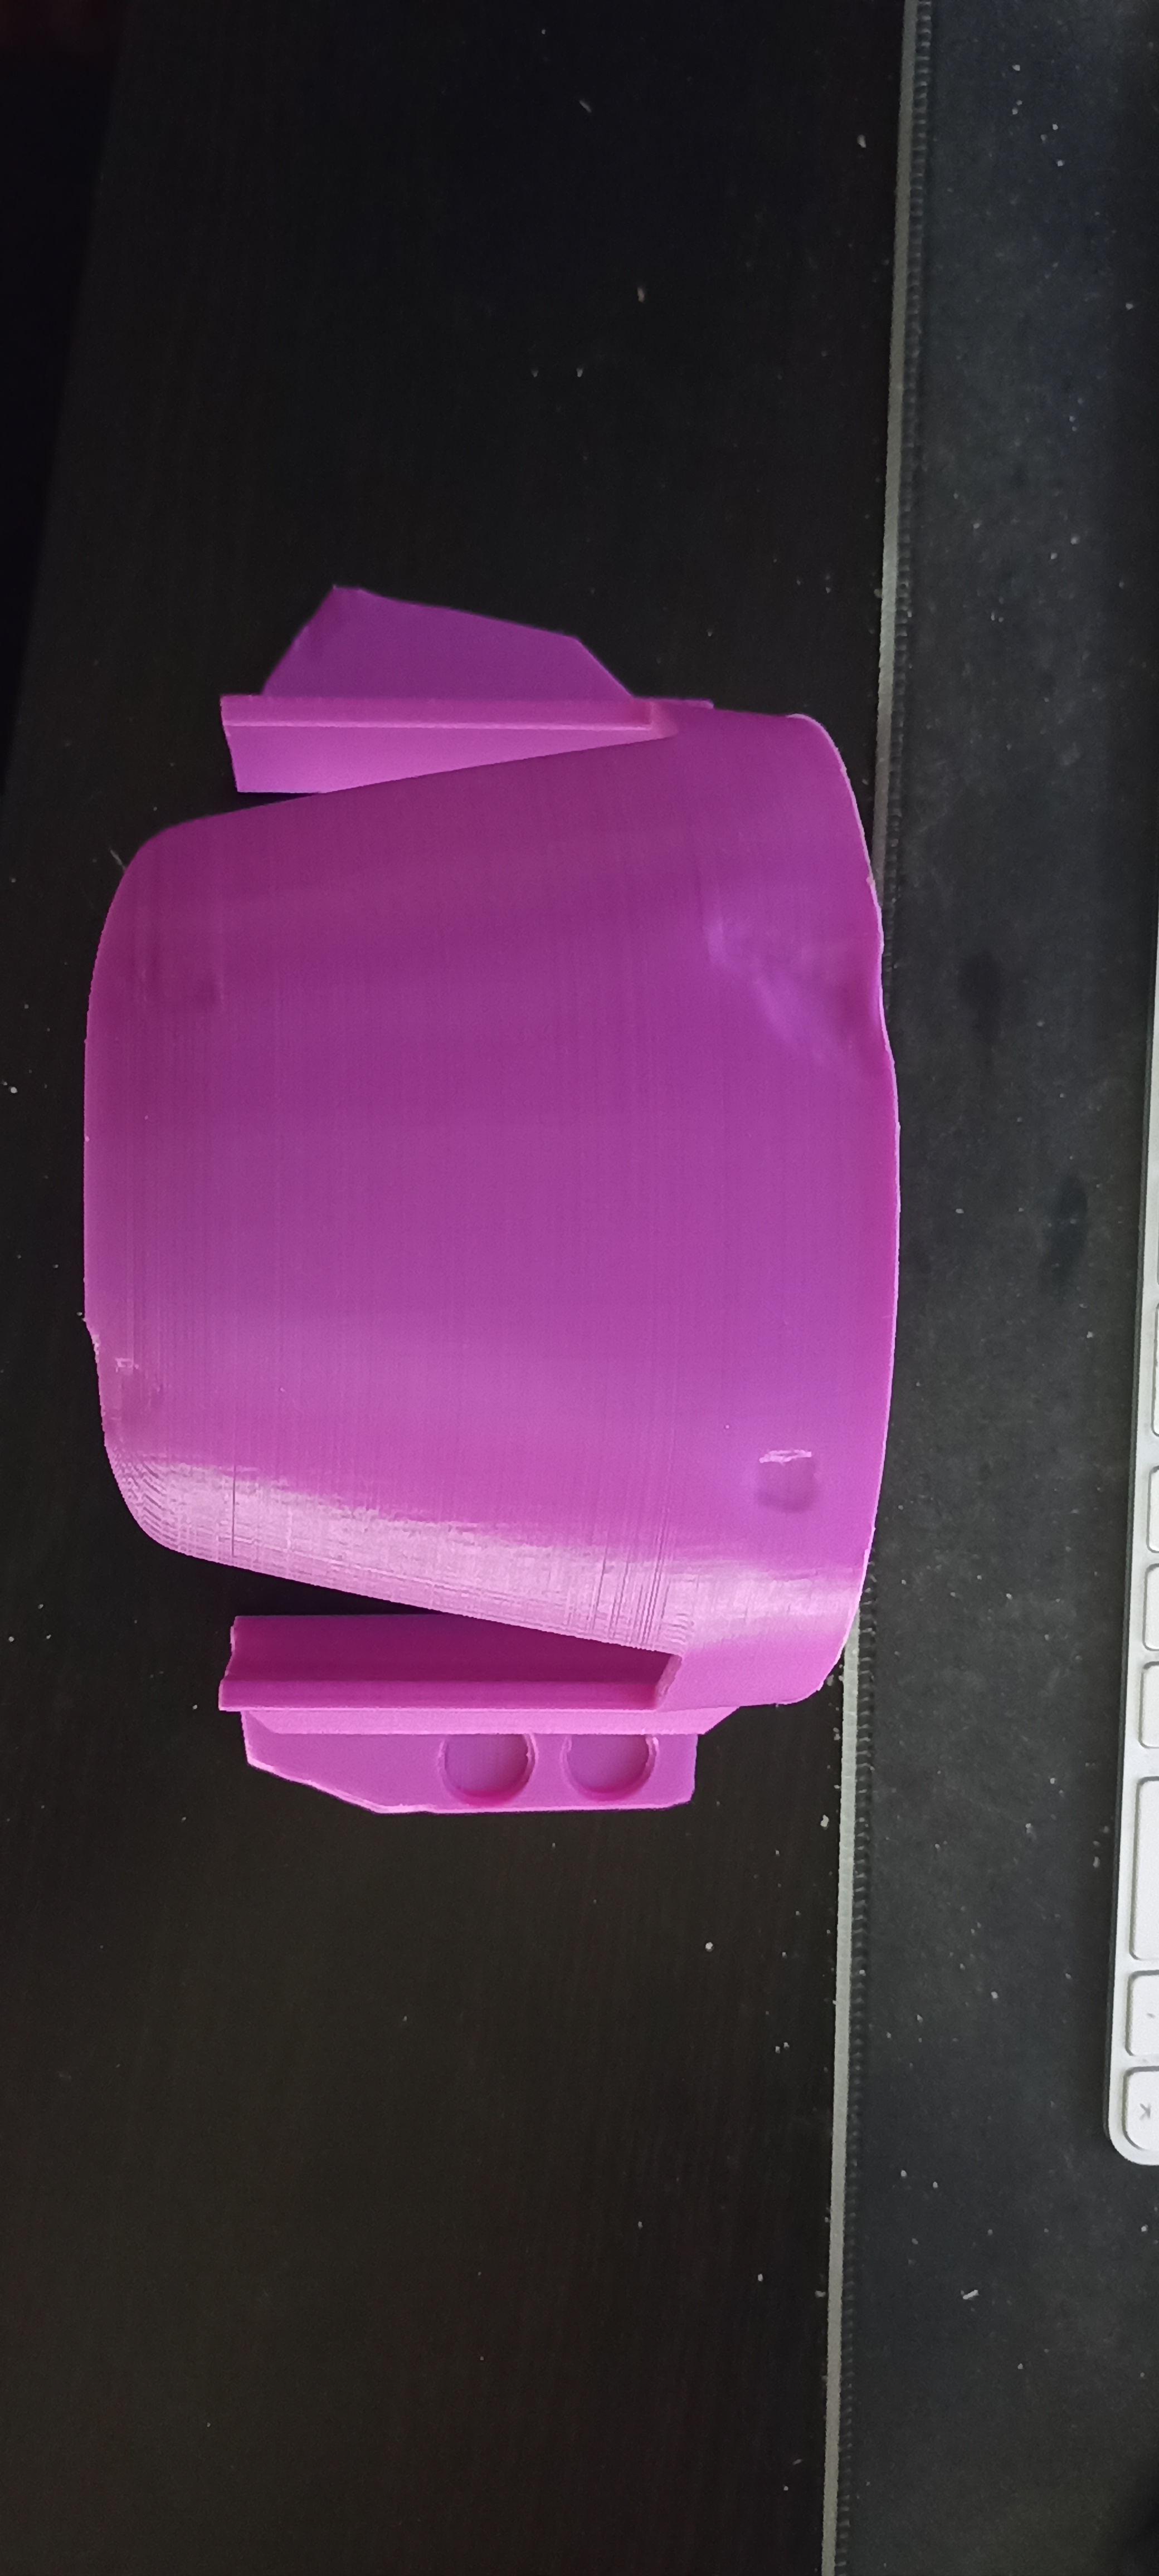
  | Kx Droid head 3d printed (PLA) |
 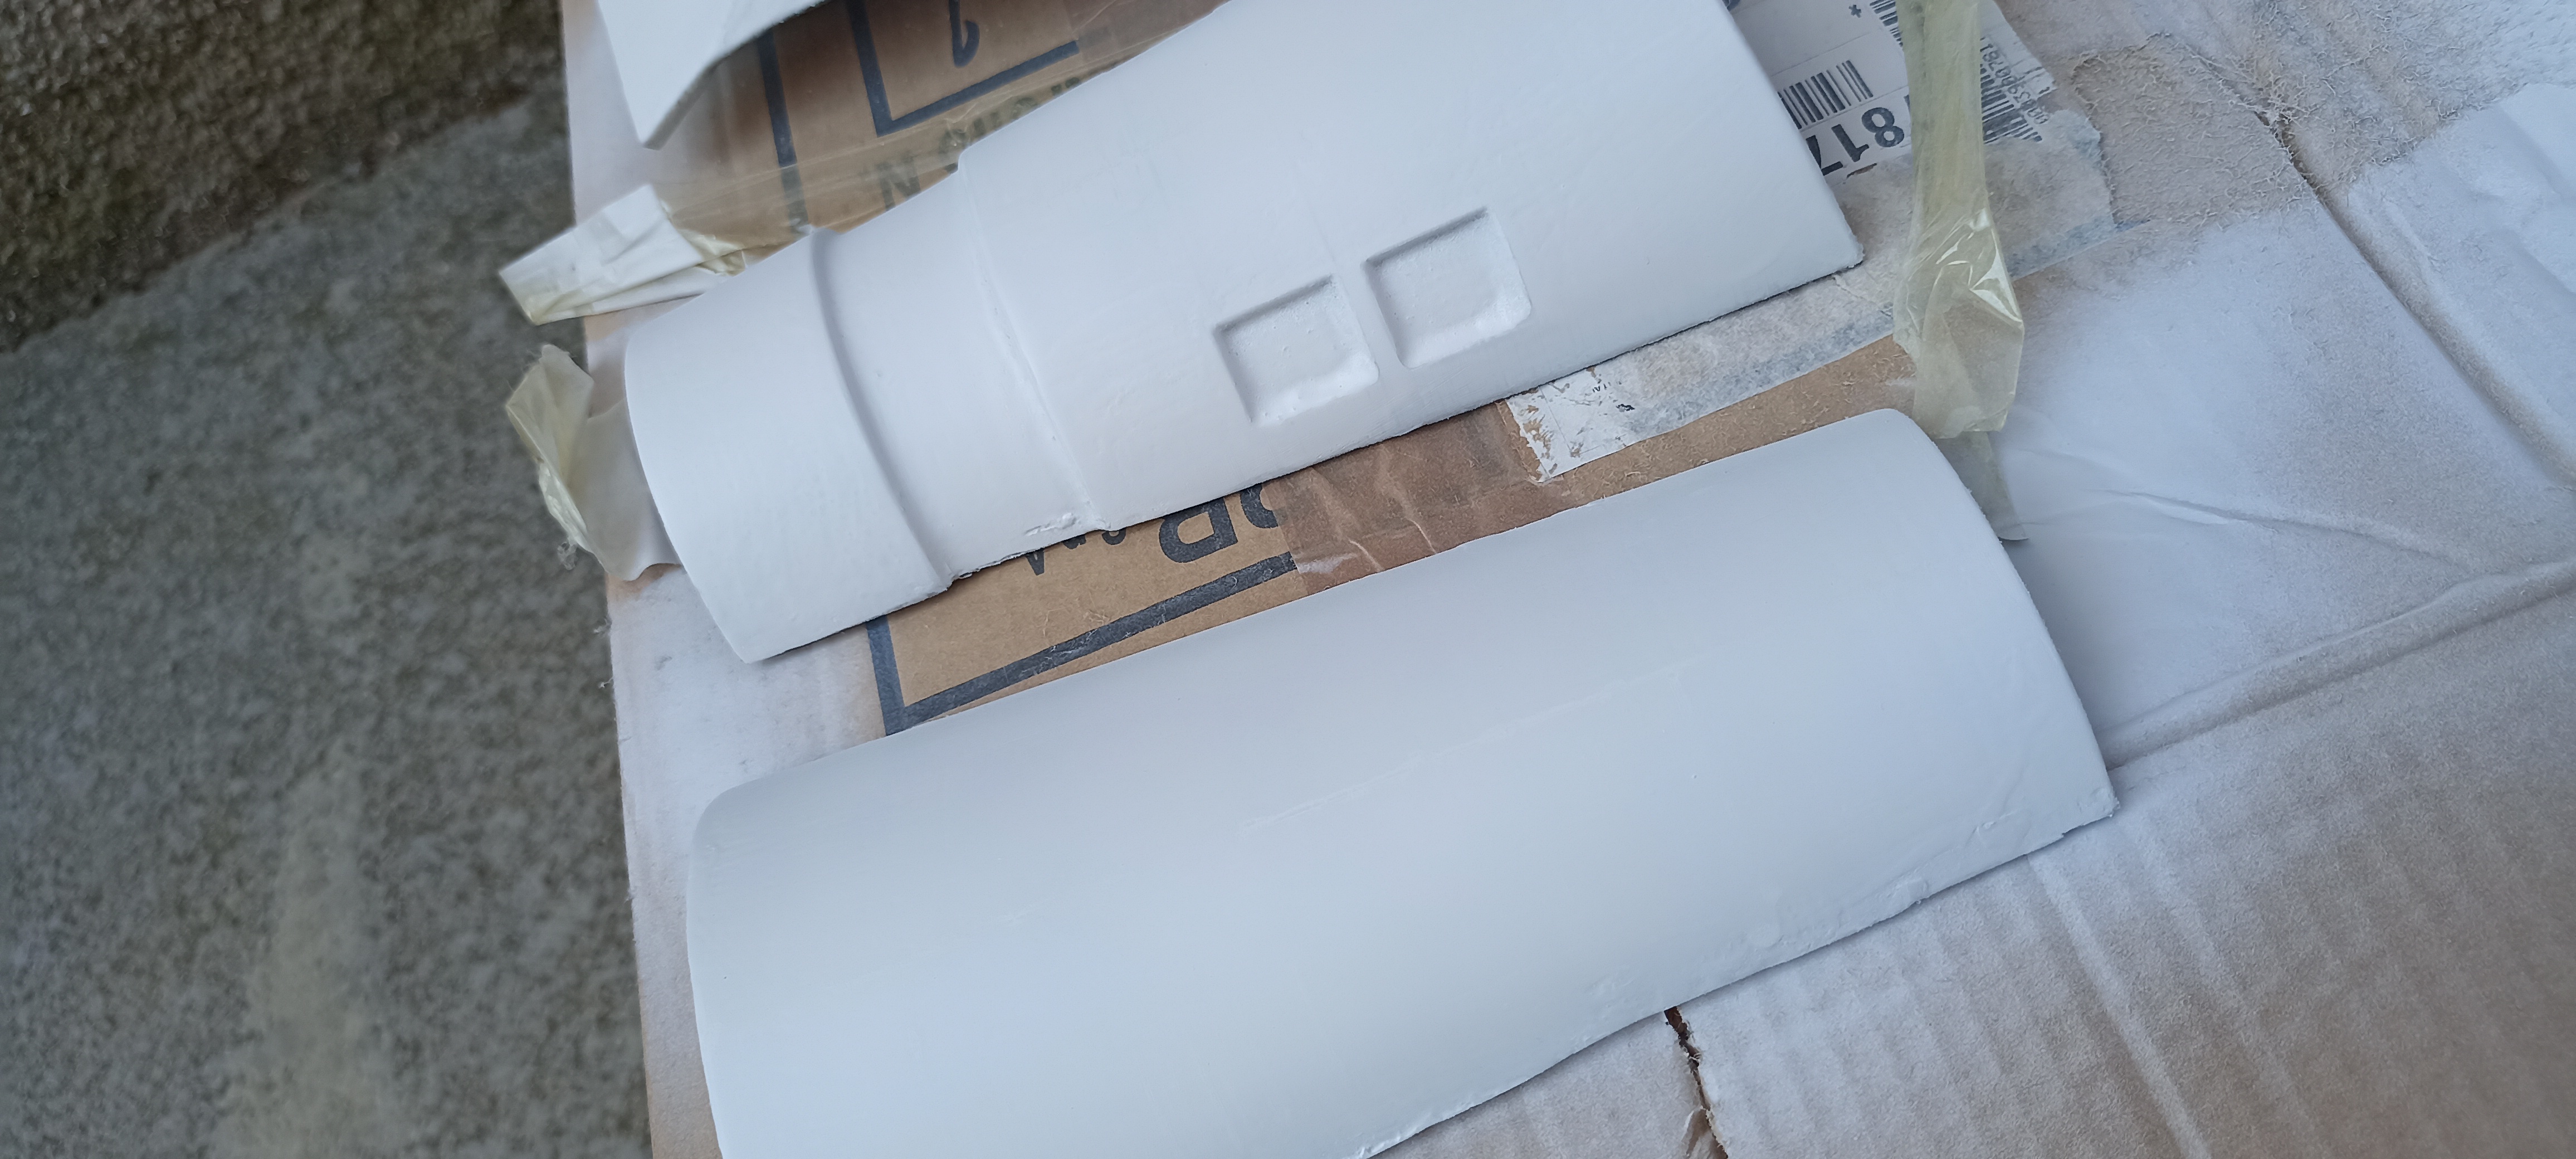 | Left forearm 3d printed, putty spray coat |
| Second putty spray layer |
| Third putty spray layer |
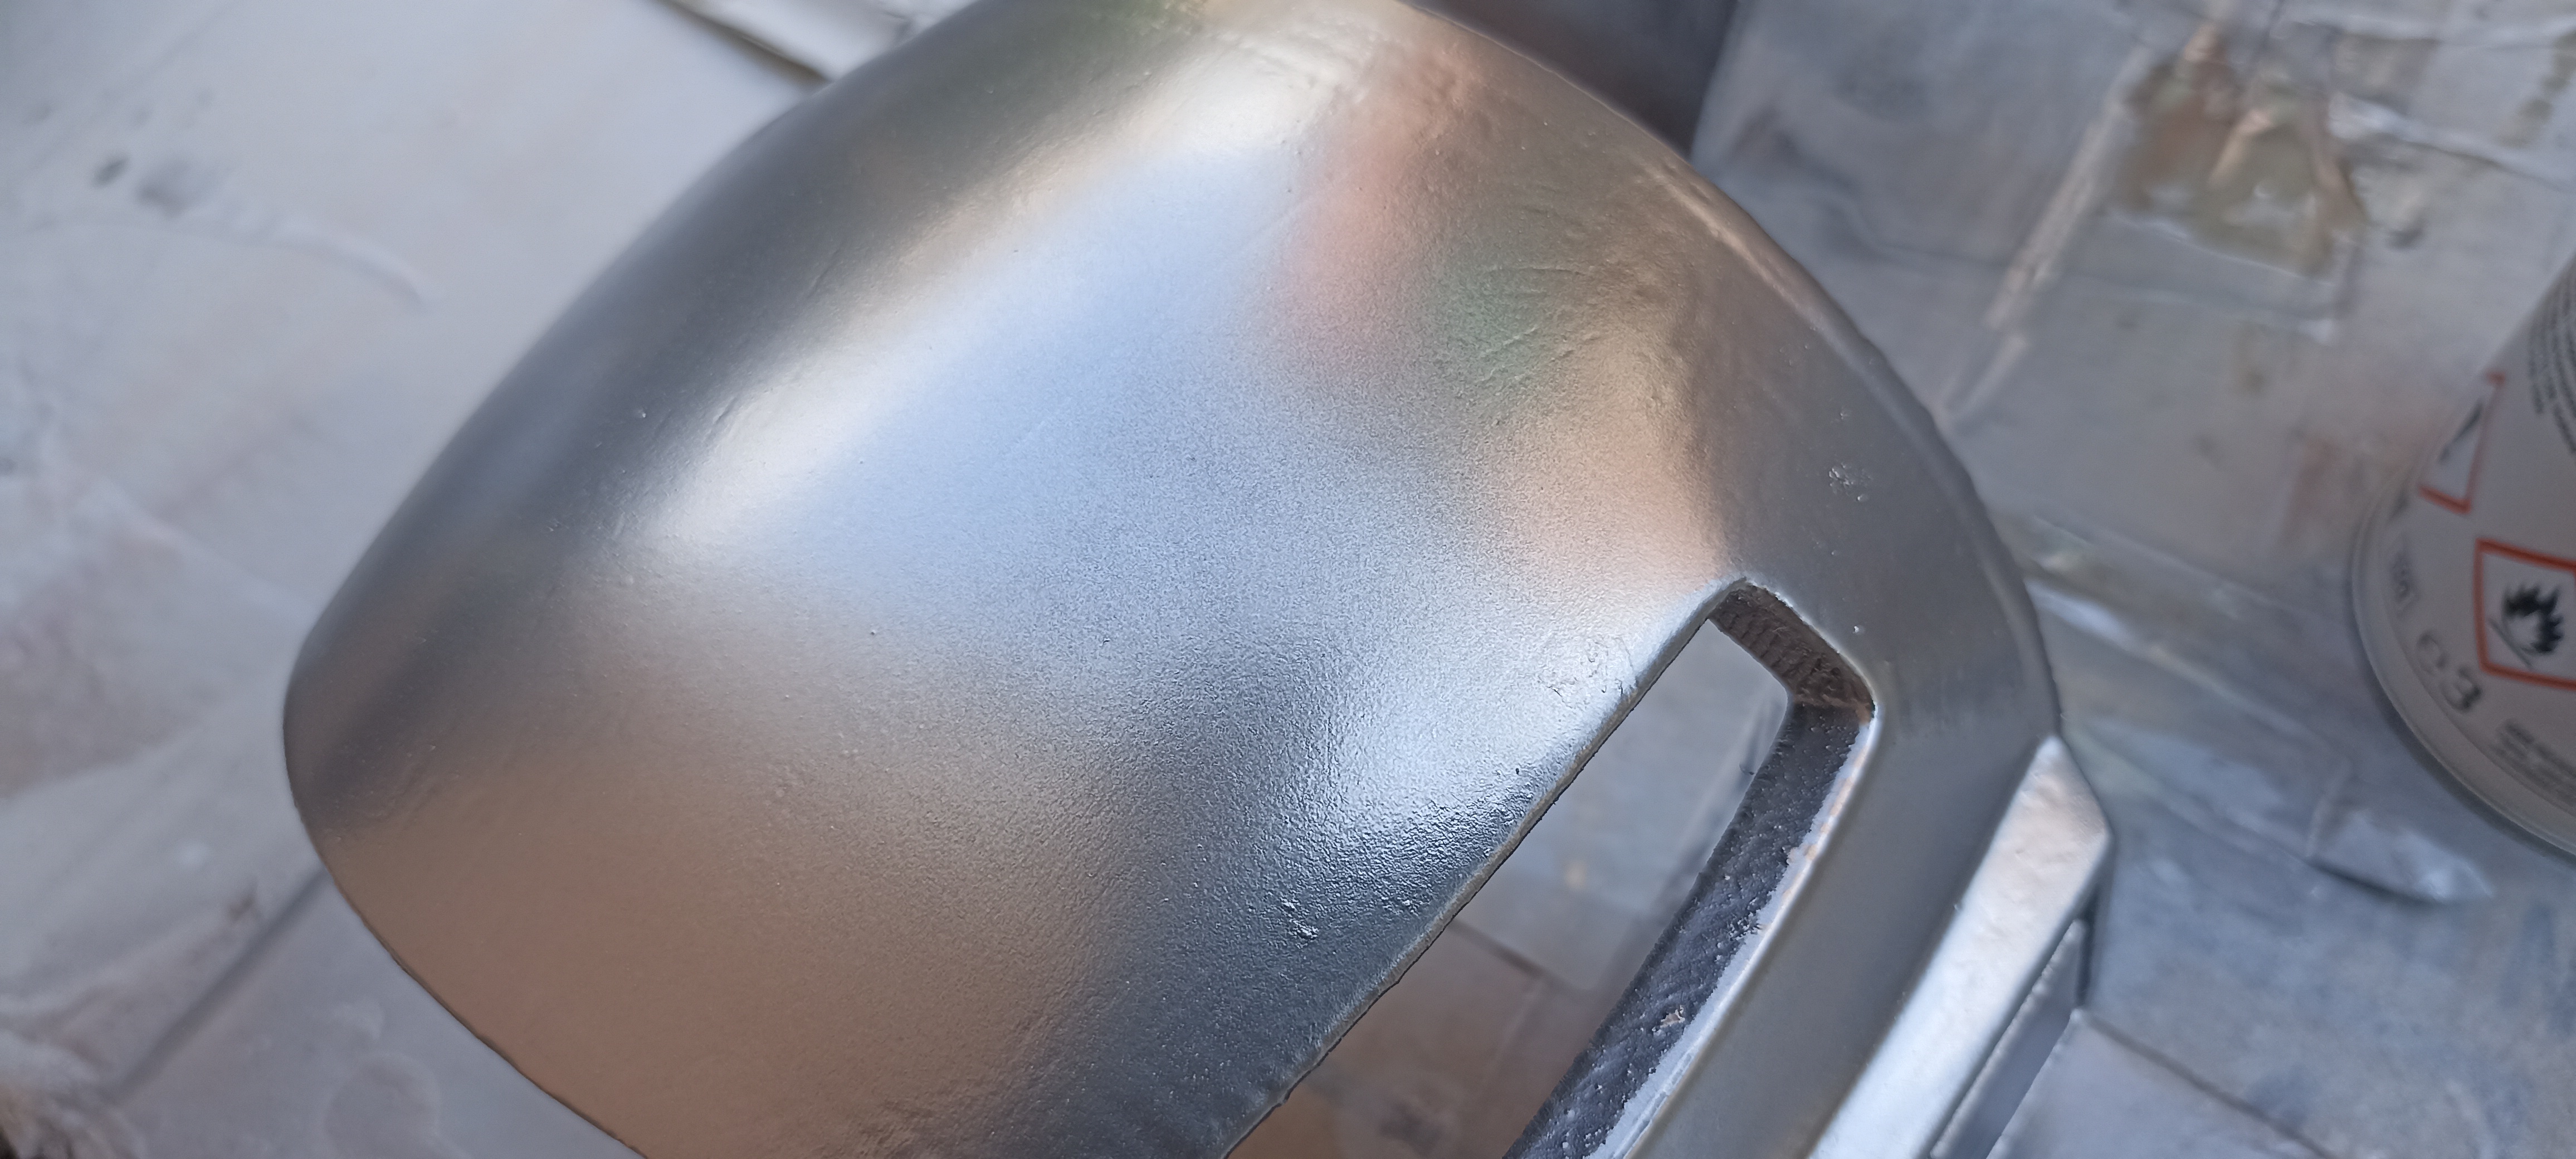
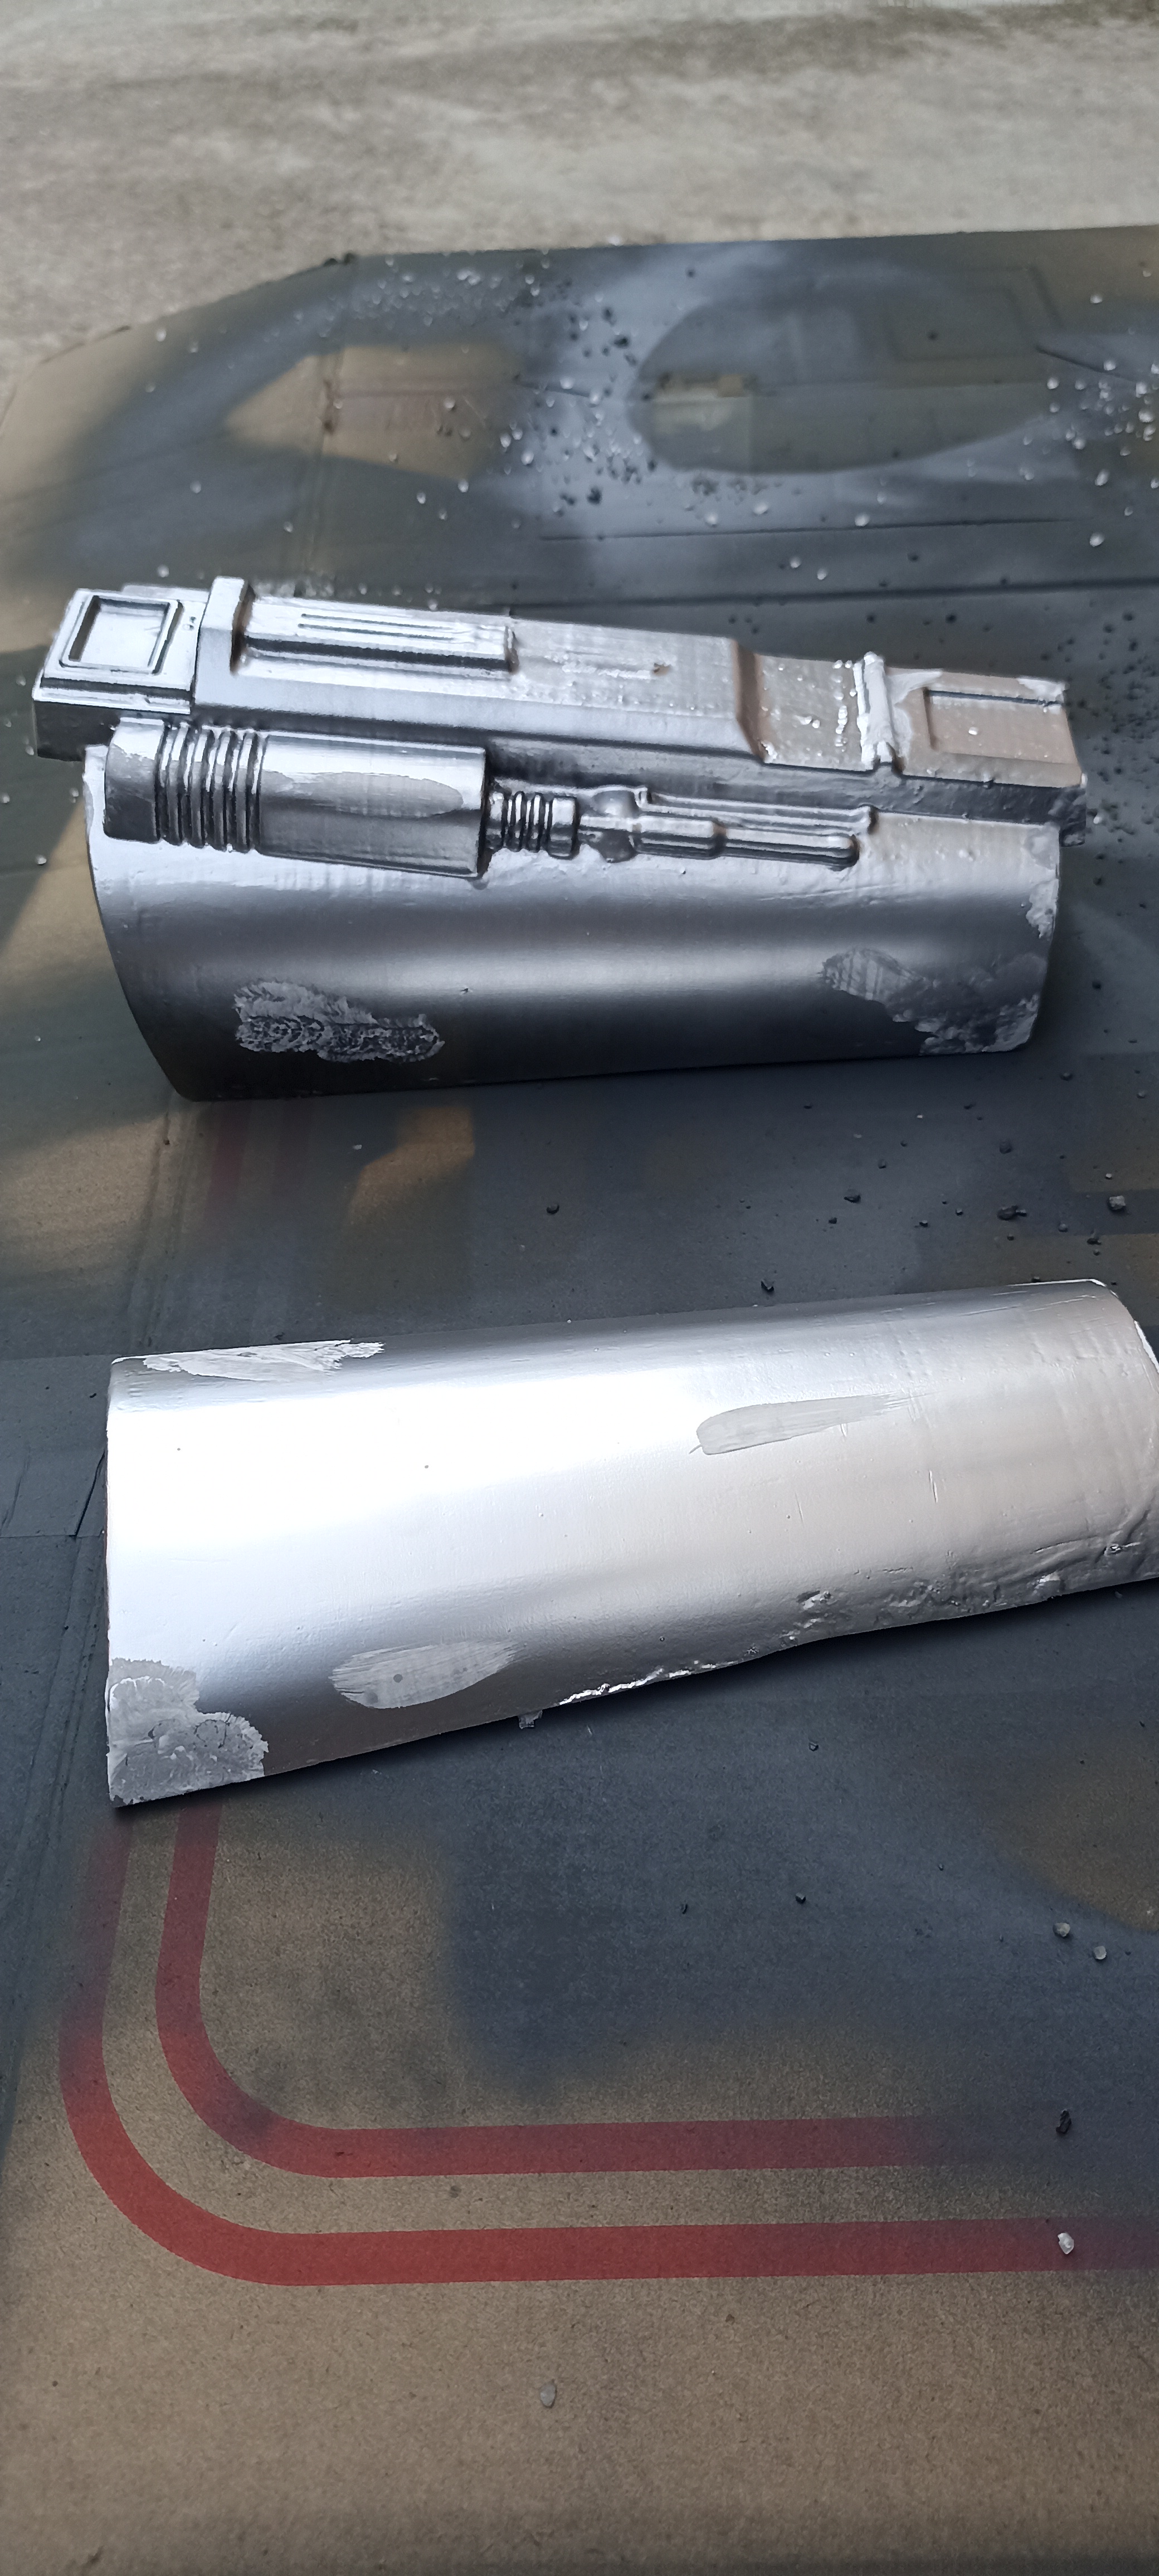 | Silver coat and some weathering. |
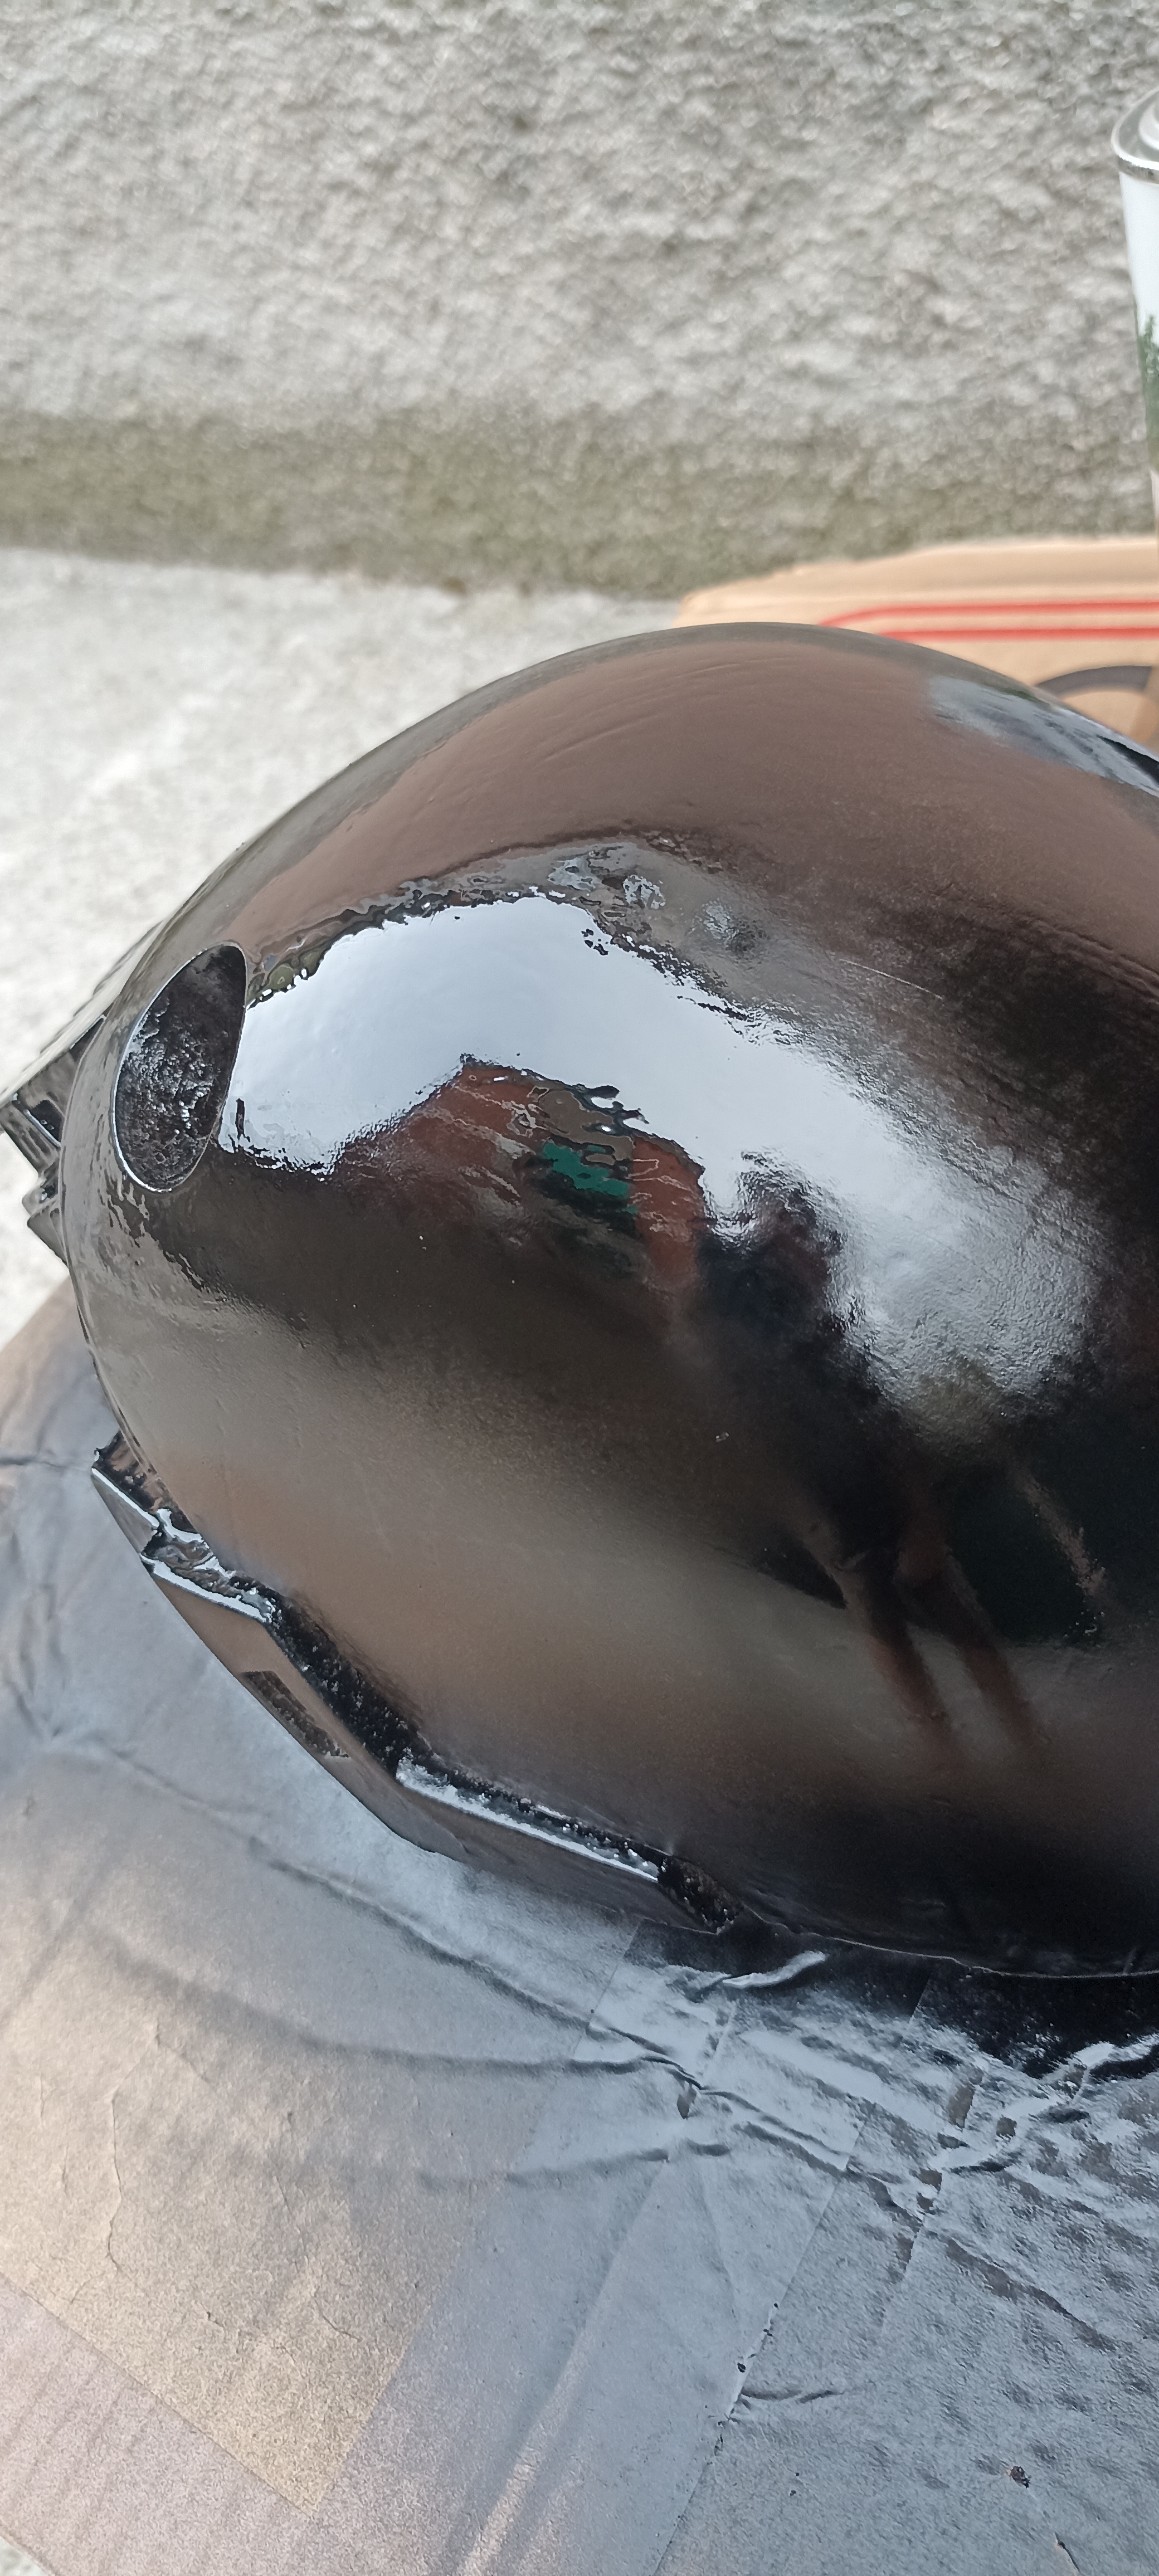 | KX head black coat. |
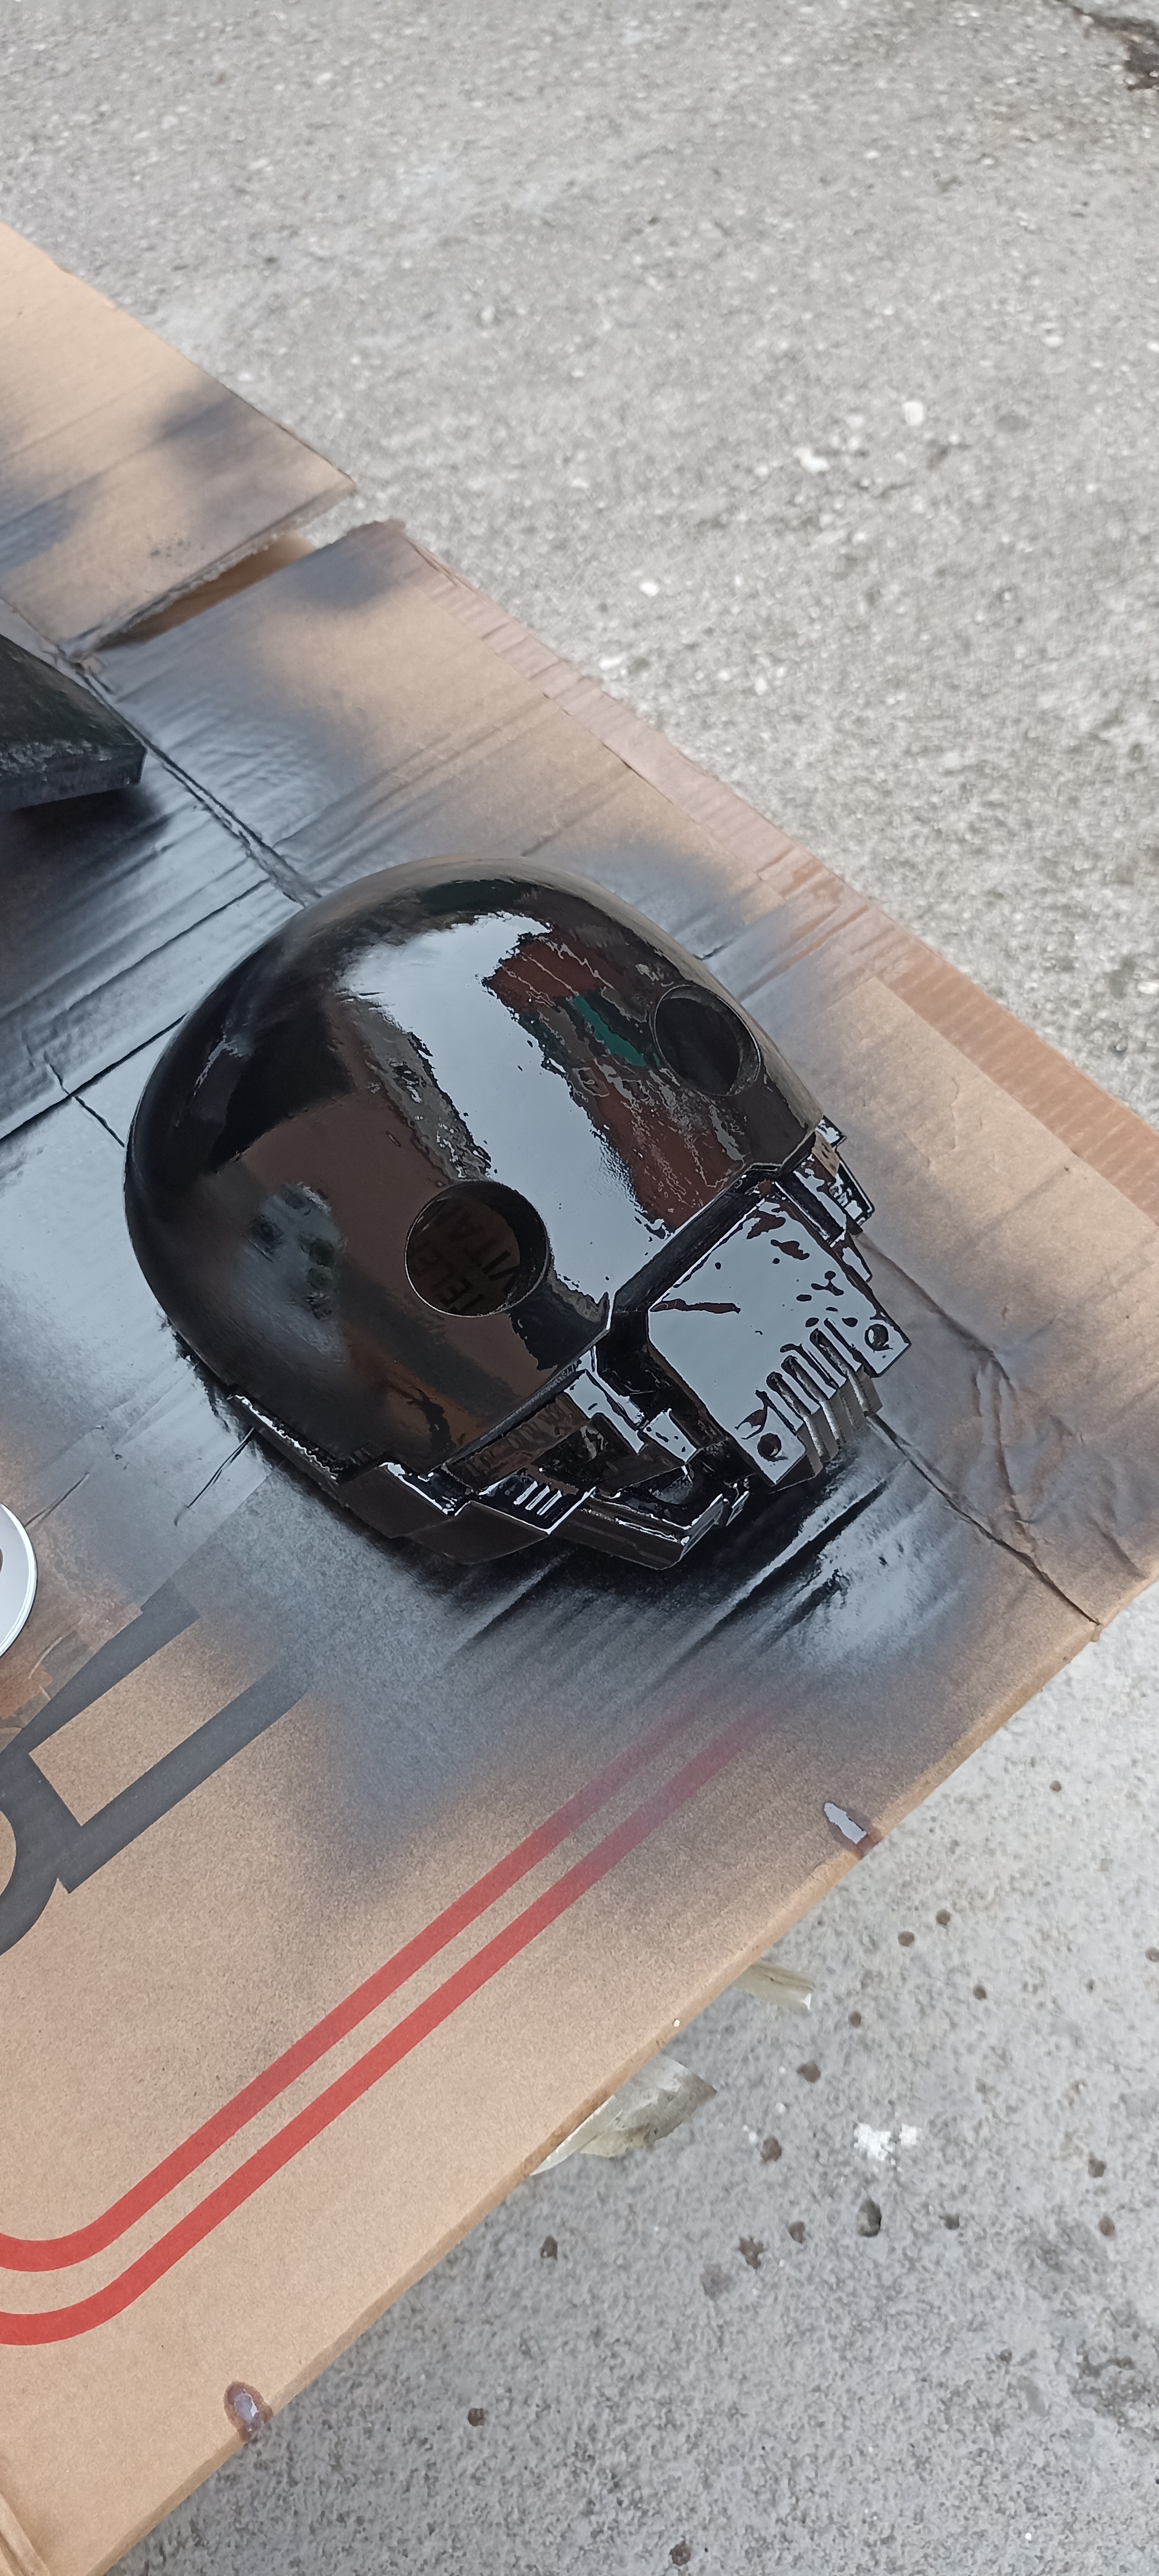 | KX head black coat. |
 | Soft Silver coat |
 | Soft Silver coat |
 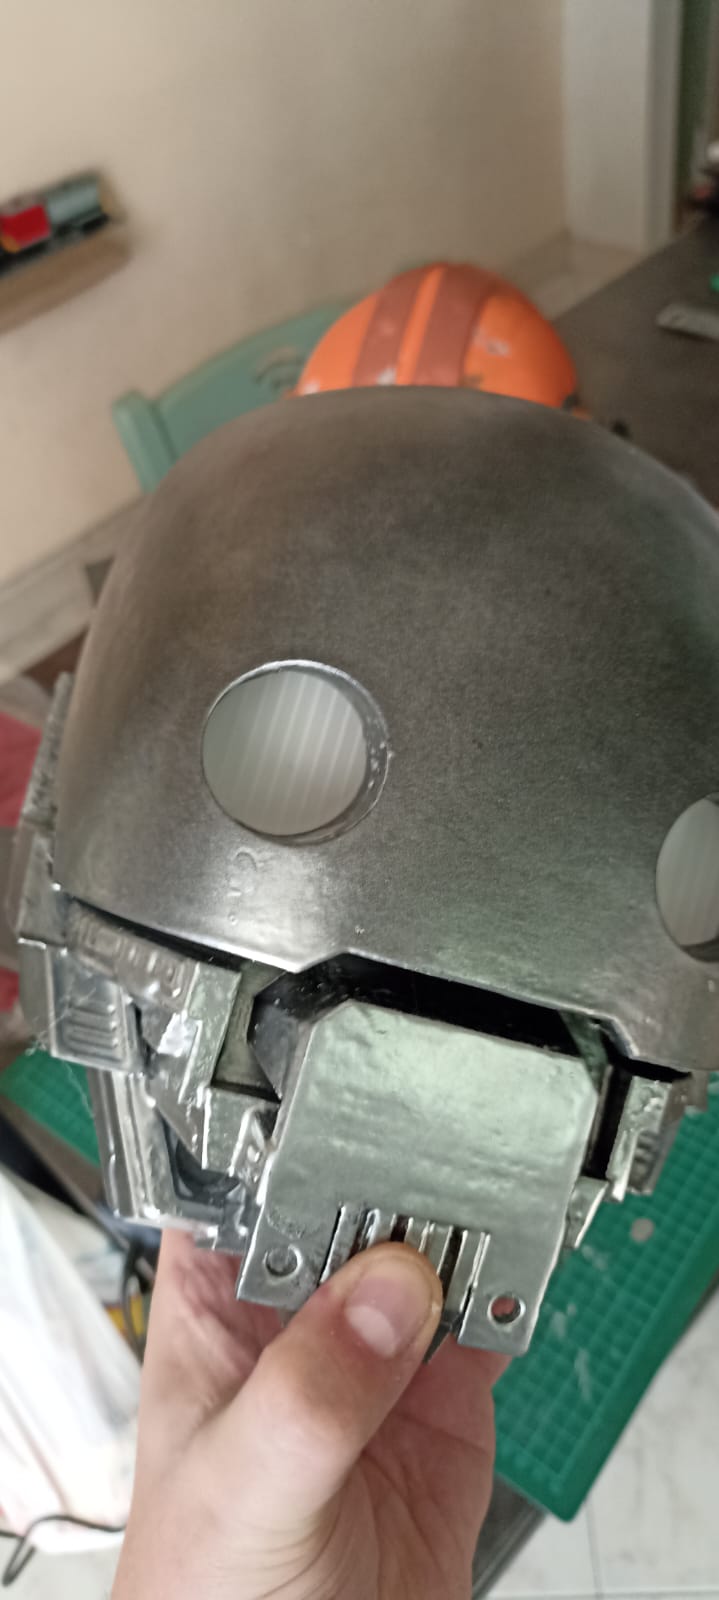 | original KX head vs crafted version, Building eyes. |
 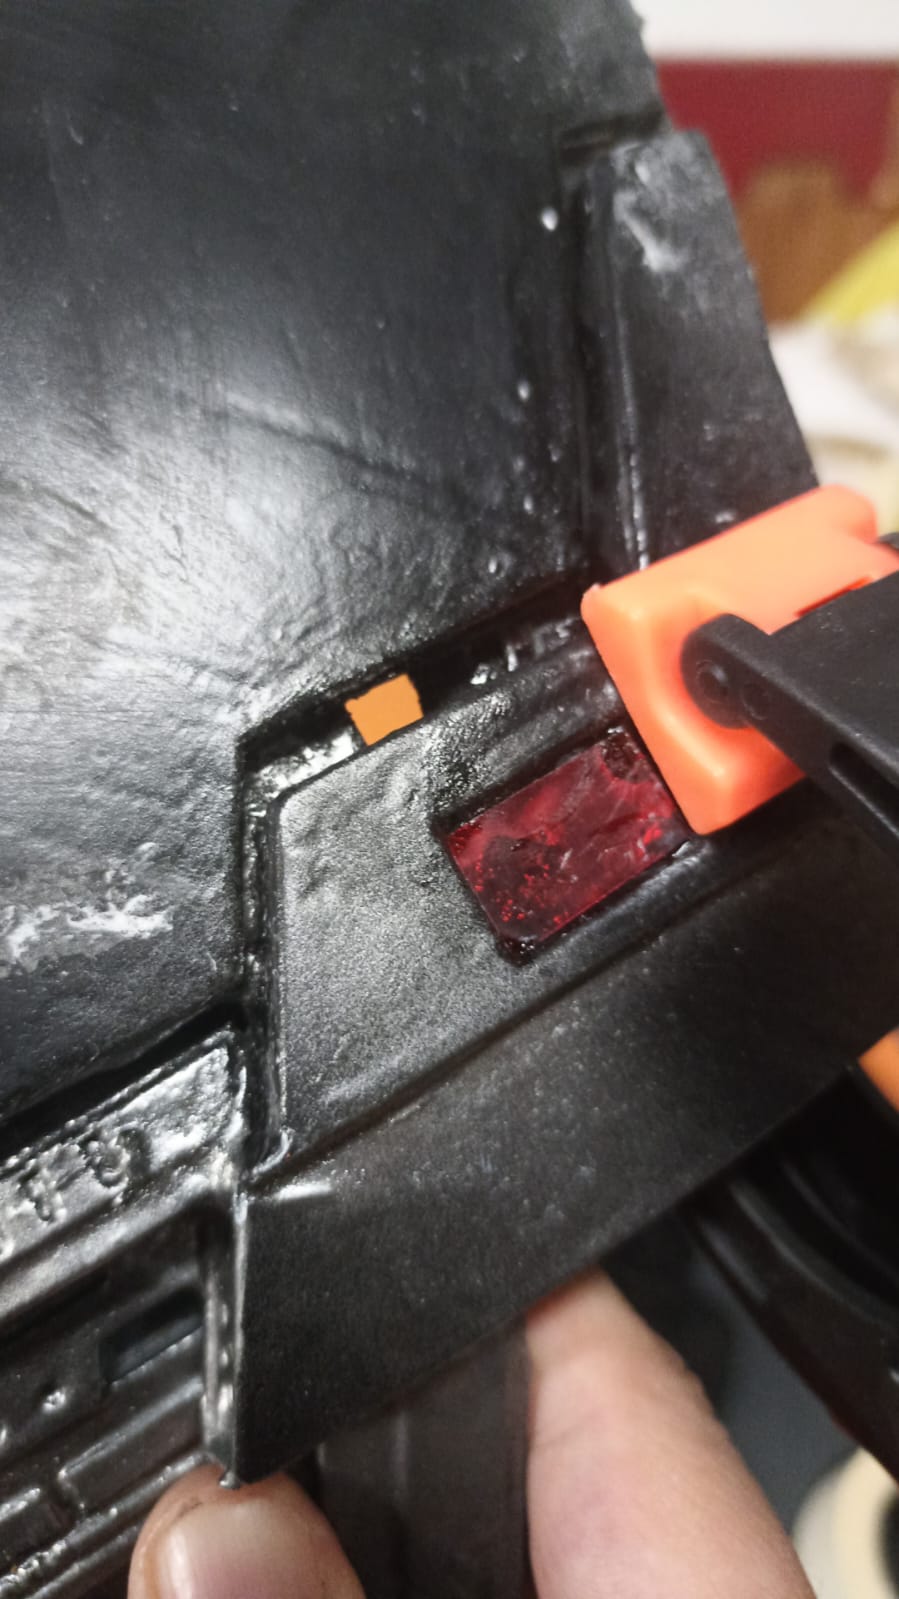 | Last black paint layer, some weathering and red detail (not painted). |
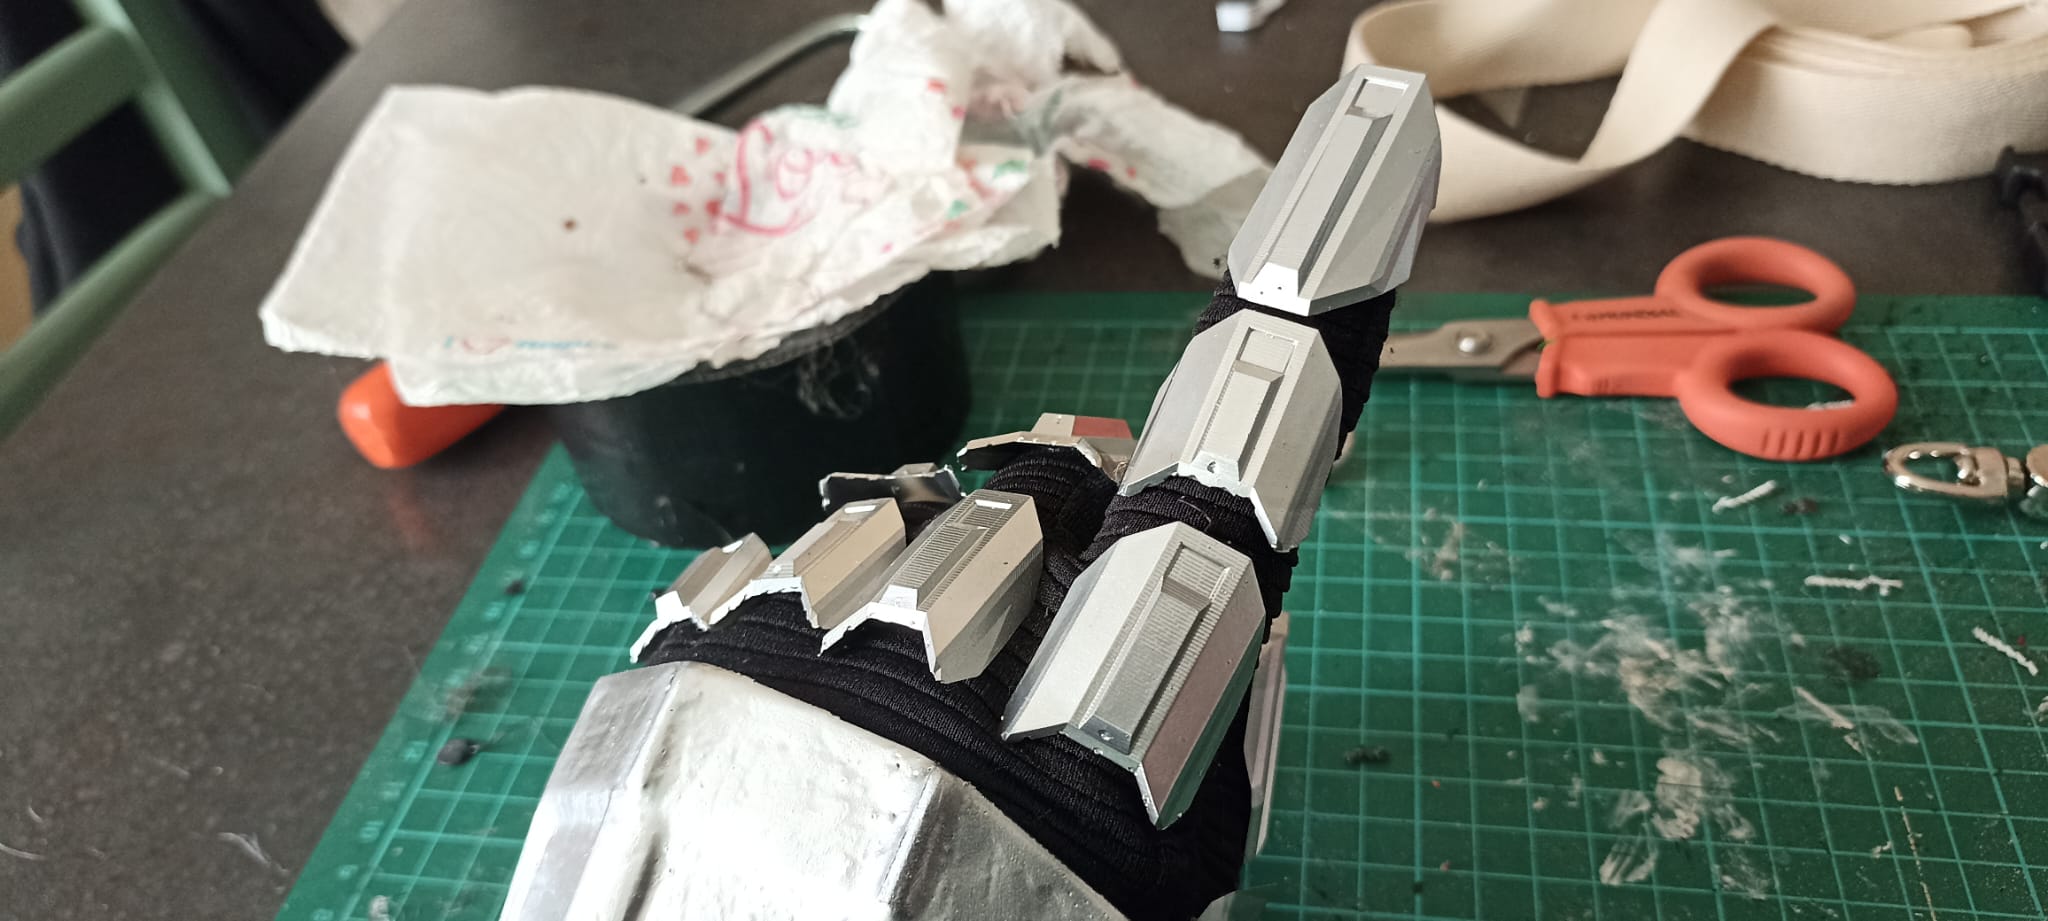
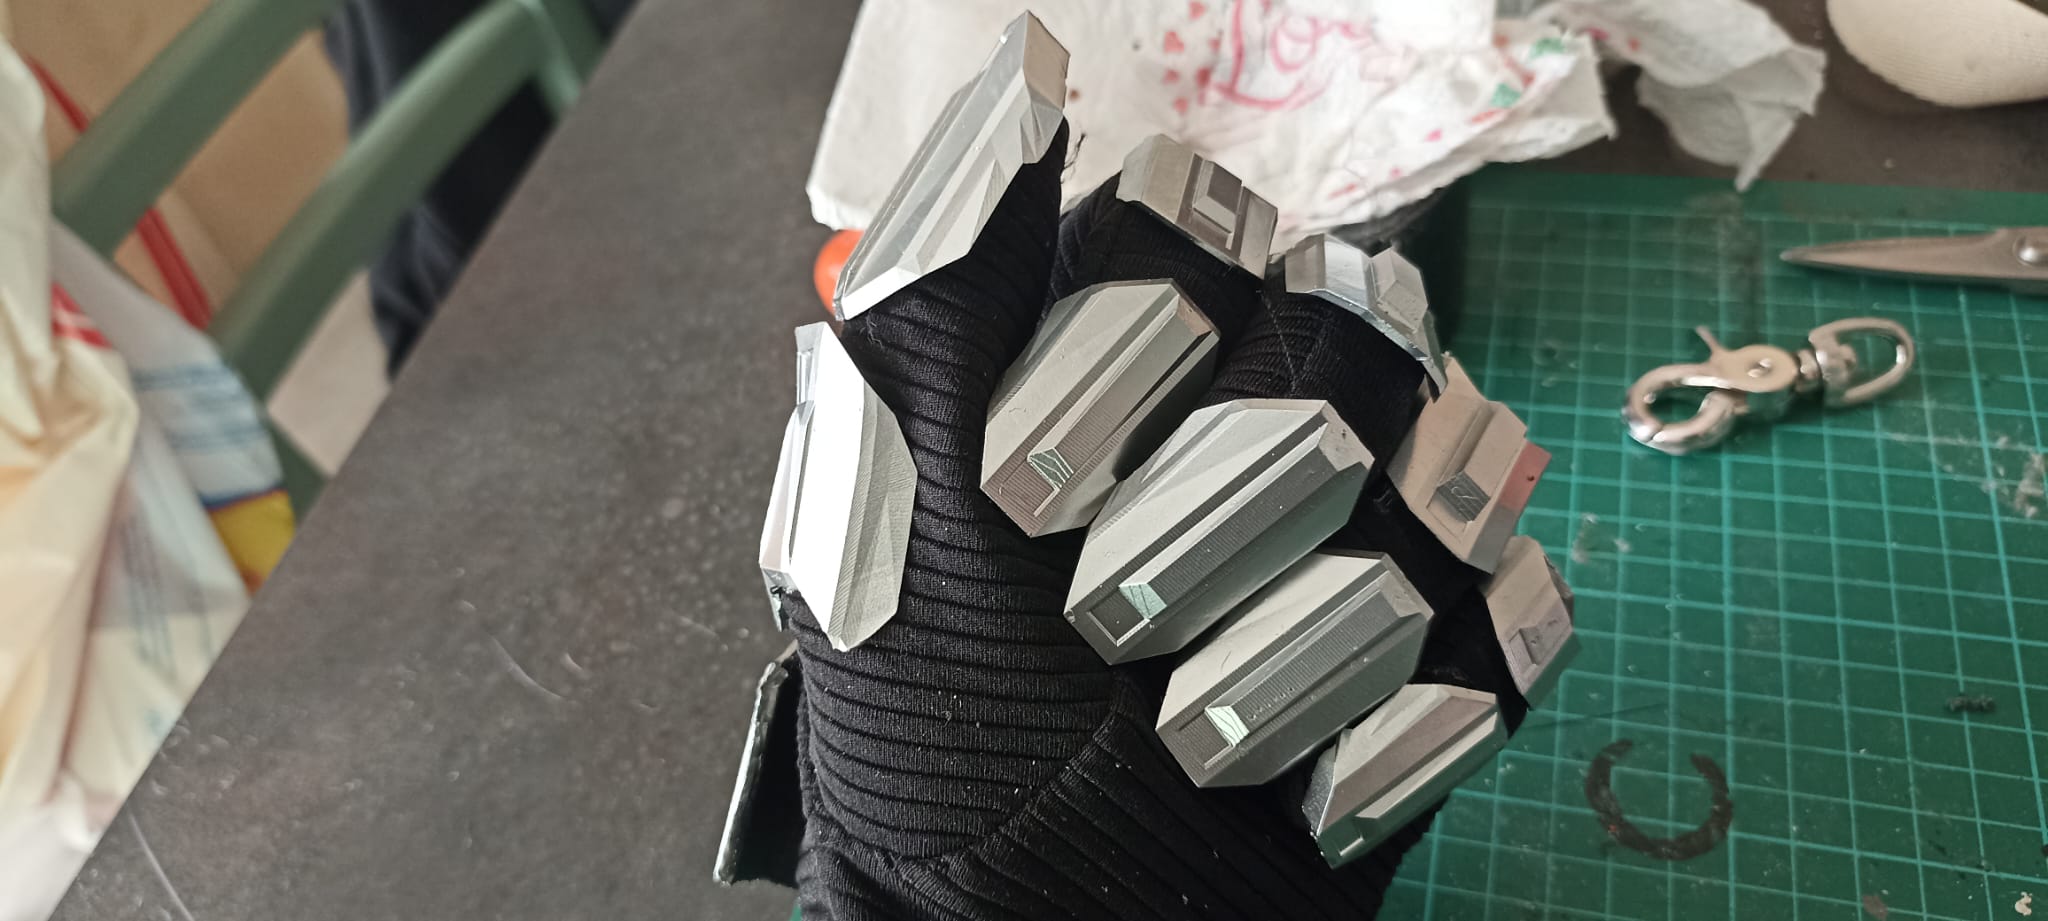 | Cyborg hand detail |
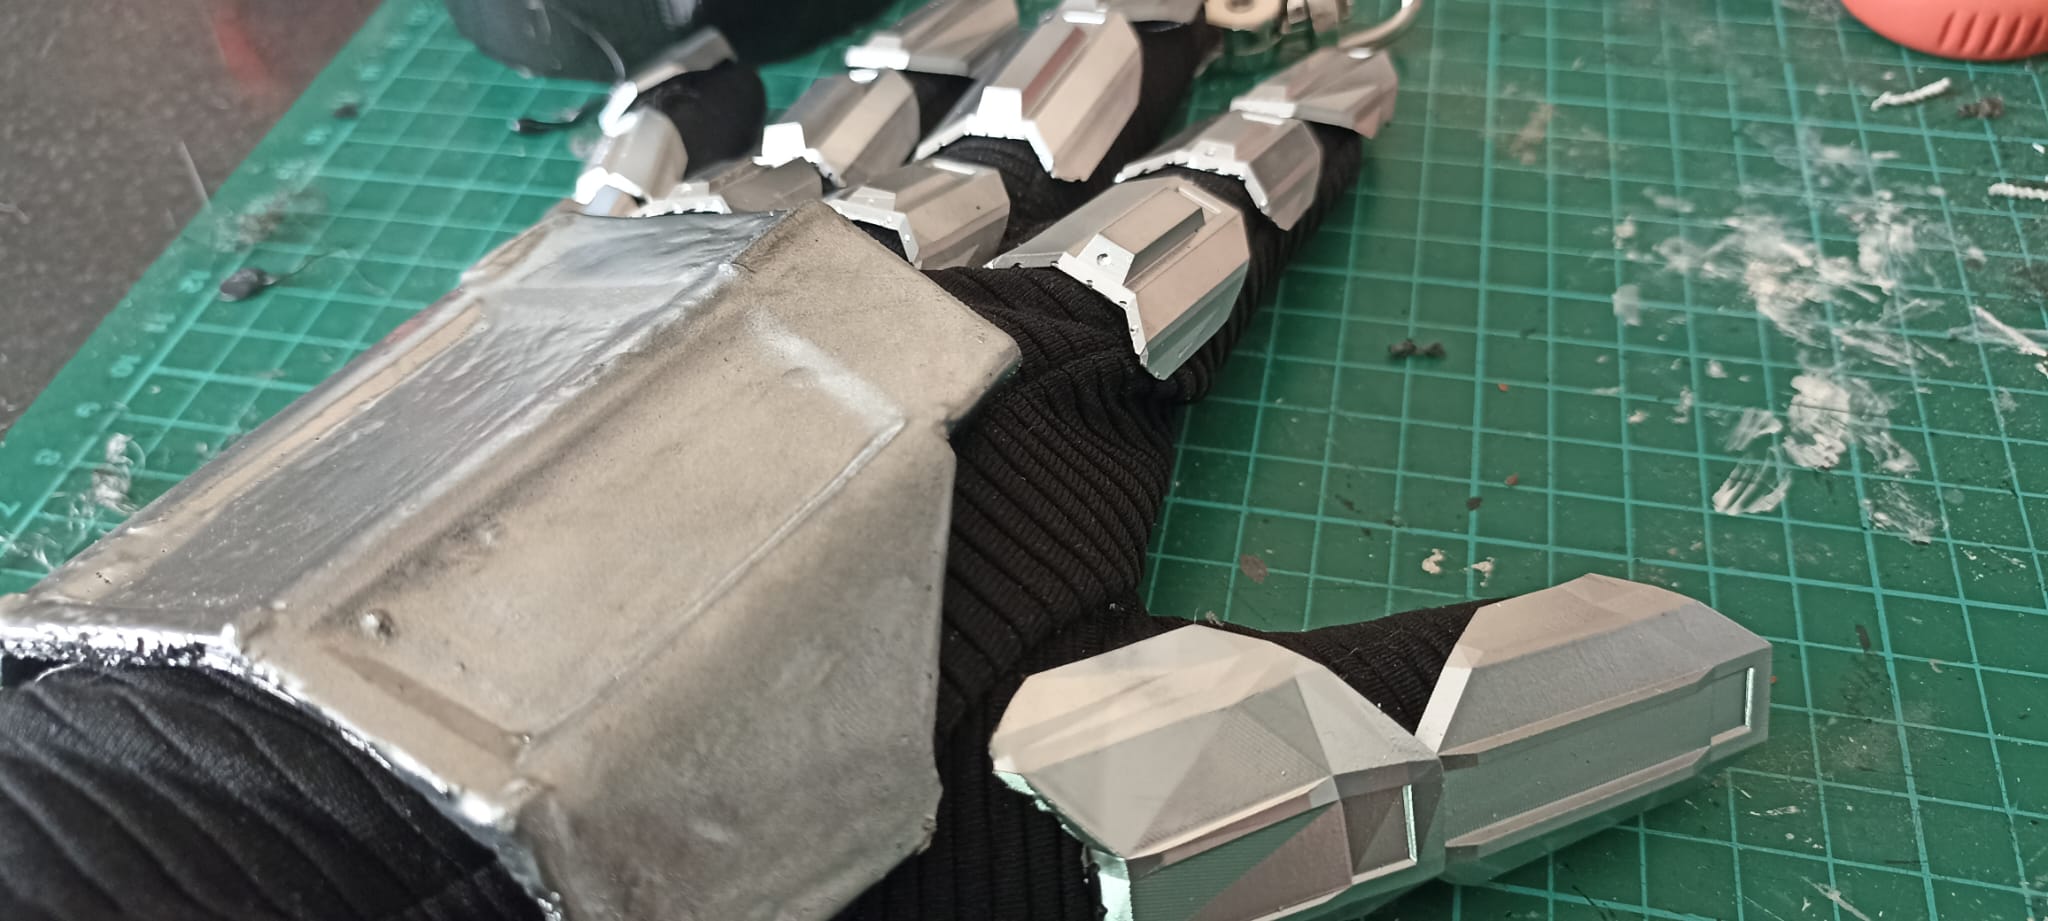 | Cyborg hand detail glove texture detail. |
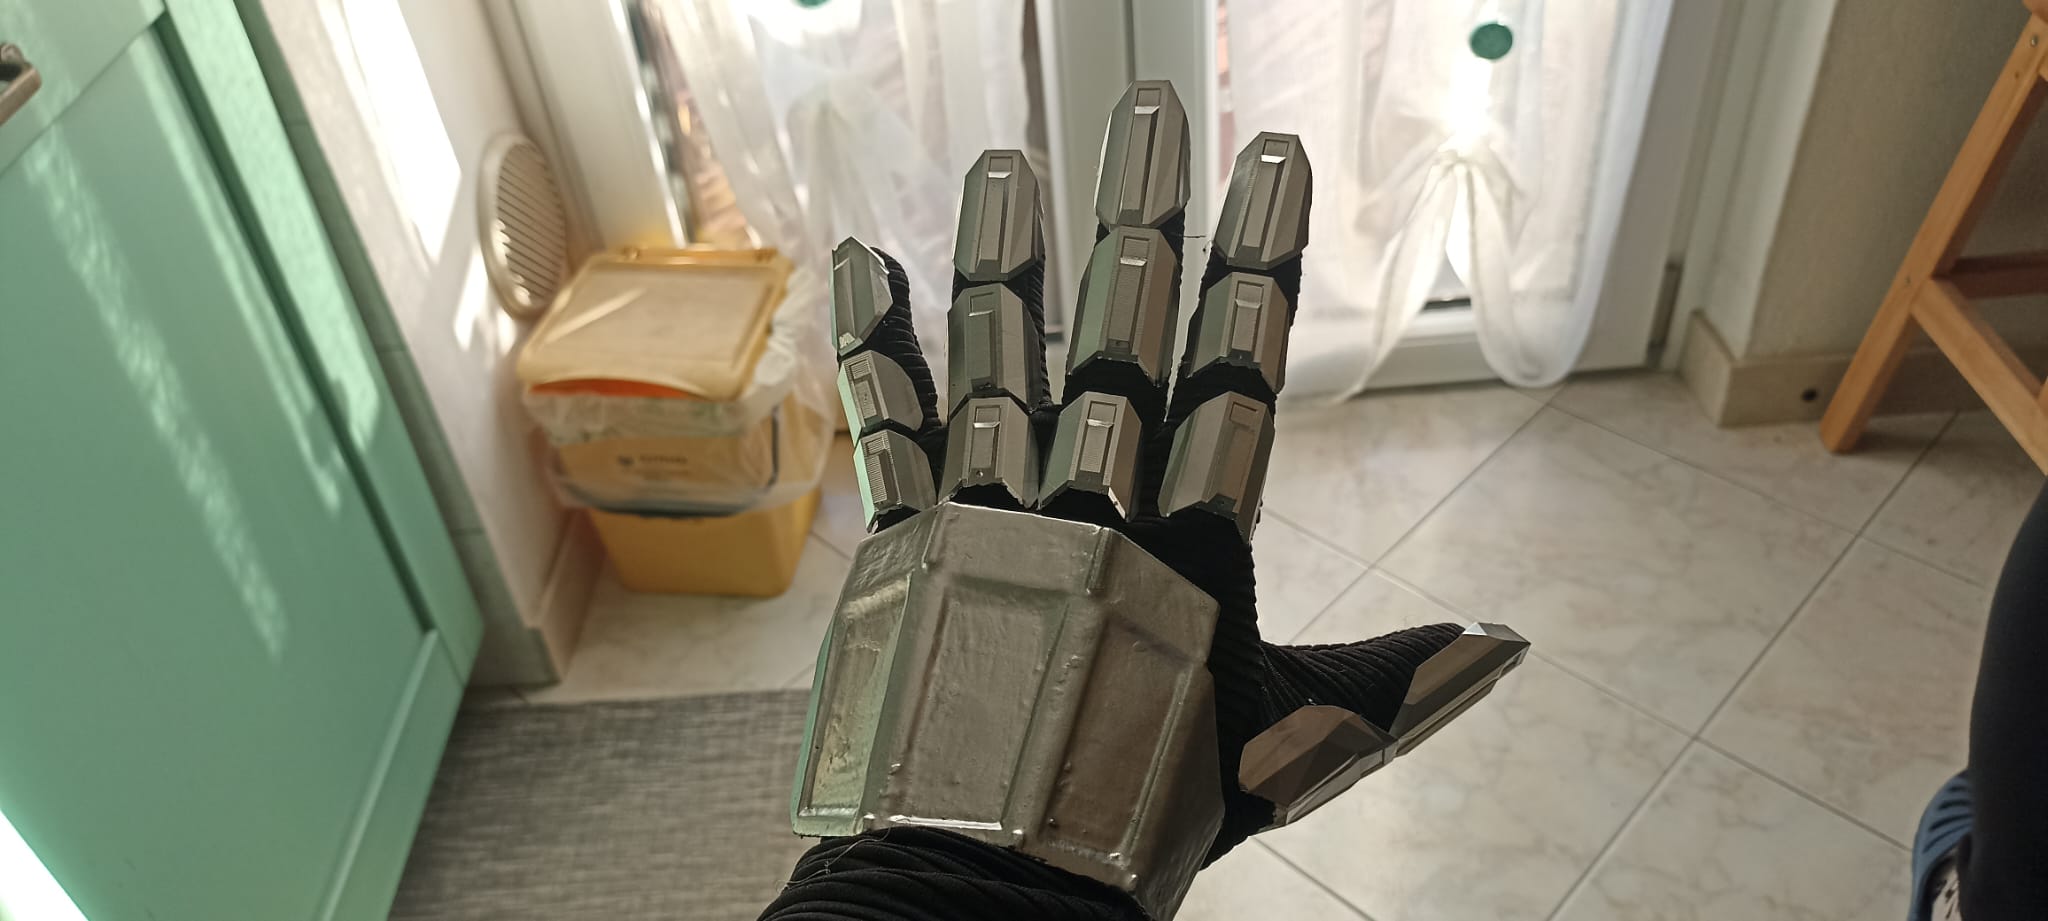 | It fit well. |
 | |
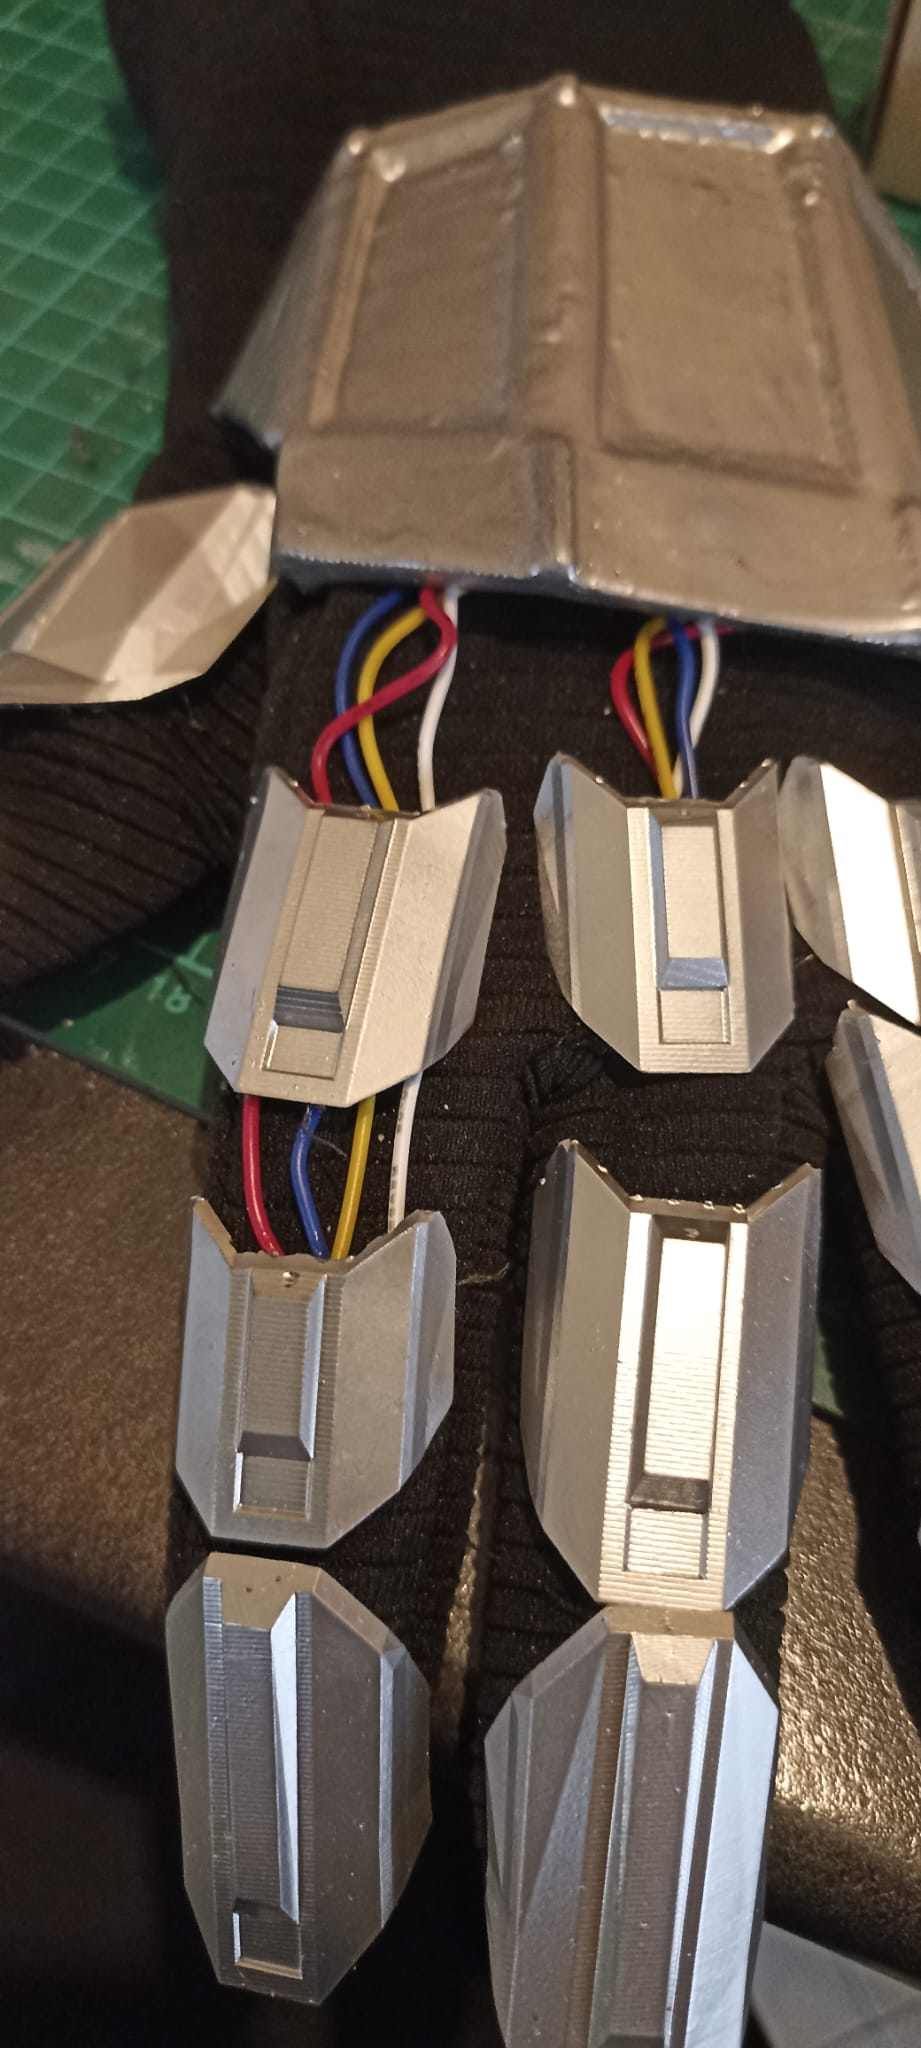 | Other details (fake cablese exposed) |
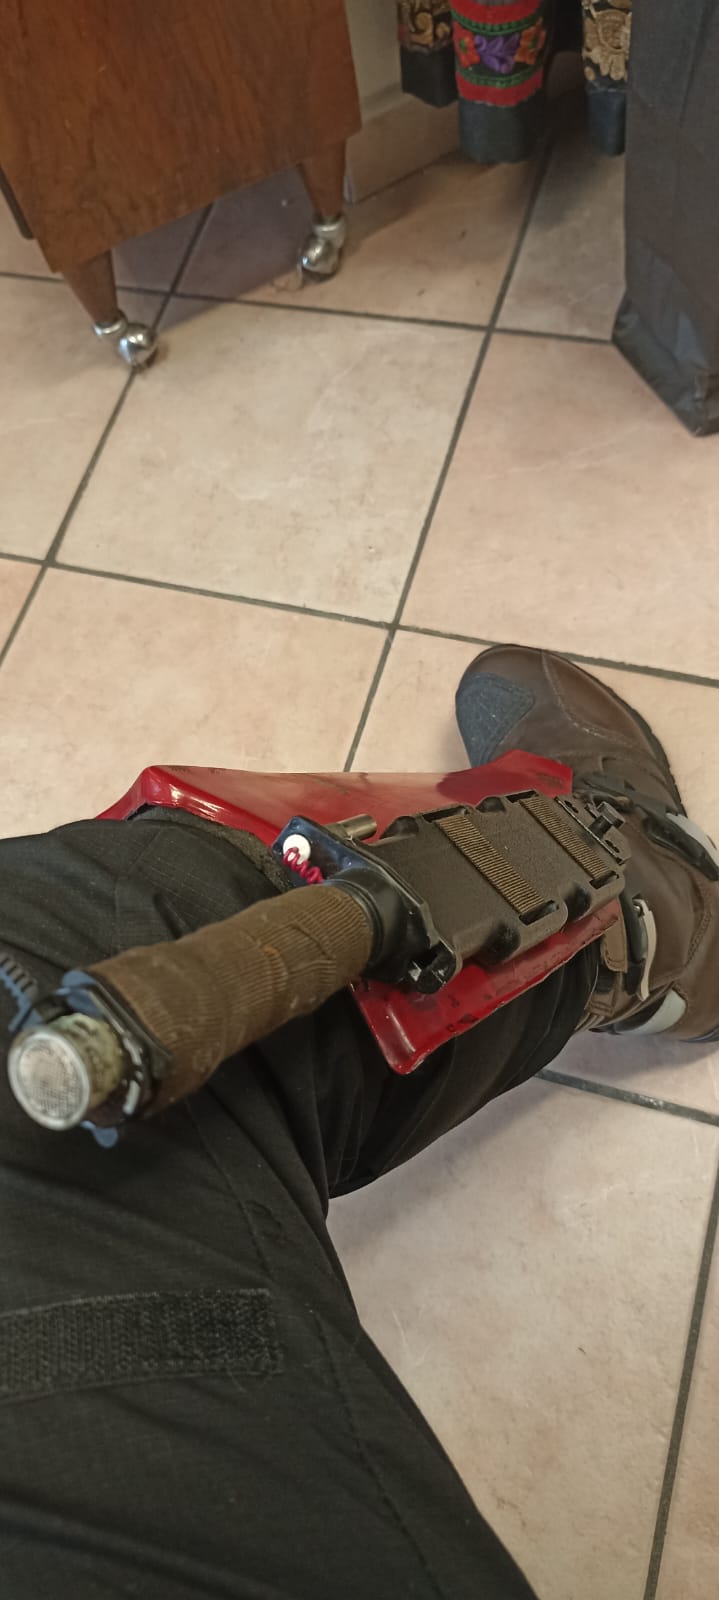
Here you can see the full process for Knee's creation
 | Starting from a 3D print with the cheapest PLA. |
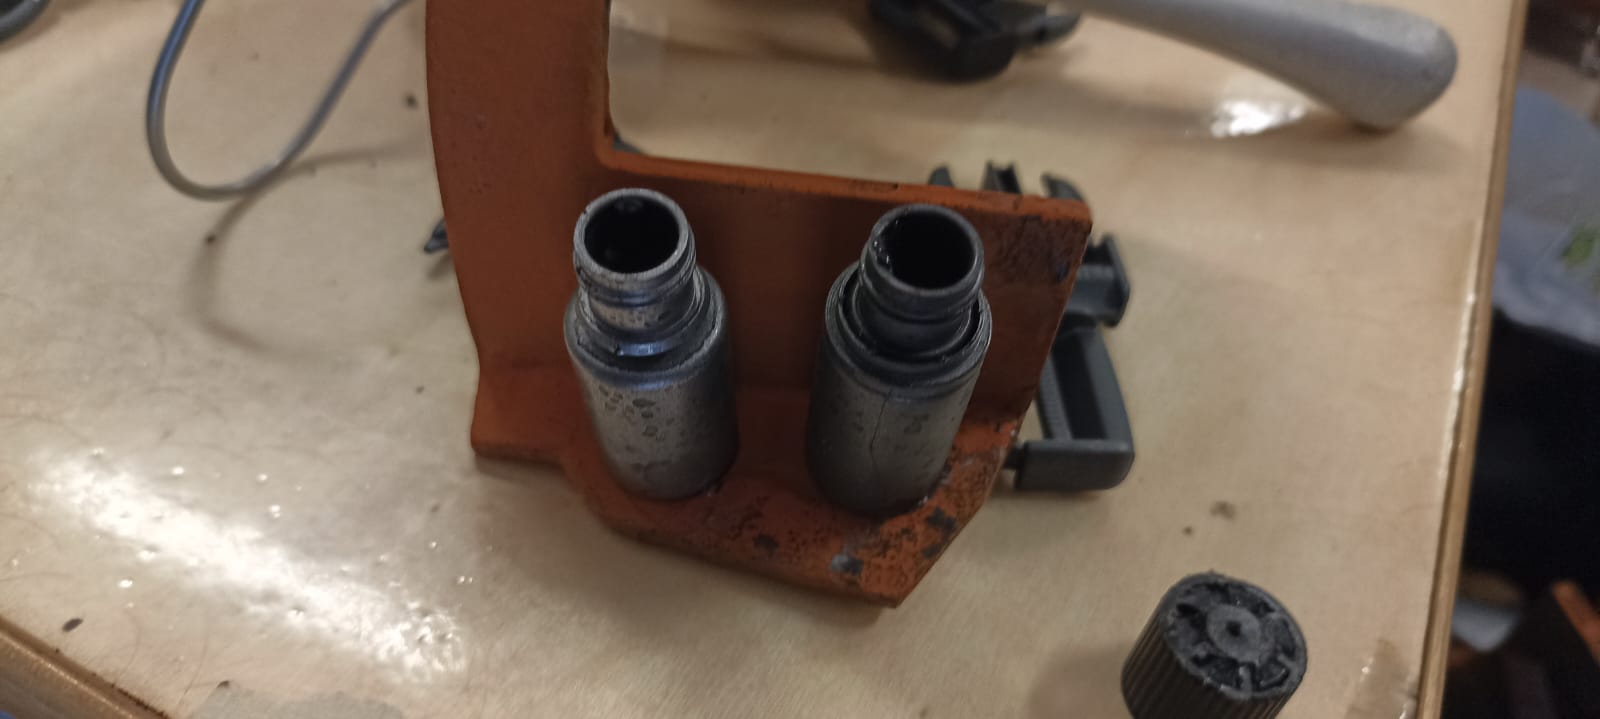
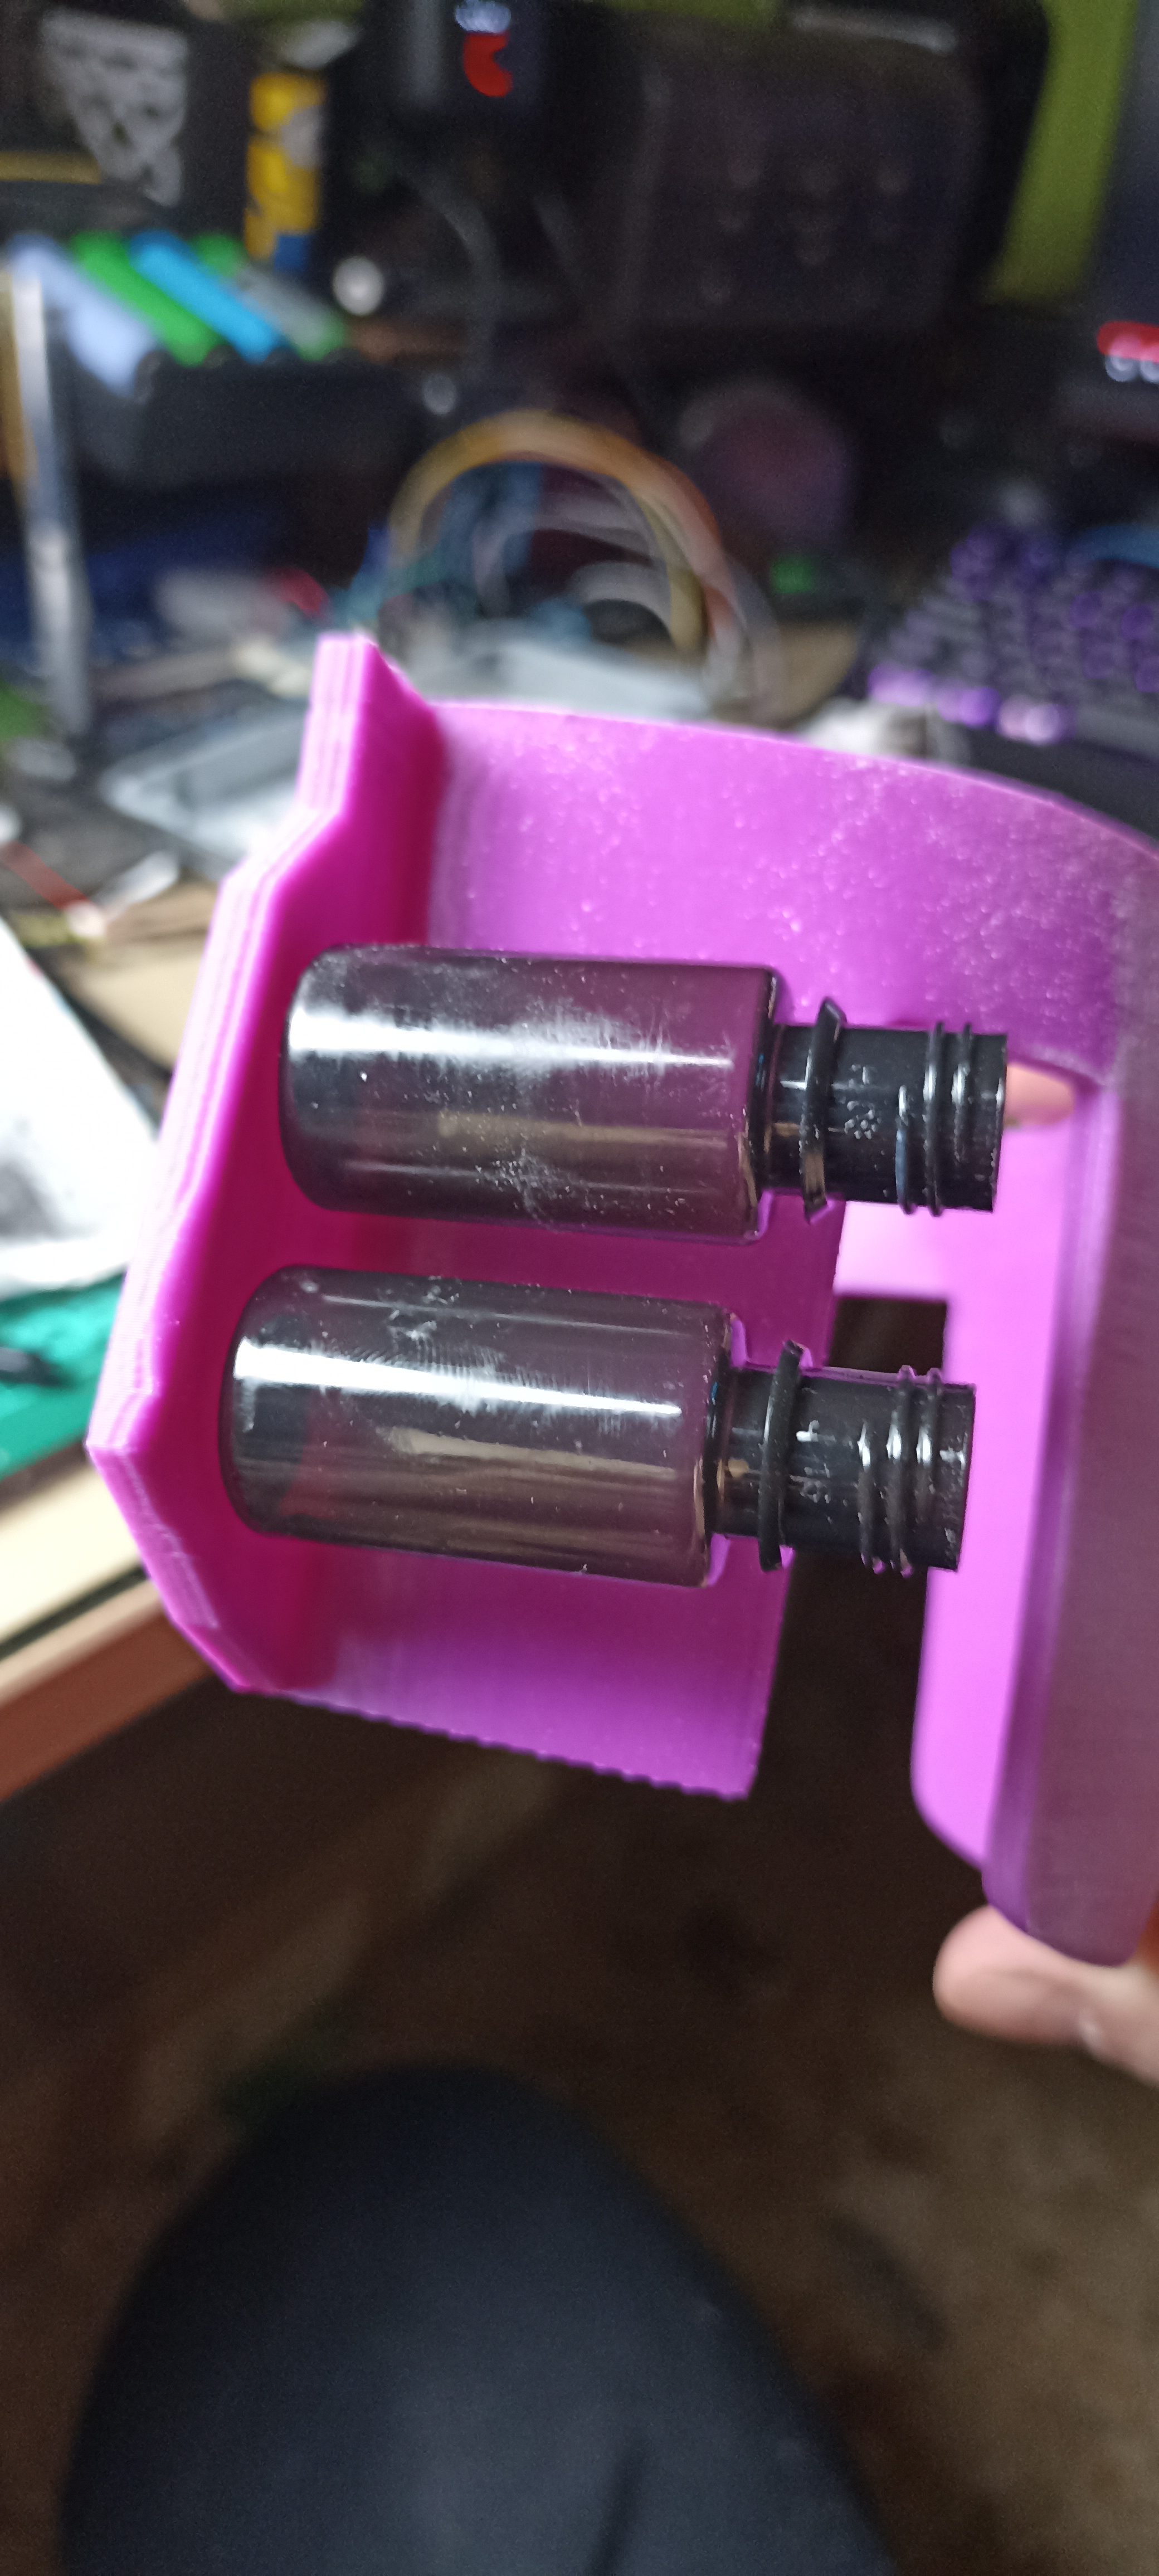 | Knee rockets are E-Sig nicotine flacon! :O |
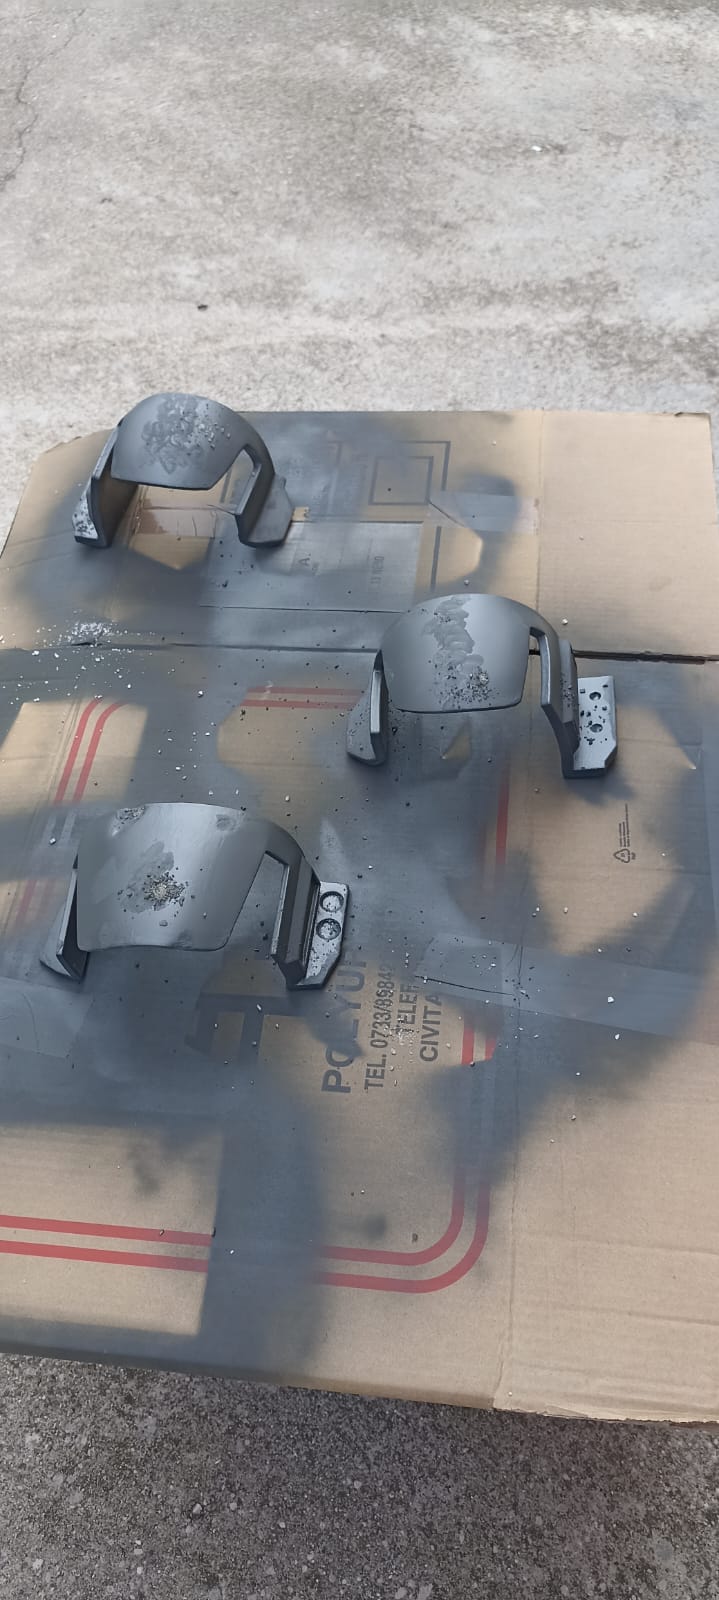
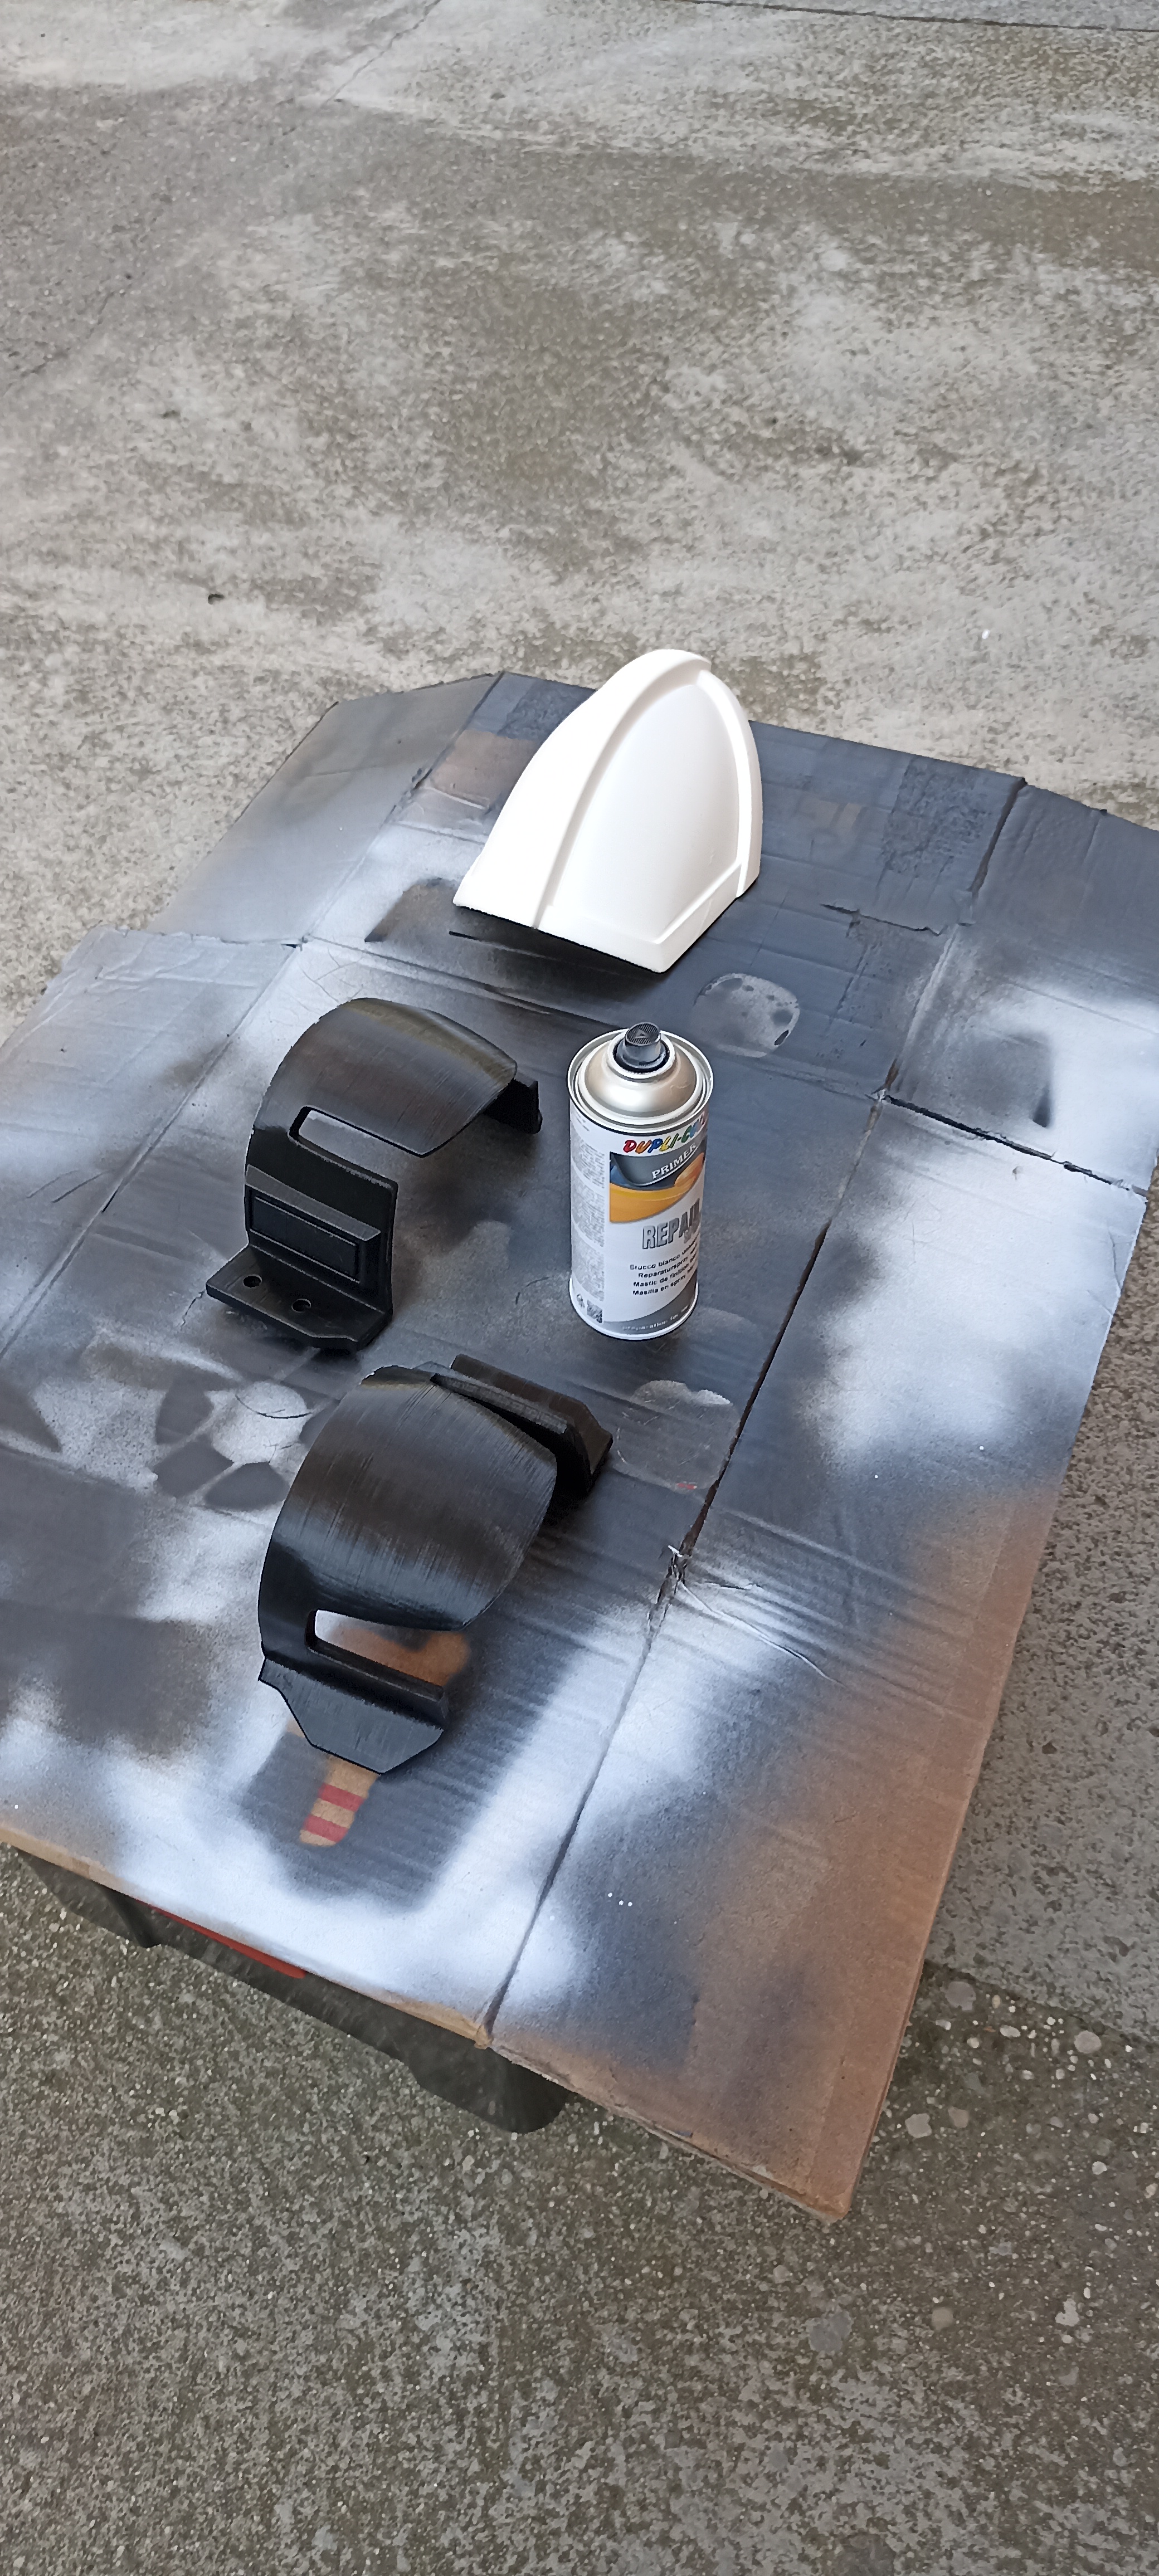 | Black coat is the starting point after some sanding and before silver coat. |
 | After apply silver coat, you can see to much print lines. OK restart from scratch. |
 | 2 Layer of UV resin and a coat of putty spry, now you can see that reflect light, now it's perfect! |
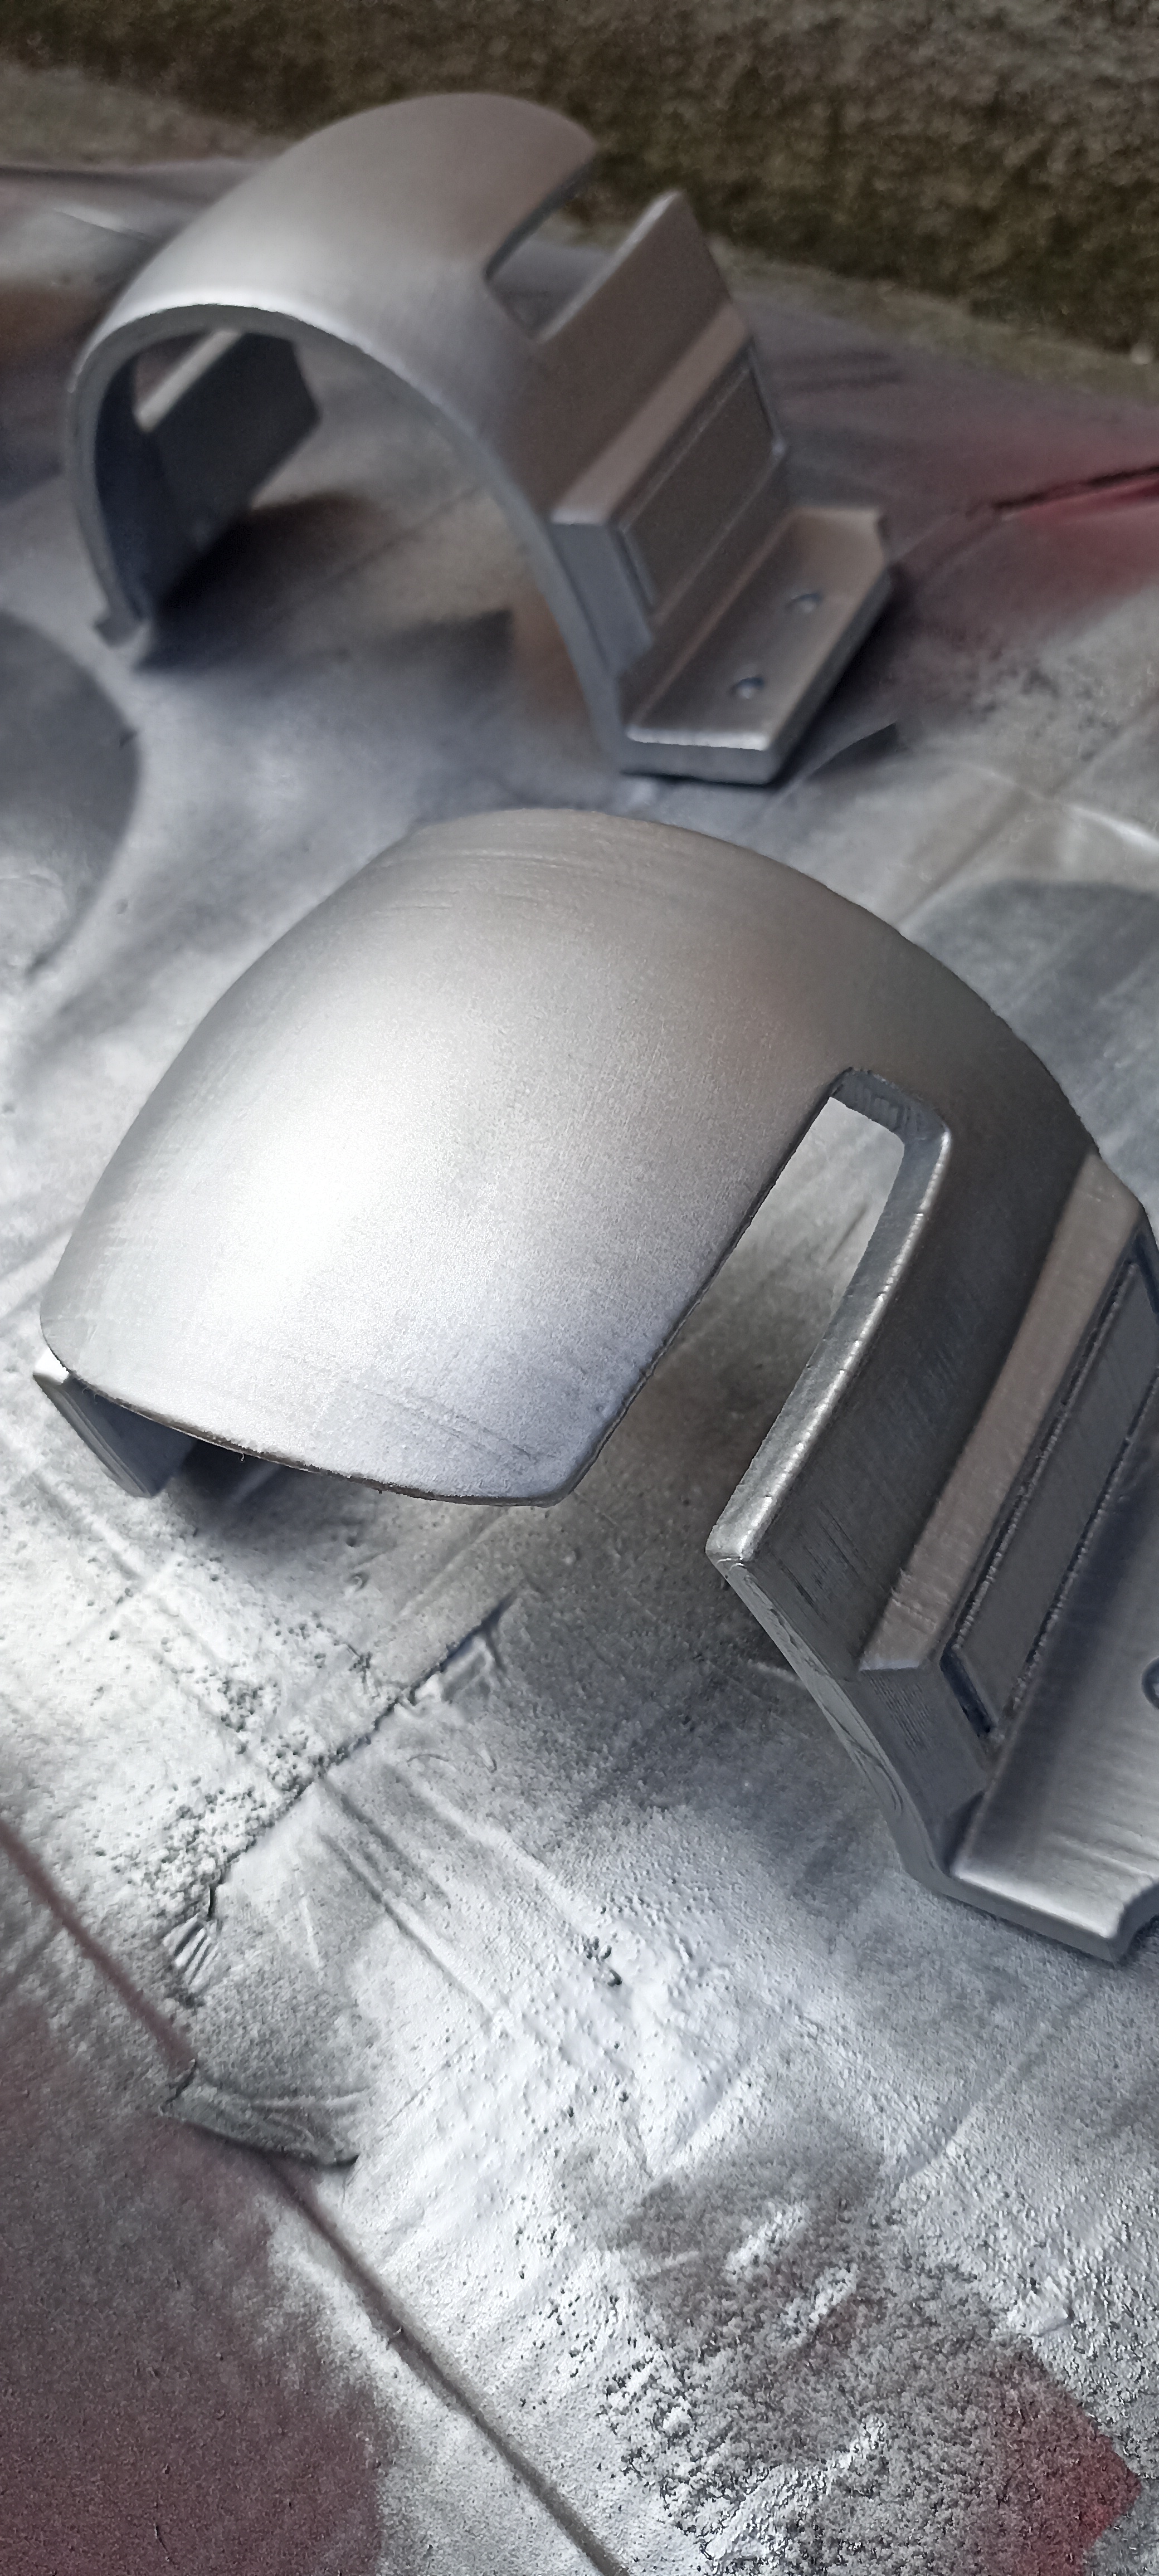
 | Silver coat now is awesome! |
 | Some toothpaste, some coarse salt. |
 | and grey coat (MG PRIME Pantone 446C Grey) |
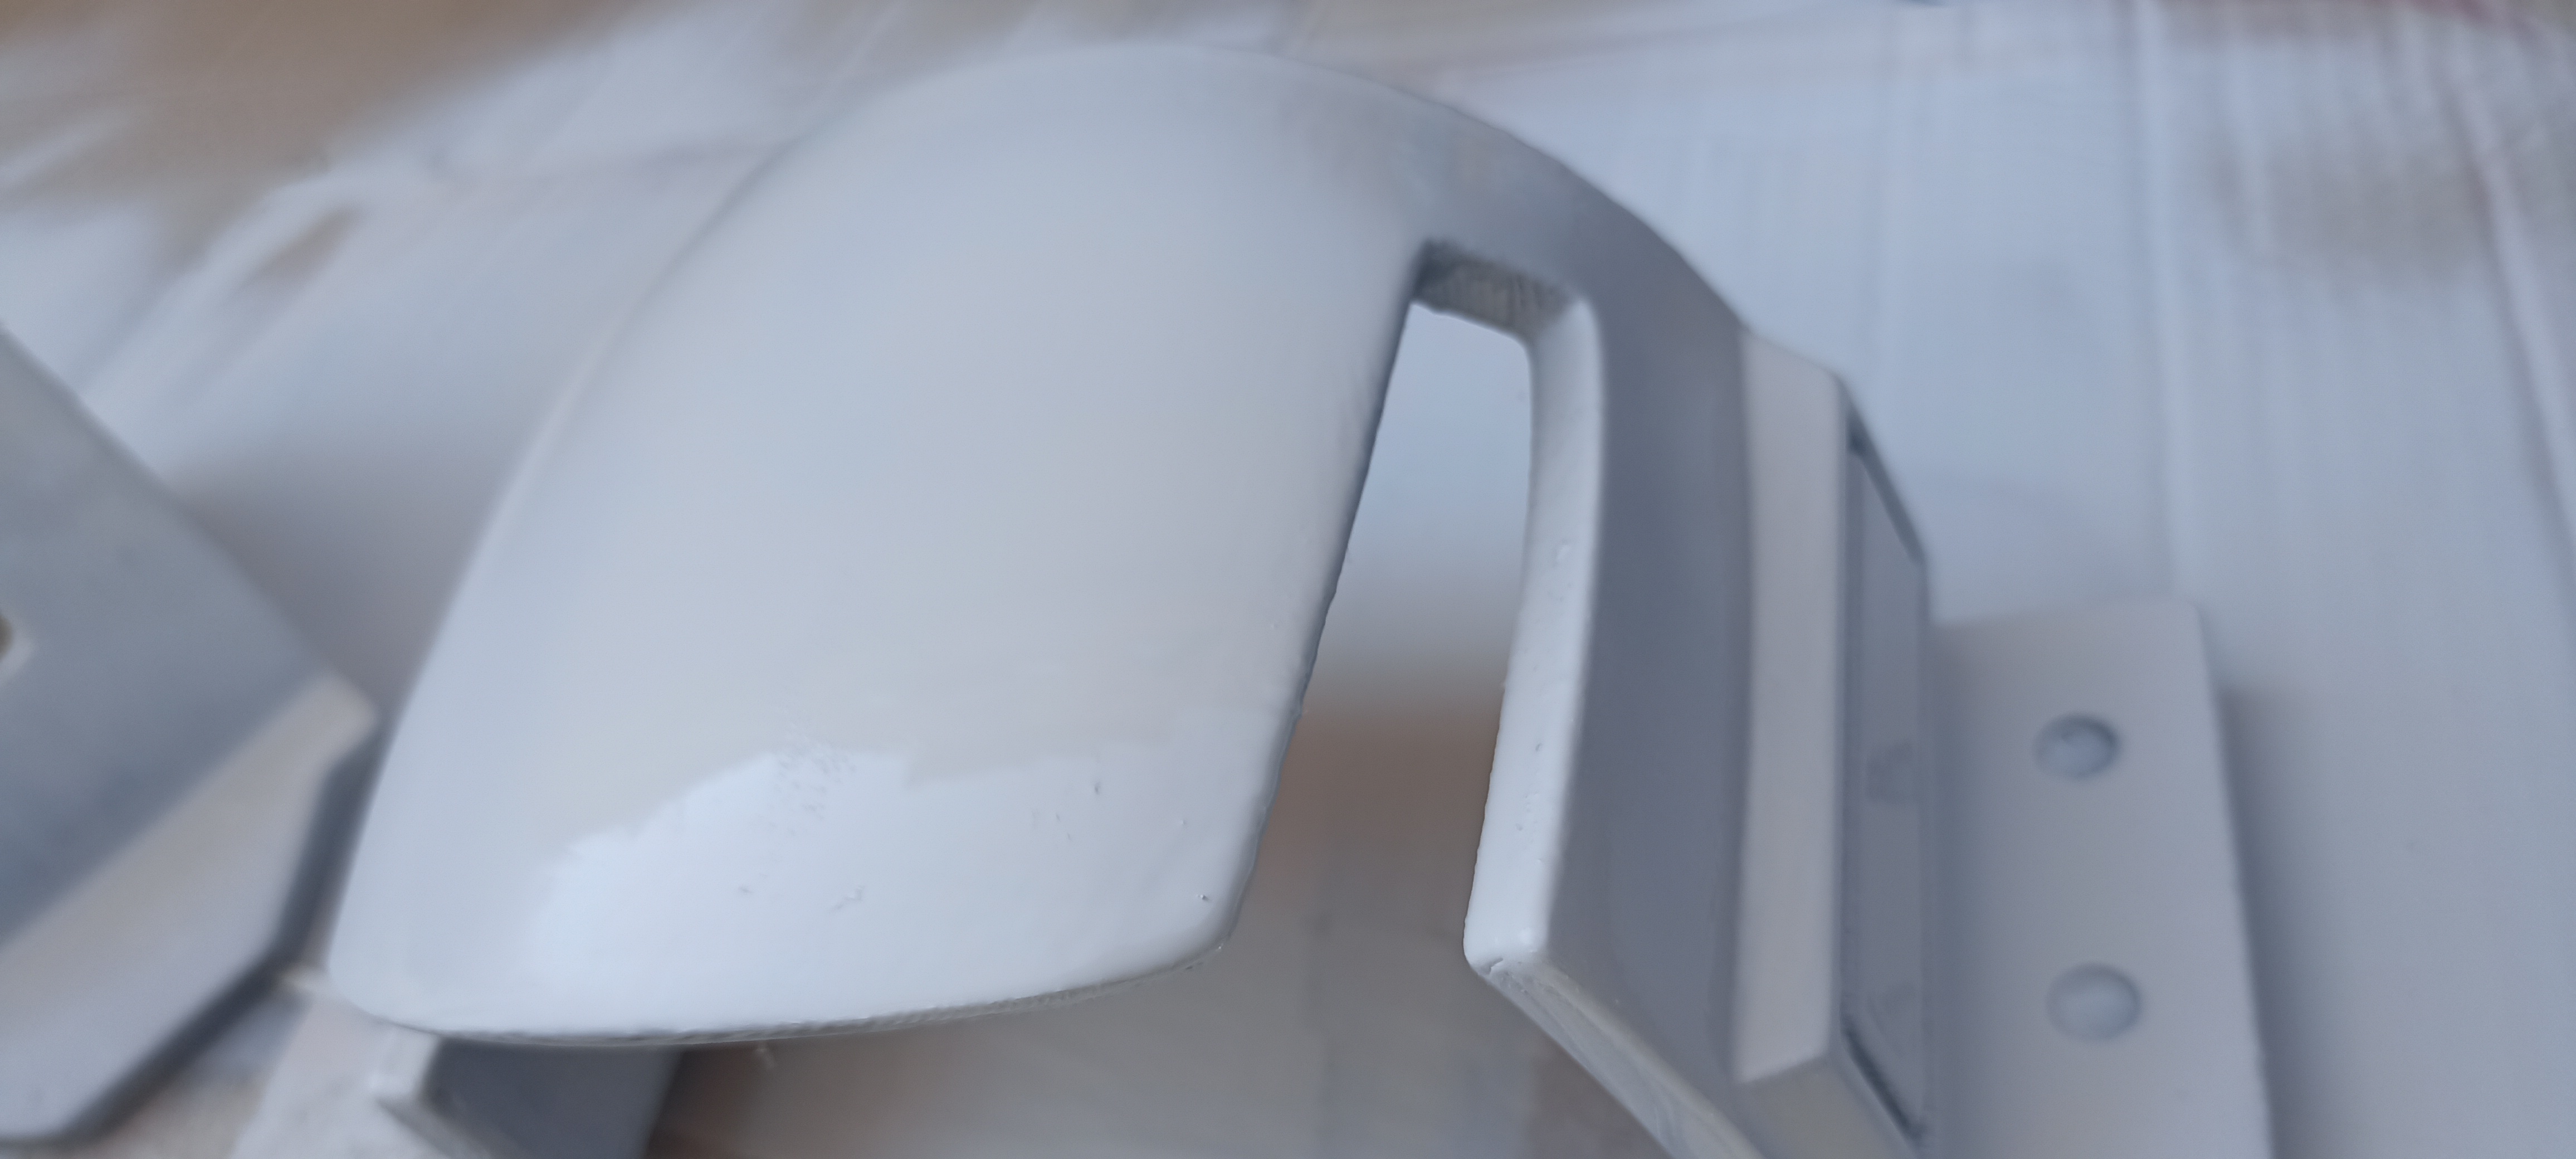
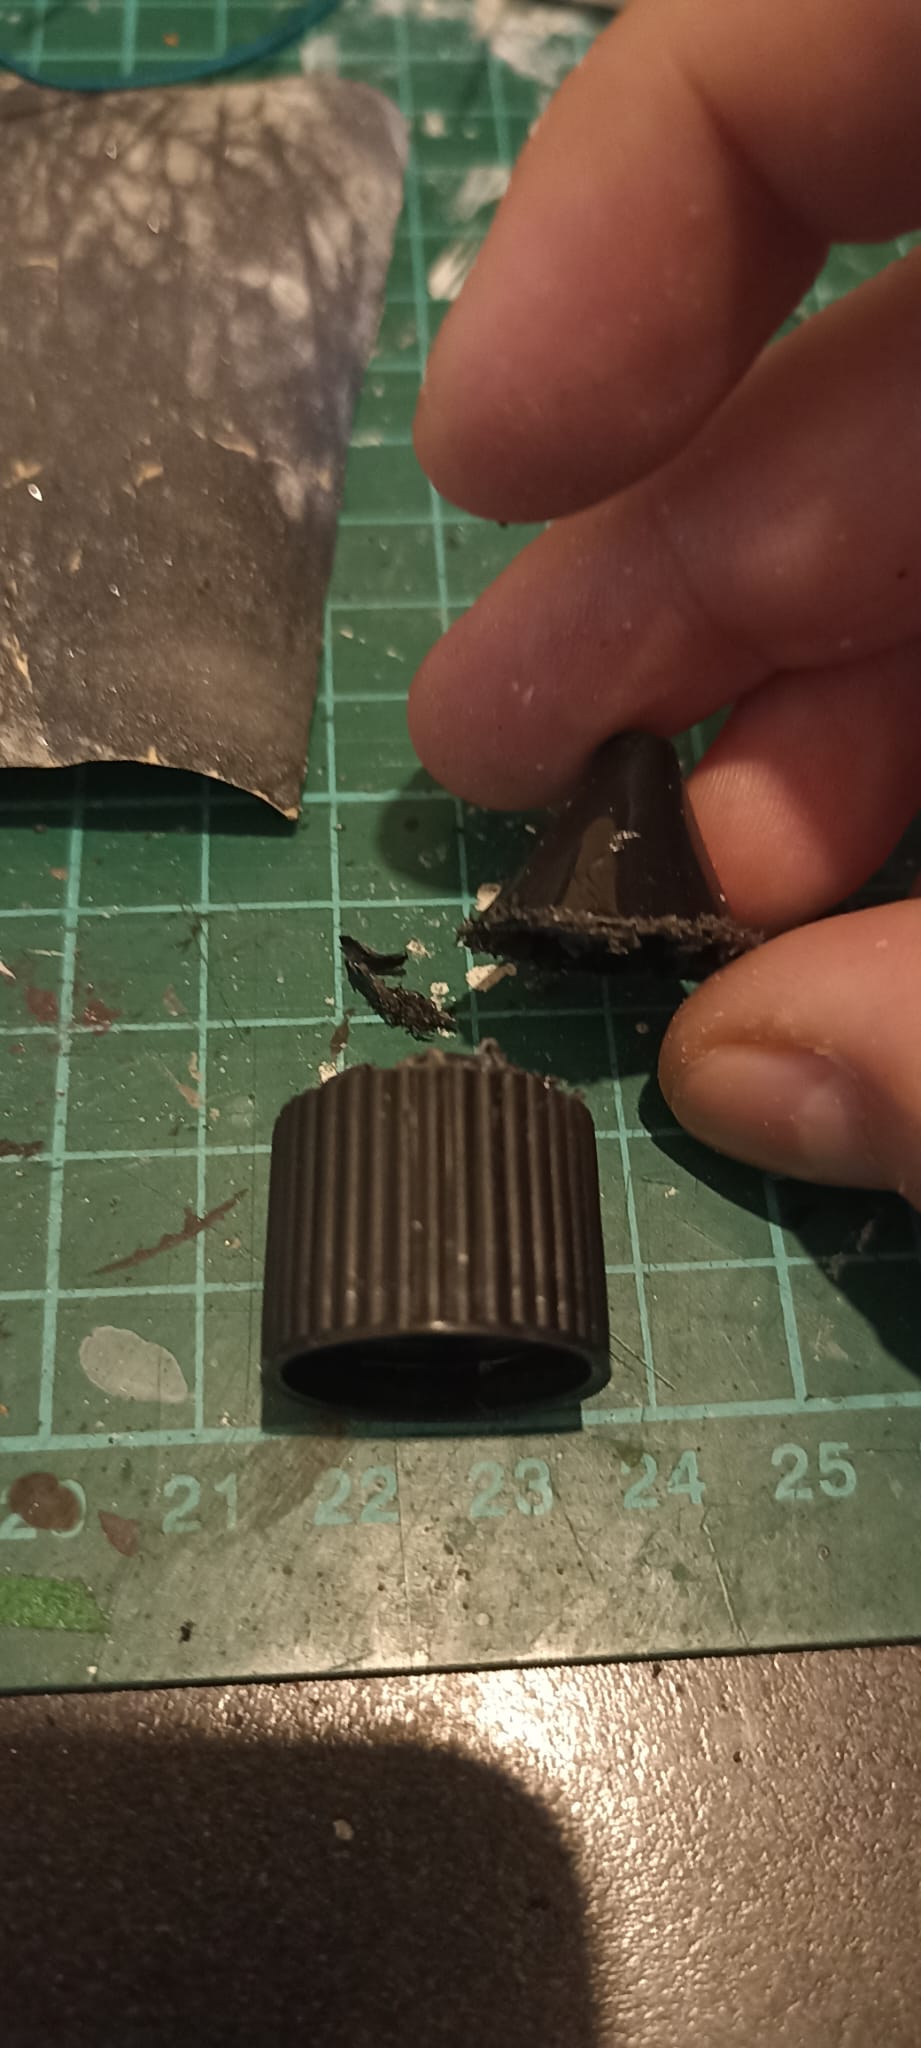 | Cut away top part of the E-Sig nicotine flacon. |
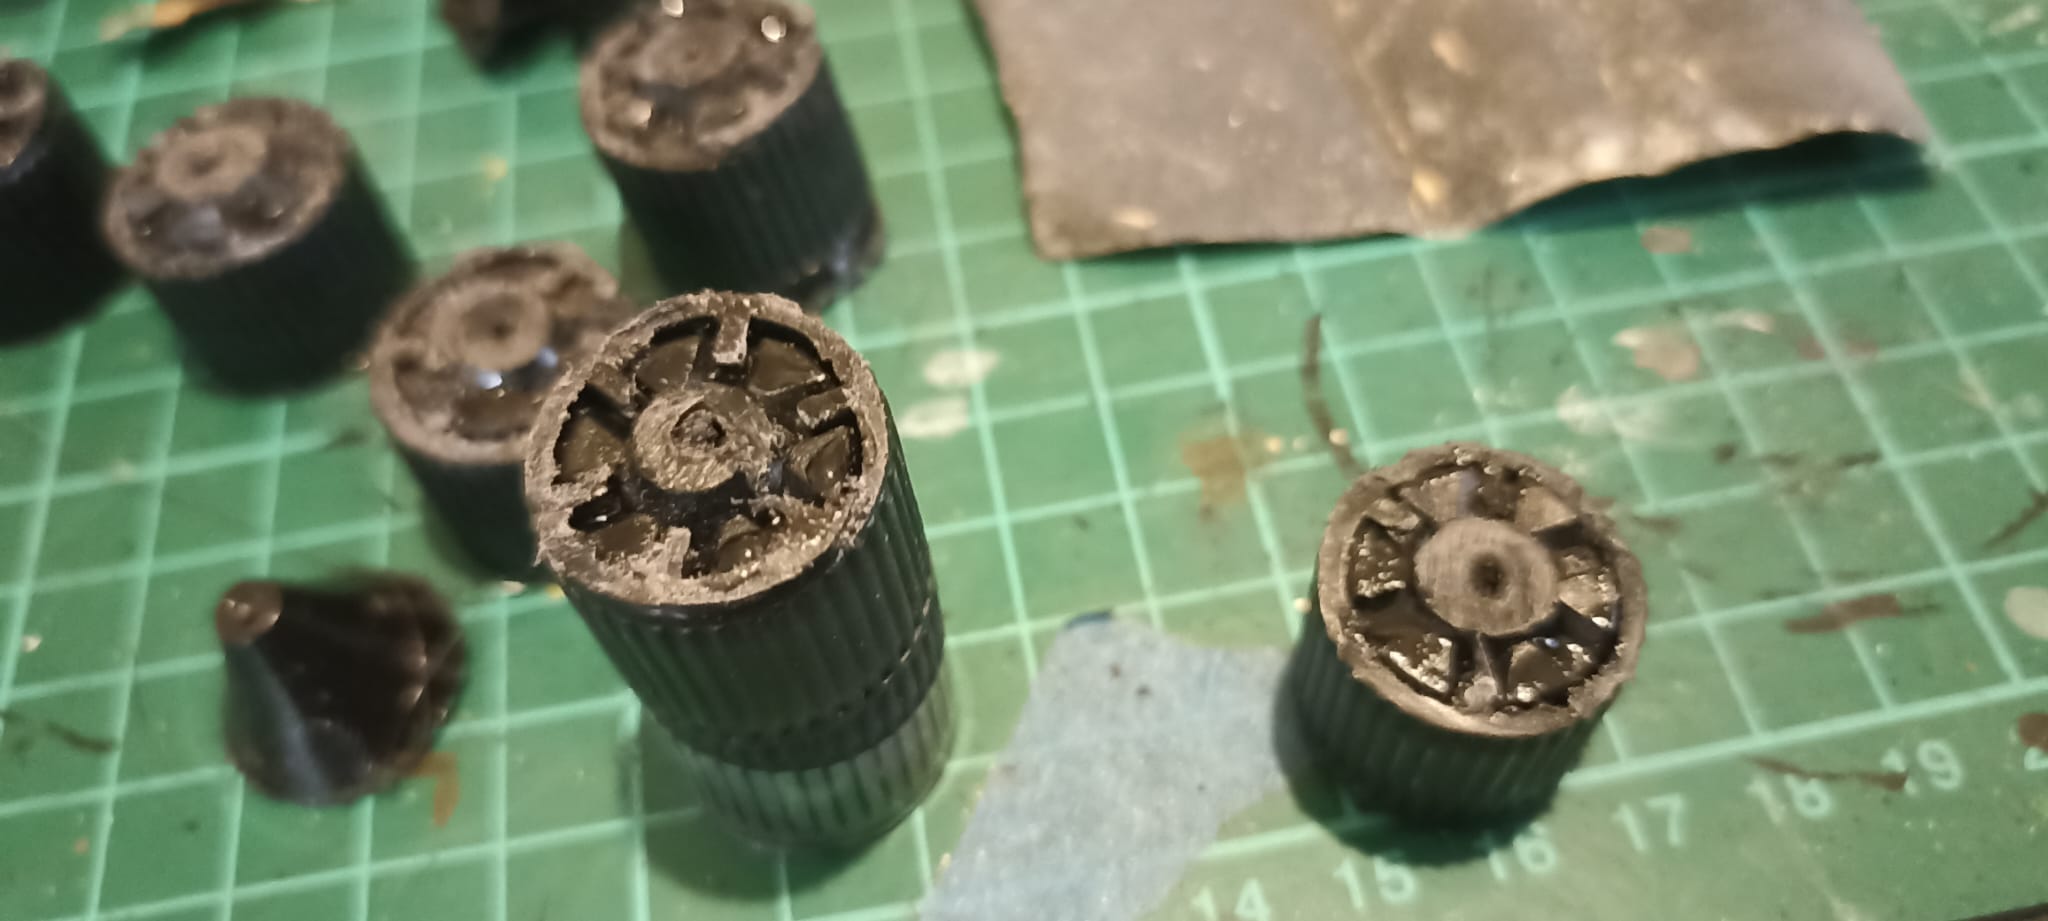 | In my mind this could be could as final part of knee rockets |
 | Knee rockets Option A (seems better) |
 | Knee rockets Option B (good idea but i don't like them) |